Awakening's Real Sound Quest Guide
✉ Send your thoughts in our Genshin 6.4 Patch Survey!
★ Exclusive: Dive back in time with the Meta History
◆ Hot: Version 6.4, Luna 5 Codes
◆ Builds: Varka, Flins, Skirk, Escoffier
◆ Events: Travelers' Tales, He Who Caught the Wind
◆ Future: Linnea, Version 6.5 Luna VI
Awakening's Real Sound is the third quest under the Khvarena of Good and Evil quest chain in the Girdle of the Desert for Genshin Impact 3.6. See how to unlock and how to complete the world quest in this guide!
List of Contents
How to Unlock Awakening's Real Sound
Complete The Splendorous Sky That Day
Awakening's Real Sound can be unlocked by completing the first subquest of Khvarena of Good and Evil, The Splendorous Sky That Day!
The Splendorous Sky That Day Quest Guide
Awakening's Real Sound Quest Walkthrough
Go to the Hills of Barsom
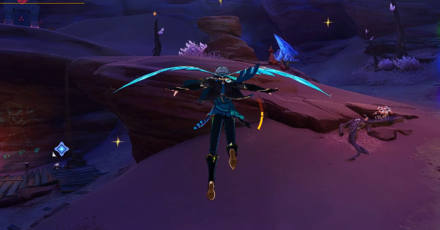
Go to the Hills of Barsom to search for Rashnu. You can use the bridge adjoining Vourukasha Oasis and Hills of Barsom, then scale the mountainside to easily reach Rashnu!
Go to the Giant Tree
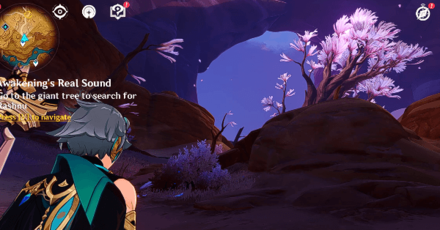
Once you're in Hills of Barsom, head over to the tree with the pinkish leaves, located at the center of the plateau. You'll see the Vijnanapati of the Order the Skeptics, Nasejuna by the tree.
Nasejuna will then proceed to tell you how he managed to locate the location of the other Kory Drums.
Go the Location Nasejuna Mentioned
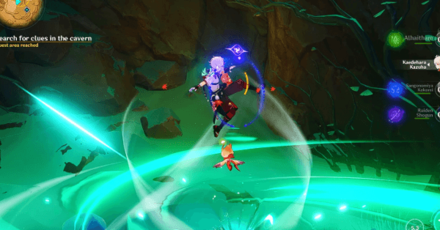
Once inside, hit the loose sand pile at the end of the room of the cavern with Anemo to reveal the Korybantes: Rupa buried underneath. You'll also obtain a note left by someone.
Copy Drum Score
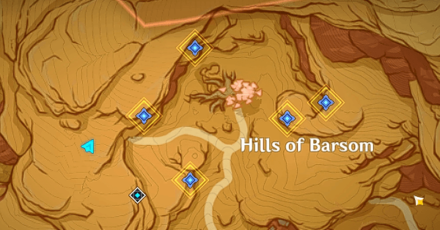
After reading the note and discussing with the group, copy the five drum scores scattered throughout the Hills of Barsom.
All Five Drum Score Locations
| Kory Drum Scores | |
|---|---|
| 1 | 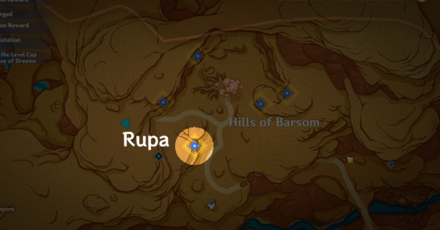 Korybantes Score: Rupa Located just nearest to the cavern Nasejuna mentioned. Defeat the Treasure Hoarders first to copy the Rupa score. |
| 2 | 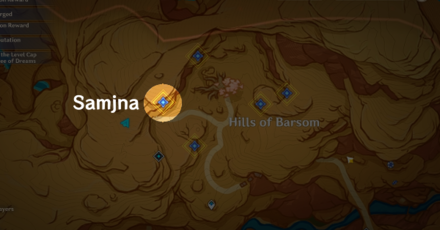 Korybantes Score: Samjna Then make a sharp turn to your right and use the Four-Leaf Sigils to get over the wooden ledge with another set of Treasure Hoarder enemies. Defeat them to then copy |
| 3 | 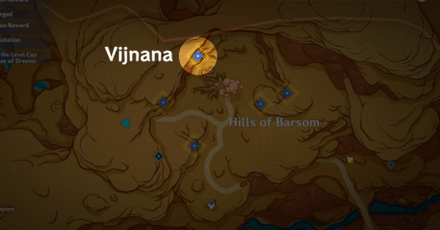 Korybantes Score: Vijnana Jump off the ledge then glide slightly to your left until you see the Four-Leaf Sigils. Use them to easily traverse towards the wooden platform where the Vijnana score is located. |
| 4 | 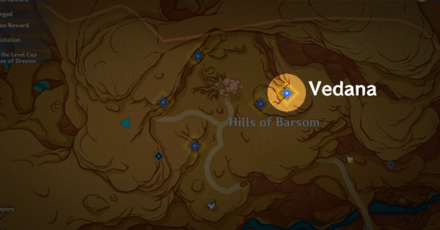 Korybantes Score: Vedana Then, glide towards the huge root arching upwards. Use the Four-Leaf sigil atop it to easily travel towards the left side of the cliff. Defeat the hilichurls then copy the Vedana score afterwards. |
| 5 | 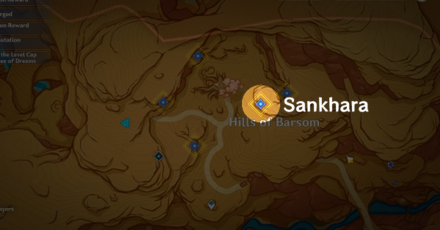 Korybantes Score: Sankhara Lastly head down the and turn slightly to your right, until you see the wooden platform with the inscription on the wall. Copy the Sankhara score from it. |
Look for Other Kory Drums
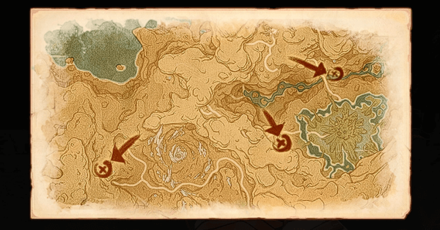
There are three Kory Drums you'll need to obtain to awaken Rashnu from her slumber, namely the Vijnana Kory Drum, Samjna Kory Drum, and Sankhara Kory Drum!
How to Get the Korybantes: Vijnana
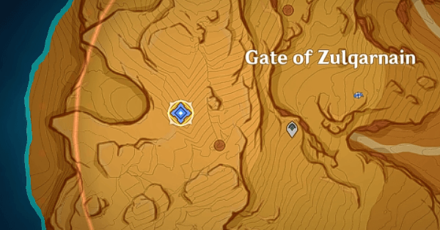
Go to the Vijnana Kory Drum's location at the Gate of Zulqarnain using the Teleport Waypoint, southwest of Tunigi Hollow.
From there, head towards the opening directly beneath the plateau, where you'll encounter a lone Eremite camp. Defeat them then head deep into the cavern until you see the Bright Flame Altar.
| How to Complete the Trial of Fluorescent Flame | |
|---|---|
| 1 | Commence the trial by interacting with the huge bell then, walk to your left to light up the first altar. |
| 2 | From the first altar, walk towards your right until you see the second altar atop the ledge by the wall. You'll pass through a huge root and a bush, to know you're headed towards the right direction. |
| 3 | Then, glide down slightly to your left until you see the third altar. |
| 4 | Afterwards, use the Four-Leaf sigil to your right, then make a sharp turn to your right until you see the fourth altar. |
| 5 | From fourth altar, press forward until you see the Four-Leaf Sigil positioned above you. Use it then immediately light up the fifth altar mid-air. |
| 6 | Then, walk towards your left until you see the sixth altar located on the edge of a small cliff, right beside a wilted tree. |
| 7 | Lastly, jump, and glide down towards the seventh altar, located few paces away from the sixth to complete the Trial of Fluorescent Flame. You can obtain the Korybantes: Vijnana nearby the starting point of the trial. |
How to Get the Korybantes: Samjna
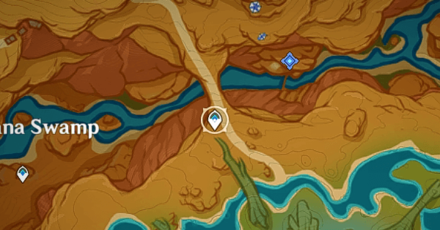
Teleport to the Waypoint on the bridge between the Hills of Barsom and Vourukasha Oasis. Then, glide down towards the opening on the left side of the waterfall and head straight into it until you see the second trial.
Take note that the Trial of Submerged Waves is comprised of three separate challenges.
| How to Complete the Trial of Submerged Waves | |
|---|---|
| 1 | Commence the first challenge by interacting with the huge bell in front of you. Then, swap out with Sorush and use your skill to snatch away the Special Four-Leaf Sigil by pressing E or tapping on the skill. |
| 2 | Then, fly towards the end of the particles and place the Special Four-Leaf Sigil there. Be careful on veering too far, as this will cause you to fail the challenge. |
| 3 | Return to your original position by pressing Z or by tapping on Sorush's icon. You can then use the repositioned Special Four-Leaf Sigil to get all four particles in one go. |
| 4 | Commence the second challenge by activating the bell down the ledge right across the first bell. Use Sorush's skill again to snatch the Special Four-Leaf Sigil. |
| 5 | Place the Special Four-Leaf Sigil directly on top of the first and second particles to your left. Be careful not to move too far away from the second bell, as it will return the sigil to its original position. |
| 6 | Swap Sorush away by pressing Z or tapping on her icon, then use the Special Four-Leaf Sigil to get all the Dendro particles as you hover down using your glider. |
| 7 | Commence the third challenge by activating the last bell. Immediately switch with Sorush, then snatch the Special Four-Leaf Sigil using her skill. |
| 8 | Then, place the Special Four-Leaf Sigil at the end of the queue of Dendro particles right across the third bell. |
| 9 | Lastly, swap Sorush out then use the Special Four-Leaf Sigil and the Four-Leaf Sigil on the other side of the cavern, to complete the trial! The Korybantes: Samjna is on the opposite side of the cavern, inside a small cave! |
How to Get the Korybantes: Sankhara
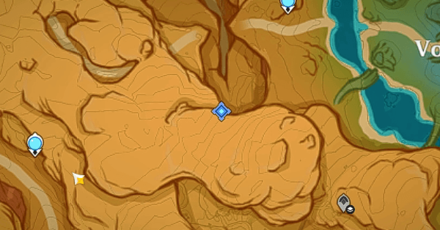
Teleport to the Statue of the Seven in Vourukasha Oasis, and make a sharp turn to your right. Jump off the cliff and glide down until you see a massive ravine.
Continue gliding down until you see yourself inside a massive cavern with a trial bell in the middle. Unlike the first two trials, Trial of Ferocious Thunder only requires you to defeat enemies! Defeating the enemy mobs within the time limit will reward you with the Korybantes: Sankhara.
Go to the Giant Tree
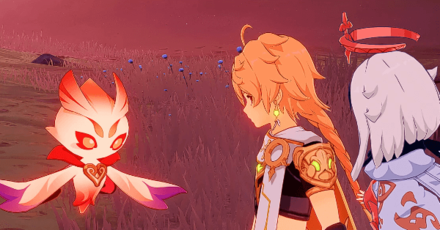
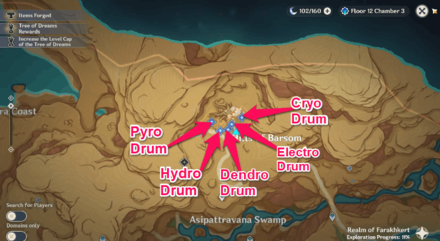
After getting all the three Kory Drums and collecting the scores, go back to Rashnu's tree in the Hills of Barsom and return the Kory Drums to their place.
All Kory Drums Position
| Kory Drums Map Location |
|---|
 View Full Image |
Perform According to the Drum Score
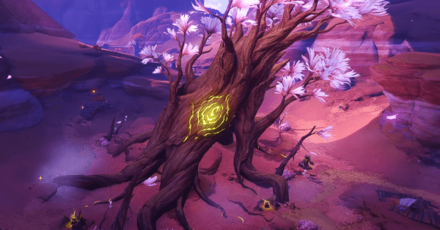
After placing all the Kory Drums into their corresponding and respective places, interact with each drum to do the performance according to the scores you previously collected.
Check our full guide below on how to perform according to the drum score!
Perform According to the Drum's Score Guide
Awakening's Real Sound Information
Sub-Quest of Khvarena of Good and Evil

The Awakening's Real Sound quest is the third sub-quest to complete the Khvarena of Good and Evil quest chain in the Girdle of the Sands! This quest runs side-by-side with Asipattravana Itihasa, which means you'll have to complete both quests first to progress through the World Quest chain!
Khvarena of Good and Evil World Quest Chain
Quest Release Date
| Genshin Impact Version 3.6 | |
|---|---|
 |
|
| Release Date | April 12, 2023 |
The Khvarena of Good and Evil World Quest quest chain was released in Version 3.6 which went live on April 12, 2023! Check out everything in the 3.6 update here:
Version 3.6 Release Date and Patch Notes
Awakening's Real Sound Rewards
Total Quest Rewards
| Quest Rewards | ||
|---|---|---|
|
|
|
|
|
|
||
Genshin Impact Related Guides

Other Khvarena of Good and Evil Quest Guides
| Khvarena of Good and Evil World Quest Guides | ||
|---|---|---|
| The Splendorous Sky That Day | Asipattravana Itihasa | Awakening's Real Sound |
| As the Khvarena's Light Shows | As the Khvarena's Light Shows: Samudaya | As the Khvarena's Light Shows: Dukkha |
| As the Khvarena's Light Shows: Nirodha | The Hymn of Tir Yazad | |
Comment
Author
Awakening's Real Sound Quest Guide
improvement survey
03/2026
improving Game8's site?

Your answers will help us to improve our website.
Note: Please be sure not to enter any kind of personal information into your response.

We hope you continue to make use of Game8.
Rankings
Gaming News
Popular Games

Genshin Impact Walkthrough & Guides Wiki

Honkai: Star Rail Walkthrough & Guides Wiki

Umamusume: Pretty Derby Walkthrough & Guides Wiki

Pokemon Pokopia Walkthrough & Guides Wiki

Resident Evil Requiem (RE9) Walkthrough & Guides Wiki

Monster Hunter Wilds Walkthrough & Guides Wiki

Wuthering Waves Walkthrough & Guides Wiki

Arknights: Endfield Walkthrough & Guides Wiki

Pokemon FireRed and LeafGreen (FRLG) Walkthrough & Guides Wiki

Pokemon TCG Pocket (PTCGP) Strategies & Guides Wiki
Recommended Games

Diablo 4: Vessel of Hatred Walkthrough & Guides Wiki

Fire Emblem Heroes (FEH) Walkthrough & Guides Wiki

Yu-Gi-Oh! Master Duel Walkthrough & Guides Wiki

Super Smash Bros. Ultimate Walkthrough & Guides Wiki

Pokemon Brilliant Diamond and Shining Pearl (BDSP) Walkthrough & Guides Wiki

Elden Ring Shadow of the Erdtree Walkthrough & Guides Wiki

Monster Hunter World Walkthrough & Guides Wiki

The Legend of Zelda: Tears of the Kingdom Walkthrough & Guides Wiki

Persona 3 Reload Walkthrough & Guides Wiki

Cyberpunk 2077: Ultimate Edition Walkthrough & Guides Wiki
All rights reserved
Copyright© 2012-2024 HoYoverse — COGNOSPHERE. All Rights Reserved.
The copyrights of videos of games used in our content and other intellectual property rights belong to the provider of the game.
The contents we provide on this site were created personally by members of the Game8 editorial department.
We refuse the right to reuse or repost content taken without our permission such as data or images to other sites.


