Dune-Entombed Fecundity: Part 2 Quest Guide
✉ Send your thoughts in our Genshin 6.4 Patch Survey!
★ Exclusive: Dive back in time with the Meta History
◆ Hot: Version 6.4, Luna 5 Codes
◆ Builds: Varka, Flins, Skirk, Escoffier
◆ Events: Travelers' Tales, He Who Caught the Wind
◆ Future: Linnea, Version 6.5 Luna VI
Dune-Entombed Fecundity: Part II is part four of the Dirge of Bilqis quest in the Hadramaveth Desert for Genshin Impact. See how to unlock and how to complete the world quest in this guide!
| The Dirge of Bilqis Quest Guides | |
|---|---|
| Wisdom Has Built Her House | Temple Where Sand Flows |
| Dune-Entombed: Part I | Dune-Entombed: Part II |
| Dune-Entombed: Part III | The Eternal Dream, Ever Lush |
List of Contents
How to Unlock Dune-Entombed Fecundity: Part 2
Finish the Part II of Dune-Entombed Fecundity
Dune-Entombed Fecundity Part 2 automatically unlocks after you finish its Part III sub-quest under the The Dirge of Bilqis chain in Desert of Hadramaveth.
Dune-Entombed Fecundity: Part 2 Quest Walkthrough
Go to the Place Azariq Mentioned
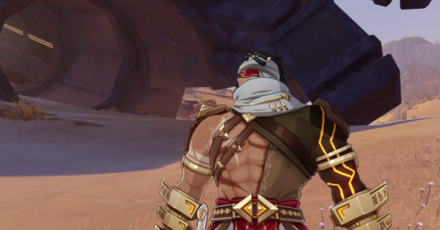
Go to the location in the Dunes of Steel, by the arm of the Giant Ruin Machine.
Enter the Machine Wreckage
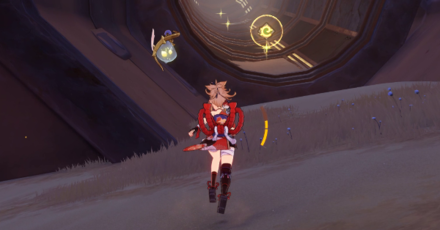
Go inside the Giant Machine either on foot or by using the Four-leaf Sigils.
Open the Cabin Door Inside
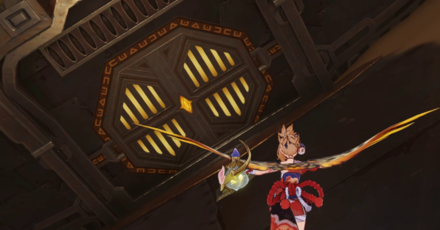
Once you're inside, you'll see that the Cabin Door is locked. Unlock it by picking up the scattered energy blocks lying around and placing them in the slot by the door. You can carry three energy blocks at once.
| Block # | How to Get |
|---|---|
| No. 1 | 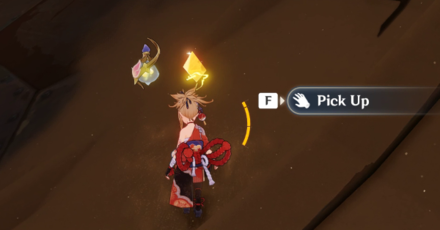 The first energy block is right in front of the Cabin Door which you can easily pick up. |
| No. 2 | 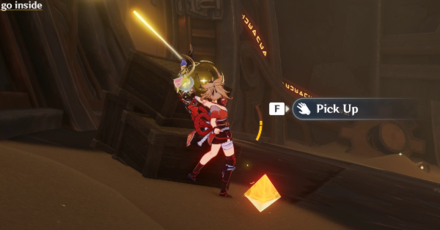 The second energy block is hidden inside the wooden crate on the door's right side. Destroy it to pick up the energy block. |
| No. 3 | 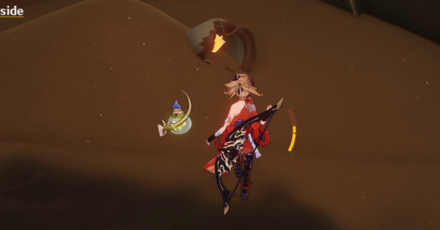 The third energy block is just a little to the left of the crate, inside the half-buried pot. |
Activate the Giant Machine's Energy System
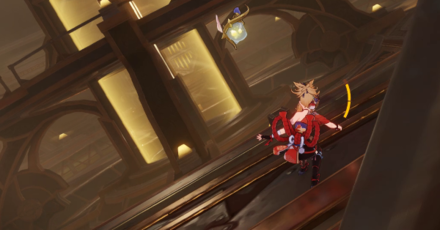
Once you're inside, a cutscene of Azariq will get triggered telling you to activate the Giant Machine. You can do so by picking up the energy blocks and placing them inside the energy cells in the lowest level of the Giant Machine.
| Block # | How to Get |
|---|---|
| No. 1 | The first and nearest energy block is located just a few steps away on the left of the Giant Machine elevator. Pick it up and head to the opposite direction, towards the entrance. |
| No. 2 | Go towards the closed gate marked with a single energy block slot in its front, on the left side of the Giant Machine's entrance. Place the energy block into the slot to open the gate, pick up the energy block inside, and draw the energy block from the slot to get a total of two energy blocks. |
| No. 3 | The third energy block is locked behind the gate a little to Azariq's right. Place the two energy blocks into the slot by the gate to open it, get the energy block inside, then draw the two blocks from slot to obtain a total of three energy blocks. |
Go to the Lowest Level of the Giant Machine
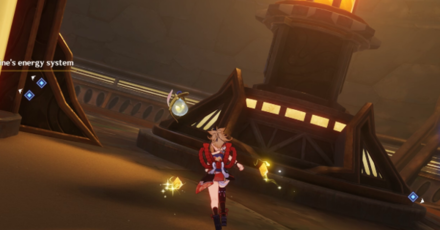
Once down, place each energy block into the three energy cells that look like yellow pillars scattered around the elevator. When successfully activated, a brief cutscene will trigger.
Enter the control cabin and operate the Giant Machine

Ride the elevator heading towards the top level to easily access the control cabin. Once inside, you will momentarily be able to control the Giant Machine, but will eventually lose power in its left arm which you'll be needing to restore.
Restore power to the left arm of the Giant Machine
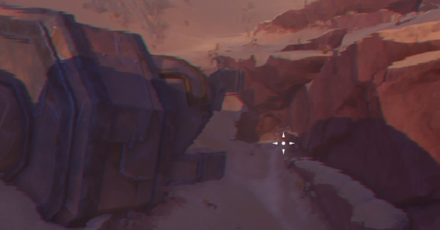
You can restore power to the left arm by placing the energy blocks to the energy cells in the top level. There's no need for you to go back to the lowest level to do this.
Get the Two Energy Blocks
You'll be needing two energy blocks to restore power to the left arm, which are both located nearby the entrance of a shutdown energy cell. One of the blocks is located on the bridge going to the cell, and the other, a little to left of the entrance.
Place the Blocks to the Cells
Once you've obtained the two energy blocks place each to the shutdown energy cells. The first one is inside the gate nearby the location of the energy blocks and the second one is on ledge across it.
Restore Power to the Left Arm Guide
Go back to the control cabin and create a passage using the Giant Machine
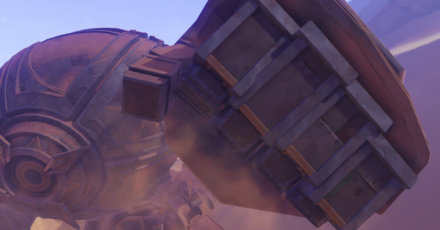
With the re-powered Giant Machine, lock onto the spot in the desert terrain and punch through it to create a passageway. Enter the cave through the Giant Machine's arm.
Keep exploring and reactivate the ancient mechanism
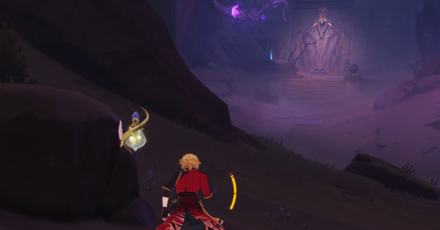
Once inside the cave, touch the mechanism to activate the switch the door on the farthest end of the cavern. You will encounter a Remarkable Chest surrounded by enemy fungi. Head towards the door.
Look for the Passage to Proceed
| Objectives | |
|---|---|
| 1 | Release the Primal Ember from its Primal Sconce and guide it upwards using the stairs. |
| 2 | Continue guiding it until you see an empty Primal Sconce and have it rest there. Afterwards, defeat the nearby Primal Construct Repulsor enemy. |
| 3 | Attack the nearby Ruin Mechanism twice to redirect its current towards the pile of sand to reveal a hidden mechanism inside. |
| 4 | Activate the blue mechanism to fix the other broken blue mechanism nearby. Once fixed, go towards it and activate it too. |
| 5 | Go back to the Ruin Mechanism and move it once, then attack it twice to remove the pile of sands. Activate the switch to turn off the big fan. |
| 6 | Head back to the Primal Sconce with the Primal Ember and release it. Guide it towards the empty Primal Torch. It will spawn a common chest once it reaches its destination. |
| 7 | Afterwards, descend down the opening in the floor at the farthest end of the room. There you'll see another Remarkable Chest, a closed door, and a switch. Activate the switch to open the door that leads back to the original chamber. |
| 8 | Head towards the room on Azariq's right. Activate the blue mechanism inside to reconnect the Pipe Diverted Valves. Then, open the closed door by flicking the switch beside the stairs on. This will lead you along a cavern full of enemy fungi. Go forward until you see a broken blue mechanism. |
| 9 | After a brief cutscene, go inside the nearest door with the Ruin Mechanism on your left. Move it once and attack it to remove the pile of sands and reveal the door switch. Activate it to open the door. |
| 10 | Inside the room, there are two pile of sands on your left and a Ruin Mechanism on the corner. Attack the mechanism thrice to reveal the hidden Ruin Mechanism in one of the piles. |
| 11 | Attack the Ruin Mechanism twice to reveal the blue mechanism underneath the sand pile. Activate it to rotate the valve. |
| 12 | Get out of the room and turn right. You should see an empty Primal Sconce stationed at the corner and a Primal Ember at the end of the flight of stairs in front of it. |
| 13 | After defeating the Primal Contruct Repulsor, release the Primal Ember from the sconce and lead it outside until it gets inside the Primal Torch. Activate the blue mechanism afterwards. |
Open the Ancient Gate
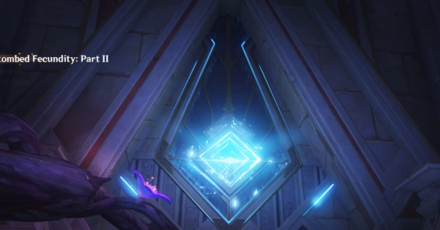
After activating the blue mechanism, walk towards the flight of stairs until you reach the upper level of the cavern. Keep going forward until you see a switch guarded by a Grounded Geoshroom. Flip the switch to open the Ancient Gate.
Obtain Liloupar's fragment and open the door
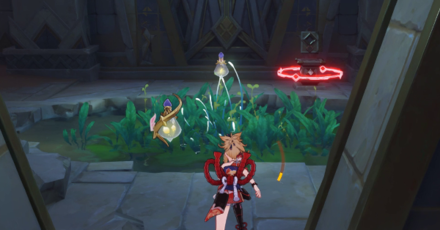
As you head deeper in the ruins, you'll come across a large room with two empty Primal Sconces on the left and two empty Primal Torches on the right. On your left, guide the lone Primal Ember to one of the Sconces.
Then, keep walking forward down the stairs, and obtain Liloupar's fragment in the middle of the tiny patch of greens. After the cutscene, flip the switch to open the door and you'll see an Everlight Cell in front of you.
Everlight Puzzle in the Ancient Ruin
| Objectives | |
|---|---|
| 1 | Rotate the Everlight Cell once to remove the barrier on the left side of the corridor. |
| 2 | Walk towards the Primal Ember and release it from its Primal Sconce. Guide it and immediately stop just in front of the door, otherwise it will float straight into the big fan. |
| 3 | Turn off the big fan by rotating the Everlight Cell once more. Wait until the fan stops, then guide the Primal Ember to the empty Primal Sconce just in front of the fan. |
| 4 | Release the Ember from the sconce and guide it back to the large room with the two Torches and Sconces. |
| 5 | Release the Embers from the Sconces and guide them to the empty Primal Torches. Using the switch will open the door and spawn an Exquisite chest. |
Go to the Deepest Part of Mt. Damavand

After passing through the door, go down the pit to reach the deepest of Mt. Damavand. There will be enemy Flying Serpents all around, so keep an eye out!
Activate the mechanism
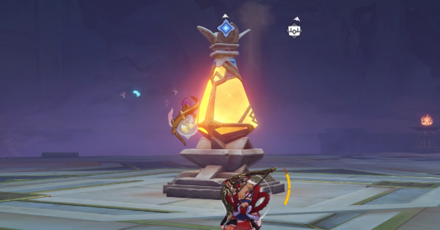
Go down the platform and touch the mechanism to activate it. Once you do, it will start attracting monsters, which you need to fend off to protect the mechanism. You'll have to defeat a total of 9 waves of enemy mobs to do so.
Head back to the surface

After defeating the monsters and activating the mechanism, head towards the exit and talk briefly with the gang. You can go to the surface by teleporting using the map or by talking to Jeht or Azariq.
Dune-Entombed Fecundity: Part 2 Information
Sub-Quest of The Dirge of Bilqis
This quest is the fifth sub-quest to complete the Desert of Hadramaveth quest chain under The Dirge of Bilqis.
The Dirge of Bilqis World Quest Chain Guide
Quest Release Date
| Genshin Impact Version 3.4 | |
|---|---|
 |
|
| Release Date | January 18, 2023 |
Dune-Entombed Fecundity: Part II was released in Version 3.4, which went live on January 18, 2023! Check out everything in the 3.4 update here:
Version 3.4 Banners and Patch Notes
Dune-Entombed Fecundity: Part 2 Rewards
Total Quest Rewards
| Quest Rewards | ||
|---|---|---|
|
|
|
|
|
|
|
|
Genshin Impact Related Guides

Guides to Sumeru Areas
| Sumeru Area Guides | |
|---|---|
 Rainforest Area Rainforest Area |
 Desert Area Desert Area |
Guide to Desert Regions
| Sumeru Desert Guides | ||
|---|---|---|
 The Great Red Sand The Great Red Sand |
 Desert of Hadramaveth Desert of Hadramaveth |
 Girdle of the Sands Girdle of the Sands |
Map Features in Desert of Hadramaveth
| Notable Hadramaveth Desert Guides | |
|---|---|
 Dendroculus Locations Dendroculus Locations |
 Shrine of Depths Shrine of Depths |
 Hidden Waypoints Hidden Waypoints |
 Fishing Spots Fishing Spots |
 Hadramaveth Clearance Hadramaveth Clearance |
|
Desert of Hadramaveth Domains
| Hadramaveth Desert Domains | |
|---|---|
 Fane of Panjvahe Fane of Panjvahe |
 City of the Deceased City of the Deceased |
Desert of Hadramaveth World Quests
Desert of Hadramaveth Exploration Guides
Tips and Tricks
| Tips and Tricks for Things in Hadramaveth Desert | |
|---|---|
 How to Open the Ancient Gate How to Open the Ancient Gate |
 How to Restore Power to the Left Arm How to Restore Power to the Left Arm |
 Activate the Device and Open the Gate Activate the Device and Open the Gate |
 Debris of Panjvahe Teleport Waypoint Debris of Panjvahe Teleport Waypoint |
 Jinni in the Magic Bottle Upgrades Jinni in the Magic Bottle Upgrades |
|
Items in the Desert of Hadramaveth
| Items found in the Desert of Hadramaveth | |
|---|---|
 Liloupar Gadget Liloupar Gadget |
 Sand Grease Pupa Sand Grease Pupa |
 Ancient Stone Key Ancient Stone Key |
 Fatui Stronghold Key Fatui Stronghold Key |
Creatures in the Desert of Hadramaveth
Enemies in the Desert of Hadramaveth
| Enemy and Boss Guides | ||
|---|---|---|
 Setekh Wenut Setekh Wenut |
 Eremite Floral Ring-Dancer Eremite Floral Ring-Dancer |
 Eremite Scorching Loremaster Eremite Scorching Loremaster |
 Consecrated Flying Serpent Consecrated Flying Serpent |
 Consecrated Scorpion Consecrated Scorpion |
 Consecrated Red Vulture Consecrated Red Vulture |
Wildlife in the Desert of Hadramaveth
| Wildlife in the Desert of Hadramaveth | ||
|---|---|---|
 Flying Serpent Flying Serpent |
All Interactive Map Guides

Comment
Author
Dune-Entombed Fecundity: Part 2 Quest Guide
improvement survey
03/2026
improving Game8's site?

Your answers will help us to improve our website.
Note: Please be sure not to enter any kind of personal information into your response.

We hope you continue to make use of Game8.
Rankings
Gaming News
Popular Games

Genshin Impact Walkthrough & Guides Wiki

Honkai: Star Rail Walkthrough & Guides Wiki

Umamusume: Pretty Derby Walkthrough & Guides Wiki

Pokemon Pokopia Walkthrough & Guides Wiki

Resident Evil Requiem (RE9) Walkthrough & Guides Wiki

Monster Hunter Wilds Walkthrough & Guides Wiki

Wuthering Waves Walkthrough & Guides Wiki

Arknights: Endfield Walkthrough & Guides Wiki

Pokemon FireRed and LeafGreen (FRLG) Walkthrough & Guides Wiki

Pokemon TCG Pocket (PTCGP) Strategies & Guides Wiki
Recommended Games

Diablo 4: Vessel of Hatred Walkthrough & Guides Wiki

Fire Emblem Heroes (FEH) Walkthrough & Guides Wiki

Yu-Gi-Oh! Master Duel Walkthrough & Guides Wiki

Super Smash Bros. Ultimate Walkthrough & Guides Wiki

Pokemon Brilliant Diamond and Shining Pearl (BDSP) Walkthrough & Guides Wiki

Elden Ring Shadow of the Erdtree Walkthrough & Guides Wiki

Monster Hunter World Walkthrough & Guides Wiki

The Legend of Zelda: Tears of the Kingdom Walkthrough & Guides Wiki

Persona 3 Reload Walkthrough & Guides Wiki

Cyberpunk 2077: Ultimate Edition Walkthrough & Guides Wiki
All rights reserved
Copyright© 2012-2024 HoYoverse — COGNOSPHERE. All Rights Reserved.
The copyrights of videos of games used in our content and other intellectual property rights belong to the provider of the game.
The contents we provide on this site were created personally by members of the Game8 editorial department.
We refuse the right to reuse or repost content taken without our permission such as data or images to other sites.
 Sandstorms in the Desert
 Atmospheric Vortexes
 Sacred Seals
 Primal Obelisks
 Rune Mechanisms
 Weathered Obelisk
 Wenut Tunnels
 Cascade Pools and Spouts
 Chess Pieces
 Chess Activation Device
 Memories of Eternal Oasis
 Mysterious Stone Slate
 Remarkable Chests
 Treasure Chests
 Safhe Shatranj Puzzle
 Debris of Panjvahe Puzzle
 Passage of the Ghouls Puzzle
 Passage of Ghouls Totems
 Dual-Phase Neverlight Cells
 Weathered Rocks
 Runic Window and Pane
 Hadramaveth Viewpoints
 Gurabad's Ruin
 Enigmatic Pages
 Seelie Locations
 Wadi Al-Majuj Sacred Seals
 Safhe Shatranj Chess Puzzle


![Everwind Review [Early Access] | The Shaky First Step to A Very Long Journey](https://img.game8.co/4440226/ab079b1153298a042633dd1ef51e878e.png/thumb)

![Monster Hunter Stories 3 Review [First Impressions] | Simply Rejuvenating](https://img.game8.co/4438641/2a31b7702bd70e78ec8efd24661dacda.jpeg/thumb)


