Dreams Beneath the Searing Sand World Quest
✉ Send your thoughts in our Genshin 6.4 Patch Survey!
★ Exclusive: Dive back in time with the Meta History
◆ Hot: Version 6.4, Luna 5 Codes
◆ Builds: Varka, Flins, Skirk, Escoffier
◆ Events: Travelers' Tales, He Who Caught the Wind
◆ Future: Linnea, Version 6.5 Luna VI
Dreams Beneath the Searing Sand is the final quest of the Golden Slumber chain in Sumeru for Genshin Impact. See how to unlock the quest, and how to solve puzzles in Khaj-Nisut such as passing the three trials and escaping Khaj-Nisut in this guide!
List of Contents
How to Unlock Dreams Beneath the Searing Sand
Complete The Secret of Al-Ahmar
Dreams Beneath the Searing Sand automatically unlocks after you finish the The Secret of Al-Ahmar sub-quest in Golden Slumbers.
The Secret of Al-Ahmar Quest Guide
Dreams Beneath the Searing Sand Quest Walkthrough
Return to the Oasis
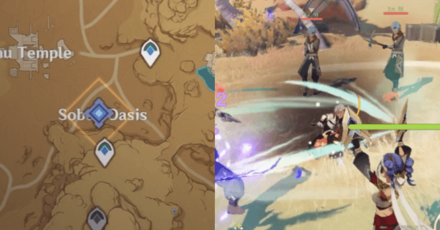
Go back to the Sobek Oasis and defeat the Eremites attacking the camp. Talk to Nachtigal after defeating the enemies.
Go to the Next Oasis
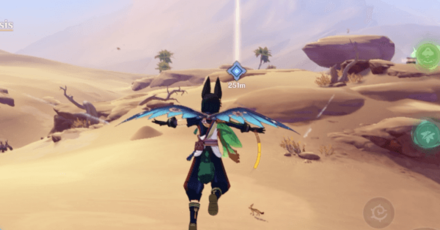
Go north to the oasis near The Dune of Carouses and camp with Jhet and the others. It's indicated by a quest marker on the map, so follow it.
Go to Khaj-Nisut
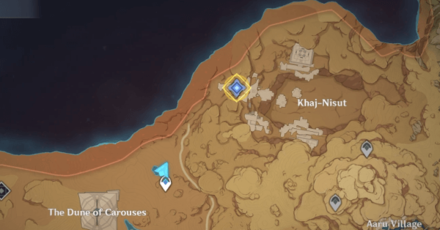
Follow the road nearby to go to Khaj-Nisut. You can use the Four-Leaf Sigils to travel a lot faster or teleport to the waypoint if you've unlocked it. A cutscene will trigger once you go to the broken bridge.
Afterwards, head south to the Eremite camp and defeat the enemies.
Khaj-Nisut Puzzles and Dendroculus Guide
Search for clues in the Eremites' Camp
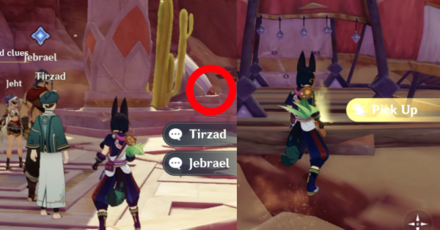
You will have to find A Short Letter that can be found in one of the mini tents in the campsite. Afterwards talk to Jebrael to progress further.
Pass the Three Trials
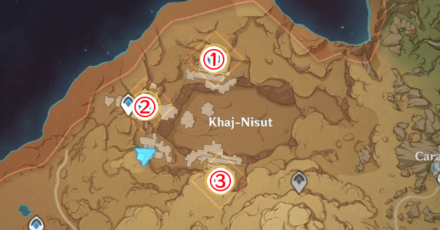
Players must pass the three trials by going inside each ruin and operate the Plinth of the Secret Rites. Each of the three trials have different obstacles whether its through puzzles or enemies to defeat.
How to Pass the Three Trials
How to Pass the Trial 1
| How to Complete the Trial | |
|---|---|
| 1 | 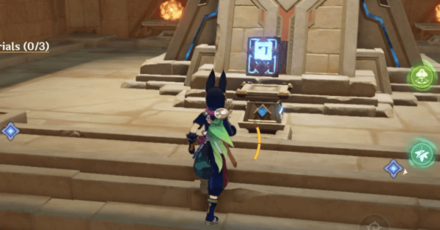 Operate the Plinth of the Secret Rites. |
| 2 | 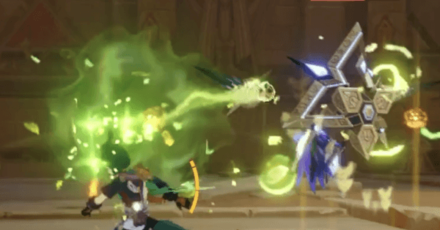 Head down and defeat waves Primal Constructs! You will have to do this in the next floor as well. |
| 3 | 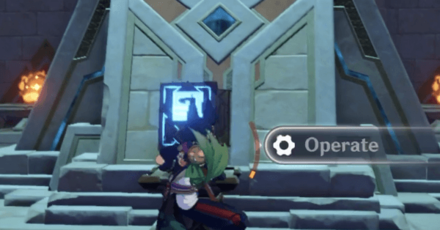 Operate the Plinth of the Secret Rites again to complete the trial. |
How to Pass the Trial 2
| How to Complete the Trial | |
|---|---|
| 1 |  Operate the Plinth of the Secret Rites then head down the hole. |
| 2 | 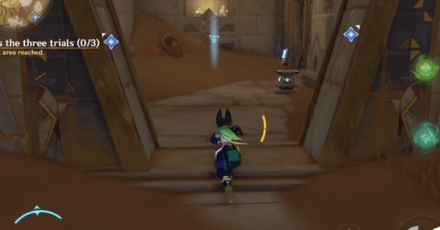 Collect the Forged Primal Light on the way and use it on the special platform on the next room. |
| 3 | 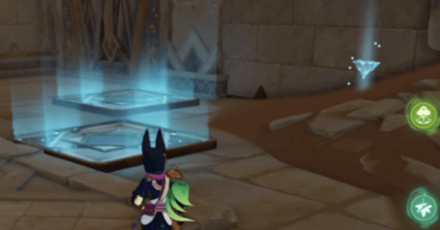 Collect the Forged Primal Light on the same room and use it on the unused special platform. |
| 4 | 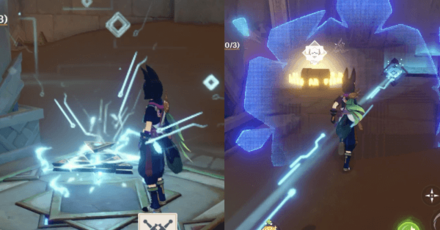 Use the Obscuring Cell to open up the wall and give way to the Primal Beam. |
| 5 | 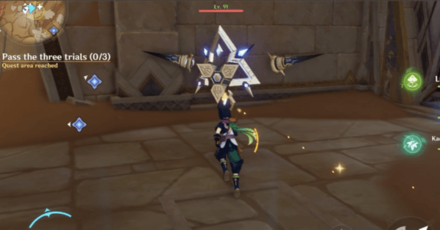 Head to the next room and defeat the Primal Construct. |
| 6 | 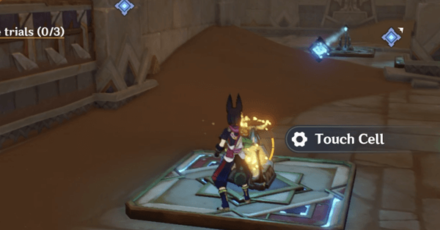 Collect the Forged Primal Light on the same room and use it on the unused special platforms. Use the Verity Cell to open up the wall and the door to the next room. |
| 7 | 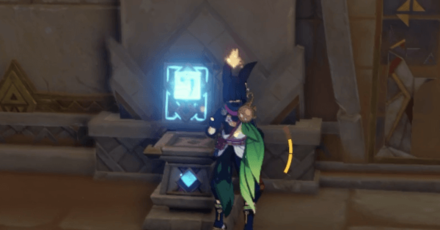 Operate the Plinth of the Secret Rites on the next room. |
| 8 | Fall down the hole and defeat the Primal Construct. |
| 9 | 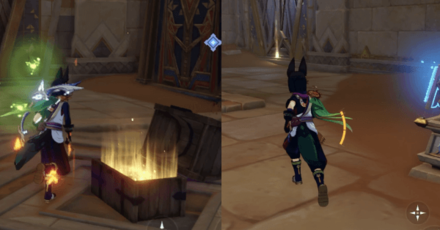 Collect the Keystone (I) from a chest and use it on the door near the Wind Current. |
| 10 | 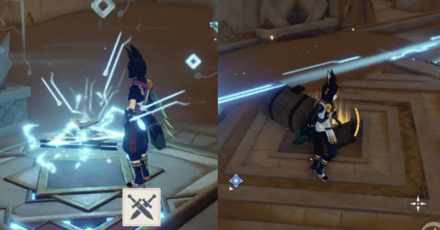 Use the Forged Primal Lights on the Keystone Replicators. Use the Verity Cell to open up the wall and open the chest to collect Keystone (II). |
| 11 | 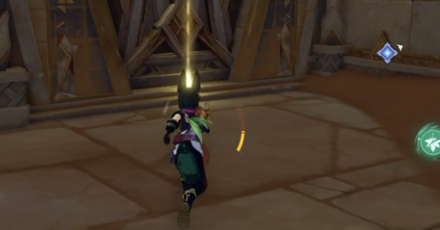 Use Keystone (II) on the door at the farthest end. |
| 12 | 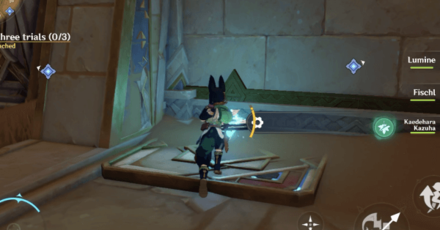 Use the Forged Primal Lights on the platforms. Use the Verity Cell to open up the wall. |
| 13 | 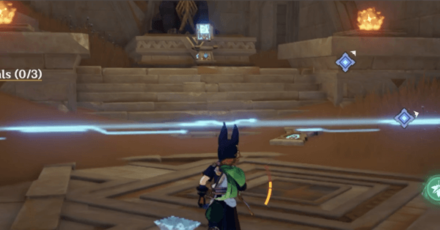 Head to the room in the middle and operate the Plinth of the Secret Rites to complete the trial. |
How to Pass the Trial 3
| How to Complete the Trial | |
|---|---|
| 1 |  Operate the Plinth of the Secret Rites and head down the hole. |
| 2 | 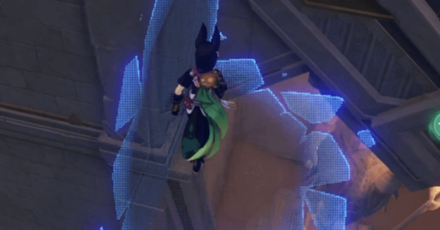 Go through the maze of multiple levels and fall down the holes. |
| 3 | 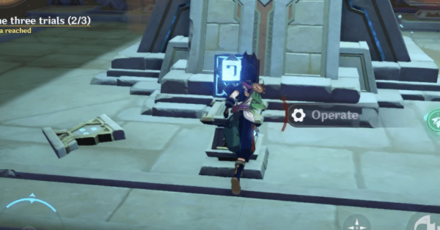 Operate the Plinth of the Secret Rites again to complete the trial. |
Find the Way to Khaj-Nisut
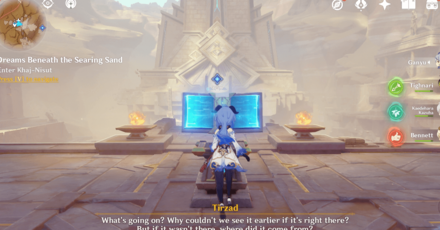
After completing all of the trials, teleport to the Khaj-Nisut waypoint and interact with the Plinth of the Secret Rites nearby to unlock Khaj-Nisut. Use the Four-Leaf Sigils that'll appear to reach the Khaj-Nisut entrance quickly.
Activate another Plinth of Secret the Rites to Open the Entrance
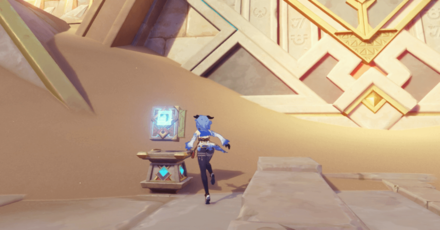
Activate another Plinth of the Secret Rites upon reaching the entrance. Go inside and follow Benben, then head down the ruins. You will eventually bump into a Plinth of the Secret Rites, so activate it when you get to it.
Activate the Mechanism in the Center of the Hall
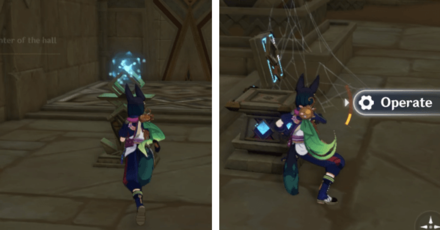
To activate the mechanism in the center of the hall, you must use the Plinth of the Secret Rites to open up the mechanism.
In order to use the Plinth of the Secret Rites, you must release the Primal Embers nearby the mechanism and follow them until they reach the Primal Torches.
First Primal Ember
| First Primal Ember Walkthrough | |
|---|---|
| 1 | 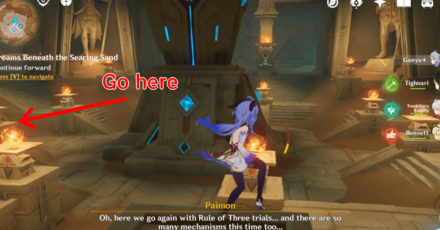 Release the Primal Ember on the left side from where you enter the area. |
| 2 | 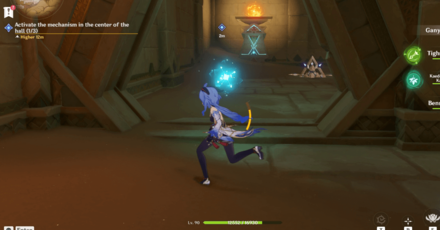 Follow the Primal Ember down below in a room with a Primal Construct. |
| 3 | 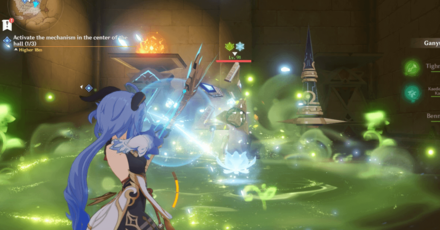 You can defeat the Primal Construct first or you can guide it immediately to its Primal Torch |
| 4 | 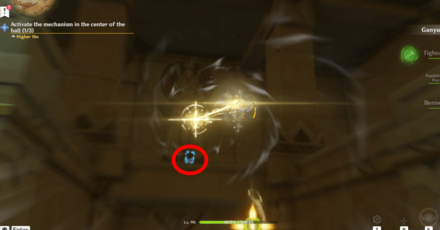 Go back to where you first released the Primal Ember and go up to the Plinth of the Secret Rites to activate it. You can use the Four-Leaf Sigils to get to it fast. |
Second Primal Ember
| Second Primal Ember Walkthrough | |
|---|---|
| 1 | 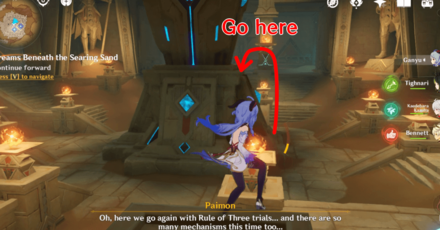 Release the Primal Ember on the opposite side of the room from where you activated the Plinth. |
| 2 | 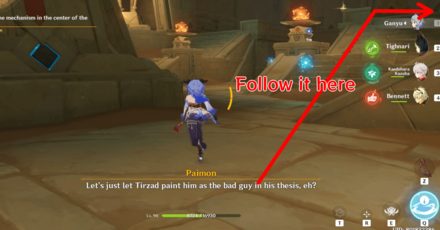 Follow it to the room on the left side. It should have a quest marker on it in case you lost it. |
| 3 | 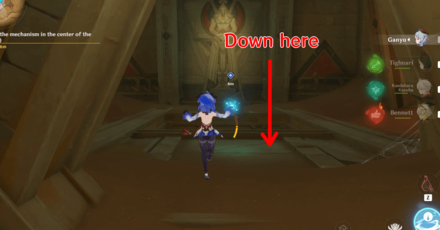 Go down from that room and defeat a Primal Construct blocking the way. |
| 4 | 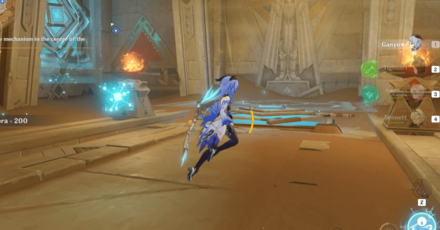 Wait for the Large Fan Blades from moving then release the Primal Ember. |
| 5 | 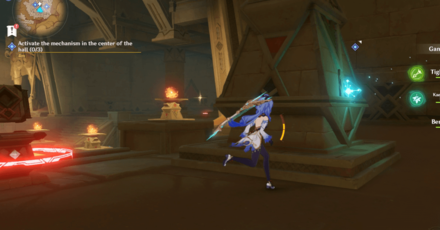 Follow it on the upper floor until it reaches its Primal Torch. |
| 6 | 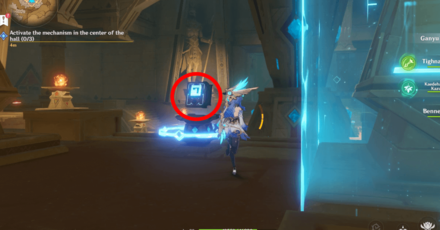 Activate the newly unlocked Plinth of the Secret Rites. |
Third Primal Ember
| Third Primal Ember Walkthrough | |
|---|---|
| 1 | 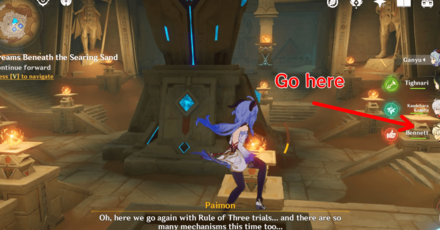 From the location where you first enter the area, go to the Primal Ember on the right and release it. |
| 2 | 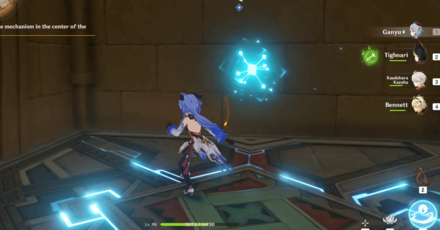 Use the elevator to go down and follow it there. |
| 3 | 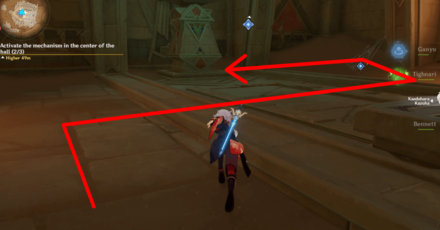 There will be invisible walls down below. Get past it by moving on the leftmost part then go around to the rightmost part. Go left again and touch the Primal Ember to move it to its Primal Torch. |
| 4 | 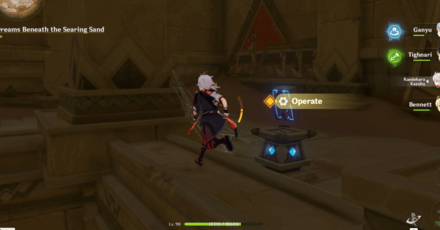 Go back to where you released this Primal Ember and activate the Plinth of the Secret Rites above. |
Operate Prism of Khaj-Nisut and try to reach Khaj-Nisut’s upper floor
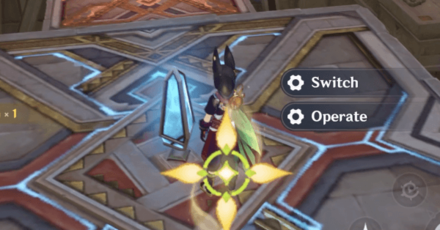
Go up until you find a puzzle room. Go to the Prism of Khaj-Nisut in the middle and do it in the following in order:
- Operate
- Switch
- Operate
- Operate
Afterwards, a mechanism will show up. Use the Four-Leaf Sigil and activate the switch to the elevator. You will fight Primal Constructs before heading to the second elevator.
How to Operate Prism of Khaj-Nisut
Defeat Samail's Subordinates
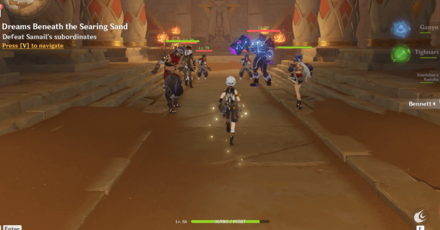
You will discover that Samail and his group has been working together with the Fatui. Defeat the Eremites and the Fatui once Samail sits on the throne.
Escape from Khaj-Nisut
| How to Escape from Khaj-Nisut | |
|---|---|
| 1 | 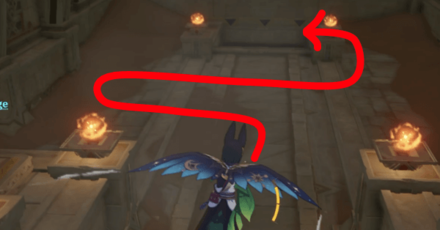 Glide down the hole. Go left then right when going through the invisible maze. |
| 2 | 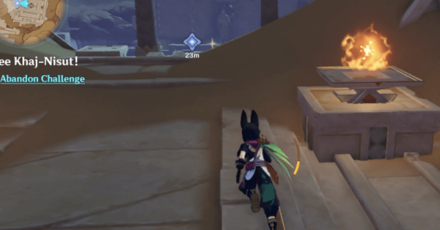 Go to the door on the back. Afterwards, head back, then go right to land on the floor and exit Khaj Nisut. |
Dreams Beneath the Searing Sand Information
Sub-quest of Golden Slumber

This quest is a sub-quest to complete the long Desert quest chain, under Golden Slumber. You'll need to complete all quests to unlock ruins and exploration abilites in the Desert area of Sumeru!
Golden Slumber World Quest Chain Guide
Dreams Beneath the Searing Sand Rewards
Total Quest Rewards
| Quest Rewards | ||
|---|---|---|
|
|
|
|
|
|
||
Genshin Impact Related Guides

Other Golden Slumber Quest Guides
| Golden Slumber World Quest Guides | ||
|---|---|---|
| Lost in the Sands | An Introduction to Indoor Archaeology | The Secret of Al-Ahmar |
| Dreams Beneath the Searing Sand | ||
Comment
has a bug where the last plinth's energy star never makes it to its destination, so this quest is unfinishable if you encounter it. I have heard switching night/day relogging fixes it sometimes, but not for me. guess i wont be playing this game anymore :( too many bugs.
Author
Dreams Beneath the Searing Sand World Quest
improvement survey
03/2026
improving Game8's site?

Your answers will help us to improve our website.
Note: Please be sure not to enter any kind of personal information into your response.

We hope you continue to make use of Game8.
Rankings
Gaming News
Popular Games

Genshin Impact Walkthrough & Guides Wiki

Honkai: Star Rail Walkthrough & Guides Wiki

Umamusume: Pretty Derby Walkthrough & Guides Wiki

Pokemon Pokopia Walkthrough & Guides Wiki

Resident Evil Requiem (RE9) Walkthrough & Guides Wiki

Monster Hunter Wilds Walkthrough & Guides Wiki

Wuthering Waves Walkthrough & Guides Wiki

Arknights: Endfield Walkthrough & Guides Wiki

Pokemon FireRed and LeafGreen (FRLG) Walkthrough & Guides Wiki

Pokemon TCG Pocket (PTCGP) Strategies & Guides Wiki
Recommended Games

Diablo 4: Vessel of Hatred Walkthrough & Guides Wiki

Fire Emblem Heroes (FEH) Walkthrough & Guides Wiki

Yu-Gi-Oh! Master Duel Walkthrough & Guides Wiki

Super Smash Bros. Ultimate Walkthrough & Guides Wiki

Pokemon Brilliant Diamond and Shining Pearl (BDSP) Walkthrough & Guides Wiki

Elden Ring Shadow of the Erdtree Walkthrough & Guides Wiki

Monster Hunter World Walkthrough & Guides Wiki

The Legend of Zelda: Tears of the Kingdom Walkthrough & Guides Wiki

Persona 3 Reload Walkthrough & Guides Wiki

Cyberpunk 2077: Ultimate Edition Walkthrough & Guides Wiki
All rights reserved
Copyright© 2012-2024 HoYoverse — COGNOSPHERE. All Rights Reserved.
The copyrights of videos of games used in our content and other intellectual property rights belong to the provider of the game.
The contents we provide on this site were created personally by members of the Game8 editorial department.
We refuse the right to reuse or repost content taken without our permission such as data or images to other sites.


![Monster Hunter Stories 3 Review [First Impressions] | Simply Rejuvenating](https://img.game8.co/4438641/2a31b7702bd70e78ec8efd24661dacda.jpeg/thumb)


sorry to hear that.