Jellicent Moveset & Best Build for Ranked Battle
★ Tier List / Doubles Tier List / Movesets / Rental Teams
✬ Pokemon HOME Dex Completion Shiny Rewards:
┗ Meloetta | Manaphy | Enamorus | Keldeo | Meltan
☆ Competitive Battle Guide
This is a strategy guide for using Jellicent in competitive play for the games Pokemon Sword and Shield. Read on for tips on the best Nature, EV spreads, Movesets, and Held Items to use with Jellicent, as well as its strengths and weak points.
| Jellicent - Related Guides | |
|---|---|
 Evolution and Learnset Evolution and Learnset |
 Build for Ranked Battle Build for Ranked Battle |
List of Contents
Basic Information for Jellicent
Types and Abilities
| Pokemon | Type 1 | Type 2 |
|---|---|---|

|

|
|
| Abilities | ||
| Water Absorb | Restores HP if hit by an Water-type move. | |
| Cursed Body | May disable a move used on the Pokemon. | |
| Damp (Hidden) | Prevents the use of self-destructing moves. | |
Jellicent Weaknesses and Resistances
| Type | |
|---|---|
| Takes 4x damage |
|
| Takes 2x damage |


|
| Takes 0.5x damage |


|
| Takes 1/4x damage |
|
| Takes 0x damage |


|
Base Stats
| HP | Attack | Defense | Sp. Atk | Sp. Def | Speed |
|---|---|---|---|---|---|
| 100 | 60 | 70 | 85 | 105 | 60 |
Best Nature for Jellicent
| Best Natures | ||
|---|---|---|
| Bold (+Def, -Atk) |
||
Singles Moveset for Jellicent
Mixed Defensive Wall Moveset & Best Build

| Nature | Bold(+Def, -Atk) |
|---|---|
| EV Spread | HP 252 / Def 196 / Spd 60 |
| Final Stat Values | HP 207 / Def 126 / Sp.Atk 105 / Sp.Def 125 / Spd 88 |
| Ability | Water Absorb |
| Held Item | Leftovers |
| Moveset | ・Strength Sap ・Night Shade ・Taunt ・Will-O-Wisp |
Jellicent finds a niche in the metagame as a bulky mixed wall with key resistances and immunities, as well as access to great utility moves.
About Jellicent's Moves
Strength Sap is a powerful utility move that lowers the target's attack stat while also healing Jellicent an amount based on the target's effective attack stat.
If this move is used on Haxuros, who has an effective attack stat of 191, Jellicent will heal that amount!
Night Shade allows Jellicent to hit opposing Pokemon for consistent damage equal to the target's level. Taunt allows it to shut down slower opposing walls, while Will-O-Wisp makes Jellicent a difficult Pokemon for physical sweepers to switch into.
About Jellicent's EV Spread
We're using a custom EV spread with full investment on HP and 196 Defensive EVs. Jellicent has a lower Defense stat, but with a Bold Nature and the right EVs, it will have a more well-rounded and equal defensive stats.
With the given Defense EVs, Jolly Choice Band Dracovish can't outright KO it even with a super effective Strong Jaw boosted Crunch!
Finally, 60 Speed EVs allows Jellicent to outspeed slower walls, such as Ferrothorn and Toxapex and cripple them with Taunt.
About Jellicent's Ability
Water Absorb allows Jellicent to wall opposing Water-type Pokemon common in the Metagame, such as Urshifu Rapid-Strike, Dracovish, and Gyarados.
About Jellicent's Held Item
We're using Leftovers to provide Jellicent some much-needed passive recovery.
Other Viable Moves
| Scald | An alternative to Will-O-Wisp that gives Jellicent a chance to inflict Burns even if it's under the effects of Taunt. |
|---|---|
| Recover | A more consistent recovery move but lacks Strength Sap's utility. |
| Confuse Ray | An alternative to Will-O-Wisp that stacks with other status moves. |
How to Use Jellicent Effectively
A Sturdy Mixed Wall with Unique Resistances
Jellicent sets itself apart from other defensive Pokemon thanks to its resistance to Poison, Bug, Steel, Fire, and Ice-type moves, as well as immunity to Normal, Fighting, and Water-type moves.
How to Build a Team with Jellicent
Jellicent easily fits into many teams and is a popular choice for defensive core with other walls in defensive-oriented teams.
An Aggressive Wall
Unlike other walls, Jellicent is best played aggressively against both physical sweepers and walls using its moves. When it's not crippling sweepers with Strength Sap and Will-O-Wisp, it's blocking slower walls with Taunt and chipping their health with Nightshade. Thanks to its unique playstyle, it's a popular choice for defensive teams.
Check out our guide below to learn how to build a defensive team.
How to Build a Defensive Team
A Rain Counter
Jellicent is also a great counter to Water-type sweepers in Rain Teams. The ability to wall terrifying sweepers like Choice Locked Dracovish and Urshifu Rapid-Strike make it a great choice for teams struggling against Hyper Offense teams.
Despite countering Rain Teams, Jellicent is often used as the main defensive wall in one although it faces stiff competition from Toxapex.
Check out our article below to learn how to build a Weather Team.
How to Build a Weather Team
Counters for Jellicent
| Weakness |
|
|---|

Use a Strong Attacker with a Super Effective Attack
Despite its great bulk, there are certain sweepers that can easily take down Jellicent with their super effective attacks.
Best Pokemon to Use
| Pokemon | Description |
|---|---|
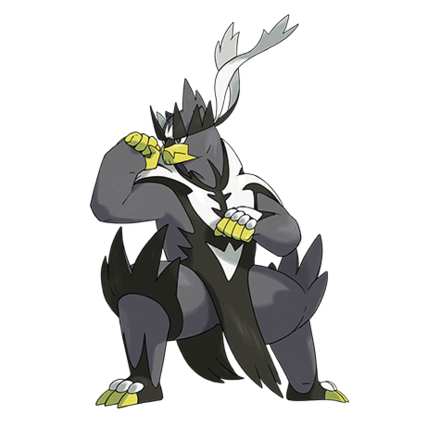 Urshifu Single-Strike Style Urshifu Single-Strike Style
|
Ranking: ★★★★★ ・Can KO Jellicent with a super effective Wicked Blow Moveset & Best Build for Urshifu Single-Strike Style |
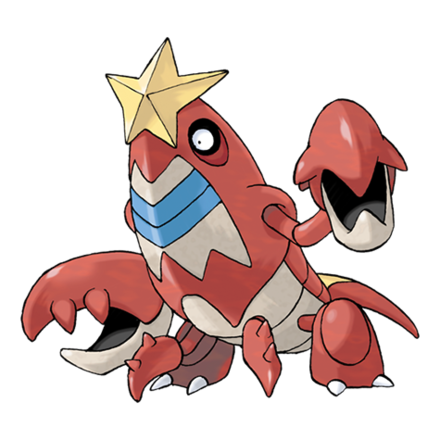 Crawdaunt Crawdaunt
|
Ranking: ★★★★★ ・Can KO Jellicent with a super effective Knock Off Moveset & Best Build for Crawdaunt |
Related Links

All Competitive Builds for Ranked Battle
Competitive Guides for Pokemon Sword and Shield
| Competitive Pokemon Battle Guides | |||||
|---|---|---|---|---|---|
 Tier List Tier List |
 Best Builds Best Builds |
 Series 10 List of Contenders Series 10 List of Contenders |
|||
 Doubles Tier List Doubles Tier List
|
 Team Building Team Building |
 Rental Teams Rental Teams |
|||
Best Builds for Returning Pokemon
Author

Jellicent Moveset & Best Build for Ranked Battle
Rankings

Gaming News


![The Liar Princess and the Blind Prince Review [PC] | Lovely to Look at but Tedious to Play](https://img.game8.co/4442586/8d95f5faf05780f1765ce7e0938bd825.jpeg/thumb)
![Marathon Cryo Archive Map Teased as [REDACTED] on Selection Screen](https://img.game8.co/4442236/6357203e58172f6de57f1991e7c39b22.png/thumb)

Popular Games

Genshin Impact Walkthrough & Guides Wiki
Umamusume: Pretty Derby Walkthrough & Guides Wiki
Pokemon Pokopia Walkthrough & Guides Wiki
Honkai: Star Rail Walkthrough & Guides Wiki
Monster Hunter Stories 3: Twisted Reflection Walkthrough & Guides Wiki
Arknights: Endfield Walkthrough & Guides Wiki
Wuthering Waves Walkthrough & Guides Wiki
Zenless Zone Zero Walkthrough & Guides Wiki
Pokemon TCG Pocket (PTCGP) Strategies & Guides Wiki
Monster Hunter Wilds Walkthrough & Guides Wiki


Recommended Games
Diablo 4: Vessel of Hatred Walkthrough & Guides Wiki
Cyberpunk 2077: Ultimate Edition Walkthrough & Guides Wiki
Fire Emblem Heroes (FEH) Walkthrough & Guides Wiki
Yu-Gi-Oh! Master Duel Walkthrough & Guides Wiki
Super Smash Bros. Ultimate Walkthrough & Guides Wiki
Pokemon Brilliant Diamond and Shining Pearl (BDSP) Walkthrough & Guides Wiki
Elden Ring Shadow of the Erdtree Walkthrough & Guides Wiki
Monster Hunter World Walkthrough & Guides Wiki
The Legend of Zelda: Tears of the Kingdom Walkthrough & Guides Wiki
Persona 3 Reload Walkthrough & Guides Wiki


All rights reserved
©2019 Pokémon. ©1995-2019 Nintendo/Creatures Inc. /GAME FREAK inc.
The copyrights of videos of games used in our content and other intellectual property rights belong to the provider of the game.
The contents we provide on this site were created personally by members of the Game8 editorial department.
We refuse the right to reuse or repost content taken without our permission such as data or images to other sites.