Darmanitan - Moveset & Best Build for Ranked Battle
★ Tier List / Doubles Tier List / Movesets / Rental Teams
✬ Pokemon HOME Dex Completion Shiny Rewards:
┗ Meloetta | Manaphy | Enamorus | Keldeo | Meltan
☆ Competitive Battle Guide
This is a strategy guide for using Darmanitan in competitive play for the games Pokemon Sword and Shield. Read on for tips on the best Nature, EV spreads, Movesets, and Held Items to use with Darmanitan, as well as its strengths and weak points.
| Darmanitan - Related Guides | |
|---|---|
 Evolution and Learnset Evolution and Learnset |
 Build for Ranked Battle Build for Ranked Battle |
List of Contents
Basic Information for Darmanitan
Types and Abilities
| Pokemon | Type 1 | Type 2 |
|---|---|---|

|
||
| Abilities | ||
| Sheer Force | Removes added effects to increase move damage. | |
| Zen Mode (Hidden) | Changes form when HP drops below half. | |
Darmanitan Weaknesses and Resistances
| Type | |
|---|---|
| Takes 4x damage |
|
| Takes 2x damage |


|
| Takes 0.5x damage |


|
| Takes 1/4x damage |
|
| Takes 0x damage |
|
Base Stats
| HP | Attack | Defense | Sp. Atk | Sp. Def | Speed |
|---|---|---|---|---|---|
| 105 | 140 | 55 | 30 | 55 | 95 |
Best Nature for Darmanitan
| Best Natures | ||
|---|---|---|
| Jolly (+Spd, -SpAtk) |
Adamant (+Atk, -SpAtk) |
|
Singles Movesets for Darmanitan
Choice Scarf Moveset & Best Build
| Nature | Jolly (+Spd, -SpAtk) |
|---|---|
| EV Spread | HP 4 / Atk. 252 / Spd. 252 |
| Final Stat Values | HP 181 / Atk. 192 / Def. 75 / Sp.Def. 75 / Spd. 161 |
| Ability | Sheer Force |
| Held Item | Choice Scarf |
| Moveset | ・
Flare Blitz
・ Earthquake ・ Rock Slide ・ Trick |
These values are from base stats and ideal EVs, excluding external factors.
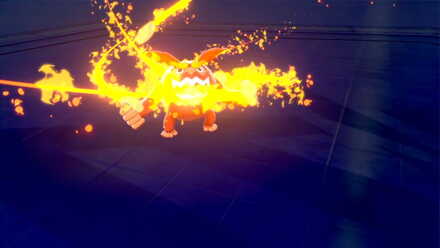
Equipping Choice Scarf will boost Darmanitan's speed, and its Ability Sheer Force will boost the power of its moves, allowing you to deal high damage fast, like its counterpart Galarian Darmanitan.
Trick
If you have Choice Scarf equipped, you can use Trick to force the opponent to hold Choice Scarf and prevent an attacker from setting up or a defensive Pokemon from using support moves. After switching items, you'll be able to start using other moves as normal, but be careful as Darmanitan's Speed will return to its original value.
U-turn
When using Darmanitan simply as a high-speed attacker, U-turn is recommended, so when it's at a disadvantage against its opponent, it can escape while simultaneously dealing damage.
Alternate Move Choices
| U-turn | High priority alternate choice for Trick. |
|---|---|
| Iron Head | Used for hitting Fairy types. |
| Superpower | A powerful Fighting-type move effective against the likes of Tyranitar. |
| Zen Headbutt | Effective against Poison and Fighting types. |
Life Orb Moveset & Best Build
| Nature | Jolly (+Spd, -SpAtk) |
|---|---|
| EV Spread | HP 4 / Atk. 252 / Spd. 252 |
| Final Stat Values | HP 181 / Atk. 192 / Def. 75 / Sp.Def. 75 / Spd. 161 |
| Ability | Sheer Force |
| Held Item | Life Orb |
| Moveset | ・
Flare Blitz
・ Earthquake ・ Rock Slide ・ Iron Head |
These values are from base stats and ideal EVs, excluding external factors.
Darmanitan has the unique potential to deal increased damage with Life Orb, which boosts the power of moves, without the cost of losing HP. Due to its Ability Sheer Force, Darmanitan will avoid the effects of taking damage from Life Orb, while still being able to benefit from the power increase.
Alternate Move Choices
| Superpower | A powerful Fighting-type move effective against the likes of Tyranitar. |
|---|---|
| Zen Headbutt | Effective against Poison and Fighting types. |
| U-turn | Lets you manipulate the flow of battle. When faster, allows escape from a threatening opponent. |
How to Use Darmanitan Effectively
High-power attacker with Sheer Force
Moves that have additional effects will reach 1.3x their normal power due to Sheer Force. It is specifically compatible with Flare Blitz, a move which is powerful regardless of the target's type.
And unlike Galarian Darmanitans with Gorilla Tactics, a similar Ability, Darmanitan is not locked to using only one move.
Counters for Darmanitan
| Weakness |
|
|---|

Defensive Pokemon can weather its hits
It is highly recommended that you use defensive Pokemon that can withstand Darmanitan's heavy damage, such as Pokemon with HP-restoring moves and abilities.
Best Pokemon to Use
| Pokemon | Description |
|---|---|
 Milotic Milotic
|
Ranking: ★★★★★ ・Its ability Marvel Scale makes it effective against Physical attackers ・Recover allows it to recover HP Moveset & Best Build for Milotic |
Put in something that can take its hit and strike back
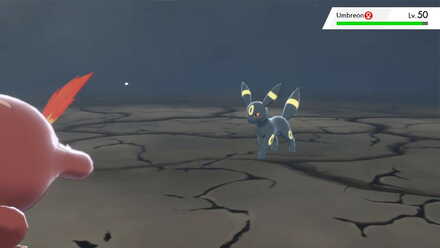
Counter with Pokemon that can fight back after being hit. Since Darmanitan does not have strong defensive stats, it is easy to beat it with its weaknesses.
Mimikyu has the opportunity to use Darmanitan to set up, thanks to its Ability Disguise, which will protect it from any attack once. You can use this chance to use Attack-boosting moves such as Swords Dance, and after Dynamaxing, it can take out Darmanitan and be ready for the next Pokemon.
Best Pokemon to Use
| Pokemon | Description |
|---|---|
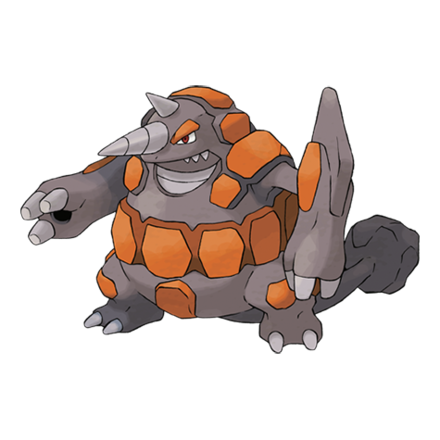 Rhyperior Rhyperior
|
Ranking: ★★★★☆ ・A good type matchup and strong defenses ・Can hit super-effectively and try for a KO Moveset & Best Build for Rhyperior |
 Mimikyu Mimikyu
|
Ranking: ★★★★☆ ・Its Ability Disguise allows it to weather one hit Moveset & Best Build for Mimikyu |
Related Links

All Competitive Builds for Ranked Battle
Competitive Guides for Pokemon Sword and Shield
| Competitive Pokemon Battle Guides | |||||
|---|---|---|---|---|---|
 Tier List Tier List |
 Best Builds Best Builds |
 Series 10 List of Contenders Series 10 List of Contenders |
|||
 Doubles Tier List Doubles Tier List
|
 Team Building Team Building |
 Rental Teams Rental Teams |
|||
Best Builds for Returning Pokemon
All Competitive Builds for Ranked Battle
## Competitive Guides for Pokemon Sword and Shield
| Competitive Pokemon Battle Guides | |||||
|---|---|---|---|---|---|
| Tier List |
Best Builds |
Series 10 List of Contenders |
|||
| Doubles Tier List
|
Team Building |
Rental Teams |
|||
Best Builds for Returning Pokemon
Author

Darmanitan - Moveset & Best Build for Ranked Battle
Rankings

Gaming News


![Monster Hunter Stories 3 Review [First Impressions] | Simply Rejuvenating](https://img.game8.co/4438641/2a31b7702bd70e78ec8efd24661dacda.jpeg/thumb)
Popular Games

Genshin Impact Walkthrough & Guides Wiki
Honkai: Star Rail Walkthrough & Guides Wiki
Umamusume: Pretty Derby Walkthrough & Guides Wiki
Pokemon Pokopia Walkthrough & Guides Wiki
Resident Evil Requiem (RE9) Walkthrough & Guides Wiki
Monster Hunter Wilds Walkthrough & Guides Wiki
Wuthering Waves Walkthrough & Guides Wiki
Arknights: Endfield Walkthrough & Guides Wiki
Pokemon FireRed and LeafGreen (FRLG) Walkthrough & Guides Wiki
Pokemon TCG Pocket (PTCGP) Strategies & Guides Wiki


Recommended Games
Diablo 4: Vessel of Hatred Walkthrough & Guides Wiki
Cyberpunk 2077: Ultimate Edition Walkthrough & Guides Wiki
Fire Emblem Heroes (FEH) Walkthrough & Guides Wiki
Yu-Gi-Oh! Master Duel Walkthrough & Guides Wiki
Super Smash Bros. Ultimate Walkthrough & Guides Wiki
Pokemon Brilliant Diamond and Shining Pearl (BDSP) Walkthrough & Guides Wiki
Elden Ring Shadow of the Erdtree Walkthrough & Guides Wiki
Monster Hunter World Walkthrough & Guides Wiki
The Legend of Zelda: Tears of the Kingdom Walkthrough & Guides Wiki
Persona 3 Reload Walkthrough & Guides Wiki


All rights reserved
©2019 Pokémon. ©1995-2019 Nintendo/Creatures Inc. /GAME FREAK inc.
The copyrights of videos of games used in our content and other intellectual property rights belong to the provider of the game.
The contents we provide on this site were created personally by members of the Game8 editorial department.
We refuse the right to reuse or repost content taken without our permission such as data or images to other sites.