Potbottom Desert Map and Obtainable Pokemon
★ Tier List / Doubles Tier List / Movesets / Rental Teams
✬ Pokemon HOME Dex Completion Shiny Rewards:
┗ Meloetta | Manaphy | Enamorus | Keldeo | Meltan
☆ Competitive Battle Guide

This is a list of Pokemon that appear in the Potbottom Desert area in the Isle of Armor DLC for the games Pokemon Sword and Shield. Read on for information on which Pokemon appear there, obtainable items, and more.
| Isle of Armor Wild Area Maps | ||
|---|---|---|
 Fields of Honor Fields of Honor |
 Soothing Wetlands Soothing Wetlands |
 Forest of Focus Forest of Focus |
 Challenge Beach Challenge Beach |
 Brawlers' Cave Brawlers' Cave |
 Loop Lagoon Loop Lagoon |
 Stepping-Stone Sea Stepping-Stone Sea |
 Insular Sea Insular Sea |
 Honeycalm Island Honeycalm Island |
 Honeycalm Sea Honeycalm Sea |
Potbottom Desert |
 Warm-Up Tunnel Warm-Up Tunnel |
 Training Lowlands Training Lowlands |
 Challenge Road Challenge Road |
 Courageous Cavern Courageous Cavern |
 Workout Sea Workout Sea |
||
List of Contents
Potbottom Desert Maps
All Items, Characters and Important Locations
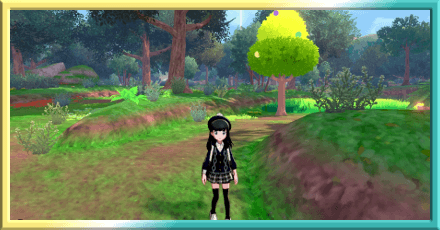
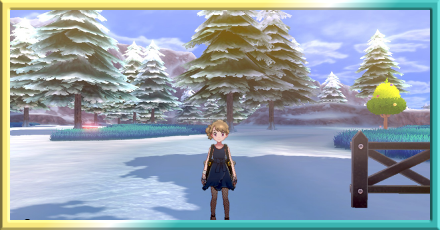
 Enlarge
Click for a full list of items and important areas you can find in Potbottom Desert!
Diglett Locations
 Enlarge
These Alolan Digletts can be found in Potbottom Desert. Learn how to find all the Digletts in our full guide!
Potbottom Desert Max Raid Dens
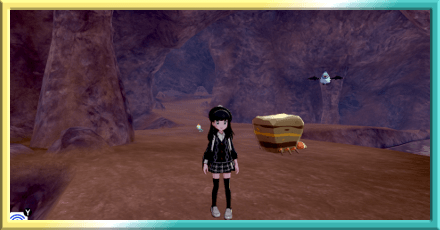
 Enlarge
Pokemon will appear in the Dens above for Max Raid Battles.
| List of Dens (Click to Jump!) | |||
|---|---|---|---|
| ▼ Den A | ▼ Den B | ▼ Den C | - |
Max Raid Den A
Enlarge| Normal Den | Hidden Ability: Yes |
Hidden Ability: Yes |
|---|---|
Hidden Ability: No |
Hidden Ability: No |
Hidden Ability: Yes |
Hidden Ability: No |
Hidden Ability: No |
Hidden Ability: Yes |
Hidden Ability: No |
|
| Rare Den | Hidden Ability: Yes |
Hidden Ability: Yes |
Hidden Ability: Yes |
Hidden Ability: Yes |
Hidden Ability: Yes |
Hidden Ability: Yes |
Hidden Ability: Yes |
Hidden Ability: Yes |
Hidden Ability: Yes |
Hidden Ability: Yes |
Hidden Ability: Yes |
Hidden Ability: Yes |
Max Raid Den B
Enlarge| Normal Den | Hidden Ability: Yes |
Hidden Ability: Yes |
|---|---|
Hidden Ability: No |
Hidden Ability: Yes |
Hidden Ability: No |
Hidden Ability: No |
Hidden Ability: Yes |
Hidden Ability: No |
Hidden Ability: No |
|
| Rare Den | Hidden Ability: Yes |
Hidden Ability: Yes |
Hidden Ability: Yes |
Hidden Ability: Yes |
Hidden Ability: Yes |
Hidden Ability: Yes |
Hidden Ability: Yes |
Hidden Ability: Yes |
Hidden Ability: Yes |
Hidden Ability: Yes |
Max Raid Den C
Enlarge| Normal Den | Hidden Ability: Yes |
Hidden Ability: No |
|---|---|
Hidden Ability: Yes |
Hidden Ability: No |
Hidden Ability: Yes |
Hidden Ability: No |
Hidden Ability: No |
Hidden Ability: Yes |
Hidden Ability: No |
Hidden Ability: Yes |
| Rare Den | Hidden Ability: Yes |
Hidden Ability: Yes |
Hidden Ability: Yes |
Hidden Ability: Yes |
Hidden Ability: Yes |
Hidden Ability: Yes |
Hidden Ability: Yes |
Hidden Ability: Yes |
Hidden Ability: Yes |
|
Visible Encounters in Potbottom Desert
Clear (Visible)
| Pokemon | Type |
|---|---|
 Chansey Chansey
|

|
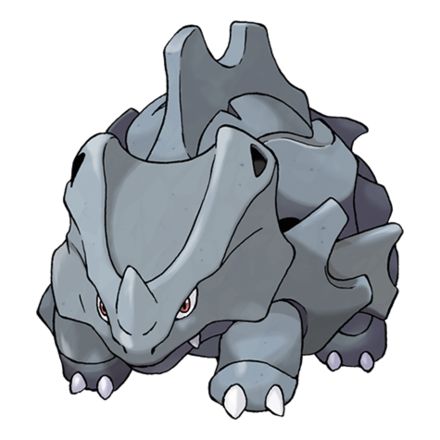 Rhyhorn Rhyhorn
|


|
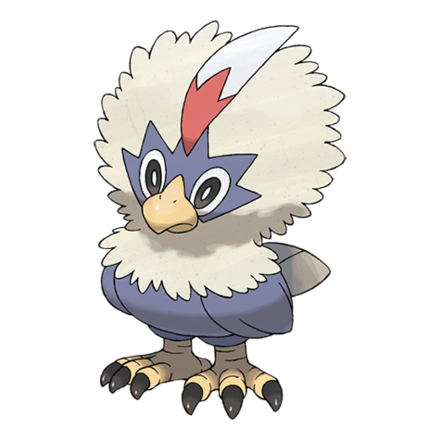 Rufflet Rufflet
Sword only |

|
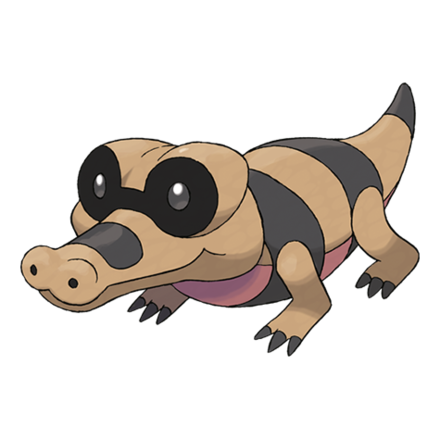 Sandile Sandile
|

|
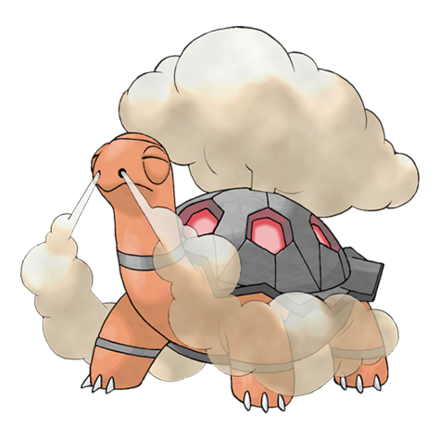 Torkoal Torkoal
|

|
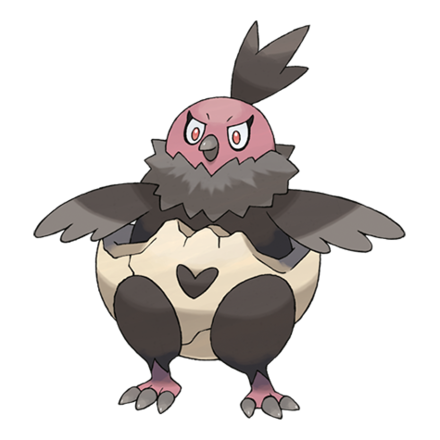 Vullaby Vullaby
Shield only |
|
Cloudy (Visible)
| Pokemon | Type |
|---|---|
|
Chansey
|
|
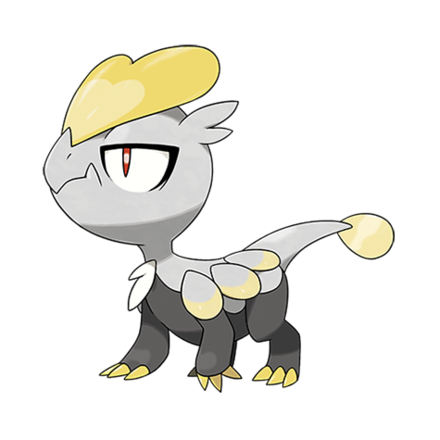 Jangmo-o Jangmo-o
Sword only |

|
 Pawniard Pawniard
|

|
|
Rhyhorn
|
|
|
Rufflet
Sword only |
|
|
Sandile
|
|
|
Torkoal
|
|
|
Vullaby
Shield only |
|
Sunny (Visible)
| Pokemon | Type |
|---|---|
|
Chansey
|
|
 Fletchling Fletchling
|
|
|
Rhyhorn
|
|
|
Rufflet
Sword only |
|
|
Sandile
|
|
|
Torkoal
|
|
|
Vullaby
Shield only |
|
Rain (Visible)
| Pokemon | Type |
|---|---|
|
Chansey
|
|
|
Rhyhorn
|
|
|
Rufflet
Sword only |
|
|
Sandile
|
|
 Shinx Shinx
|

|
|
Torkoal
|
|
|
Vullaby
Shield only |
|
Thunderstorm (Visible)
| Pokemon | Type |
|---|---|
|
Chansey
|
|
|
Rhyhorn
|
|
|
Rufflet
Sword only |
|
|
Sandile
|
|
|
Torkoal
|
|
|
Vullaby
Shield only |
|
Sandstorm (Visible)
| Pokemon | Type |
|---|---|
|
Chansey
|
|
|
Rhyhorn
|
|
|
Rufflet
Sword only |
|
|
Sandile
|
|
 Scraggy Scraggy
Sword only |

|
 Silicobra Silicobra
|
|
|
Torkoal
|
|
|
Vullaby
Shield only |
|
Fog (Visible)
| Pokemon | Type |
|---|---|
 Blissey Blissey
|
|
|
Rhyhorn
|
|
|
Rufflet
Sword only |
|
|
Sandile
|
|
|
Torkoal
|
|
|
Vullaby
Shield only |
|
Random Encounters in Potbottom Desert
There are no randomly encountered Pokemon in Potbottom Desert.
Special Overworld Encounters in Potbottom Desert
Clear (Visible)
| Pokemon | Type |
|---|---|
 Rhyperior Rhyperior
|
|
 Rhydon Rhydon
|
|
 Braviary Braviary
Sword only |
|
 Mandibuzz Mandibuzz
Shield only |
|
 Sandaconda Sandaconda
|
|
 Marowak Marowak
|
|
Cloudy (Visible)
| Pokemon | Type |
|---|---|
|
Braviary
Sword only |
|
|
Mandibuzz
Shield only |
|
 Krookodile Krookodile
|
|
 Krokorok Krokorok
|
|
Sunny (Visible)
| Pokemon | Type |
|---|---|
|
Rhyperior
|
|
|
Rhydon
|
|
|
Braviary
Sword only |
|
|
Mandibuzz
Shield only |
|
|
Torkoal
|
|
|
Sandaconda
|
|
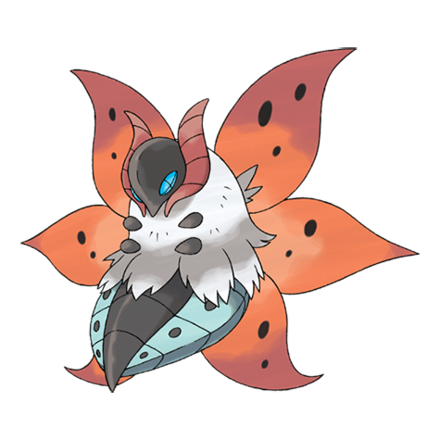 Volcarona Volcarona
|

|
|
Marowak
|
|
Rain (Visible)
| Pokemon | Type |
|---|---|
|
Braviary
Sword only |
|
|
Mandibuzz
Shield only |
|
|
Krookodile
|
|
|
Krokorok
|
|
Thunderstorm (Visible)
| Pokemon | Type |
|---|---|
|
Braviary
Sword only |
|
|
Mandibuzz
Shield only |
|
|
Krookodile
|
|
|
Krokorok
|
|
Sandstorm (Visible)
| Pokemon | Type |
|---|---|
|
Rhyperior
|
|
|
Rhydon
|
|
|
Braviary
Sword only |
|
|
Mandibuzz
Shield only |
|
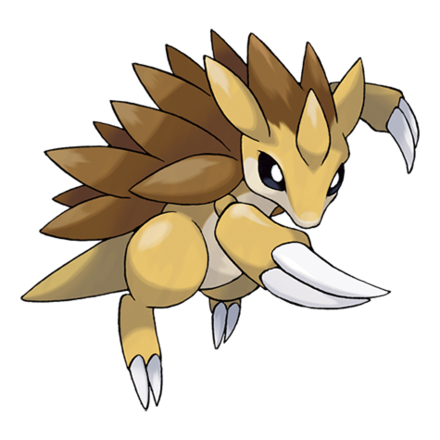 Sandslash Sandslash
|
|
Fog (Visible)
| Pokemon | Type |
|---|---|
|
Rhyperior
|
|
|
Braviary
Sword only |
|
|
Mandibuzz
Shield only |
|
|
Torkoal
|
|
|
Sandaconda
|
|
|
Marowak
|
|
Obtainable Items in Potbottom Desert
List of TRs
| No. | Move | Location | Price |
|---|---|---|---|
| TR21 | Reversal | Near the northern part of the map. | - |
| TR96 | Drill Run | Near the eastern part of the map | - |
List of Items
| Item | |
|---|---|
| Rocky Helmet | Fire Stone |
| Flame Orb | Protector |
| Smooth Rock | - |
Related Links
Wild Area and Raid Strategy

The Crown Tundra Maps
 Slippery Slope
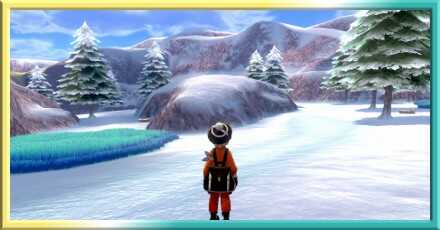 Frostpoint Field
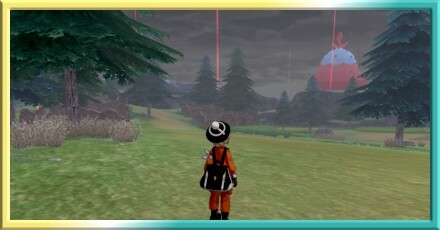 Giant's Bed
 Old Cemetery
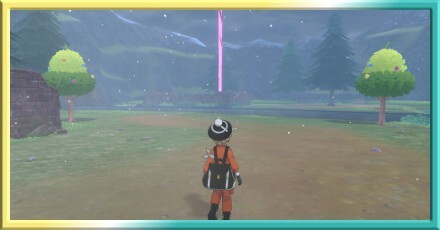 Giant's Foot
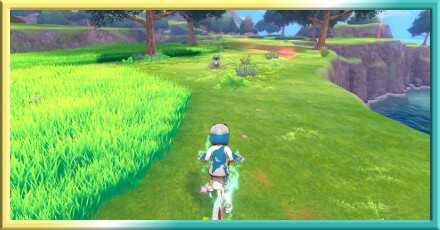 Ballimere Lake
 Dyna Tree Hill
 Frigid Sea
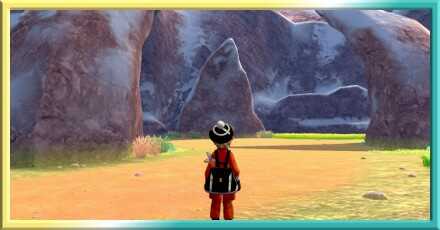 Three-Point Pass
 Snowslide Slope
 Path to the Peak
 Crown Shrine
 Lakeside Cave
 Roaring-Sea Caves
 Tunnel to the Top
The Isle of Armor Maps
| Isle of Armor Wild Area Maps | ||
|---|---|---|
| Fields of Honor |
Soothing Wetlands |
Forest of Focus |
| Challenge Beach |
Brawlers' Cave |
Loop Lagoon |
| Stepping-Stone Sea |
Insular Sea |
Honeycalm Island |
| Honeycalm Sea |
Potbottom Desert |
Warm-Up Tunnel |
| Training Lowlands |
Challenge Road |
Courageous Cavern |
| Workout Sea |
||
All Wild Area Maps
 Rolling Fields
 Dappled Grove
 West Lake Axewell
 Axew's Eye
 Giant's Seat
 South Lake Miloch
 East Lake Axewell
 Watchtower Ruins
 Motostoke Riverbank
 Stony Wilderness
 Bridge Field
 Dusty Bowl
 Giant's Mirror
 Giant's Cap
 Lake of Outrage
 Hammerlocke Hills
 North Lake Miloch
All Raid Boss Locations

Author

Potbottom Desert Map and Obtainable Pokemon
Rankings
- We could not find the message board you were looking for.

Gaming News

![The Liar Princess and the Blind Prince Review [PC] | Lovely to Look at but Tedious to Play](https://img.game8.co/4442586/8d95f5faf05780f1765ce7e0938bd825.jpeg/show)
![The Liar Princess and the Blind Prince Review [PC] | Lovely to Look at but Tedious to Play](https://img.game8.co/4442586/8d95f5faf05780f1765ce7e0938bd825.jpeg/thumb)
![Marathon Cryo Archive Map Teased as [REDACTED] on Selection Screen](https://img.game8.co/4442236/6357203e58172f6de57f1991e7c39b22.png/thumb)

Popular Games

Genshin Impact Walkthrough & Guides Wiki
Umamusume: Pretty Derby Walkthrough & Guides Wiki
Pokemon Pokopia Walkthrough & Guides Wiki
Honkai: Star Rail Walkthrough & Guides Wiki
Monster Hunter Stories 3: Twisted Reflection Walkthrough & Guides Wiki
Arknights: Endfield Walkthrough & Guides Wiki
Wuthering Waves Walkthrough & Guides Wiki
Zenless Zone Zero Walkthrough & Guides Wiki
Pokemon TCG Pocket (PTCGP) Strategies & Guides Wiki
Monster Hunter Wilds Walkthrough & Guides Wiki


Recommended Games
Diablo 4: Vessel of Hatred Walkthrough & Guides Wiki
Cyberpunk 2077: Ultimate Edition Walkthrough & Guides Wiki
Fire Emblem Heroes (FEH) Walkthrough & Guides Wiki
Yu-Gi-Oh! Master Duel Walkthrough & Guides Wiki
Super Smash Bros. Ultimate Walkthrough & Guides Wiki
Pokemon Brilliant Diamond and Shining Pearl (BDSP) Walkthrough & Guides Wiki
Elden Ring Shadow of the Erdtree Walkthrough & Guides Wiki
Monster Hunter World Walkthrough & Guides Wiki
The Legend of Zelda: Tears of the Kingdom Walkthrough & Guides Wiki
Persona 3 Reload Walkthrough & Guides Wiki


All rights reserved
©2019 Pokémon. ©1995-2019 Nintendo/Creatures Inc. /GAME FREAK inc.
The copyrights of videos of games used in our content and other intellectual property rights belong to the provider of the game.
The contents we provide on this site were created personally by members of the Game8 editorial department.
We refuse the right to reuse or repost content taken without our permission such as data or images to other sites.