Ho-Oh - Moveset & Best Build for Ranked Battle
★ Tier List / Doubles Tier List / Movesets / Rental Teams
✬ Pokemon HOME Dex Completion Shiny Rewards:
┗ Meloetta | Manaphy | Enamorus | Keldeo | Meltan
☆ Competitive Battle Guide

This is a strategy guide for using Ho-Oh in competitive play for the games Pokemon Sword and Shield. Read on for tips on the best Nature, EV spreads, Movesets, and Held Items to use with Ho-Oh, as well as its strengths and weak points.
| Ho-oh - Related Guides | |
|---|---|
 Evolution and Learnset Evolution and Learnset |
 Build for Ranked Battle Build for Ranked Battle |
List of Contents
Basic Information for Ho-Oh
Types and Abilities
| Pokemon | Type 1 | Type 2 |
|---|---|---|

|

|
|
| Abilities | ||
| Pressure | The Pokemon raises the foe's PP usage. | |
| Regenerator (Hidden) | Restores a little HP when withdrawn from battle. | |
Ho-oh Weaknesses and Resistances
| Type | |
|---|---|
| Takes 4x damage |

|
| Takes 2x damage |


|
| Takes 0.5x damage |


|
| Takes 1/4x damage |


|
| Takes 0x damage |

|
Base Stats
| HP | Attack | Defense | Sp. Atk | Sp. Def | Speed |
|---|---|---|---|---|---|
| 106 | 130 | 90 | 110 | 154 | 90 |
Best Nature for Ho-Oh
| Best Natures | |
|---|---|
| Careful (+Sp.Def, -Sp.Atk) |
Impish (+Def, -Sp.Atk) |
| Adamant (+Atk, -Sp.Atk) |
|
Singles Movesets for Ho-Oh
Physical Attacker Moveset & Best Build
| Nature | Adamant (+Atk, -Sp.Atk) |
|---|---|
| EV Spread | Atk 252 / Def 132 / Spd 124 |
| Final Stat Values | HP 181 / Atk 200 / Def 127 / Sp.Def 174 / Spd 126 |
| Ability | Regenerator |
| Held Item | Life Orb |
| Moveset | ・Sacred Fire
・Brave Bird ・Earthquake ・Recover |
Ho-Oh is a threatening physical attacker in the current metagame. While most physical attackers aim to outspeed and overpower the opposing team, the Rainbow Pokemon functions more as a bulky offensive pivot that can threaten opposing physical sweepers with a burn from Sacred Fire.
About Ho-Oh's Moves
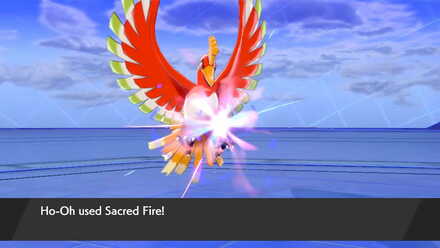
Sacred Fire is Ho-Oh's strongest Fire-type STAB and has a 50% chance to inflict a burn. This move makes Ho-Oh very difficult to switch into as it can potentially burn its checks and counters if they decide to switch in.
Brave Bird is its secondary Flying-type STAB and provides great neutral coverage at the cost of some recoil damage. It also becomes Max Airstream during Dynamax, allowing Ho-Oh to boost its Speed stat by one stage.
Earthquake is its main coverage move and allows Ho-Oh to hit Heatran and Toxapex for super effective damage.
It's last move is Recover, restoring up to 50% of Ho-Oh's lost HP and lets it stay for longer in matches.
About Ho-Oh's EV Spread
We're using a bulkier physical attacking EV spread with full investment in Attack and 124 Speed EVs. The remaining 132 EVs are invested in Defense to boost its physical bulk.
About Ho-Oh's Ability
Regenerator is Ho-Oh's best Ability, restoring 1/3 of its Maximum HP when it switches out. This essentially nullifies the recoil damage of Brave Bird and Life Orb.
About Ho-Oh's Held Item
Life Orb boosts the power of Ho-Oh's moves by 30% at the cost of some recoil damage, although this is mitigated by its Regenerator Ability.
Other Viable Moves
| Iron Head | An alternative coverage move that's mostly used during Dynamax where it becomes Max Steelspike, boosting Ho-Oh's Defense stat by 1 stage. |
|---|---|
| Fly | A two-turn move that Ho-Oh can use to stall out the opposing Pokemon's Dynamax. |
| Flare Blitz | An alternative physical Fire-type move that becomes a 140 Base Power Max Flare in Dynamax. |
Physically Defensive Moveset & Best Build
| Nature | Impish (+Def, -Sp.Atk) |
|---|---|
| EV Spread | HP 204 / Atk 36 / Def 140 / Sp.Def 4 / Spd 124 |
| Final Stat Values | HP 207 / Atk 155 / Def 140 / Sp.Def 175 / Spd 126 |
| Ability | Regenerator |
| Held Item | Heavy-Duty Boots |
| Moveset | ・Sacred Fire
・Brave Bird ・Substitute ・Recover |
Ho-Oh can forgo an attacking set for a more defensive-oriented moveset. Unlike other defensive Pokemon, it doesn't lose any offensive momentum as it can still hit hard with minimal investment thanks to its high powered moves.
About Ho-Oh's Moves
Sacred Fire is Ho-Oh's strongest Fire-type STAB and has a 50% chance to inflict a burn. It still hits reasonably well with minimal investment and is mostly used to spread burns.
Brave Bird is its secondary Flying-type STAB and provides great neutral coverage at the cost of some recoil damage. It's mostly used during Dynamax where it becomes Max Airstream, boosting Ho-Oh's Speed stat by one stage
Substitute is a great support move that protects Ho-Oh from status conditions such as Paralysis and Poison. Recover is its last move, restoring up to 50% of Ho-Oh's lost HP.
About Ho-Oh's EV Spread
We're using a defensive EV spread for this Ho-Oh with an Impish Nature. 204 HP EVs and 140 Def EVs make it as physically bulky as possible, while 4 Sp.Def EVs slightly boost its naturally high Special Defense.
The remaining EVs are placed in Attack and Speed. 36 Atk EVs give it an effective 155 Attack stat at Level 50, which allows it to still hit hard with its STAB moves. 124 Spd EVs make it as fast as possible, allowing it to outrun slower attackers such as Bisharp and defensive Pokemon such as Chansey.
About Ho-Oh's Held Item
We're giving this Ho-Oh Heavy-Duty Boots, which protects Ho-Oh from entry hazards such as Stealth Rock.
Other Viable Moves
| Earthquake | Can replace Substitute so that Ho-Oh can hit Heatran and Nihilego for super effective damage. |
|---|---|
| Dual Wingbeat | Can replace Brave Bird so that Ho-Oh has a way to break Focus Sash, Sturdy, and Mimikyu's Disguise. |
| Iron Head | Can replace Substitute if using Ho-Oh as a Dynamax Pokemon. Becomes Max Steelspike, boosting Ho-Oh's Defense stat by 1 stage. |
How to Use Ho-Oh Effectively
A Powerful Offensive Pivot
A combination of powerful moves, utility in Sacred Fire, and Regenerator makes Ho-Oh one of the best offensive pivots in the current metagame.
The fact that it has a 50% chance to inflict a burn with its signature move means it's also very difficult to switch into as even defensive Pokemon don't appreciate getting worn down by a burn.
How to Build a Team with Ho-Oh
Ho-Oh is a very attractive choice as a main Dynamax attacker for both offensive and defensive-oriented teams, although it struggles with other Legendary Pokemon that can provide higher and more immediate damage.
Despite this, its great bulk and the utility it provides with Sacred Fire makes it a great Pokemon to build a team around on.
Use it as an Offensive Pivot
Ho-Oh excels as an offensive pivot and can either function as the team's Dynamax Pokemon or as a supporting physical attacker.
Example Offensive Pivot + Offensive Team
| Lead Dynamax | Offensive Pivot | Special Attacker |
|---|---|---|
 Rillaboom Rillaboom
|
 Ho-oh Ho-oh
|
 Raichu Raichu
|
Rillaboom leads this offensive team and also fills the role of the team's Dynamax or Gigantamax Pokemon. With U-Turn, it can pivot to Ho-Oh if it faces an unfavorable type matchup like Cinderace or Dragonite, with Ho-Oh driving them off with Earthquake or burning them with Sacred Fire respectively.
Rillaboom, in turn, threatens bulky Water-types such as Quagsire and Gastrodon that Ho-Oh has trouble with.
Raichu rounds off this team's coverage by providing strong Electric-type STAB. It also synergizes well with Ho-Oh as its Lightning Rod Ability absorbs Electric-types directed at the Rainbow Pokemon.
How to Build an Offensive Team
Use it as a Defensive Pivot
Ho-Oh is a great choice for defensive-oriented teams as even with minimal Attack investment, it still hits reasonably hard with its STAB moves - on top of the extra utility it provides with Sacred Fire.
Example Defensive Pivot + Defensive Team
| Lead Setup Sweeper | Defensive Pivot | Special Wall |
|---|---|---|
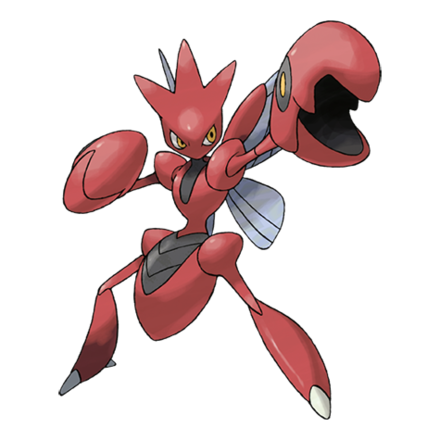 Scizor Scizor
|
Ho-oh
|
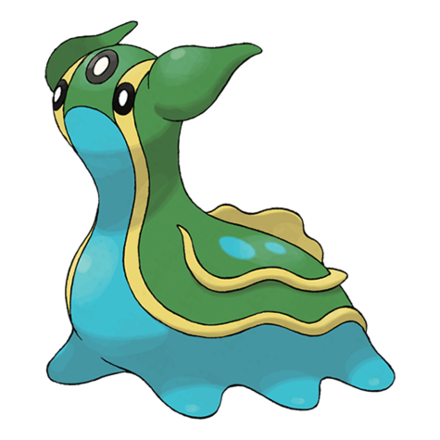 Gastrodon Gastrodon
|
Ho-Oh makes a great defensive pivot for this team, synergizing well with both Scizor and Gastrodon.
Scizor can U-Turn out of the battle if it encounters a Fire-type Pokemon, pivoting to Ho-Oh who can shrug off both physical and special Fire-type moves thanks to its great mixed bulk.
Gastrodon serves as this team's Special Wall and is the partner Ho-Oh pivots to when it encounters Water and Electric-types. Gastrodon, in turn, appreciates Ho-Oh's ability to deter Grass-types and the burns it provides with Sacred Fire.
Counters for Ho-Oh
| Weakness |
|
|---|
Hit it With Rock-type Moves
Ho-Oh can be dealt with by taking advantage of its 4x weakness to Rock-type moves. Its overall high defense means you'll want to strike with strong moves like Stone Edge or ones that can break its Substitute like Rock Blast.
Best Pokemon to Use
| Pokemon | Description |
|---|---|
 Tyranitar Tyranitar
|
Ranking: ★★★★★
・Resists Ho-Oh's Fire-type STAB ・Can deal heavy damage with Crunch or break Ho-Oh's Substitute with Rock Blast ・Choice Band variants can KO Ho-Oh with one Stone Edge Moveset & Best Build for Tyranitar |
 Landorus (Therian Forme) Landorus (Therian Forme)
|
Ranking: ★★★★★
・Can lower Ho-Oh's Attack with Intimidate ・Choice Scarf variants can outspeed Ho-Oh and KO with Stone Edge Moveset & Best Build for Landorus (Therian Forme) |
 Rhyperior Rhyperior
|
Ranking: ★★★★★
・Choice Band variants can easily KO Ho-Oh with Stone Edge ・Soild Rock allows it to survive Ho-Oh's Earthquake and get a boost from Weakness Policy Moveset & Best Build for Rhyperior |
 Galarian Darmanitan Galarian Darmanitan
|
Ranking: ★★★★
・Choice Scarf variants outspeed Ho-Oh and easily KOs with Gorilla Tactics boosted Stone Edge ・Very risky to use due to its weakness to Fire-type moves and Stone Edge's lower accuracy Moveset & Best Build for Galarian Darmanitan |
 Hippowdon Hippowdon
|
Ranking: ★★★★
・Great physical bulk lets it set up Stealth Rock and phaze with Yawn ・Can get worn down with burns from Ho-Oh's Sacred Fire Moveset & Best Build for Hippowdon |
Related Links

All Competitive Builds for Ranked Battle
Competitive Guides for Pokemon Sword and Shield
| Competitive Pokemon Battle Guides | |||||
|---|---|---|---|---|---|
 Tier List Tier List |
 Best Builds Best Builds |
 Series 10 List of Contenders Series 10 List of Contenders |
|||
 Doubles Tier List Doubles Tier List
|
 Team Building Team Building |
 Rental Teams Rental Teams |
|||
Best Builds for The Crown Tundra Pokemon
Author

Ho-Oh - Moveset & Best Build for Ranked Battle
Rankings
- We could not find the message board you were looking for.

Gaming News


![The Liar Princess and the Blind Prince Review [PC] | Lovely to Look at but Tedious to Play](https://img.game8.co/4442586/8d95f5faf05780f1765ce7e0938bd825.jpeg/thumb)
![Marathon Cryo Archive Map Teased as [REDACTED] on Selection Screen](https://img.game8.co/4442236/6357203e58172f6de57f1991e7c39b22.png/thumb)

Popular Games

Genshin Impact Walkthrough & Guides Wiki
Umamusume: Pretty Derby Walkthrough & Guides Wiki
Pokemon Pokopia Walkthrough & Guides Wiki
Honkai: Star Rail Walkthrough & Guides Wiki
Monster Hunter Stories 3: Twisted Reflection Walkthrough & Guides Wiki
Arknights: Endfield Walkthrough & Guides Wiki
Wuthering Waves Walkthrough & Guides Wiki
Zenless Zone Zero Walkthrough & Guides Wiki
Pokemon TCG Pocket (PTCGP) Strategies & Guides Wiki
Monster Hunter Wilds Walkthrough & Guides Wiki


Recommended Games
Diablo 4: Vessel of Hatred Walkthrough & Guides Wiki
Cyberpunk 2077: Ultimate Edition Walkthrough & Guides Wiki
Fire Emblem Heroes (FEH) Walkthrough & Guides Wiki
Yu-Gi-Oh! Master Duel Walkthrough & Guides Wiki
Super Smash Bros. Ultimate Walkthrough & Guides Wiki
Pokemon Brilliant Diamond and Shining Pearl (BDSP) Walkthrough & Guides Wiki
Elden Ring Shadow of the Erdtree Walkthrough & Guides Wiki
Monster Hunter World Walkthrough & Guides Wiki
The Legend of Zelda: Tears of the Kingdom Walkthrough & Guides Wiki
Persona 3 Reload Walkthrough & Guides Wiki


All rights reserved
©2019 Pokémon. ©1995-2019 Nintendo/Creatures Inc. /GAME FREAK inc.
The copyrights of videos of games used in our content and other intellectual property rights belong to the provider of the game.
The contents we provide on this site were created personally by members of the Game8 editorial department.
We refuse the right to reuse or repost content taken without our permission such as data or images to other sites.