Heat Rotom - Moveset & Best Build for Ranked Battle
★ Tier List / Doubles Tier List / Movesets / Rental Teams
✬ Pokemon HOME Dex Completion Shiny Rewards:
┗ Meloetta | Manaphy | Enamorus | Keldeo | Meltan
☆ Competitive Battle Guide
| Heat Rotom Movesets in Other Games | |
|---|---|
 SV SV |
 SWSH SWSH |
This is a strategy guide for using Heat Rotom in competitive play for the games Pokemon Sword and Shield. Read on for tips on the best Nature, EV spreads, Movesets, Builds, and Held Items to use with Heat Rotom, as well as its strengths and weak points.
| Rotom - Related Articles | ||||
|---|---|---|---|---|
 Evolution and Learnset Evolution and Learnset |
||||
List of Contents
Basic Information for Heat Rotom
Types and Abilities
| Pokemon | Type 1 | Type 2 |
|---|---|---|

|

|
|
| Abilities | ||
| Levitate | Gives immunity to Ground type moves. | |
Heat Rotom Weaknesses and Resistances
| Type | |
|---|---|
| Takes 4x damage |

|
| Takes 2x damage |


|
| Takes 0.5x damage |


|
| Takes 1/4x damage |

|
| Takes 0x damage |
|
Base Stats
| HP | Attack | Defense | Sp. Atk | Sp. Def | Speed |
|---|---|---|---|---|---|
| 50 | 65 | 107 | 105 | 107 | 86 |
Best Nature for Heat Rotom
| Best Natures | ||
|---|---|---|
| Modest (SpAtk↑, Atk↓) |
Timid (Spd↑, Atk↓) |
|
| Bold (Def↑, Atk↓) |
Calm (SpDef↑, Atk↓) |
|
Singles Movesets for Heat Rotom
Physical Defender Moveset & Best Build

| Nature | Bold (+Def, -Atk) |
|---|---|
| EV Spread | HP 252 / Def. 252 / Spd. 4 |
| Final Stat Values | HP 157 / Def 174 / Sp.Atk 125 / Sp.Def 127 / Spd 107 |
| Ability | Levitate |
| Held Item | Sitrus Berry |
| Moveset | ・Volt Switch ・Discharge ・Overheat ・Will-o-Wisp |
This is a build which takes advantage of Rotom's high Base HP and Defense to make it a potent physical defender. This allows it to switch in on physical heavy hitters like Mimikyu, and then if things turn bad, it can switch out with Volt Switch to further improve the team's position.
Taking threats such as Mimikyu and Galarian Darmanitan into account, this build runs Bold Nature, with EVs in HP and Defense, but it's also possible to go for a Calm Nature with EVs in HP and Special Defense if you're worried about Special attackers more than Physical attackers.
Other Viable Moves
| Thunderbolt | An alternate choice for Discharge. For those who are willing to make the tradeoff of chance of Paralysis for more power. |
|---|
Choice Specs Moveset & Best Build

| Nature | Modest (+SpAtk, -Atk) |
|---|---|
| EV Spread | HP 4 / Sp.Atk 252 / Spd 252 |
| Final Stat Values | HP 125 / Def 127 / Sp.Atk 172 / Sp.Def 128 / Spd 138 |
| Ability | Levitate |
| Held Item | Choice Specs |
| Moveset | ・Volt Switch ・Thunderbolt ・Overheat ・Shadow Ball |
With Heat Rotom's high Base Special Attack, it's also possible to arm it with Choice Specs and turn it into a mean Special attacker. Along with the ability to get STAB on Fire and Electric-type Moves, it also has sufficient defensive capability to handle attacks with neutral damage, making it a capable counter to everpresent foes like Mimikyu, Ferrothorn and Aegislash.
Other Viable Moves
| Trick | Force a Support Pokemon or a Physical Attacker to hold the Choice Specs to limit their usefulness. |
|---|---|
| Discharge | An alternate option for Thunderbolt. It's a tradeoff for when you value Paralysis odds over power. |
Choice Scarf Moveset & Best Build
| Nature | Timid (+Speed, -Atk) |
|---|---|
| EV Spread | HP 252 / Sp.Def 4 / Spd 252 |
| Final Stat Values | HP 125 / Def 127 / Sp.Atk 125 / Sp.Def 128 / Spd 151 |
| Ability | Levitate |
| Held Item | Choice Scarf |
| Moveset | ・Volt Switch ・Thunderbolt ・Overheat ・Trick |
This is a build that aims to capitalize on Heat Rotom's high special attack stat with a strong STAB moves like Thunderbolt and Overheat as well as a strong utility move in Volt Switch. Trick is there to Choice Scarf lock your opponent.
Other Viable Moves
| Dark Pulse | A good coverage move against Ghost and Psychic-type Pokemon. |
|---|
Assault Vest Moveset & Best Build
| Nature | Modest (+Sp.Atk, -Atk) |
|---|---|
| EV Spread | HP 252 / Sp.Atk 252 / Sp.Def 4 |
| Final Stat Values | HP 157 / Def 127 / Sp.Atk 172 / Sp.Def 128 / Spd 106 |
| Ability | Levitate |
| Held Item | Assault Vest |
| Moveset | ・Volt Switch ・Discharge ・Overheat ・Dark Pulse |
A tankier build that focuse on trying to get paralysis using Discharge. Use Volt Switch for utility while Overheat and Dark Pulse are there for coverage.
Other Viable Moves
| Thunderbolt | A more powerful STAB move. Use instead of Discharge if you value power more than paralysis. |
|---|
Doubles Moveset for Heat Rotom

Anti-Sun Moveset & Best Build
| Nature | Modest (+Sp. Atk, -Atk) |
|---|---|
| EV Spread | HP 252 / Def 4 / Sp. Atk 244 / Sp. Def 4 / Spe 4 |
| Final Stat Values | HP 157 / Def 128 / Sp. Atk 171 / Sp. Def 128 / Spe 107 |
| Ability | Levitate |
| Held Item | Safety Goggles |
| Moveset | ・Thunderbolt
・Overheat ・Nasty Plot ・Will-O-Wisp |
This Heat Rotom build is meant to improve a team's matchup against Sun teams. It can easily check both Venusaur and Charizard, and can also potentially knock out Groudon after a Nasty Plot, while being able to withstand an unboosted Max Rockfall in Dynamax.
About Heat Rotom's Moves
Thunderbolt is Heat Rotom's most reliable STAB move. While it does not particularly like going up against Water-types, having Thunderbolt on Heat Rotom gives it coverage against them.
Overheat is Heat Rotom's secondary STAB move. It gives Heat Rotom quick burst damage on anything that doesn't resist it, and can knock out Pokemon who are weak to Fire.
Nasty Plot turns Heat Rotom into a powerful offensive threat, making Thunderbolt a powerful move against any Pokemon that isn't immune to it. It also makes for an incredibly powerful Overheat. Nasty Plot can also offset the Special Attack drop from Overheat. Dynamaxing after a successful Nasty Plot is often a good idea but be wary of your opponent having switch-ins to Pokemon that resist it.
Will-O-Wisp is great for crippling physical attackers by inflicting burn.
About Heat Rotom's EV Spread
We maximize HP EV's because Heat Rotom has an awful HP stat. Maximum HP EV's along with 4 EV's in Defense and Special Defense allow for decent survivability. We also alot 4 EV's to Speed so that Heat Rotom can outspeed Pokemon with base 86 Speed and slower who are uninvested in Speed. The remaining EV's are put into Special Attack so that Heat Rotom with Modest Nature can dish out powerful STAB moves.
About Heat Rotom's Ability
Levitate is Heat Rotom's only Ability. This is very valuable considering it grants Heat Rotom immunity from its x4 weakness to Ground.
About Heat Rotom's Held Item
Safety Goggles protects Heat Rotom from being put to sleep by Sleep Powder and from Rage Powder's redirection. It can also protect Heat Rotom from the incremental damage from Sandstorm and Hail.
Other Viable Moves
| Ally Switch | Ally Switch is a good move for protecting a teammate. It allows Heat Rotom to redirect attacks, notably Sleep Powders and Thunder Waves from its partners. Ally Switch is also a good way to grant a teammate evasion, getting it out of the way of an incoming super-effective move. |
|---|---|
| Trick | Trick is a powerful move choice if Heat Rotom is equipped with a Choice item such as Choice Scarf or Choice Specs. |
| Electroweb | Electroweb is an effective form of speed control, being able to lower the opposing Pokemon's Speed. |
| Volt Switch | Volt Switch allows Heat Rotom to pivot out of the active spot and let a teammate come in safely. |
| Protect | Protect is a valuable move in battle and is useful for scouting moves or stalling out Dynamax turns. |
How to Use Heat Rotom Effectively
Teammates that can cover for Heat Rotom's weaknesses are always appreciated. It would also be ideal for Heat Rotom to cover for its teammates' weaknesses as well. Teammates that can debuff or redirect damage are good for Heat Rotom to have, so that it can be allowed to use moves like Will-O-Wisp or Nasty Plot.
How to Build a Team with Heat Rotom
Special Attacker
| Physical Attacker | Special Attacker | Special Attacking Tank |
|---|---|---|
 Landorus (Therian Forme) Landorus (Therian Forme)
|
 Heat Rotom Heat Rotom
|
 Gastrodon Gastrodon
|
Heat Rotom naturally synergizes with Ground-types because it can check Pokemon that they are commonly weak to. Landorus for instance is threatened by Ice-types, which Heat Rotom can handily take care of. Gastrodon has trouble against Grass-types, and Heat Rotom can check those as well.
Landorus can also help Heat Rotom with its Intimidate Ability, lowering an opposing Rock-type's Attack stat. While Gastrodon can redirect Water-type moves away from Heat Rotom.
Gastrodon can offer support through Yawn, which may open opportunities for Heat Rotom to set up a Nasty Plot.
Counters for Heat Rotom
| Weakness |
|
|---|
Counter Heat Rotom with Super-Effective Moves
Although reasonably bulky, Heat Rotom will not be able to withstand boosted Water-type or Rock-type moves.
Best Pokemon to Use
| Pokemon | Description |
|---|---|
 Groudon Groudon
|
Ranking: ★★★★★
・Can wall Heat Rotom unless Heat Rotom has set up Nasty Plot. ・Can hit Heat Rotom with a super-effective Rock-type move. Groudon - Moveset & Best Build for Ranked Battle |
|
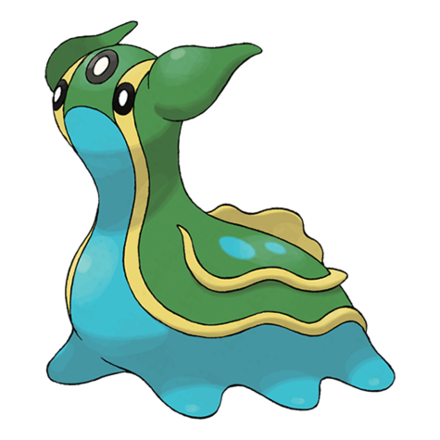
Gastrodon
|
Ranking: ★★★★★
・Can wall Heat Rotom even after a Nasty Plot. ・Can hit Heat Rotom with a super-effective Water-type move. Gastrodon - Moveset & Best Build for Ranked Battle |
 Nihilego Nihilego
|
Ranking: ★★★★★
・Outspeeds and can knock out Heat Rotom with a boosted Meteor Beam. Nihilego - Moveset & Best Build for Ranked Battle |
Related Links

All Competitive Builds for Ranked Battle
Competitive Guides for Pokemon Sword and Shield
| Competitive Pokemon Battle Guides | |||||
|---|---|---|---|---|---|
 Tier List Tier List |
 Best Builds Best Builds |
 Series 10 List of Contenders Series 10 List of Contenders |
|||
 Doubles Tier List Doubles Tier List
|
 Team Building Team Building |
 Rental Teams Rental Teams |
|||
Best Builds for Returning Pokemon
All Competitive Builds for Ranked Battle
## Competitive Guides for Pokemon Sword and Shield
| Competitive Pokemon Battle Guides | |||||
|---|---|---|---|---|---|
| Tier List |
Best Builds |
Series 10 List of Contenders |
|||
| Doubles Tier List
|
Team Building |
Rental Teams |
|||
Best Builds for Returning Pokemon
Comment
How can Excadrill KO rotom heat with earthquake ? Rotom heat has Levitate , and it makes in IMMUNE to ground types.
Author

Heat Rotom - Moveset & Best Build for Ranked Battle
Rankings

Gaming News

![Monster Hunter Stories 3 Review [First Impressions] | Simply Rejuvenating](https://img.game8.co/4438641/2a31b7702bd70e78ec8efd24661dacda.jpeg/show)
![The Liar Princess and the Blind Prince Review [PC] | Lovely to Look at but Tedious to Play](https://img.game8.co/4442586/8d95f5faf05780f1765ce7e0938bd825.jpeg/thumb)
![Marathon Cryo Archive Map Teased as [REDACTED] on Selection Screen](https://img.game8.co/4442236/6357203e58172f6de57f1991e7c39b22.png/thumb)

Popular Games

Genshin Impact Walkthrough & Guides Wiki
Umamusume: Pretty Derby Walkthrough & Guides Wiki
Pokemon Pokopia Walkthrough & Guides Wiki
Honkai: Star Rail Walkthrough & Guides Wiki
Monster Hunter Stories 3: Twisted Reflection Walkthrough & Guides Wiki
Arknights: Endfield Walkthrough & Guides Wiki
Wuthering Waves Walkthrough & Guides Wiki
Zenless Zone Zero Walkthrough & Guides Wiki
Pokemon TCG Pocket (PTCGP) Strategies & Guides Wiki
Monster Hunter Wilds Walkthrough & Guides Wiki


Recommended Games
Diablo 4: Vessel of Hatred Walkthrough & Guides Wiki
Cyberpunk 2077: Ultimate Edition Walkthrough & Guides Wiki
Fire Emblem Heroes (FEH) Walkthrough & Guides Wiki
Yu-Gi-Oh! Master Duel Walkthrough & Guides Wiki
Super Smash Bros. Ultimate Walkthrough & Guides Wiki
Pokemon Brilliant Diamond and Shining Pearl (BDSP) Walkthrough & Guides Wiki
Elden Ring Shadow of the Erdtree Walkthrough & Guides Wiki
Monster Hunter World Walkthrough & Guides Wiki
The Legend of Zelda: Tears of the Kingdom Walkthrough & Guides Wiki
Persona 3 Reload Walkthrough & Guides Wiki


All rights reserved
©2019 Pokémon. ©1995-2019 Nintendo/Creatures Inc. /GAME FREAK inc.
The copyrights of videos of games used in our content and other intellectual property rights belong to the provider of the game.
The contents we provide on this site were created personally by members of the Game8 editorial department.
We refuse the right to reuse or repost content taken without our permission such as data or images to other sites.
Excadrill has the ability Mold Breaker, which bypasses any ability of the opossing Pokémon when it attacks. And since Levitate is an ability, it stops working when Excadrill attacks, which makes Rotom vulnerable ti Earthquake.