This survey will take about 1 minute.
Your answers will help us to improve our website.
Genshin Impact
Wriothesley Story Quest Act 1: Reborn in the Land of Grievances
✉ Send your thoughts in our Genshin 6.4 Patch Survey!
★ Exclusive: Dive back in time with the Meta History
◆ Hot: Version 6.4, Luna 5 Codes
◆ Builds: Varka, Flins, Skirk, Escoffier
◆ Events: Travelers' Tales, He Who Caught the Wind
◆ Future: Linnea, Version 6.5 Luna VI
Reborn in the Land of Grievances is Wriothesley's Act 1 Story Quest released in Genshin Impact 4.1. See how to unlock the story quest, how to solve the Wriothesley story quest puzzle, its walkthrough, and the complete rewards here!
| Wriothesley's Character Guides | |||
|---|---|---|---|
|
|
|
||
List of Contents
How to Unlock Wriothesley's Story Quest
Complete the Prerequisite Quests
| Quest Unlock Requirements | |
|---|---|
 |
|
| Unlock Condition |
Reach Adventure Rank 40+ |
|
Chapter 4: Act 4 Cataclysm's Quickening |
To unlock Wriothesley's Story Quest, you must have first completed Chapter 4: Act 4 of the Archon Quests, Cataclysm's Quickening! You must have also reached AR40+, and spent one Story Key to unlock it!
List of Story Quests
Wriothesley's Story Quest Act 1 Walkthrough
An Opportunity for Rebirth
| Objectives | |
|---|---|
| 1 | 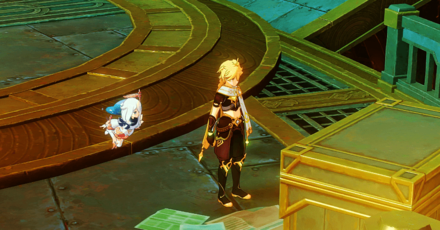 Go to the Fortress of Meropide through the Dormitory Block, until you hear a voice of a person inside a box. Faissolle then tells you that he has lost his hat. |
| 2 |  After offering to help him search for his hat, go down the Administrative Area and look for the hat near the lift. After seeing it's not there, look for the hat hear the railings next. |
| 3 | 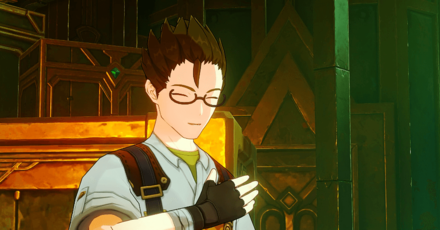 Seeing that the hat is nowhere to be found, go to the Rag and Bone Shop to purchase a hat for Faissolle. You're greeted by Chamboduc, Alvard's proxy. He then gives you the hat for free after talking to him. |
| 4 | 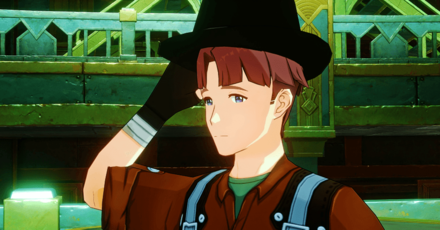 Once you've gotten the hat from the shop, head up to the Dormitory Block, and give it to Faissolle. To his disappointment, however, it's not the same as his lost one. |
| 5 | 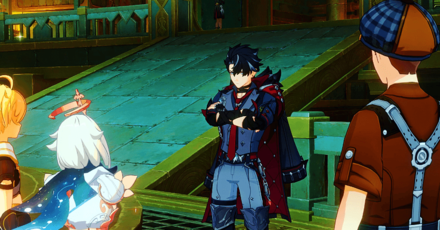 Wriothesley then tells the group that he has found Faissolle's hat from somewhere. After giving him his lost hat, go to the Coupon Cafeteria at Wriothesley's behest. |
| 6 |  While catching up with Wriothesley at the Coupon Cafeteria, Guelet suddenly appears carrying a box of contraband they're intercepted from the latest shipment of cargo. Guelet leaves promptly after completing her report. |
| 7 | 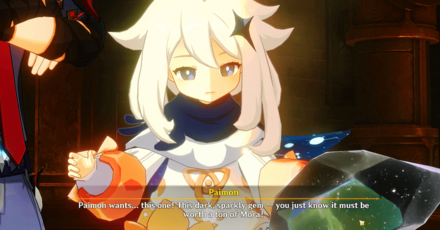 While perusing the contents of the box, Wriothesley tells you to pick whichever you like as a gift from him. Paimon then picks up a dark gem that looks worth a ton of Mora. |
| 8 |  After touching the dark gem, Paimon, Wriothesley, and the Traveler, all experienced similar bouts of flashbacks of unpleasant memories. Deciding to investigate about the gem further, the group heads over to the Beret Society's gathering place. |
The Proud “Beret Society”
| Objectives | |
|---|---|
| 1 |  Go to the Beret Society's gathering place just few steps away from the Coupon Cafeteria. There you'll meet Dourgie, the society's leader. |
| 2 |  While Wriothesley is talking to Dourgie, talk to the other members of the Beret Society. All of them are just steps away from each other, and are all within the gathering place! |
| 3 |  After talking to Rigas, Aucelet, and Boulmier, head back to Wriothesley and talk more about the dealings of the society with Dougier. In a few while, an anxious Faissolle walks past the gathering place. |
| 4 | 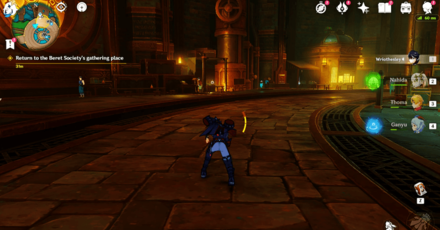 Once you and Wriothesley have gotten away from the gathering place, he then tells you about his ongoing investigation of the society. At his behest, go back to the gathering place and talk again to the members. |
| 5 |  Realizing that there's something off about the Society, head back to Wriothesley and share your thoughts to him. Afterwards, wait until nighttime (18:00 - 24:00), then head over to his office. |
| 6 |  Once inside, talk more about the society and what his troops has found about them. Afterwards, wait with Wriothesley inside his office. |
| 7 | 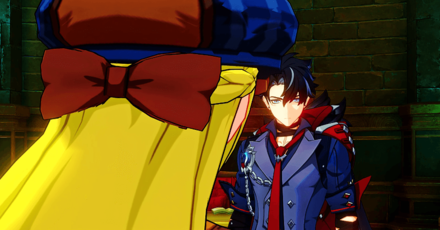 A knock then resonates inside, revealing an anxious person behind the door, named Avice. She then tells the group that someone is following her. |
| 8 |  As Avice tells about her beloved Faissolle who was currently in danger, Dougier abruptly enters the office beckoning for Avice to stop. After a few while, both of them leaves the Duke's office. |
| 9 |  Left with nothing, the Traveler thinks of where did Avice hide the secret. To know where Avide hid the secret, do the following:
|
| 10 | 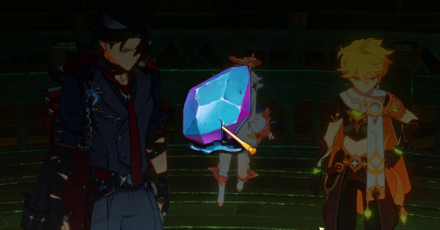 After hearing the Traveler's conclusion, Wriothesley tinkers with Avice's Hair Clip, which he then pokes straight through the dark gem. |
It's What He Deserves
| Objectives | |
|---|---|
| 1 | 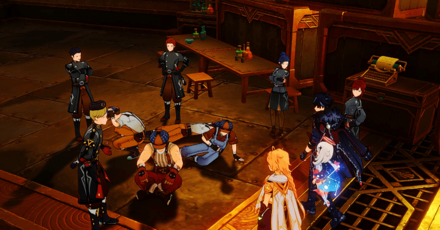 Once you've concluded what Dourgie is doing with the members of the Beret Society, go back to the society's gathering place near the Coupon Cafeteria. |
| 2 |  After arriving at the gathering place, several of Wriothesley's men have forestalled and taken some members of the society into custody, after an attempt to flee. |
| 3 |  Then, look for more clues around the gathering place. Paimon calls you over once you're near enough, while you can simply walk towards Wriothesley to talk to him. Lastly, view the clue near the typewriter to progress! |
| 4 |  After discussing the clues, Wriothesley's men reports back that the society's gathering place is empty, and has been deliberately tampered to make it look like it's being used. |
| 5 | 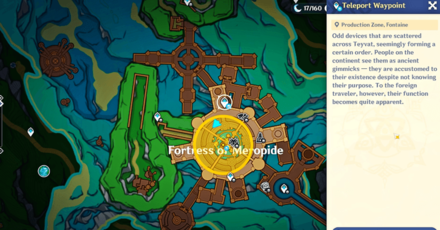 Upon realizing this, go to the Production Zone to investigate further. Simply use the Waypoint to go there, and the quest should automatically continue as soon you've arrived at the floor! |
| 6 |  Once on the Production Zone, investigate with Wriothesley, until you see the fallen guard with a member of the society. Go after them as soon as they bolt away! |
| 7 |  After a quick interrogation of Wyler and Gouzien, head down to the Abandoned Production Zone to reach the real headquarters of the Beret Society. |
| 8 | 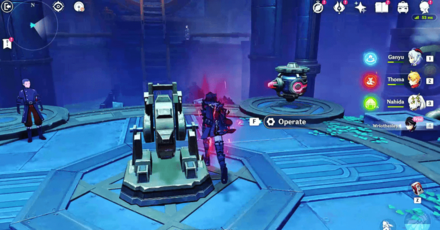 Once you've proceeded deep within the real HQ of Beret Society, operate the central device on the platform to get the "Rotate Device" option. This mechanism is focal on solving Wriothesley's story quest puzzle! |
| 9 | 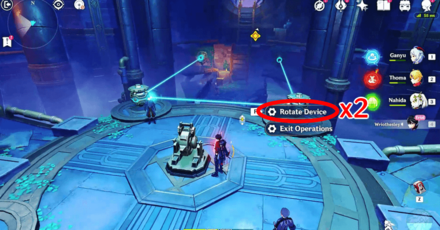 Rotate the device twice to open a door on the left side of the room. |
| 10 | 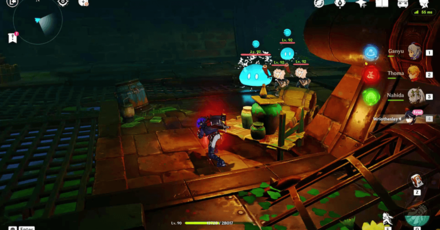 Continue exploring through the newly opened door, down several levels and past two groups of Hilichurls and Slimes. |
| 11 |  You will encounter another room with a new set of mechanism puzzles. The door behind you will also close. Remove the purple Limiting Device on the central device to be able to use the Operating Device. |
| 12 |  Rotate the device twice to fill the room with water and reach the ceiling where another path is. |
| 13 | 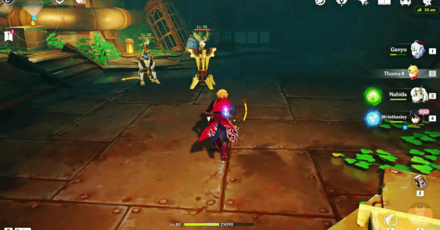 Defeat the Clockwork Meka to open the door in the next hallway and proceed to the quest cutscene. |
| 14 |  Head to the other end of the room where another set of mechanisms and a locked door are located. Remove the Limiting Device on the leftmost red mechanism to start. |
| 15 | 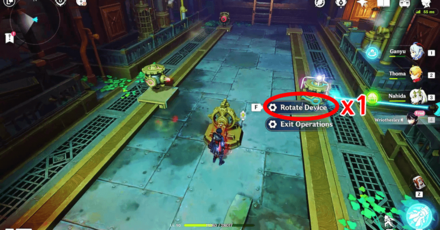 Use the central Operating Device to rotate the leftmost mechanism once, and then select Exit Operations. |
| 16 | 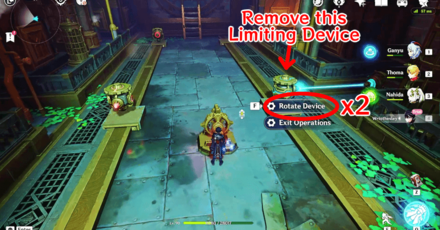 Remove the Limiting Device on the rightmost, blue mechanism and rotate both devices twice to open the door. |
| 17 |  Go through the door to get back to the large room and platform where the first puzzle is waiting. |
| 18 | 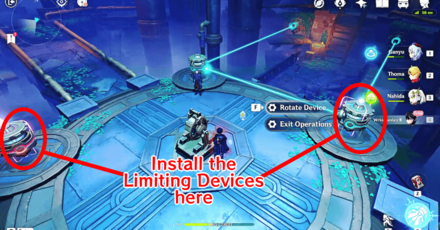 Install a Limiting Device on the remaining red mechanism as well as on the device directly across from it. |
| 19 | 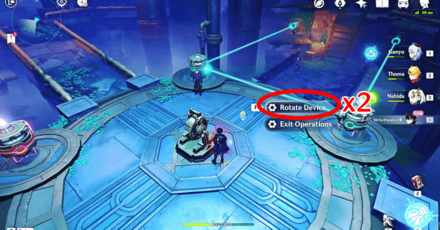 Rotate the remaining device twice to open the final, large door. |
| 20 |  Head inside the door, where you will see the remaining members of the Beret Society gathered around the supposed punishment of Avice and Faissolle. |
| 21 |  After a brief dialogue with Dourgie, defeat the Gardemek enemies, and conclude the cutscene with Wriothesley and the society's leader. |
| 22 |  Once the events involving the Beret Society have concluded, and their dissolution has been set, wait for two days, and catch up with Wriothesley at the Coupon Cafeteria. |
Wriothesley Story Quest Act 1 Rewards
All Story Quest Rewards
| Sub Quest | Quest Rewards |
|---|---|
| An Opportunity for Rebirth |
|
| The Proud “Beret Society” |
|
| It's What He Deserves |
|
Wriothesley Story Quest Act 1 Information
Wriothesley Story Quest Details
Join Wriothesley investigate the dealings of the famous Beret Society, and its leader, Dougier, set inside the underwater place of exile, the Fortress of Meropide!
Wriothesley Best Builds and Materials
Wriothesley Story Quest Act 1 Release Date
Released in Phase 2 of Version 4.1
| Genshin Impact Version 4.1 | |
|---|---|
 |
|
| Release Date | September 27, 2023 |
Wriothesley's Story Quest Act 1, Reborn in the Land of Grievances, was released during Phase 2 of Version 4.1. This coincides with Wriothesley's release banner as well!
Genshin Impact Related Guides

All Story Quest Guides
Dendro Characters Story Quest

| Character | Story Quests | ||
|---|---|---|---|
| Act 1 | |||
| Act 1 | |||
| Act 1 | Act 2 | ||
| Act 1 | |||
| Act 1 | |||
| Act 1 | |||
Pyro Characters Story Quest

| Character | Story Quests | ||
|---|---|---|---|
| Act 1 | |||
| Act 1 | |||
| Act 1 | |||
| Act 1 | |||
| Act 1 | |||
| Act 1 | |||
| Act 1 | |||
| Act 1 | |||
| Act 1 | |||
| Act 1 | Act 2 | ||
Cryo Characters Story Quest

| Character | Story Quests | ||
|---|---|---|---|
| Act 1 | |||
| Act 1 | |||
| Act 1 | |||
| Act 1 | |||
| Act 1 | |||
| Act 1 | |||
| Act 1 | |||
| Act 1 | |||
Anemo Characters Story Quest

| Character | Story Quests | ||
|---|---|---|---|
| Act 1 | |||
| Act 1 | |||
| Act 1 | |||
| Act 1 | |||
| Act 1 | |||
| Act 1 | |||
| Act 1 | |||
Geo Characters Story Quest

| Character | Story Quests | ||
|---|---|---|---|
| Act 1 | |||
| Act 1 | |||
| Act 1 | |||
| Act 1 | |||
| Act 1 | |||
| Act 1 | Act 2 | ||
Hydro Characters Story Quest

| Character | Story Quests | ||
|---|---|---|---|
| Act 1 | |||
| Act 1 | |||
| Act 1 | |||
| Act 1 | |||
| Act 1 | |||
| Act 1 | |||
| Act 1 | |||
| Act 1 | |||
| Act 1 | |||
| Act 1 | |||
| Act 1 | |||
Electro Characters Story Quest

| Character | Story Quests | ||
|---|---|---|---|
| Act 1 | |||
| Act 1 | |||
| Act 1 | Act 2 | ||
| Act 1 | Act 2 | ||
| Act 1 | |||
| Act 1 | |||
| Act 1 | |||
Comment
Author

Wriothesley Story Quest Act 1: Reborn in the Land of Grievances
Please participate in our site
improvement survey
03/2026
improvement survey
03/2026
Would you assist in
improving Game8's site?
improving Game8's site?

×
We are listening to our users' valuable opinions and discussing how to act on them.
The information collected through this survey will be used for the purpose of improving our services. In addition, the information will only be disclosed a part of a statistic in a format that will not allow identification of personal information.
Begin Survey
Not Now
×
Please rate each item regarding Game8.co's Advertisements.
Amount of Ads
Very Dissatisfied
Somewhat Dissatisfied
Fine
Somewhat Satisfied
Highly Satisfied
Placement of Ads
Timing of Ad Display
Ad Loading Speed
Safeness of Ads
Content of Ads
×
Please rate each item regarding Game8.co's Quality of Articles.
Amount of information
Very Dissatisfied
Somewhat Dissatisfied
Fine
Somewhat Satisfied
Highly Satisfied
Frequency of updates
Speed of new information
Accuracy of articles
Understandibility of articles
Readability of sentences
×
Please rate each item regarding Game8.co's Usability of the Site.
Ease of finding information
Very Dissatisfied
Somewhat Dissatisfied
Fine
Somewhat Satisfied
Highly Satisfied
Loading Speed
Use of Color
Font Size
Visibility of Images
Easy to Understand Layout
×
Please rate each item regarding Game8.co's Message Boards, Comments.
Ease of Writing
Very Dissatisfied
Somewhat Dissatisfied
Fine
Somewhat Satisfied
Highly Satisfied
Readability
Ease in Finding Information
Comment Quality
Comment Quantity
Admin Response
×
Please rate each item regarding Game8.co's Site's new design.
Please rate our site's new design
Very Dissatisfied
Somewhat Dissatisfied
Fine
Somewhat Satisfied
Highly Satisfied
Do you think that the website's design change makes the site easier to use?
Has the new design made it easier for you to find information on the site?
Has the new design improved the overall visual appeal of the site?
How would you rate your overall satisfaction with the new design of the site?
×
How likely are you to recommend Game8 to someone you know?
Very Unlikely
0
1
2
3
4
5
6
7
8
9
10
Very Likely
If you have other opinions regarding potential improvement to the website, please share them with us. We would appreciate your honest opinion.
Note: This is a free response section, so you can proceed without entering anything.
Note: Please be sure not to enter any kind of personal information into your response.
Note: Please be sure not to enter any kind of personal information into your response.
×
Thank You
×
Thank you for participating in our survey! Your answers will help us to improve the quality of our website and services.
We hope you continue to make use of Game8.
We hope you continue to make use of Game8.
Close


Rankings
Gaming News


Popular Games

Genshin Impact Walkthrough & Guides Wiki
Honkai: Star Rail Walkthrough & Guides Wiki
Umamusume: Pretty Derby Walkthrough & Guides Wiki
Pokemon Pokopia Walkthrough & Guides Wiki
Resident Evil Requiem (RE9) Walkthrough & Guides Wiki
Monster Hunter Wilds Walkthrough & Guides Wiki
Wuthering Waves Walkthrough & Guides Wiki
Arknights: Endfield Walkthrough & Guides Wiki
Pokemon FireRed and LeafGreen (FRLG) Walkthrough & Guides Wiki
Pokemon TCG Pocket (PTCGP) Strategies & Guides Wiki


Recommended Games
Diablo 4: Vessel of Hatred Walkthrough & Guides Wiki
Fire Emblem Heroes (FEH) Walkthrough & Guides Wiki
Yu-Gi-Oh! Master Duel Walkthrough & Guides Wiki
Super Smash Bros. Ultimate Walkthrough & Guides Wiki
Pokemon Brilliant Diamond and Shining Pearl (BDSP) Walkthrough & Guides Wiki
Elden Ring Shadow of the Erdtree Walkthrough & Guides Wiki
Monster Hunter World Walkthrough & Guides Wiki
The Legend of Zelda: Tears of the Kingdom Walkthrough & Guides Wiki
Persona 3 Reload Walkthrough & Guides Wiki
Cyberpunk 2077: Ultimate Edition Walkthrough & Guides Wiki


All rights reserved
Copyright© 2012-2024 HoYoverse — COGNOSPHERE. All Rights Reserved.
The copyrights of videos of games used in our content and other intellectual property rights belong to the provider of the game.
The contents we provide on this site were created personally by members of the Game8 editorial department.
We refuse the right to reuse or repost content taken without our permission such as data or images to other sites.