
This survey will take about 1 minute.
Your answers will help us to improve our website.
Genshin Impact
Revelations From the Past Quest Guide
✉ Send your thoughts in our Genshin 6.4 Patch Survey!
★ Exclusive: Dive back in time with the Meta History
◆ Hot: Version 6.4, Luna 5 Codes
◆ Builds: Varka, Flins, Skirk, Escoffier
◆ Events: Travelers' Tales, He Who Caught the Wind
◆ Future: Linnea, Version 6.5 Luna VI
Revelations From the Past is the third subquest of the Between Pledge and Forgettance quest chain in Genshin Impact 5.0. See how to unlock it, how to open the barrier, how to unlock the mechanism, how to get the Golden Entreaty, its walkthrough, and rewards here in this guide!
| Between Pledge and Forgettance Quest Guides | ||
|---|---|---|
| Lost in the Woods | Rite of the Bold | Revelations from the Past |
List of Contents
How to Unlock Revelations From the Past
Complete the Prerequisites
| Quest Unlock Requirements | |
|---|---|
 |
|

|
Quest: #2 Rite of the Bold |
You can unlock Revelations From the Past immediately after completing the previous subquest of Between Pledge and Forgettance quest line, Rite of the Bold. You will get the map location once Pacal has given you his blessing to open the ruins of the Sage of the Stolen Flame.
Between Pledge and Forgettance Quest Guide
Revelations From the Past Walkthrough
Go to the entrance to the ruins
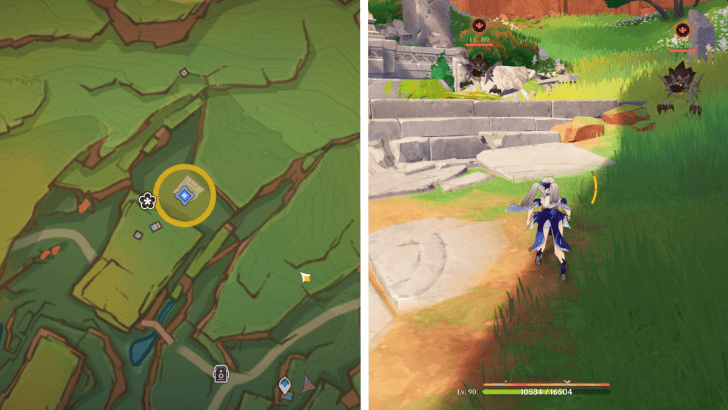
Once you've gotten the blessing from Pacal, go to the entrance to the ruins at Tequemecan Valley. You can easily access this location by using the Waypoint in the Sulfurous Veins, and treading on foot towards the ruin's entrance. There are Rifthound enemies guarding the entrance, so prepare for a fight.
Open the Barrier
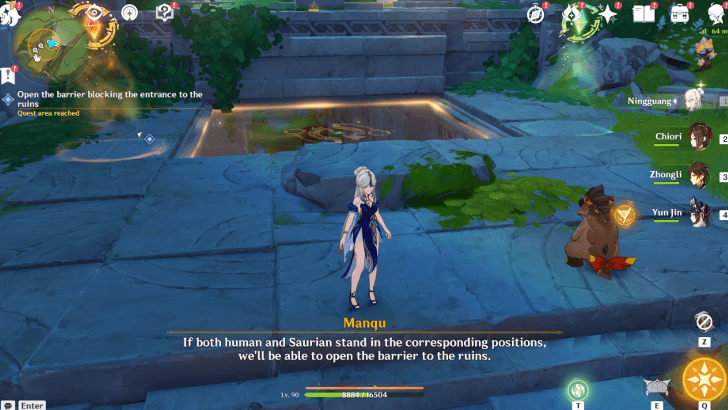
Place the Talisman atop the pedestal then open the barrier blocking the entrance to the ruins. To open the barrier blocking the entrance to the ruins, make the Traveler stand on the yellow square and your Tepetlisaur buddy on the green box.
How to Open the Barrier Blocking the Entrance
| How to Open the Barrier on the Entrance | |
|---|---|
| 1 | 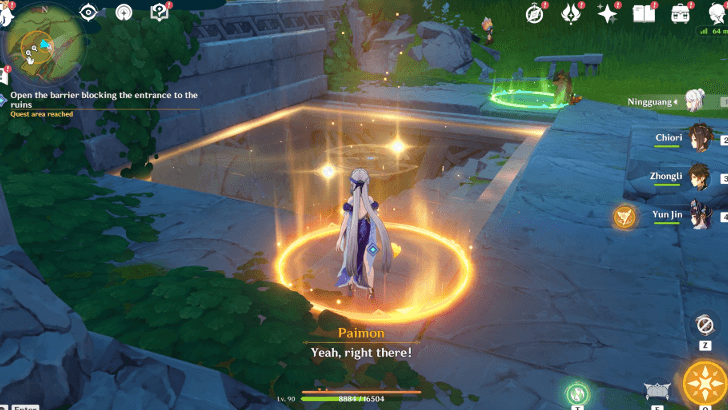 To open the barrier blocking the entrance to the ruins, first have your Traveler stand on the yellow square to the right. |
| 2 | 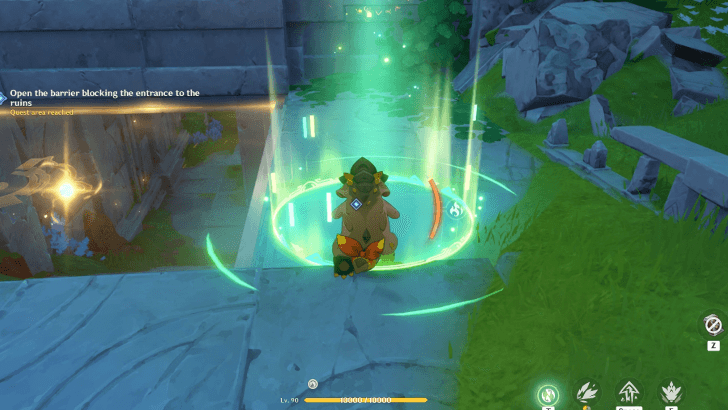 Then, press T on your keyboard or select the Tepetlisaur button to control your Saurian buddy. Simply stand on the green box to complete the puzzle! |
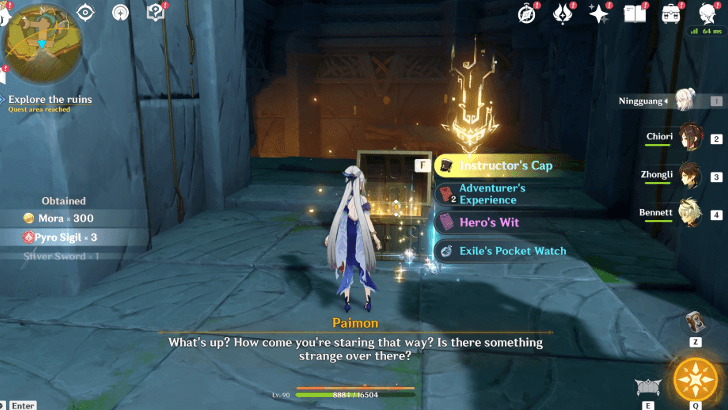
Explore the ruins
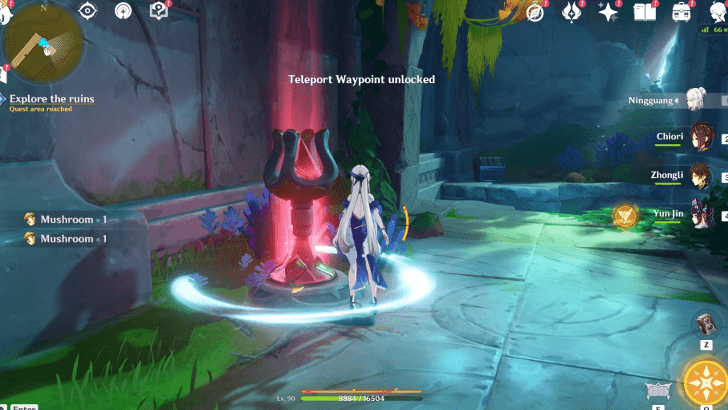
Afterwards, explore the ruins. Continue walking along the narrow hallway until you see the teleport waypoint. There's also an Exquisite Chest as you press on, so make sure to pick it up before reaching the end of the hallway!
Open the barrier
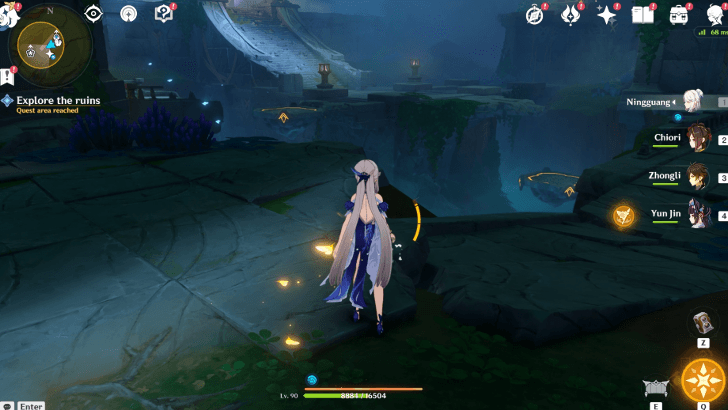
After descending from the ledge, swim towards the doorway, which connects to a much large room. There's another barrier puzzle just like with the entrance, but this one's a bit harder. To open the barrier for this area, use the mechanisms nearby to move the floating platforms!
How to Open the Barrier
| How to Open the Barrier | |
|---|---|
| 1 | To open the barrier, use the first lever once to move around the platforms. You'll know you have the correct settings if the platforms are color green. Then, while controlling your Tepetlisaur, head straight to the room located to the far left. |
| 2 | Once there, use your Saurian buddy's Dig skill to unravel the buried Pyro Totem underneath. |
| 3 | Afterwards, swap your controls back to your playable character, and hit the totem with any Pyro attack. |
| 4 | Next, is to head to the right side of the room while controlling your Tepetlisaurus buddy. You can use its burrow skill to quickly reach the other side. Then hit the nearest there to make the platforms go from green to orange. |
| 5 | Once the platforms have become orange, control your character and have it stand on the platform directly below the yellow light. |
| 6 | Afterwards, control your Tepetlisaurus again, and hit the lever beside it once to make the orange platforms green. |
| 7 | Simply walk over the green platform to open the barrier! |
Explore the ruins
With the barrier removed, walk towards the large doorway, and loot the Precious Chest you'll spot along the way. Then, after hearing the mysterious voice, explore the ruins by heading deep within.
Traverse the corridor
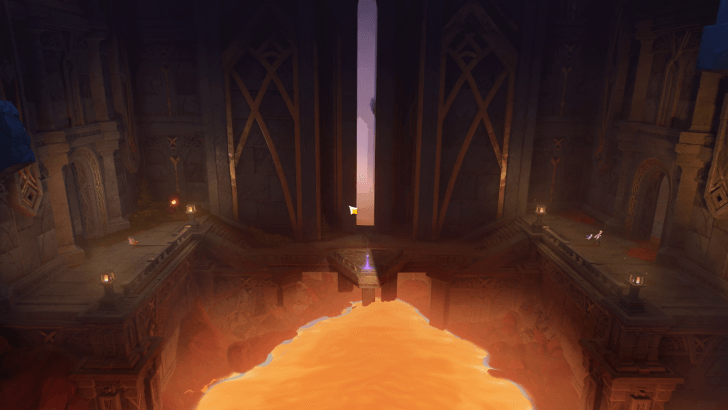
As you press forward, you'll see another large chamber filled with Liquid Phlogiston, and a towering mural depicting the supposed Pyro Archon and the Sage of the Stolen Flame. After the cutscene, traverse the corridor by controlling the Traveler and the Tepetlisaur separately, just like with previous puzzles.
Unlock the mechanism
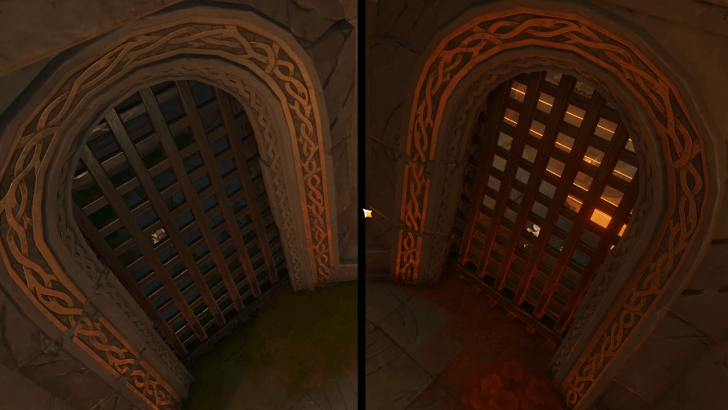
Entering each room will lock both the Traveler and the Tepetlisaur inside. To unlock the mechanism you must solve the puzzles within, which means you have to solve two sets of puzzles: one as the Tepetlisaur, and another as your playable character.
How to Unlock the Mechanism (Tepetlisaurus Puzzle)
| How To Unlock the Mechanisms | |
|---|---|
| 1 | To unlock the mechanism, solve the series of puzzles inside each area as a Tepetlisaur and a playable character. For this guide, we'll solve the Tepetlisaurus puzzles first, as they're easier to do. |
| 2 | While controlling your Tepetlisaur buddy, press forward until you see a large cavern filled with trees and a lake. To avoid touching the body of water, tread along the right side of the cavern, until you see the breakable rocks. |
| 3 | There are a total of three breakable rocks you can destroy using the Body Slam skill of your Saurian buddy. Destroying the third one reveals a single Tremulous Crystal inside. |
| 4 | Once revealed, hit the Tremulous Crystal once to reveal four more crystals. Strike all of them one at a time, until you trigger a resonance that will break the huge slab of crystal blocking your way. |
| 5 | Then, using the crystal as a makeshift bridge, traverse to the other side. There's a hollow log along the way you can pass through to avoid contact with water.. |
| 6 | Continue forward until you see another Tremulous Crystal. As with the first one, strike it once to reveal four more crystals, and hit them all to trigger a resonance. |
| 7 | Once all the three giant crystals have tumbled down, use one of them to reach the small concrete platform right in the middle of the lake. There's a Pyroculus you can pick as you stand on it. |
How to Unlock the Mechanism (Character Puzzle)
| How To Unlock the Mechanisms | |
|---|---|
| 1 | Once you've successfully reached the platform as a Tepetlisaurus, swap your control over to your character. Then, jump down the ledge while avoiding being in contact with any of the laser or the lava. Then, hit the breakable wall to your left to destroy it. There's another Pyroculus you can pick up as you head inside. |
| 2 | Use the stairs behind the Pyroculus, until you see an Exquisite Chest. After looting its content, do a quick jump from the ledge, and glide slowly to safely avoid the lasers. Make sure to keep on gliding while panning your glider to the left, otherwise you'll land straight onto the Liquid Phlogiston. |
| 3 | As soon as you land, you'll see a bunch of scattered lasers that will trigger the Liquid Phlogiston to rise. You can avoid the lasers but you can also touch them as they will only trigger once. The lava will take some of your HP, but not enough to completely kill your character. |
| 4 | Reach for the switch past the lasers, and turn it off. This will disable them, as well as reveal a hidden path right across the switch. |
| 5 | Keep on walking ntil you see a lever to your left. Operate it once, to disable to laser that blocks the doorway, and raise the platform of the Tepetlisaurus on its side of the room. Walk towards the Precious Chest at the end of the pathway, and loot it. |
| 6 | Then, quickly control your Tepetlisaurus, and have it stand on the green square at the end of the platform. Simply control your character back, once done. |
| 7 | Back on your character's room, you'll notice a bunch of deactivated Pyro Totems. You don't need to hit them to activate them, but instead, walk along the stairs to your left and make sure to hit the lasers along the way. Doing so makes the lava rise up, thereby activating the totems all at once. This also activates a nearby switch. |
| 8 | Then, use the switch to open the door in front of you, and keep on walking until you see a mural. Stand on the yellow marker, and do the same with Saurian companion. |
Meet up with Your Saurian Buddy
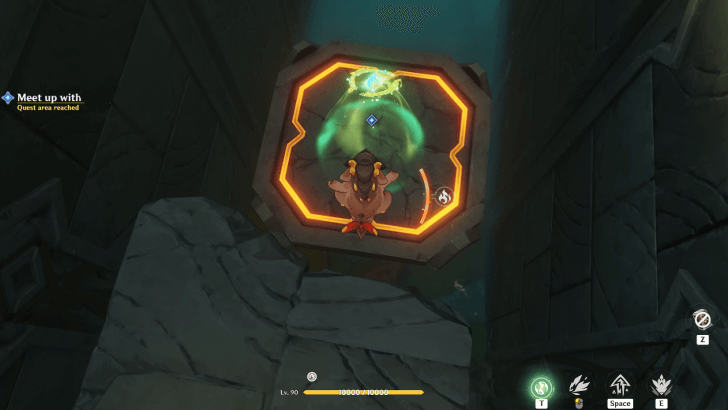
After the cutscene with the Mural, go to your left to meet up with your Saurian Buddy. There's a Precious Chest before the yellow marker, so make sure to claim it before standing on the marker.
Your control will automatically switch to your Saurian buddy once your character has settled on the yellow marker, so just jump down on green square to continue the trial.
Traverse the lava
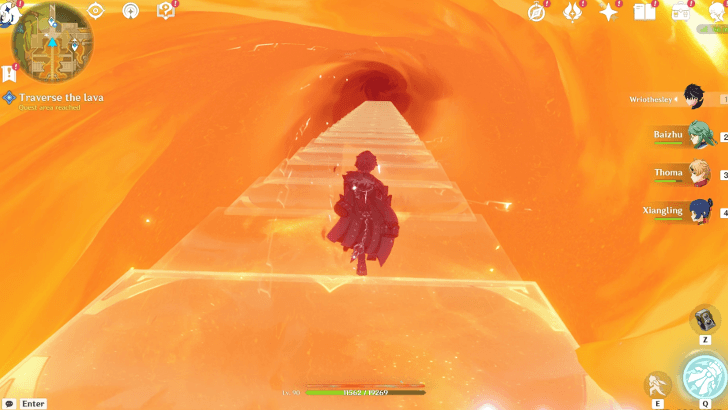
Another cutscene about the mural plays out, followed by a staircase that leads straight to the Liquid Phlogiston below. Traverse the Lava using the stairs until you reach its end.
| Note: Make sure to bring a team with a healer and strong characters, as the fight that ensues after this objective is challenging. A Bow character also helps whittle down its HP from a distance, as the Wolflord is a pretty agile boss. |
Touch the inscription
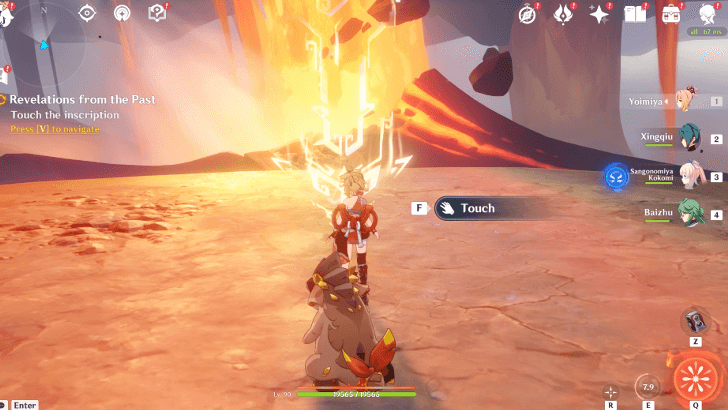
After defeating the opponents, touch the inscription to get teleported to the secret area of the Sage of the Stolen Flame. Once you've presented the amulet, a brief cutscene plays out and you will obtain the Golden Entreaty.
Revelations From the Past Rewards
Total Quest Rewards
| Total Quest Rewards |
 Primogem x50 |
 Mora x54500 |
|---|---|---|
 Hero's Wit x5 |
||
Golden Entreaty
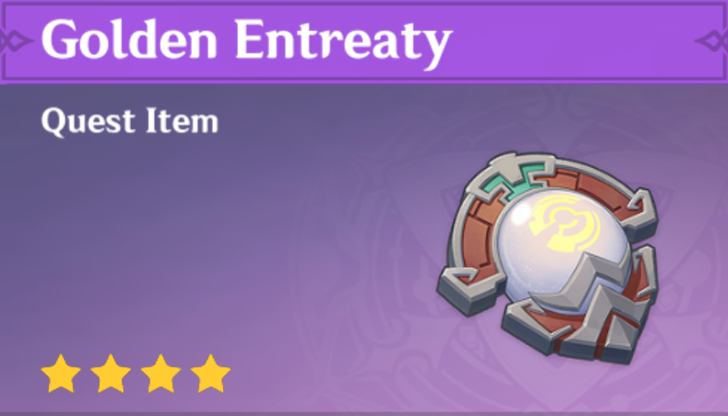
You can obtain a Golden Entreaty after completing the Revelations From the Past Quest. It will automatically be in your inventory after touching the Inscription towards the end.
Golden Entreaty Location and How to Use
Luxurious and Precious Chests
Aside from the regular rewards above, Travelers will also get one Luxurious Chest and two Precious Chest after completing the entire quest chain. The quest items, Cornerstone of Stars and Flames, as well as Golden Entreaty will also be logged onto the Traveler's inventory!
Genshin Impact Related Guides

Other Between Pledge and Forgettance Quest Guides
| Between Pledge and Forgettance World Quest Guides | ||
|---|---|---|
| Between Pledge and Forgettance | Lost in the Woods | Rite of the Bold |
| Revelations From the Past | ||
Comment
7  Anonymous 11 months
It looks there isn't exit or teleport out
Author

Revelations From the Past Quest Guide
Please participate in our site
improvement survey
03/2026
improvement survey
03/2026
Would you assist in
improving Game8's site?
improving Game8's site?

×
We are listening to our users' valuable opinions and discussing how to act on them.
The information collected through this survey will be used for the purpose of improving our services. In addition, the information will only be disclosed a part of a statistic in a format that will not allow identification of personal information.
Begin Survey
Not Now
×
Please rate each item regarding Game8.co's Advertisements.
Amount of Ads
Very Dissatisfied
Somewhat Dissatisfied
Fine
Somewhat Satisfied
Highly Satisfied
Placement of Ads
Timing of Ad Display
Ad Loading Speed
Safeness of Ads
Content of Ads
×
Please rate each item regarding Game8.co's Quality of Articles.
Amount of information
Very Dissatisfied
Somewhat Dissatisfied
Fine
Somewhat Satisfied
Highly Satisfied
Frequency of updates
Speed of new information
Accuracy of articles
Understandibility of articles
Readability of sentences
×
Please rate each item regarding Game8.co's Usability of the Site.
Ease of finding information
Very Dissatisfied
Somewhat Dissatisfied
Fine
Somewhat Satisfied
Highly Satisfied
Loading Speed
Use of Color
Font Size
Visibility of Images
Easy to Understand Layout
×
Please rate each item regarding Game8.co's Message Boards, Comments.
Ease of Writing
Very Dissatisfied
Somewhat Dissatisfied
Fine
Somewhat Satisfied
Highly Satisfied
Readability
Ease in Finding Information
Comment Quality
Comment Quantity
Admin Response
×
Please rate each item regarding Game8.co's Site's new design.
Please rate our site's new design
Very Dissatisfied
Somewhat Dissatisfied
Fine
Somewhat Satisfied
Highly Satisfied
Do you think that the website's design change makes the site easier to use?
Has the new design made it easier for you to find information on the site?
Has the new design improved the overall visual appeal of the site?
How would you rate your overall satisfaction with the new design of the site?
×
How likely are you to recommend Game8 to someone you know?
Very Unlikely
0
1
2
3
4
5
6
7
8
9
10
Very Likely
If you have other opinions regarding potential improvement to the website, please share them with us. We would appreciate your honest opinion.
Note: This is a free response section, so you can proceed without entering anything.
Note: Please be sure not to enter any kind of personal information into your response.
Note: Please be sure not to enter any kind of personal information into your response.
×
Thank You
×
Thank you for participating in our survey! Your answers will help us to improve the quality of our website and services.
We hope you continue to make use of Game8.
We hope you continue to make use of Game8.
Close


Rankings
Gaming News


![Monster Hunter Stories 3 Review [First Impressions] | Simply Rejuvenating](https://img.game8.co/4438641/2a31b7702bd70e78ec8efd24661dacda.jpeg/thumb)
Popular Games

Genshin Impact Walkthrough & Guides Wiki
Honkai: Star Rail Walkthrough & Guides Wiki
Umamusume: Pretty Derby Walkthrough & Guides Wiki
Pokemon Pokopia Walkthrough & Guides Wiki
Resident Evil Requiem (RE9) Walkthrough & Guides Wiki
Monster Hunter Wilds Walkthrough & Guides Wiki
Wuthering Waves Walkthrough & Guides Wiki
Arknights: Endfield Walkthrough & Guides Wiki
Pokemon FireRed and LeafGreen (FRLG) Walkthrough & Guides Wiki
Pokemon TCG Pocket (PTCGP) Strategies & Guides Wiki


Recommended Games
Diablo 4: Vessel of Hatred Walkthrough & Guides Wiki
Cyberpunk 2077: Ultimate Edition Walkthrough & Guides Wiki
Fire Emblem Heroes (FEH) Walkthrough & Guides Wiki
Yu-Gi-Oh! Master Duel Walkthrough & Guides Wiki
Super Smash Bros. Ultimate Walkthrough & Guides Wiki
Pokemon Brilliant Diamond and Shining Pearl (BDSP) Walkthrough & Guides Wiki
Elden Ring Shadow of the Erdtree Walkthrough & Guides Wiki
Monster Hunter World Walkthrough & Guides Wiki
The Legend of Zelda: Tears of the Kingdom Walkthrough & Guides Wiki
Persona 3 Reload Walkthrough & Guides Wiki


All rights reserved
Copyright© 2012-2024 HoYoverse — COGNOSPHERE. All Rights Reserved.
The copyrights of videos of games used in our content and other intellectual property rights belong to the provider of the game.
The contents we provide on this site were created personally by members of the Game8 editorial department.
We refuse the right to reuse or repost content taken without our permission such as data or images to other sites.
i know its been a while, but same thing's happening to me. do you perhaps remember a solution?