Peace to the Slumbering Quest Guide
✉ Send your thoughts in our Genshin 6.4 Patch Survey!
★ Exclusive: Dive back in time with the Meta History
◆ Hot: Version 6.4, Luna 5 Codes
◆ Builds: Varka, Flins, Skirk, Escoffier
◆ Events: Travelers' Tales, He Who Caught the Wind
◆ Future: Linnea, Version 6.5 Luna VI
Peace to the Slumbering is the second part of the Shadows of the Mountains Quest chain in Genshin Impact 5.0. See how to unlock this quest, its walkthrough, and all the rewards of this quest here in this guide!
| Shadows of the Mountains Quest Guides | |
|---|---|
| Beneath the Crystal Rock | Peace to the Slumbering |
How to Unlock Peace to the Slumbering
Complete Beneath the Crystal Rock Quest
To unlock Peace to the Slumbering, you must have completed the previous subquest of the Shadows of the Mountains Quest, Beneath the Crystal Rock!
Beneath the Crystal Rock Quest Guide
Peace to the Slumbering Walkthrough
Check the Hole Below
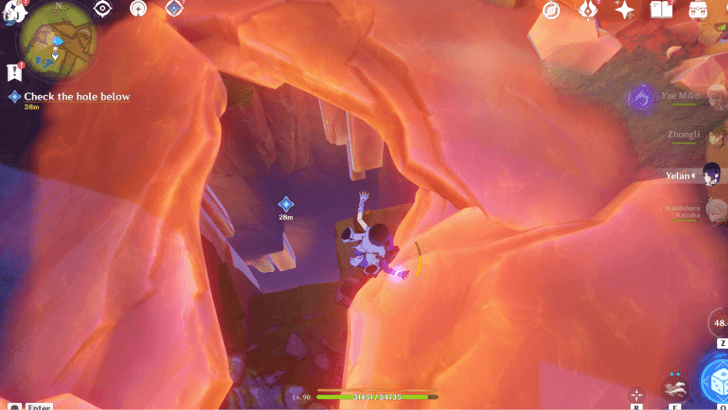
After Titu's dialogue with you, glide down the hole that the main Shadow Pin made earlier. Keep gliding or falling until you reach the lowest part, where you'll see some moving crystals and another inscription.
Touch the Inscription to Open the Path
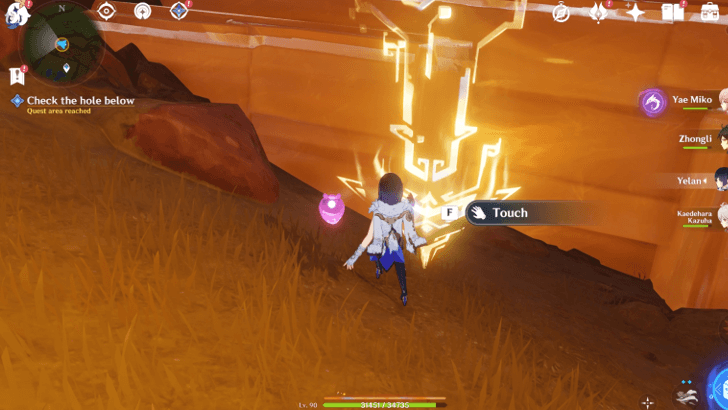
Touch it and it will open the path for you, which leads you to a tombstone. Approach it and a dialogue between you and Titu will commence. After the dialogue, the inscription will open the path to the Land of Myriad Megaliths.
Don't forget to unlock the Teleport Waypoint as this will be used later.
Touch the Inscription
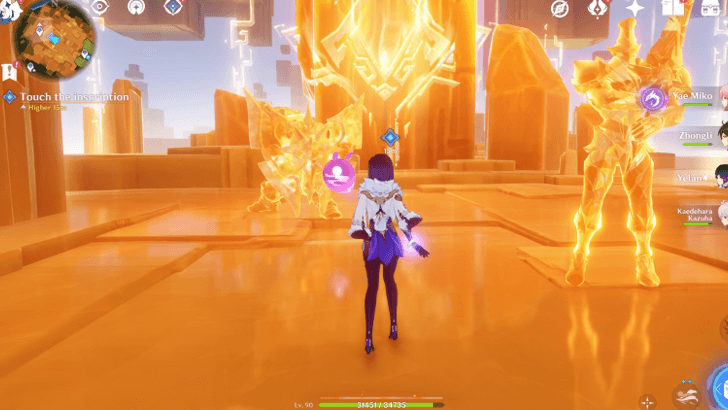
Make your way through the rising pillars and platforms of crystals and reach the middle of the area, where the inscription is. Pass through the statues in front of it and interact with it. Titu will talk to you and inscription fragments will appear all over the area.
Find the Inscription Fragments
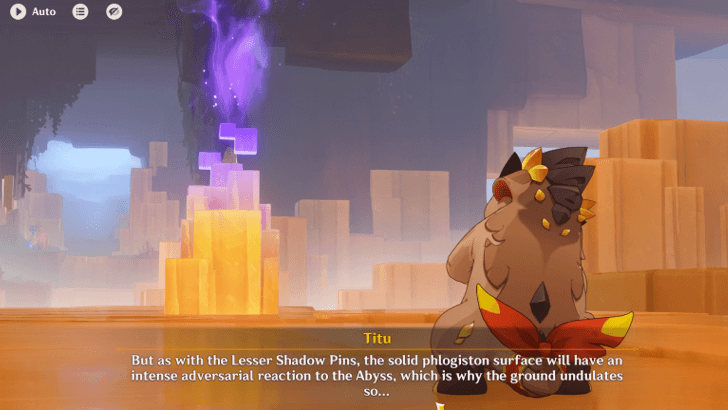
After the dialogue, you'll be asked to find the inscription fragments. The fragments are encased in Solid Phlogiston Crystals and violet smoke rises from the top. Find five of them to proceed.
Find the First Inscription Fragment
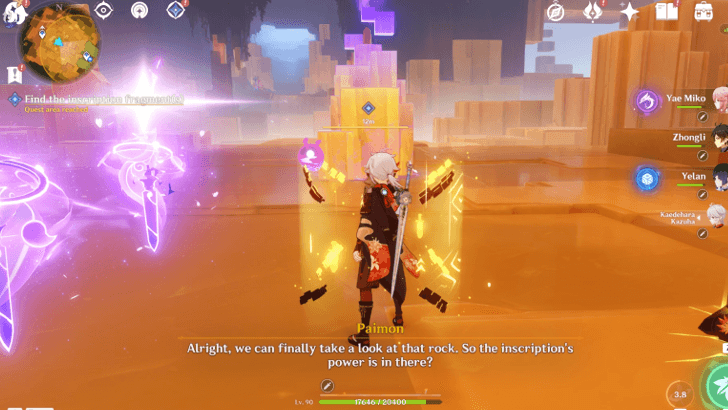
The first inscription fragment will be in front of you after the dialogue. Some Rift Hounds will appear when you approach it, so defeat them first.
After taking out the Rift Hounds, the crystal walls will retract and you can then start breaking the crystal casing of the fragment. Use a Sword, Claymore, or Polearm character to break the crystal successfully.
Find the Second Inscription Fragment
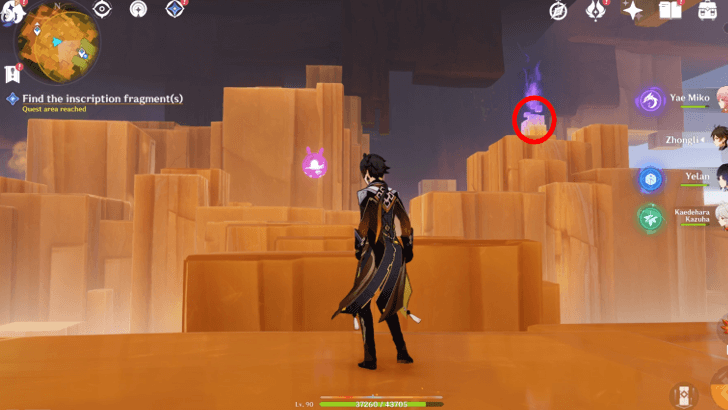
After breaking the casing and touching the fragment, the second inscription fragment will appear. The crystal pillars will shift first, so you need to climb the pillars from behind the crystal to get to it.
Find the Third Inscription Fragment
The crystal pillars and platforms will shift again after you touch the second inscription fragment. The third inscription fragment will appear on top of a high pillar. To get to it, use the Teleport Waypoint you unlocked earlier first.
You can then move forward and climb the pillars to get to the third inscription fragment.
Find the Fourth Inscription Fragment
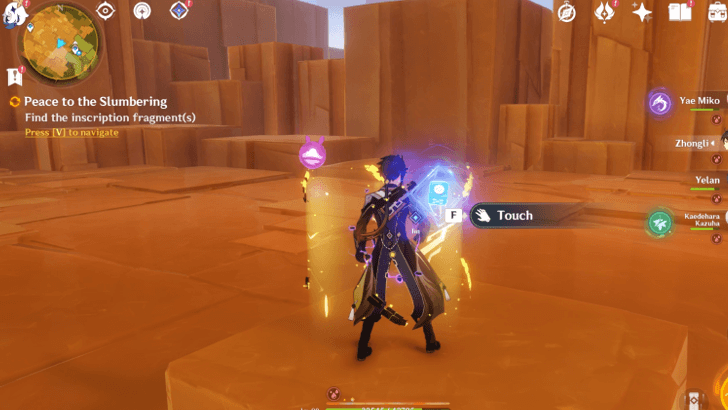
After the third inscription fragment, the crystal pillars shift again. You will be brought down into a small, makeshift arena surrounded by crystal pillars. Rift Hounds will continuously appear, along with a big one at the end.
Defeat them and the fourth inscription fragment will appear in the middle. Touch it and the crystal pillars will shift yet again.
Find the Fifth Inscription Fragment
You will then be surrounded by Solid Phlogiston Crystals. Look around and find your Saurian since it will guide you to the way out. Once you approach it, the crystal pillars will shift and make a path for you.
Follow your Saurian and it will lead you to the fifth inscription fragment. Touch the fragment and it'll lead you back to the middle pillar.
Grant the Warriors Peace
A dialogue happens after you touch the fragment at the middle pillar. The statues then unfreeze, which means you have to defeat them. Take out both Zephaniah and Irizar to get another cutscene.
After the cutscene and dialogue, you will receive a Luxurious Chest and an Iridescent Inscription Fragment. This marks the end of the Peace to the Slumbering World Quest!
Peace to the Slumbering Information
Part of the Shadows of the Mountains Quest Chain

Peace to the Slumbering is the second part of the Shadows of the Mountains World Quest. This new World Quest is part of the Version 5.0.
Peace to the Slumbering Rewards
Total Quest Rewards
| Total Quest Rewards |
 Primogem x40 |
 Mora x23,500 |
|---|---|---|
 Hero's Wit x2 |
||
Genshin Impact Related Guides

Other Shadows of the Mountains Quest Guides
| Shadows of the Mountains World Quest Guides | ||
|---|---|---|
| Beneath the Crystal Rock | Peace to the Slumbering | |
Comment
Author
Peace to the Slumbering Quest Guide
improvement survey
03/2026
improving Game8's site?

Your answers will help us to improve our website.
Note: Please be sure not to enter any kind of personal information into your response.

We hope you continue to make use of Game8.
Rankings
Gaming News
Popular Games

Genshin Impact Walkthrough & Guides Wiki

Honkai: Star Rail Walkthrough & Guides Wiki

Umamusume: Pretty Derby Walkthrough & Guides Wiki

Pokemon Pokopia Walkthrough & Guides Wiki

Resident Evil Requiem (RE9) Walkthrough & Guides Wiki

Monster Hunter Wilds Walkthrough & Guides Wiki

Wuthering Waves Walkthrough & Guides Wiki

Arknights: Endfield Walkthrough & Guides Wiki

Pokemon FireRed and LeafGreen (FRLG) Walkthrough & Guides Wiki

Pokemon TCG Pocket (PTCGP) Strategies & Guides Wiki
Recommended Games

Diablo 4: Vessel of Hatred Walkthrough & Guides Wiki

Cyberpunk 2077: Ultimate Edition Walkthrough & Guides Wiki

Fire Emblem Heroes (FEH) Walkthrough & Guides Wiki

Yu-Gi-Oh! Master Duel Walkthrough & Guides Wiki

Super Smash Bros. Ultimate Walkthrough & Guides Wiki

Pokemon Brilliant Diamond and Shining Pearl (BDSP) Walkthrough & Guides Wiki

Elden Ring Shadow of the Erdtree Walkthrough & Guides Wiki

Monster Hunter World Walkthrough & Guides Wiki

The Legend of Zelda: Tears of the Kingdom Walkthrough & Guides Wiki

Persona 3 Reload Walkthrough & Guides Wiki
All rights reserved
Copyright© 2012-2024 HoYoverse — COGNOSPHERE. All Rights Reserved.
The copyrights of videos of games used in our content and other intellectual property rights belong to the provider of the game.
The contents we provide on this site were created personally by members of the Game8 editorial department.
We refuse the right to reuse or repost content taken without our permission such as data or images to other sites.


![Monster Hunter Stories 3 Review [First Impressions] | Simply Rejuvenating](https://img.game8.co/4438641/2a31b7702bd70e78ec8efd24661dacda.jpeg/thumb)


