 Chasca
 Faruzan
 Heizou
 Ifa
Ifa Jahoda
 Jean
Jean Kazuha
 Lan Yan
 Lynette
 Mizuki
 Sayu
Sayu Sucrose
 Traveler (Anemo)
 Varka
Varka Venti
Venti Wanderer
 Xianyun
 Xiao
Xiao Aloy
Aloy Ayaka
Ayaka Charlotte
 Chongyun
 Citlali
 Diona
Diona Escoffier
 Eula
Eula Freminet
 Ganyu
Ganyu Kaeya
Kaeya Layla
Layla Mika
Mika Qiqi
Qiqi Rosaria
 Shenhe
 Skirk
Skirk Wriothesley
 Alhaitham
 Baizhu
 Collei
 Emilie
 Kaveh
Kaveh Kinich
 Kirara
 Lauma
Lauma Nahida
 Nefer
Nefer Tighnari
 Traveler (Dendro)
 Yaoyao
 Beidou
 Clorinde
 Cyno
Cyno Dori
Dori Fischl
 Flins
Flins Iansan
 Ineffa
 Keqing
 Lisa
Lisa Ororon
 Raiden
 Razor
Razor Sara
Sara Sethos
 Shinobu
 Traveler (Electro)
 Varesa
 Yae Miko
 Albedo
 Chiori
 Gorou
Gorou Illuga
 Itto
Itto Kachina
 Navia
Navia Ningguang
 Noelle
 Traveler (Geo)
 Xilonen
 Yun Jin
 Zhongli
 Zibai
Zibai Aino
Aino Ayato
Ayato Barbara
 Candace
 Columbina
 Dahlia
 Furina
 Kokomi
 Mona
Mona Mualani
 Neuvillette
 Nilou
Nilou Sigewinne
 Tartaglia
 Traveler (Hydro)
 Xingqiu
 Yelan
Yelan Amber
Amber Arlecchino
 Bennett
 Chevreuse
 Dehya
Dehya Diluc
Diluc Durin
Durin Gaming
 Hu Tao
 Klee
Klee Lyney
Lyney Mavuika
 Thoma
Thoma Traveler (Pyro)
 Xiangling
 Xinyan
 Yanfei
 Yoimiya
This survey will take about 1 minute.
Your answers will help us to improve our website.
Genshin Impact
List of All Bow Characters
✉ Send your thoughts in our Genshin 6.4 Patch Survey!
★ Exclusive: Dive back in time with the Meta History
◆ Hot: Version 6.4, Luna 5 Codes
◆ Builds: Varka, Flins, Skirk, Escoffier
◆ Events: Travelers' Tales, He Who Caught the Wind
◆ Future: Linnea, Version 6.5 Luna VI
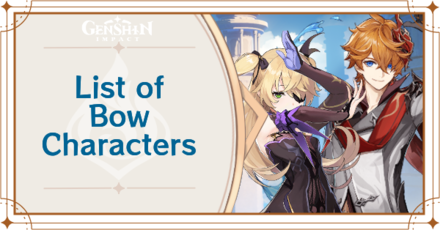
Here is the list of characters that use Bows in Genshin Impact, arranged by rarity, element, and region. We also have the rankings for the best Bow characters to get a better idea on their roles and strengths!
List of Contents
All Bow Users
List of All Bow Characters
Best Bow Characters
Best Bow Characters Ranked
| SS Tier | |
|---|---|
| S Tier | |
| A Tier | |
| B Tier | |
| C Tier | No characters! |
| D Tier |
Characters are shown in no particular order.
SS Tier Bow Characters
| Character | Roles and Strengths |
|---|---|
|
|
As a Sub-DPS ・Oz stays on the field to deal continuous Electro DMG, but needs full constellations to achieve the optimal level. ・Rotating between Elemental Skill and Burst let's Oz have permanent field time. |
S Tier Bow Characters
| Character | Roles and Strengths |
|---|---|
|
|
As a Sub-DPS ・Sub-DPS character with a powerful Elemental Burst that can be used to set up or trigger Hydro Elemental Reactions, while also buffing her active characters' damage. ・Elemental Skill deals competitive damage and gives a lot of energy to funnel for her burst. Moreover, her Elemental Skill can group enemies closer together. |
|
|
As a DPS ・Specializes in Rainbow teams where she can convert her damage into other elements that is Pyro, Hydro, Electro, or Cryo, making her versatile in team-building. ・Flying is extremely useful in overworld exploration especially in Natlan. ・Bullets in AoE situations are split between enemies, essentially making her a single-target damage dealer. |
A Tier Bow Characters
| Character | Roles and Strengths |
|---|---|
|
|
As a DPS ・On Hexerei teams, Venti becomes an on-fielder powerhouse for Pure Anemo DMG mixed with Swirl. As a Sub-DPS ・Powerful crowd control and Swirl damage to one location from Elemental Burst. ・High energy recharge rate. ・Struggles with enemies that are harder to pull-in. ・Constellations reduce enemy elemental resistances. |
|
|
As a Support ・Provides shields, heals, and off-field Cryo application. ・Also becomes a buffer for Elemental Mastery at C6. |
|
|
As a DPS ・Level 2 Charged Shot is great vs mobs of enemies, with high damage potential with Melt. However, it takes a long time to charge, and she's susceptible to interruptions. ・Elemental Burst, in-combination with ally pull-in effects, can quadratically target and attack enemies in one location. As a Sub-DPS ・Elemental Burst can easily set up Cryo reactions, especially Freeze. ・Her Burst can be used off-cooldown, provided you have enough Energy Recharge with another Cryo character. |
|
|
As a DPS ・Passive talent greatly compensates the lack of Elemental Reactions in a Mono-Pyro team. ・High damage on both single target and AoE. ・Susceptible to interruptions. |
|
|
As a Support ・Buffs Anemo DMG and decreases enemy Anemo RES. ・Has an extremely high Energy requirement without her C6 constellation, which makes her a high investement character. |
|
|
As a Sub-DPS ・Enables the Electro-Charged niche with his personal damage and the ability to hold the Scroll of the Hero of Cinder City Artifact Set, and a decent battery as long as he's in Electro-Charged. ・Locked in Electro-Charged teams and subpar on any other reactions. |
B Tier Bow Characters
| Character | Roles and Strengths |
|---|---|
|
|
As a DPS ・Riptide applies strong Hydro application especially against multiple opponents. ・Currently the best driver for Vaporize. |
|
|
As a DPS ・Elemental Skill infuses Normal Attacks with Pyro, which has a high base scaling. ・Supports that can improve her resistance to interruption and ATK SPD are needed to improve her overall performance. |
|
|
As a Support ・Increases party members' ATK. ・Becomes the best Electro Support buffer after unlocking C6, but is clunky and energy hungry at low constellations. |
|
|
As a Support ・Best Geo Support for DEF-focused Geo teams who can provide Geo DMG and DEFbuffs, and interruption resistance. ・Turns into a well-rounded offensive support and healer with C4, and a top-tier support at his niche at C6. |
|
|
As a DPS ・Damage primarily comes from Charged Attacks and Elemental Bursts ・Deals big damage by using the Spread Dendro Elemental Reaction. ・Can distract most enemies with his taunt. |
|
|
As a Sub-DPS ・Deals off-field Dendro damage, perfect for triggering Elemental Reactions. ・Elemental Burst AoE is small, so enemies can easily get outside of the AoE. |
|
|
As a Support ・Comfortable healing in the overworld. ・Low uptime on her heals and Elemental Skill ticks. ・ Low uptime on her buffs for off-field Elemental Skills. ・ No useful utility on Elemental Burst or Special Charged Attacks. |
|
|
As a DPS ・Versatile playstyles as he can choose either Charged Attack spamming, or Normal Attack spamming through his Elemental Burst, depending on his current Energy. ・Charged Attack form makes him stationary and susceptible to interruptions. ・Stats is inherintly on the low-side due to him being a 4-star. |
|
|
As a Sub-DPS ・Applicator of PHEC elements while off-field. ・Long on-field time may be a detriment to team DPS. As a Support ・Heals at her base kit and buffs Lunar-teams at C6. ・Comparable to Sucrose but loses out on max damage per rotation as her buffs doesn't overtake Sucrose's potential. |
C Tier Bow Characters
| Character | Roles and Strengths | There are no characters in this tier! |
|---|
D Tier Bow Characters
| Character | Roles and Strengths |
|---|---|
|
|
As a Sub-DPS ・Can apply AoE Pyro with Burst. ・Use Elemental Skill to taunt enemies away from Main DPS. ・C6 Constellation provides party-wide buffs with Elemental Burst. |
|
|
As a DPS ・Can increase own Normal ATK DMG with Elemental Skill, but requires bomblets to be hit by the pellets to gain access to infusion. ・No access to constellations means that her performance is only limited to a point forever. |
Genshin Impact Related Guides

All Characters and Voice Actors
List of All Characters
| Characters by Element | |||
|---|---|---|---|
Playable Characters
Upcoming Characters
| All Upcoming Characters |
 Alice Alice
|
 Capitano Capitano
|
 Dainsleif Dainsleif
|
 Dottore Dottore
|
|---|---|---|---|
 Linnea Linnea
|
 Lohen Lohen
|
 Nicole Nicole
|
 Pantalone Pantalone
|
 Pierro Pierro
|
 Pulcinella Pulcinella
|
 Rerir Rerir
|
 Sandrone Sandrone
|
 Tsaritsa Tsaritsa
|
|||
Character Lists
| Characters by Rarity | |
|---|---|
| 5-Star Characters | 4-Star Characters |
| Free Characters | |
| Characters by Weapon Used | |
| Sword Users | Claymore Users |
| Polearm Users | Bow Users |
| Catalyst Users | |
| Characters by Role | |
| Main DPS Characters | Sub DPS Characters |
| Support Characters | Healers |
| Shield Characters | Buff Providers |
| Best for Exploration | Local Specialty Passives |
| Double Reward Passives | |
| Characters by Gender | |
| Male Characters | Female Characters |
| Short Male Characters | Short Female Characters |
| Medium Male Characters | Medium Female Characters |
| Tall Male Characters | Tall Female Characters |
| Characters by Height | |
| Short Characters | Medium Characters |
| Tall Characters | |
| Characters by Region | |
| Mondstadt Characters | Liyue Characters |
| Inazuma Characters | Sumeru Characters |
| Fontaine Characters | Natlan Characters |
| Nod-Krai Characters | |
Author

List of All Bow Characters
Please participate in our site
improvement survey
03/2026
improvement survey
03/2026
Would you assist in
improving Game8's site?
improving Game8's site?

×
We are listening to our users' valuable opinions and discussing how to act on them.
The information collected through this survey will be used for the purpose of improving our services. In addition, the information will only be disclosed a part of a statistic in a format that will not allow identification of personal information.
Begin Survey
Not Now
×
Please rate each item regarding Game8.co's Advertisements.
Amount of Ads
Very Dissatisfied
Somewhat Dissatisfied
Fine
Somewhat Satisfied
Highly Satisfied
Placement of Ads
Timing of Ad Display
Ad Loading Speed
Safeness of Ads
Content of Ads
×
Please rate each item regarding Game8.co's Quality of Articles.
Amount of information
Very Dissatisfied
Somewhat Dissatisfied
Fine
Somewhat Satisfied
Highly Satisfied
Frequency of updates
Speed of new information
Accuracy of articles
Understandibility of articles
Readability of sentences
×
Please rate each item regarding Game8.co's Usability of the Site.
Ease of finding information
Very Dissatisfied
Somewhat Dissatisfied
Fine
Somewhat Satisfied
Highly Satisfied
Loading Speed
Use of Color
Font Size
Visibility of Images
Easy to Understand Layout
×
Please rate each item regarding Game8.co's Message Boards, Comments.
Ease of Writing
Very Dissatisfied
Somewhat Dissatisfied
Fine
Somewhat Satisfied
Highly Satisfied
Readability
Ease in Finding Information
Comment Quality
Comment Quantity
Admin Response
×
Please rate each item regarding Game8.co's Site's new design.
Please rate our site's new design
Very Dissatisfied
Somewhat Dissatisfied
Fine
Somewhat Satisfied
Highly Satisfied
Do you think that the website's design change makes the site easier to use?
Has the new design made it easier for you to find information on the site?
Has the new design improved the overall visual appeal of the site?
How would you rate your overall satisfaction with the new design of the site?
×
How likely are you to recommend Game8 to someone you know?
Very Unlikely
0
1
2
3
4
5
6
7
8
9
10
Very Likely
If you have other opinions regarding potential improvement to the website, please share them with us. We would appreciate your honest opinion.
Note: This is a free response section, so you can proceed without entering anything.
Note: Please be sure not to enter any kind of personal information into your response.
Note: Please be sure not to enter any kind of personal information into your response.
×
Thank You
×
Thank you for participating in our survey! Your answers will help us to improve the quality of our website and services.
We hope you continue to make use of Game8.
We hope you continue to make use of Game8.
Close


Rankings
Gaming News


![Monster Hunter Stories 3 Review [First Impressions] | Simply Rejuvenating](https://img.game8.co/4438641/2a31b7702bd70e78ec8efd24661dacda.jpeg/thumb)

Popular Games

Genshin Impact Walkthrough & Guides Wiki
Honkai: Star Rail Walkthrough & Guides Wiki
Umamusume: Pretty Derby Walkthrough & Guides Wiki
Pokemon Pokopia Walkthrough & Guides Wiki
Resident Evil Requiem (RE9) Walkthrough & Guides Wiki
Monster Hunter Wilds Walkthrough & Guides Wiki
Wuthering Waves Walkthrough & Guides Wiki
Arknights: Endfield Walkthrough & Guides Wiki
Pokemon FireRed and LeafGreen (FRLG) Walkthrough & Guides Wiki
Pokemon TCG Pocket (PTCGP) Strategies & Guides Wiki


Recommended Games
Diablo 4: Vessel of Hatred Walkthrough & Guides Wiki
Fire Emblem Heroes (FEH) Walkthrough & Guides Wiki
Yu-Gi-Oh! Master Duel Walkthrough & Guides Wiki
Super Smash Bros. Ultimate Walkthrough & Guides Wiki
Pokemon Brilliant Diamond and Shining Pearl (BDSP) Walkthrough & Guides Wiki
Elden Ring Shadow of the Erdtree Walkthrough & Guides Wiki
Monster Hunter World Walkthrough & Guides Wiki
The Legend of Zelda: Tears of the Kingdom Walkthrough & Guides Wiki
Persona 3 Reload Walkthrough & Guides Wiki
Cyberpunk 2077: Ultimate Edition Walkthrough & Guides Wiki


All rights reserved
Copyright© 2012-2024 HoYoverse — COGNOSPHERE. All Rights Reserved.
The copyrights of videos of games used in our content and other intellectual property rights belong to the provider of the game.
The contents we provide on this site were created personally by members of the Game8 editorial department.
We refuse the right to reuse or repost content taken without our permission such as data or images to other sites.
Best weapon type 🏹