 The Golden Apple Vacation Returns!
 As the Courtyard in Spring Once Appeared
 Blazin' Trails
 Immernachtreich Apokalypse
 Like Rhyme and Song, the Summer Reverie
This survey will take about 1 minute.
Your answers will help us to improve our website.
Genshin Impact
Temple of the Star Latitudes Guide for Mona's Domain
✉ Send your thoughts in our Genshin 6.4 Patch Survey!
★ Exclusive: Dive back in time with the Meta History
◆ Hot: Version 6.4, Luna 5 Codes
◆ Builds: Varka, Flins, Skirk, Escoffier
◆ Events: Travelers' Tales, He Who Caught the Wind
◆ Future: Linnea, Version 6.5 Luna VI
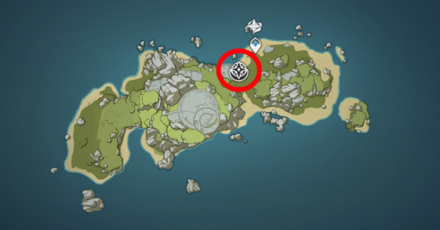
Temple of the Star Latitudes is Mona's Event Domain in Golden Apple Archipelago of Genshin Impact 2.8. Here you can find guides for the quest, puzzles, treasure chest and phantasmal conch locations, and Mona's phantom realm domain for Summertime Odyssey here!
List of Contents
Mona Domain Quest
The Ancient Azure Stars

The Ancient Azure Stars Quest Guide
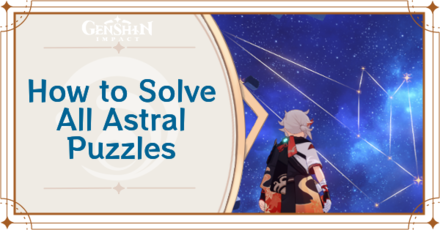
Mona Domain Puzzles
| Puzzle Guides | |
|---|---|
 Astral Puzzles |
Acient Azure Stars Puzzles |
Mona Domain Treasure Chests
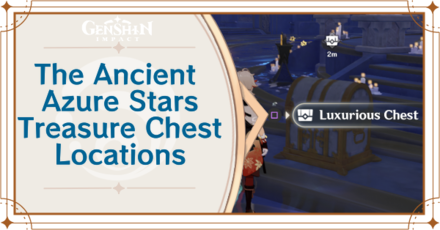
For Mona's Quest Domain, you can find a total of 19 Treasure Chests inside the Phantasmal Tales Mirage.
All Mona Domain Treasure Chests
Door 1 Chests
| Chest & Location | |
|---|---|
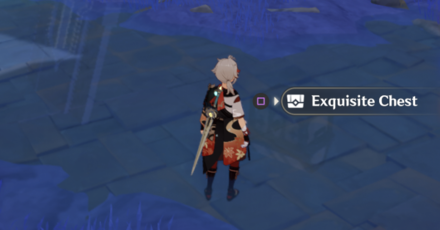
 Exquisite Chest - Move forward to this part and continue the path until you find an Astral Puzzle. |
 Exquisite Chest - Complete 3 Astral Puzzle Patterns to find a chest underneath the arrow. |
 Precious Chest - Solve the puzzle in the hidden room to unlock this chest |
 Luxurious Chest - Complete the Challenge of the Starry Sky to win a Luxurious Chest. |
How to Solve the Astral Puzzles in Door 1
Door 2 Chests

| Chest & Location | |
|---|---|
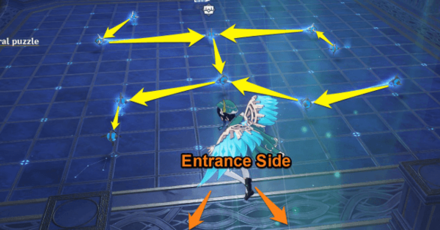
 Exquisite Chest - Complete the triangle puzzle to collect the Exquisite Chest. |
 Exquisite Chest - Complete this puzzle to collect the Exquisite Chest. |
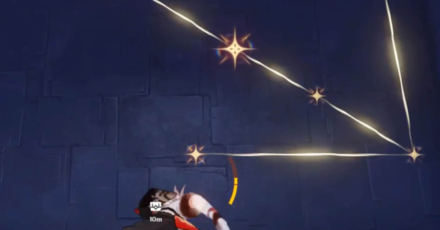
 Exquisite Chest - Set the puzzle in this image to collect an Exquisite Chest. |
|
How to Solve the Astral Puzzles in Door 2
Door 3 Chests
| Chest & Location | |
|---|---|
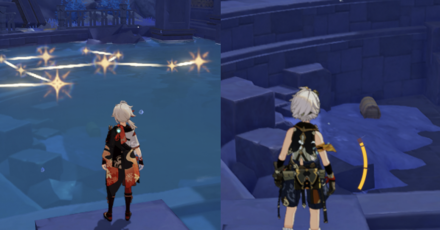
 Exquisite Chest - From a hint inside an inaccessible door, make a running man shape. |
 Exquisite Chest - Can be unlocked by setting the Astral Puzzle to a Heart shape. |
 Exquisite Chest - In this room, all of the Exquisite Chests are fake. Destroy the Hydro Stone to reveal the actual chest in the reflection. |
 Exquisite Chest - The room in it seemingly needs Hydro to activate all monuments. But in reality, two of them require Anemo and one of each require Pyro and Hydro. |
 Common Chest - There will be another mirage leading to the next room. Destroy the rock to reveal where the true torches are. Ignite the torches with the brighter red hue. |
 Common Chest - When going back to the entrance, you'll find a chest where the water with the constellation used to be. |
How to Solve the Astral Puzzles in Door 3
Door 4 Chests
| Chest & Location | |
|---|---|
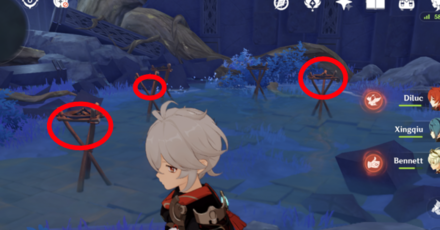
 Exquisite Chest - Cycle through the mechanism until a squid-like constellation appears, then form that shape. |
 Common Chest- Use the mechanism until the constellation turns into a circle-like shield. Use the Blue Circle to ascend and collect the Common Chest. |
 Exquisite Chest - In another room, go to the star and follow it so it can unlock the Chest. Make astral bridges with the laser devices to ascend yourself uptop. |
 Common Chest - Use the Blue Circle to ascend yourself to the next floor where you can find a Common Chest after completing the second star puzzle above. |
 Common Chest - Use the Blue Circle again to ascend yourself to the next floor where you can find another Common Chest after completing the second star puzzle above. |
|
How to Solve the Astral Puzzles in Door 4
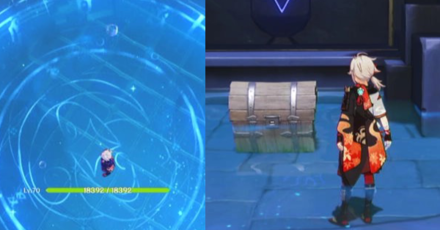
Fountain Luxurious Chest
| Chest & Location |
|---|
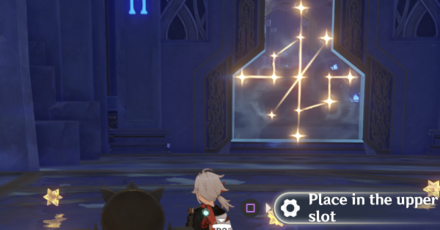
 Luxurious Chest - After completing the quests, returning to the water pool reveals a new opening. Eventually you'll reach the familiar space with a large constellation in the sky. Simply make Mona's constellation with the device. |
Mona Domain Phantasmal Conch
Found in the Phantasmal Tales

You can get the Phantasmal Conch in Mona's domain by picking the door with the above constellation, and solving the three Astral puzzles inside. This will unlock the secret pathway leading to the room where the Echoing Conch would be located!
Mona Domain Conch Walkthrough
| Objective | |
|---|---|
| 1 | Complete The Ancient Azure Stars quest and then go back inside the domain. Make sure to enter the Phantasmal Tales Mirage. |
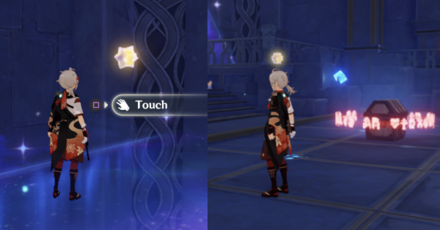
| 2 | Enter the hallway with the constellation pattern of a plus sign crossed with the letter S. Head down the corridor until you get to a room with a constellation on the left wall. |
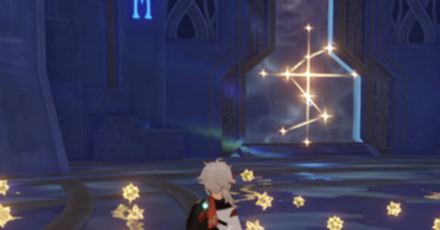
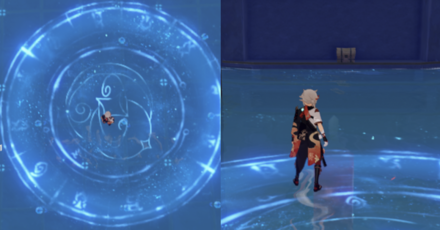
| 3 | Solve the Astral Puzzle by matching the pattern of the Star Guides to the constellation on the wall. The pattern will change into another Astral Puzzle once this is done. |
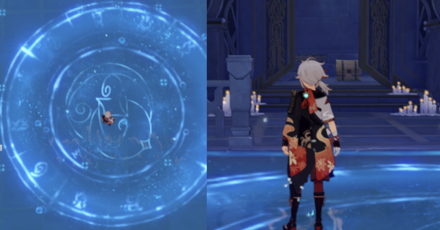
| 4 | Solve the second Astral Puzzle and match the pattern again to trigger a third constellation to appear on the wall. |
| 5 | Solve this third Astral Puzzle to spawn a Treasure Chest and an arrow on the wall. The arrow will be pointing to the corner of the room. |
| 6 | Touch the wall in the corner that the arrow is pointing to and enter the hidden pathway to the end. |
| 7 | The Echoing Conch will be on a stone surface to the left of the room at the end of the path! |
All Phantasmal Conches Locations
Mona Domain Phantom Realm
Recommended Characters
| Initial Exploration & Direct Strike Characters | |||
|---|---|---|---|
|
|
|
|
|
An Electro-charged team comp works well against all enemies in Mona's Domain. A lot of the enemies here are small and can be crowd controlled, so bring an Anemo character to finish the job quickly!
Other Recommended Characters
| Main DPS |
|
|---|---|
| Sub DPS |
|
| Support |
|
Any character combination will do as long as you have at least one Hydro, one Electro, and one Anemo character in your party. A Cryo character can also work since there is a buff that can deal increased DMG to Frozen enemies
How to Beat Temple of the Star Latitudes
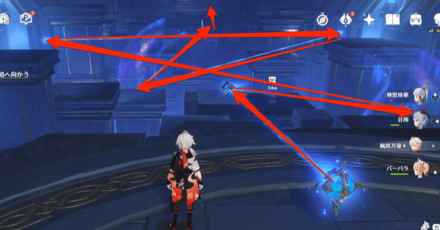
Look at the Ceiling to Solve the Puzzle

In the Initial Exploration part of the domain, you will have to solve a puzzle at the beginning before moving forward. Just stand on the corresponding platform on where the star shines the brightest is.
Step on Platforms for Buffs
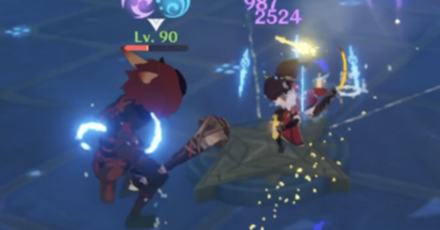
Step on the Platforms as much as you can to get random buffs from imprisoning enemies or increase DMG dealt to Frozen enemies.
Phantom Realm Information
| Temple of the Star Latitudes Phantom Realm | |
|---|---|
 |
|
| Rewards | |
| Conditions | Initial Exploration: Stage 1: Defeat enemies within 90s. Stage 2: Defeat enemies within 5 minutes. Direct Strike: Defeat enemies within 5 minutes. |
How Buffs Work in Mona's Domain
| How the Astral Harmonics Work (Random) | |
|---|---|
| 1 | Subduing Star: Imprisons all opponents currently on the field and increases the DMG thet take by 35% for 8s. |
| 2 | Collapsing Star: When a character collides with an opponent, the latter will be immediately defeated. Lasts 6s. |
| 3 | Tidal Star: Applies Hydro to all characters and opponents currently on the field. All Frozen opponents will take 50% more DMG for 8s. |
Initial Exploration Enemies
| Stage | Objectives & Enemies |
|---|---|
| Stage 1 | |
| Stage 2 |
Direct Strike Enemies
| Wave | Enemies |
|---|---|
| Wave 1 | |
| Wave 2 | |
| Wave 3 | |
| Wave 4 | |
| Wave 5 | |
| Wave 6 |
Temple of the Star Latitudes Rewards
All Mona Event Domain Rewards
| Objectives | Rewards |
|---|---|
| Complete Initial Exploration in ''Temple of the Star Latitudes''. |
|
| Complete ''Temple of the Star Latitudes'' a total of 3 time(s). |
|
| Hit opponents using a Collapsing Star a total of 5 times during the final challenge and complete the final challenge. |
|
| Activate Astral Harmonics a total of 3 times during the final challenge and complete the final challenge. |
|
Temple of the Star Latitudes Information
Phantom Realm and Phantasmal Tales

Temple of the Star Latitudes is part of the Summertime Odyssey Event! You can unlock this domain by completing The Ancient Azure Stars Event Quest!
The domain is divided between Phantom Realm, the battle challenge, and the Phantasmal Tales which is about exploration.
Summertime Odyssey Event Guide
Genshin Impact Related Guides

Summertime Odyssey Event Guide
Summertime Odyssey Phantom Realm
| Phantom Realm Guides | |
|---|---|
 Misty Hills, Foggy Vales Misty Hills, Foggy Vales |
 The Islands' Stirring Strings The Islands' Stirring Strings |
 Immernachtreich Keep Immernachtreich Keep |
 Temple of the Star Latitudes Temple of the Star Latitudes |
Summertime Odyssey Quest Guides
Other Summertime Odyssey Guides
| Summertime Odyssey Guides | |
|---|---|
 Surfpiercer Event Guide Surfpiercer Event Guide |
 All Character Locations All Character Locations |
2.8 Archipelago Puzzle Guides
Other 2.8 Golden Apple Archipelago Guides
2.8 Archipelago Quest Guides
2.8 Archipelago Map Features
Golden Apple Archipelago 2.8 Rerun Guide
All Genshin Impact Events
Author

Temple of the Star Latitudes Guide for Mona's Domain
Please participate in our site
improvement survey
03/2026
improvement survey
03/2026
Would you assist in
improving Game8's site?
improving Game8's site?

×
We are listening to our users' valuable opinions and discussing how to act on them.
The information collected through this survey will be used for the purpose of improving our services. In addition, the information will only be disclosed a part of a statistic in a format that will not allow identification of personal information.
Begin Survey
Not Now
×
Please rate each item regarding Game8.co's Advertisements.
Amount of Ads
Very Dissatisfied
Somewhat Dissatisfied
Fine
Somewhat Satisfied
Highly Satisfied
Placement of Ads
Timing of Ad Display
Ad Loading Speed
Safeness of Ads
Content of Ads
×
Please rate each item regarding Game8.co's Quality of Articles.
Amount of information
Very Dissatisfied
Somewhat Dissatisfied
Fine
Somewhat Satisfied
Highly Satisfied
Frequency of updates
Speed of new information
Accuracy of articles
Understandibility of articles
Readability of sentences
×
Please rate each item regarding Game8.co's Usability of the Site.
Ease of finding information
Very Dissatisfied
Somewhat Dissatisfied
Fine
Somewhat Satisfied
Highly Satisfied
Loading Speed
Use of Color
Font Size
Visibility of Images
Easy to Understand Layout
×
Please rate each item regarding Game8.co's Message Boards, Comments.
Ease of Writing
Very Dissatisfied
Somewhat Dissatisfied
Fine
Somewhat Satisfied
Highly Satisfied
Readability
Ease in Finding Information
Comment Quality
Comment Quantity
Admin Response
×
Please rate each item regarding Game8.co's Site's new design.
Please rate our site's new design
Very Dissatisfied
Somewhat Dissatisfied
Fine
Somewhat Satisfied
Highly Satisfied
Do you think that the website's design change makes the site easier to use?
Has the new design made it easier for you to find information on the site?
Has the new design improved the overall visual appeal of the site?
How would you rate your overall satisfaction with the new design of the site?
×
How likely are you to recommend Game8 to someone you know?
Very Unlikely
0
1
2
3
4
5
6
7
8
9
10
Very Likely
If you have other opinions regarding potential improvement to the website, please share them with us. We would appreciate your honest opinion.
Note: This is a free response section, so you can proceed without entering anything.
Note: Please be sure not to enter any kind of personal information into your response.
Note: Please be sure not to enter any kind of personal information into your response.
×
Thank You
×
Thank you for participating in our survey! Your answers will help us to improve the quality of our website and services.
We hope you continue to make use of Game8.
We hope you continue to make use of Game8.
Close


Rankings
- We could not find the message board you were looking for.
Gaming News


![Everwind Review [Early Access] | The Shaky First Step to A Very Long Journey](https://img.game8.co/4440226/ab079b1153298a042633dd1ef51e878e.png/thumb)

![Monster Hunter Stories 3 Review [First Impressions] | Simply Rejuvenating](https://img.game8.co/4438641/2a31b7702bd70e78ec8efd24661dacda.jpeg/thumb)
Popular Games

Genshin Impact Walkthrough & Guides Wiki
Honkai: Star Rail Walkthrough & Guides Wiki
Umamusume: Pretty Derby Walkthrough & Guides Wiki
Pokemon Pokopia Walkthrough & Guides Wiki
Resident Evil Requiem (RE9) Walkthrough & Guides Wiki
Monster Hunter Wilds Walkthrough & Guides Wiki
Wuthering Waves Walkthrough & Guides Wiki
Arknights: Endfield Walkthrough & Guides Wiki
Pokemon FireRed and LeafGreen (FRLG) Walkthrough & Guides Wiki
Pokemon TCG Pocket (PTCGP) Strategies & Guides Wiki


Recommended Games
Diablo 4: Vessel of Hatred Walkthrough & Guides Wiki
Fire Emblem Heroes (FEH) Walkthrough & Guides Wiki
Yu-Gi-Oh! Master Duel Walkthrough & Guides Wiki
Super Smash Bros. Ultimate Walkthrough & Guides Wiki
Pokemon Brilliant Diamond and Shining Pearl (BDSP) Walkthrough & Guides Wiki
Elden Ring Shadow of the Erdtree Walkthrough & Guides Wiki
Monster Hunter World Walkthrough & Guides Wiki
The Legend of Zelda: Tears of the Kingdom Walkthrough & Guides Wiki
Persona 3 Reload Walkthrough & Guides Wiki
Cyberpunk 2077: Ultimate Edition Walkthrough & Guides Wiki


All rights reserved
Copyright© 2012-2024 HoYoverse — COGNOSPHERE. All Rights Reserved.
The copyrights of videos of games used in our content and other intellectual property rights belong to the provider of the game.
The contents we provide on this site were created personally by members of the Game8 editorial department.
We refuse the right to reuse or repost content taken without our permission such as data or images to other sites.
puzzle 2 is 100% wrong. make a triangle instead.