Immernachtreich Apokalypse Puzzles Guide and Conch Location
✉ Send your thoughts in our Genshin 6.4 Patch Survey!
★ Exclusive: Dive back in time with the Meta History
◆ Hot: Version 6.4, Luna 5 Codes
◆ Builds: Varka, Flins, Skirk, Escoffier
◆ Events: Travelers' Tales, He Who Caught the Wind
◆ Future: Linnea, Version 6.5 Luna VI

Immernachtreich Apokalypse is the fourth event quest in Genshin Impact's Summertime Odyssey event. See how to complete the quest, complete walkthroughs for Part 1, Part 2, Part 3, and how to solve the puzzles here!
List of Contents
Immernachtreich Apokalypse Part 1
| Step by Step Instructions | |
|---|---|
| 1 | Change the time to 06:00 - 24:00 tomorrow. |
| 2 | Teleport to the Twinning Isle in Golden Apple Archipelago. |
| 3 | 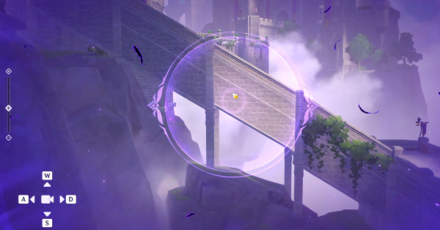 Use the Gaze of the Deep to adjust the Misplaced Image. You can zoom in and adjust the angle to place the Misplaced Image in the proper position. |
| 4 | Move forward until you see another Gaze of the Deep mechanism. |
| 5 |  Adjust the Misplaced Image by fully zooming in and connecting the stairs. |
| 6 | Use the elevator nearby to take you downstairs and use the Gaze of the Deep again. |
| 7 | 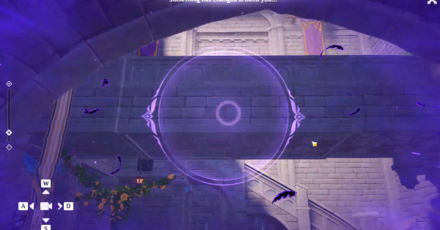 Adjust the bridge above the stairs by zooming out then adjusting to connect it. Take note that once you set the bridge, you won't be able to use the stairs, so use the elevator to go upstairs. |
| 8 | 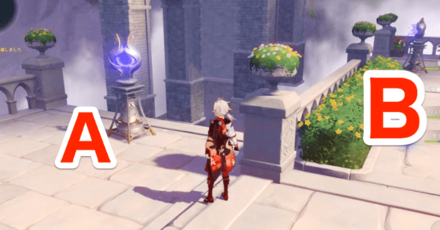 On your way, you will have to use two Gaze of the Deep mechanisms to repair the bridge. |
| 9 | 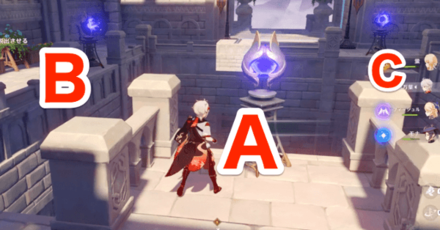 Go to the marked location in the quest. There, you will find a trapped soldier named Leon. You will have to use the Three Gaze of the Deeps to save him. |
| 10 | On your way, you'll find another Gaze of the Deep to repair the path to the tower. |
| 11 | Move to the next marked location until you find a book. |
Immernachtreich Apokalypse Part 2
| Step by Step Instructions | |
|---|---|
| 1 | 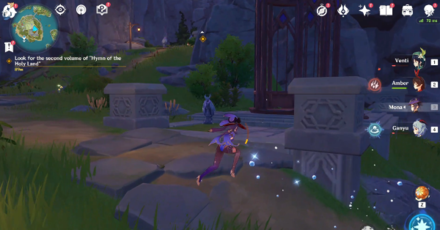 Find an elevator nearby which will lead you to the next book. |
| 2 | Operate the Device to Repair the Path. |
| 3 | 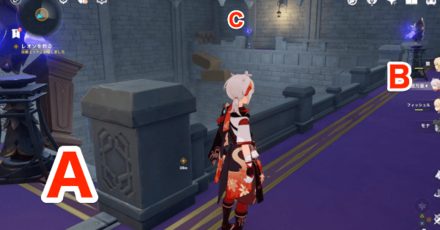 Move forward and then you will see that you have to use the Gaze of the Deep again to save Leon. |
Immernachtreich Apokalypse Part 3
| Step by Step Instructions | |
|---|---|
| 1 | 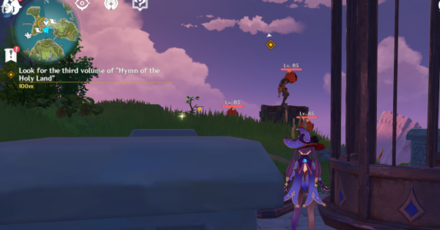 Teleport to the Northern part of Twinning Isle and use the Elevator nearby some hilichurls to get to the next book. |
| 2 | 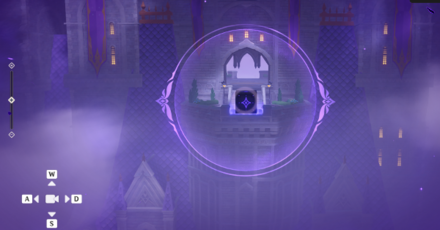 Use the Gaze of the Deep nearby to draw out a bridge. There will be two paths on the way which lead to the castle fragments in order for you to fix the Toy Castle. |
| 3 | 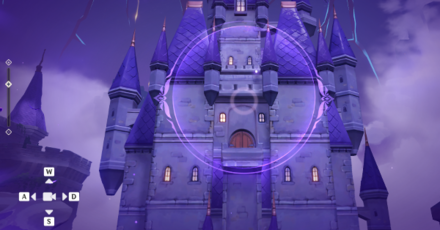 Head back to the central park via the nearby elevator to fix the Castle. |
| 4 | Ride the wind currents and you will have to save Leon again. |
| 5 | Go upstairs and read the book. |
Immernachtreich Apokalypse Puzzles
How to Repair the Bridge
| Step by Step Instructions | |
|---|---|
| 1 |  On your way, you will have to use two Gaze of the Deep mechanisms to continue. |
| 2 | 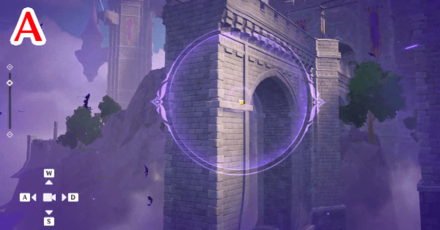 Zoom in and adjust the Misplaced Image to have the upper ends of the bridge connect. |
| 3 | 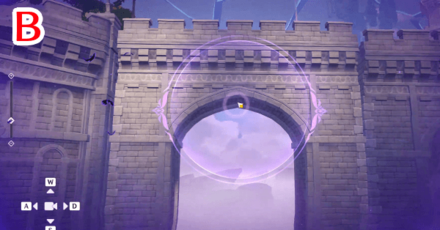 For the second half of the bridge, zoom out adjust the upper ends of it to be a little higher than the previous one. |
How to Repair the Path to the Tower
| Step by Step Instructions | |
|---|---|
| 1 | 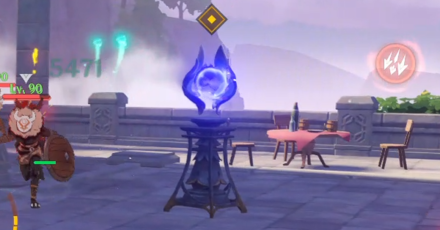 Use the Gaze of the Deep mechanism. |
| 2 | 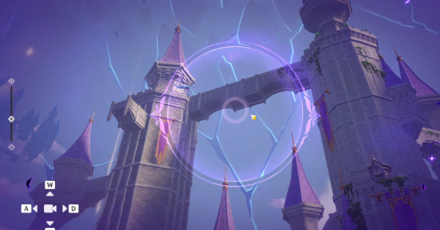 Zoom out a little and adjust the image to the left connect the bridge. |
How to Save Leon
Save Leon Part 1
| Step by Step Instructions | |
|---|---|
| 1 |  Go to the marked location in the quest. There, you will find a trapped soldier named Leon. You will have to use the Three Gaze of the Deeps to help him get out. |
| 2 | 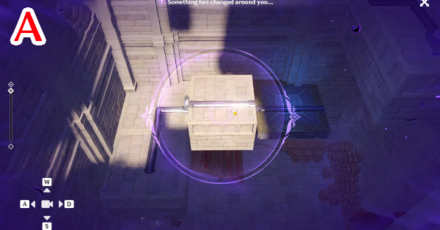 For the Gaze of the Deep near the entrance, zoom in adjust the image to have the line slightly moved up from the line that's supposed to connect. |
| 3 | 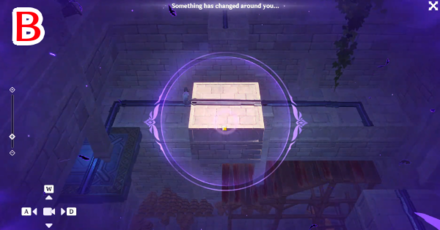 For the Gaze of the Deep on the middle, adjust the image to have the brick part on the bottom positioned a little lower from the other platforms. |
| 4 | 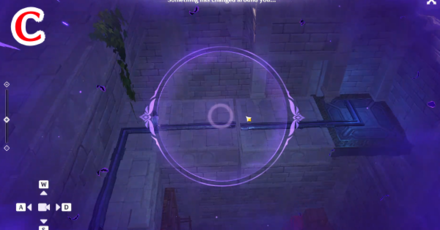 For the Gaze of the Deep on the end, adjust the image to have the block connect to the elevator that Leon will use. |
Save Leon Part 2
| Step by Step Instructions | |
|---|---|
| 1 |  You have to use the Gaze of the Deep again to save Leon. |
| 2 | 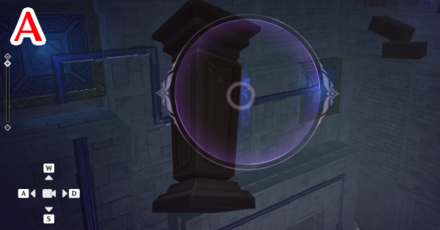 Zoom in and adjust the pillar to be in between the line. |
| 3 | 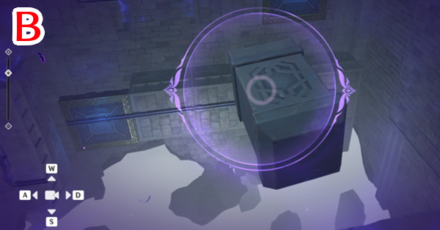 Zoom in and adjust the pillar to be on the edge of the line. |
| 4 | 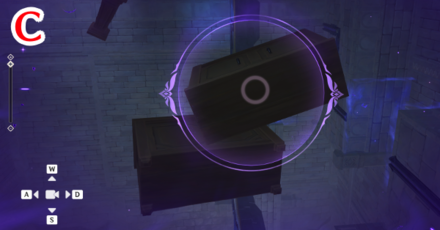 Zoom in and adjust the shelves having the circle aimed at the middle of the upper shelf. |
Save Leon Part 3
| Step by Step Instructions | |
|---|---|
| 1 | Ride the wind currents after fixing the castle and you will meet a once again trapped Leon. |
| 2 |  Head to this Gaze of the Deep which is nearest to the upper floor. |
| 3 | 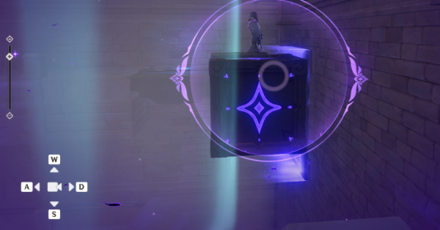 Zoom in and adjust the image to provide a box to the bottom layer. |
| 4 | 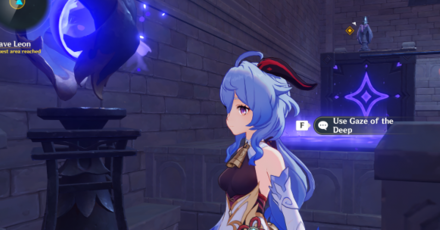 Go to the bottom-most Gaze of the Deep mechanism. Wait until Leon stops moving before you use the mechanism. |
| 5 | 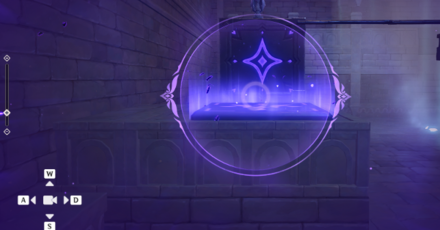 Zoom out and adjust the image to provide a box to the west layer. |
| 6 | 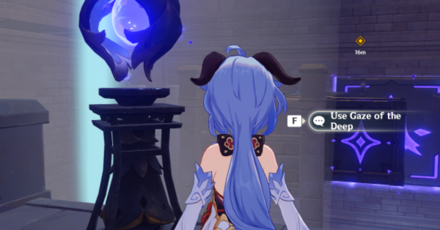 Use the Wind Current that will lead you to the Gaze of the Deep on the other side. Again, make sure that Leon stops first before using the mechanism. |
| 7 | 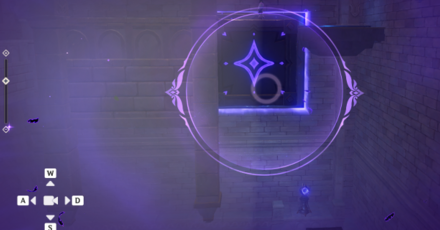 Adjust the image once more to finally free Leon. |
How to Operate the Device to Repair the Path
| Step by Step Instructions | |
|---|---|
| 1 | Go to the Gaze of the Deep mechanism nearby. |
| 2 | 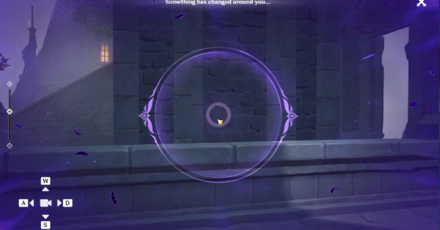 Adjust the image to have the pillar be in the middle. |
| 3 | On the path to the next Gaze of the Deep, you will find an Echoing Conch on the table. |
| 4 | 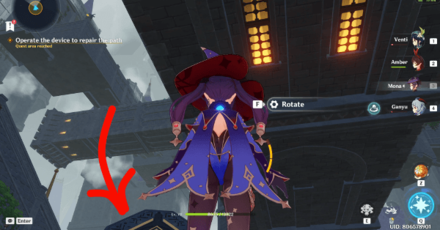 Use the device to rotate the tower twice. |
| 5 | 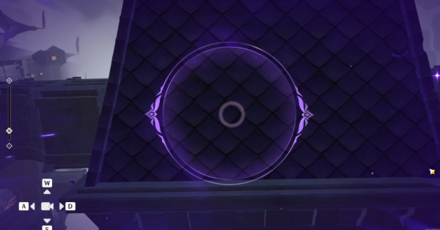 When using the next Gaze of the Deep, adjust the image to have the tower in between the bridge. |
| 6 | 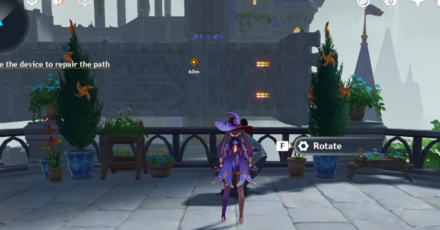 Move forward and find a device to rotate the tower until the tower is between the ladder. |
| 7 | 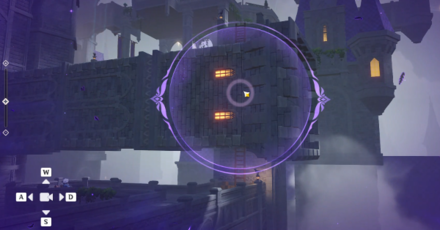 Use the Gaze of the Deep to repair the ladder. |
| 8 | 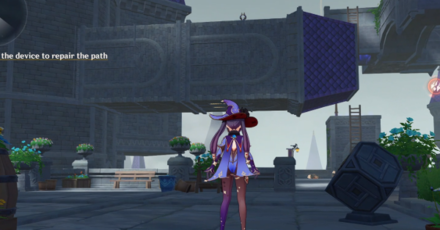 Move forward and find another mechanism to rotate the tower until you see the image above. |
| 9 | 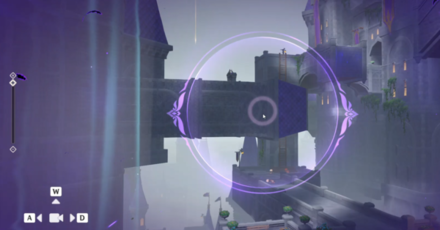 Use the Gaze of the Deep to repair the final ladder. |
How to Repair the Toy Castle
Left Path
| Step by Step Instructions | |
|---|---|
| 1 | 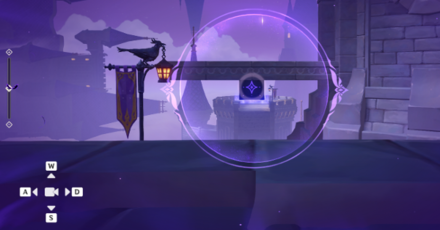 Head to this Gaze of the Deep mechanism on the left path to open up a bridge. |
| 2 | 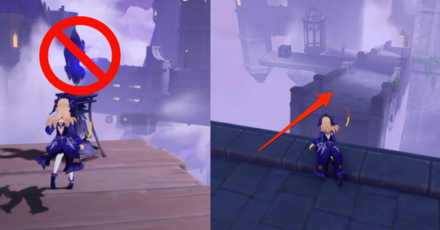 You can't use the next Gaze of the Deep on the wooden platform, so glide down instead to another path. |
| 3 | 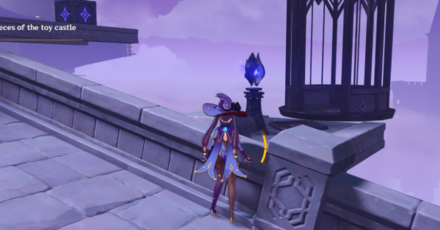 Use this Gaze of the Deep mechanism near the elevator when you get down. |
| 4 | 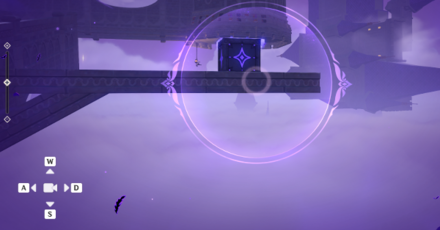 Adjust the image so that another box will appear. |
| 5 | 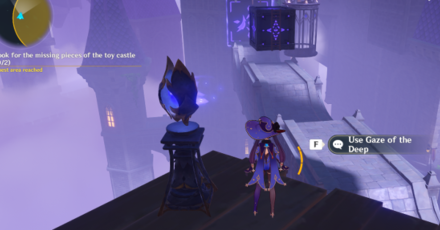 Use the Elevator and head back to the previous Gaze of the Deep. |
| 6 | 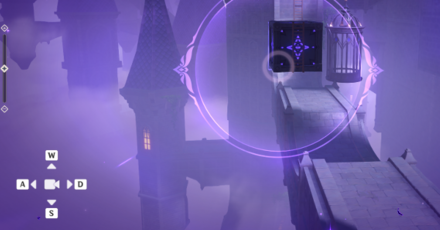 Adjust the image to complete the ladder and collect the first castle fragment. |
Right Path
| Step by Step Instructions | |
|---|---|
| 1 | 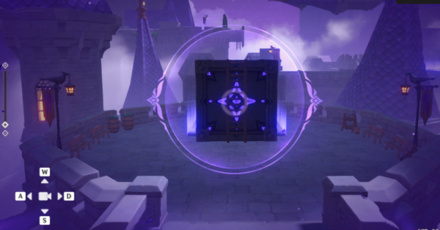 For the east path, do the first Gaze of the Deep puzzle. Zoom out and adjust to form the first part of the ladder. |
| 2 | 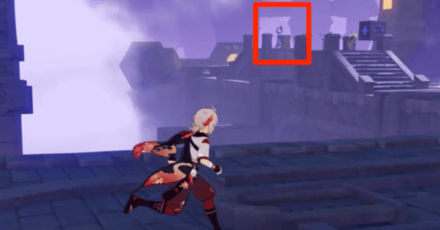 Go to the end of the path and use the Gaze of the Deep there. |
| 3 | 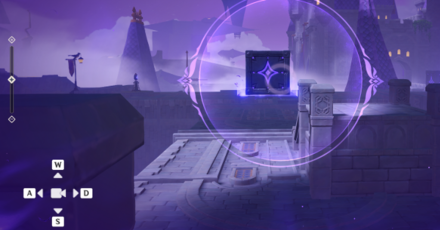 Adjust the image to make another box appear. |
| 4 | 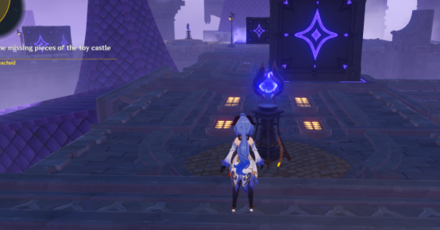 Go to the next Gaze of the Deep. |
| 5 | 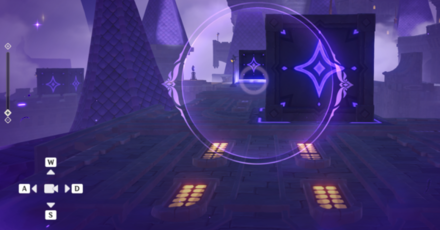 Adjust the image to make another box appear again. |
| 6 | 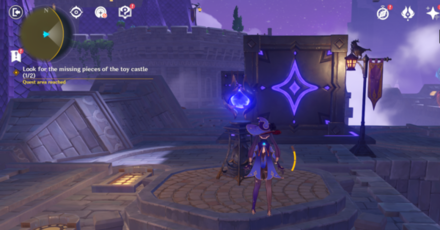 Go to the next Gaze of the Deep. |
| 7 | 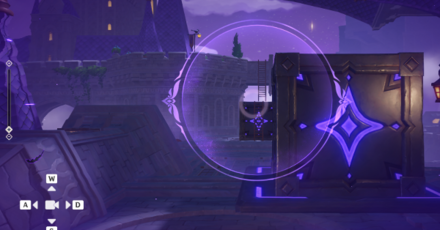 Adjust the image to completely form a ladder. |
| 8 | On your way, you will have to jump a long distance as mentioned by the signboard. Make sure you safely go down via gliding or Plunge Attack. |
| 9 | 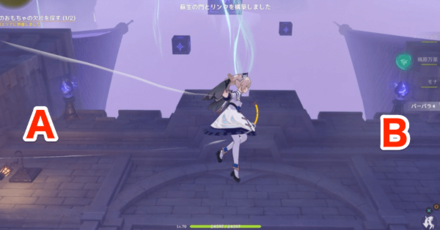 Use the two Gaze of the Deeps to form a Gliding Path. |
| 10 | 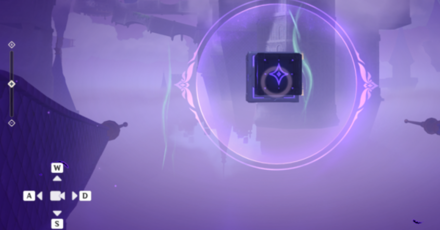 Connect the smaller box to the bigger box. |
| 11 | 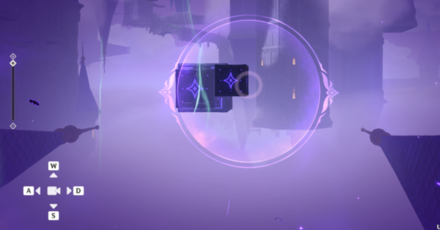 Connect the other box to the bigger box. |
| 12 | Ride the Wind Currents that will lead to the next Castle Fragment. |
Immernachtreich Apokalypse Domain Chests
To know where to get all 10 Treasure Chests, check out our in-depth guide here:
Immernachtreich Apokalypse Chest Locations
Immernachtreich Apokalypse Phantasmal Conch Location

You can find the Echoing Conch in Fischl's Domain during Part 2 of the Quest. It is found near some Hilichurls and on a table.
All Phantasmal Conches and Locations in 2.8
Immernachtreich Apokalypse Quest Details
Part III of Summertime Odyssey

Immernachtreich Apokalypse is part of the Summertime Odyssey event featuring Fischl's story in Genshin Impact. Explore more about this event in the Golden Apple Archipelago here!
Summertime Odyssey Event Guide
Immernachtreich Apokalypse Release Date
Released in Version 2.8
Immernachtreich Apokalypse was released on July 18, 2022 during the Version 2.8 update!
Version 2.8 Release Date and Patch Notes
Genshin Impact Related Guides
2.8 Archipelago Map Guides
2.8 Archipelago Puzzle Guides
2.8 Archipelago Quest Guides
| Summertime Odyssey Main Quest Guides | |||||
|---|---|---|---|---|---|
| The Golden Apple Vacation Returns! | As the Courtyard in Spring Once Appeared | ||||
| Blazin' Trails | Immernachtreich Apokalypse | ||||
| The Ancient Azure Stars | Like Rhyme and Song, the Summer Reverie | ||||
| Limited-Time World Quest Guides | |||||
| Bake-Danuki Wanderlust | Treasure Voyage | ||||
| The Final Treasure | The Misplaced Photo | ||||
| A Misplaced Conch | The Discarded Insignia | ||||
| Drama Phantasmagoria Quest Series | |||||
| Prologue | Interludes | Finale | |||
| The Treasure of the Four Skerries Quest Guides | |||||
| Treasure Clue: Minacious Isle | Treasure Clue: Broken Isle | ||||
| Treasure Clue: Twinning Isle | Treasure Clue: Pudding Isle | ||||
| Where the Treasure Dwells | |||||
| Thus Was the Work Done in Vain Quest Guides | |||||
| Secret Chamber | Ruins on the Ocean Surface | ||||
| Lake Island Notes | Hints & Sweet Madame | ||||
| Sea Salt-Crusted Key | |||||
2.8 Archipelago Event Guides
| 2.8 Archipelago Events | |
|---|---|
 Summertime Odyssey Summertime Odyssey |
 Resonating Visions Resonating Visions |
 Reminiscent Regimen Reminiscent Regimen |
 Surfpiercer Surfpiercer
|
All Genshin Impact Events

Comment
Literally i just got so mad cause of how boring this was wtf were they thinking with fischls area, the other ones have been awesome this is just monotonous and boring AF
Author
Immernachtreich Apokalypse Puzzles Guide and Conch Location
improvement survey
03/2026
improving Game8's site?

Your answers will help us to improve our website.
Note: Please be sure not to enter any kind of personal information into your response.

We hope you continue to make use of Game8.
Rankings
Gaming News
Popular Games

Genshin Impact Walkthrough & Guides Wiki

Honkai: Star Rail Walkthrough & Guides Wiki

Umamusume: Pretty Derby Walkthrough & Guides Wiki

Pokemon Pokopia Walkthrough & Guides Wiki

Resident Evil Requiem (RE9) Walkthrough & Guides Wiki

Monster Hunter Wilds Walkthrough & Guides Wiki

Wuthering Waves Walkthrough & Guides Wiki

Arknights: Endfield Walkthrough & Guides Wiki

Pokemon FireRed and LeafGreen (FRLG) Walkthrough & Guides Wiki

Pokemon TCG Pocket (PTCGP) Strategies & Guides Wiki
Recommended Games

Diablo 4: Vessel of Hatred Walkthrough & Guides Wiki

Cyberpunk 2077: Ultimate Edition Walkthrough & Guides Wiki

Fire Emblem Heroes (FEH) Walkthrough & Guides Wiki

Yu-Gi-Oh! Master Duel Walkthrough & Guides Wiki

Super Smash Bros. Ultimate Walkthrough & Guides Wiki

Pokemon Brilliant Diamond and Shining Pearl (BDSP) Walkthrough & Guides Wiki

Elden Ring Shadow of the Erdtree Walkthrough & Guides Wiki

Monster Hunter World Walkthrough & Guides Wiki

The Legend of Zelda: Tears of the Kingdom Walkthrough & Guides Wiki

Persona 3 Reload Walkthrough & Guides Wiki
All rights reserved
Copyright© 2012-2024 HoYoverse — COGNOSPHERE. All Rights Reserved.
The copyrights of videos of games used in our content and other intellectual property rights belong to the provider of the game.
The contents we provide on this site were created personally by members of the Game8 editorial department.
We refuse the right to reuse or repost content taken without our permission such as data or images to other sites.


![Monster Hunter Stories 3 Review [First Impressions] | Simply Rejuvenating](https://img.game8.co/4438641/2a31b7702bd70e78ec8efd24661dacda.jpeg/thumb)


Good to know I'm not the only one dreading this quest. The only thing more insulting than actually going with this inane drivel is the game trying to convince me it's awesome and engrossing...