Blazing Verdance Stage 2 Guide
✉ Send your thoughts in our Genshin 6.4 Patch Survey!
★ Exclusive: Dive back in time with the Meta History
◆ Hot: Version 6.4, Luna 5 Codes
◆ Builds: Varka, Flins, Skirk, Escoffier
◆ Events: Travelers' Tales, He Who Caught the Wind
◆ Future: Linnea, Version 6.5 Luna VI
Blazing Verdance is the second stage of the Chronicle of Shifting Stratagems event in Genshin Impact 5.6. See the best teams for the first and second half, how to obtain 4000 points, and all rewards for it here!
| Chronicle of Shifting Stratagems Stages | ||
|---|---|---|
 Stage 1 Stage 1 |
 Stage 2 Stage 2 |
 Stage 3 Stage 3 |
 Stage 4 Stage 4 |
 Stage 5 Stage 5 |
 Stage 6 Stage 6 |
Best Teams For Blazing Verdance
Recommended Teams For Stage 2
| First Half Teams | |||
|---|---|---|---|
|
(Featured) |
(Trial) |
|
|
|
(Featured) |
(Trial) |
|
|
|
(Featured) |
(Trial) |
|
|
| Second Half Teams | |||
|
(Featured) |
(Trial) |
|
|
|
(Featured) |
(Trial) |
|
|
|
(Featured) |
(Trial) |
|
|
While the Featured character is locked to both stages, other characters alongside the Trial character can only be used once. This means that if you use the trial character from the first half, you won't be able to use it in the second half, and vice-versa.
Bring Burning Team For The First Half
Bring any two Pyro characters to create a Burning Team Comp with Kinich and Emilie for the first half, which also compliments the two trial characters as both their overall kits thrive with the burning reactions.
Preferably, you want to bring off-field Sub DPSs, like Mavuika, Xiangling, or Thoma, to pair up with Kinich as he needs to have more screen time than the rest of your team to deal damage.
Bring Burgeon Team For The Second Half
For the second half, you need to bring a Hydro character or a Dendro character to form a Burgeon Team Comp with Kinich. You will also need a healer as you can also take damage from the exploding bloom cores.
Recommended characters would be Yelan, Xingqiu, or Furina to further boost your team's overall DMG. For the healer, they could be like Baizhu, Nahida, or Yaoyao.
Blazing Verdance Stage 2 Strategy
How to Obtain 4000 Points
| Stage Difficulty | Score Multiplier | Opponent Level |
|---|---|---|
| Normal | x1 | Lv. 40 |
| Hard | x4 | Lv. 70 |
| Very Hard | x10 | Lv. 90 |
| Fearless | x20 | Lv. 95 |
| Dire | x40 | Lv. 100 |
Choose Hard, Very Hard, or Fearless Difficulty
4,000 points can be obtained in Stage 2 by choosing either Hard, Very Hard, or Fearless difficulty, where enemies are fairly easy to defeat.
Hard difficulty is recommended for players who don't have enough or well-built characters yet. In contrast, Very Hard and Fearless difficulty is recommended for players who have a decent amount of characters and multiple team comps.
16,000 Points is Strictly for Well Invested Teams
The 16,000 points can only be achieved in Dire difficulty with a well invested team, having multiple character constellations, signature weapons, and high tier artifacts and builds.
Blazing Verdance First Half Strategy
Break Void Ward with Nightsoul Attacks
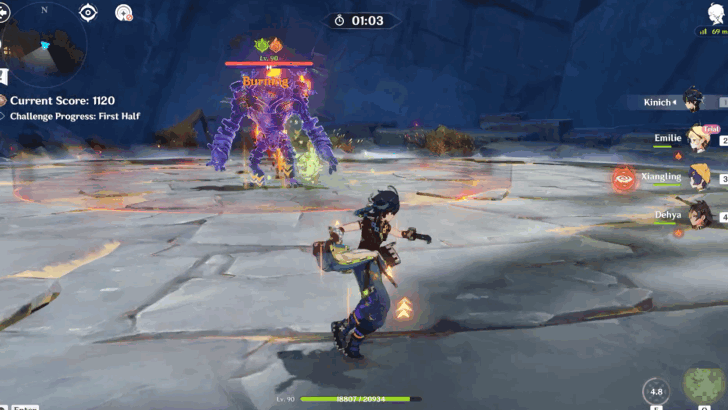
In the first half, you will encounter the Tenerous Mimiflora, which will have a Void Ward shield once it spawns. You can break it easily by using Nightsoul Attacks or a high volume of elemental attacks.
Nightsoul Attacks only come from Natlan characters and Kinich is the best option for this enemy, as he is from Natlan and the trial character for this stage.
Nightsoul's Blessing and Burst Guide
Apply Nightsoul Attacks for Secret Source Automaton
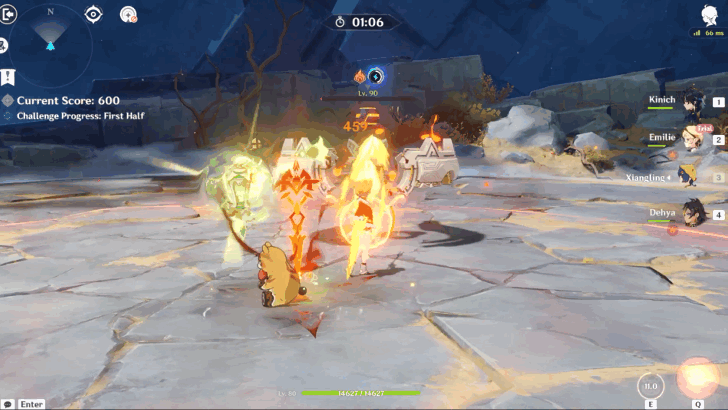
The Secret Source Automaton: Hunter-Seeker can be stunned by hitting it with Nightsoul Attacks. This is a good way to defeat it much faster, as it has a high amount of HP.
Once it absorbs enough Nightsoul Attacks, it will release a powerful attack that can be easily dodged and become immobilized for a short amount of time.
Nightsoul's Blessing and Burst Guide
Use Pyro Attacks Against Eroding Avatar of Lava
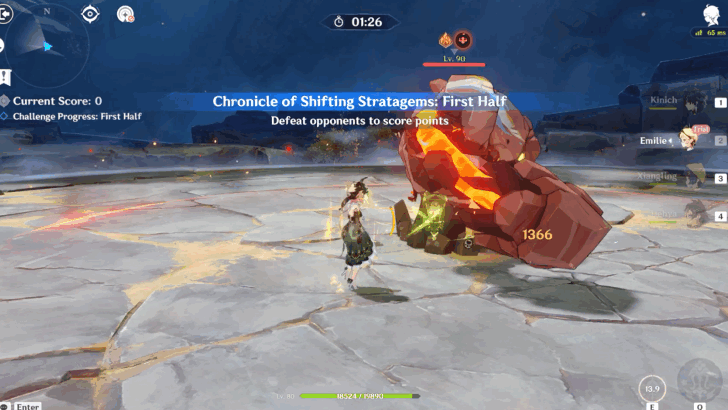
The Eroding Avatar of Lava absorbs Pyro attacks, but they also kill themselves when they absorb too much of it. A good strategy against them is to use Pyro attacks first, then hit them with Dendro to apply a Burning reaction.
This will cause an immense amount of damage to them as they are burning from the Pyro attacks and the Burning reaction at the same time.
Eroding Avatar of Lava Enemy Guide
Blazing Verdance Second Half Strategy
Defeat Wayob's Shield with Nightsoul Attacks
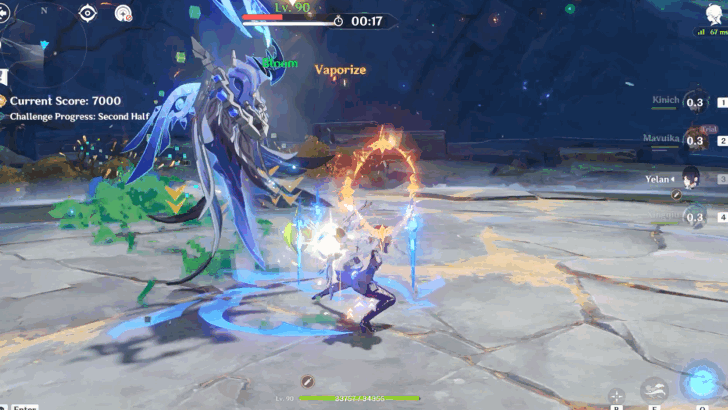
Enemies in the second half are easier to defeat than in the first half, except for the Wayob. It can summon a shield that can be broken easily by Nightsoul Attacks or Elemental Attacks.
However, once it has a shield, it will absorb all of your Elemental Energy. Breaking its shield will get you all of your Elemental Energy back. But if you fail to do so, it will turn it into an Elemental Shield.
Nightsoul's Blessing and Burst Guide
Blazing Verdance Stage Details
Stage 2 Trial Characters
| First Half Trial Characters | Elements | |
|---|---|---|
 Kinich Kinich
|
 Emilie Emilie
|
|
| Second Half Trial Characters | Elements | |
 Kinich Kinich
|
 Mavuika Mavuika
|
|
The trial characters will always be at level 80 and have the same stats regardless of the stage difficulty.
Stage 2 Buffs
| Stage 2 Buffs | After Kinich's Elemental Skill hits an opponent, his CRIT DMG will be increased by 30%. This effect lasts for 6s and stacks up to 3 times. |
|---|---|
| Challenge Buff | First Half: After a character triggers Burning on an opponent, the Dendro RES and Pyro RES of that opponent will be reduced by 40% for 5s. |
| Second Half: After a character triggers Bloom/Burgeon on an opponent, all party members will gain 50 Elemental Mastery, and their Elemental Skill and Burst DMG will be increased by 40% for 5s. |
Stage 2 Enemies
| Blazing Verdance Enemies |
|---|
|
First Half:
Second Half: |
Part of the Chronicle of Shifting Stratagems Event
Blazing Verdance is the 2nd stage of the Chronicle of Shifting Stratagems Event, where players must face and defeat powerful opponents as many times as they can.
Chronicle of Shifting Stratagems Event Guide
Blazing Verdance Rewards
All Chronicle of Shifting Stratagems Stage 2 Rewards
| Objective | Rewards |
|---|---|
| Obtain 1000 points |
|
| Obtain 2000 points |
|
| Obtain 4000 points |
|
| Obtain 8000 points |
|
| Obtain 16,000 points |
|
Genshin Impact Related Guides

Chronicle of Shifting Stratagems
Chronicle of Shifting Stratagems Stage Guides
| Chronicle of Shifting Stratagems Stages | |
|---|---|
 Heaven-Cast Thunder Heaven-Cast Thunder |
 Blazing Verdance Blazing Verdance |
 All-Binding Frost All-Binding Frost |
 All-Invigorating Flow All-Invigorating Flow |
 Boltborne Blitz Boltborne Blitz |
 Snowrending Sun Snowrending Sun |
Other Events and Schedule

Comment
Thanks for only listing Mavuika teams for side 2, really helpful for people that don't have her.
Author
Blazing Verdance Stage 2 Guide
improvement survey
03/2026
improving Game8's site?

Your answers will help us to improve our website.
Note: Please be sure not to enter any kind of personal information into your response.

We hope you continue to make use of Game8.
Rankings
- We could not find the message board you were looking for.
Gaming News
Popular Games

Genshin Impact Walkthrough & Guides Wiki

Honkai: Star Rail Walkthrough & Guides Wiki

Umamusume: Pretty Derby Walkthrough & Guides Wiki

Pokemon Pokopia Walkthrough & Guides Wiki

Resident Evil Requiem (RE9) Walkthrough & Guides Wiki

Monster Hunter Wilds Walkthrough & Guides Wiki

Wuthering Waves Walkthrough & Guides Wiki

Arknights: Endfield Walkthrough & Guides Wiki

Pokemon FireRed and LeafGreen (FRLG) Walkthrough & Guides Wiki

Pokemon TCG Pocket (PTCGP) Strategies & Guides Wiki
Recommended Games

Diablo 4: Vessel of Hatred Walkthrough & Guides Wiki

Cyberpunk 2077: Ultimate Edition Walkthrough & Guides Wiki

Fire Emblem Heroes (FEH) Walkthrough & Guides Wiki

Yu-Gi-Oh! Master Duel Walkthrough & Guides Wiki

Super Smash Bros. Ultimate Walkthrough & Guides Wiki

Pokemon Brilliant Diamond and Shining Pearl (BDSP) Walkthrough & Guides Wiki

Elden Ring Shadow of the Erdtree Walkthrough & Guides Wiki

Monster Hunter World Walkthrough & Guides Wiki

The Legend of Zelda: Tears of the Kingdom Walkthrough & Guides Wiki

Persona 3 Reload Walkthrough & Guides Wiki
All rights reserved
Copyright© 2012-2024 HoYoverse — COGNOSPHERE. All Rights Reserved.
The copyrights of videos of games used in our content and other intellectual property rights belong to the provider of the game.
The contents we provide on this site were created personally by members of the Game8 editorial department.
We refuse the right to reuse or repost content taken without our permission such as data or images to other sites.


![Monster Hunter Stories 3 Review [First Impressions] | Simply Rejuvenating](https://img.game8.co/4438641/2a31b7702bd70e78ec8efd24661dacda.jpeg/thumb)


she is a trial character there :) (only on second part) you can take her even if you don't have her