Lauma Best Builds and Teams
★ Exclusive: See results of the February 2026 Survey
◆ Hot: Version 6.4, 6.4 Codes, Version 6.5 Livestream
◆ Builds: Varka, Flins, Skirk, Escoffier
◆ Events: Operation Stronghold Defense
◆ Upcoming: Version 6.5, Linnea
Lauma is a 5-star Dendro Catalyst user in Genshin Impact that best functions as a Dendro Support! See Lauma's best builds, artifacts and weapons, team comps, and other information about her here!
| Lauma's Character Guides | |||
|---|---|---|---|
|
|
|
|
|
List of Contents
Lauma Rating and Info
Character Profile
| Lauma | ||
|---|---|---|
 |
Rating | |
| Rarity | ||
| Element | ||
| Weapon | ||
| Voice Actors |
Alexandra Guelff (EN)
Houko Kuwashima (JP) |
|
Tier List Rankings
| Main DPS | Sub-DPS | Support | Exploration |
|---|---|---|---|
| - |
|
|
|
Tier Rating
|
Directly replacing Nahida on both Sub-DPS and Support roles for Bloom, Hyperbloom, or Burgeon reactions, Lauma provides the resurgence of Dendro the element has been sorely lacking as of late. Lauma provides off-field Dendro application, Dendro and Hydro shred, and also enables the Lunar-Bloom reaction, which is basically an AoE nuke. While not as fancy as Lunar-Charged, the damage Lunar-Blooms can bring is no joke. We're expecting Lauma to be the Support to someone catering for the Lunar-Bloom reaction in the future, and because she drastically improves characters focused on Dendro reactions like Nilou, we're placing her at SS immediately. |
Character Tier List | Best Characters
Lauma's Stats
| Stat | Base Value |
|---|---|
| HP | 2151 |
| ATK | 51 |
| DEF | 135 |
| Elemental Mastery | 0 |
| Stat | Max Value |
|---|---|
| HP | 10654 |
| ATK | 255 |
| DEF | 669 |
| Elemental Mastery | 115 |
Base Stat Calculations
 | Stats indicated above are obtained from Lauma's base values. These numbers also exclude the character's equipped weapon, artifacts, talents, or other passive effects that are not innate to the character. |
|---|---|
 | All characters start with 5% CRIT Rate, 50% CRIT DMG, 100% Energy Recharge, 0 Elemental Mastery, 0% Healing Bonus, and 0% Elemental DMG bonus before any additional stats are applied. The table above includes such values. |
 | The Level 20 stats indicated for this character are calculated before their first ascension. |
Lauma's Ascension and Talent Material Summary
| All Ascension Materials Needed |
|---|
|
|
| All Talent Materials Needed |
|
|
Lauma Ascension and Talent Materials
Lauma Strengths and Weaknesses
| Strengths | |||
|---|---|---|---|
|
• Extremely powerful support for Bloom and Lunar-Bloom reactions, boosting team damage significantly. • Provides party-wide buffs through her Moonsign passive, including the ability for Bloom-reactions to CRIT. • Strong synergy with units like Nilou, allowing multiple Bloom procs without interference. |
|||
| Weaknesses | |||
|
• No support against regular Bloom or Burgeon recoil damage which will have you require a sustain. • Having more than one Nod-Krai character disables her Nascent Gleam Moonsign for regular Blooms, which means she can't run Aino or future characters if you wish to support regular Bloom reactions. • Can quickly lose Pale Hymn stacks if Blooms hit multiple enemies, leading to inconsistent output. |
Lauma Best Builds
Lauma Support Builds
Lauma's main priority is to get either her RES Shred potential or Reaction damage up, which is why it is imperative to focus on building with Deepwood Memories or Silken Moon's Serenade in mind as she will be functioning in reaction teams.
Look to pick up as much Elemental Mastery as you can to increase Lauma's reaction damage, while picking up an EM weapon to further this boost.
Dendro Debuffer/Support
| Best Weapon | |
|---|---|
| Replacement Weapons |
3.
|
| Best Artifacts | |
| Artifact Main Stats | |
| Artifact Sub Stats | Elemental Mastery, CRIT Rate, CRIT DMG, Energy Recharge |
| Sample Teams | |
Generally speaking, Lauma benefits from having as much Elemental Mastery while holding onto a supportive set like Deepwood Memories, as the team will greatly benefit from Lauma's enhanced reaction damage buffs and Dendro shred.
If fully kitting out Lauma for her more specialized Lunar Reaction role, then look into either Silken Moon's Serenade or Night of the Sky's Unveiling as set alternatives.
* Starcaller's Watch is only useful for its EM main stat, but the weapon effect does not necessarily work with Lauma.
Lauma Goal Stat Values
| Stat | Goal Value |
|---|---|
| EM | 1000 |
| Energy Recharge | 160 - 200% |
| CRIT Rate | 40% ~ 50% |
| CRIT DMG | 100% or above |
Lauma wants to first max out her Elemental Mastery to maximize her reaction DMG and buffs, then her Energy Recharge for more convenient Burst uptime.
The rest of her stats can go into both CRIT Rate and CRIT DMG, taking precedence over Energy Recharge if she will be used as a pseudo-DPS.
Lauma Talent Priority
| 1st | 2nd | 3rd |
|---|---|---|
| Elemental Skill | Elemental Burst | Normal Attack |
Lauma's kit revolves around her Elemental Skill, so it should be prioritized first, with her Elemental Burst coming in second to increase the buff it gives.
Normal Attacks are the least priority, but can still be beneficial if you plan to use Lauma as an On-field Driver.
Lauma Best Artifacts
Lauma Artifact Rankings
Deepwood Memories is Lauma's generally best choice for its easy-access Dendro RES shred. If specializing however, look for the new Nod-Krai artifact sets with either Silken Moon's Serenade as a supportive set, or Night of the Sky's Unveiling for DPS.
Best Artifacts Ranked
| Artifact | Artifact Bonuses | |
|---|---|---|
| 1st |
|
2-PC: Dendro DMG Bonus +15% 4-PC: After Elemental Skills or Bursts hit opponents, the targets' Dendro RES will be decreased by 30% for 8s. This effect can be triggered even if the equipping character is not on the field. |
| 2nd |
|
2-PC: Energy Recharge +20% 4-PC: When dealing Elemental DMG, gain the Gleaming Moon: Devotion effect for 8s: Increases all party members' Elemental Mastery by 60/120 when the party's Moonsign is Nascent Gleam/Ascendant Gleam. The equipping character can trigger this effect while off-field. All party members' Lunar Reaction DMG is increased by 10% for each different Gleaming Moon effect that party members have. Effects from Gleaming Moon cannot stack. |
| 2nd |
|
2-PC: Elemental Mastery +80 4-PC: When nearby party members trigger Lunar Reactions, if the equipping character is on the field, gain the Gleaming Moon: Intent effect for 4s: Increases CRIT Rate by 15%/30% when the party's Moonsign is Nascent/Ascendant Gleam. All party members' Lunar Reaction DMG is increased by 10% for each different Gleaming Moon effect that party members have. Effects from Gleaming Moon cannot stack. |
Best 4-Star Artifact for Lauma
| Artifact | Artifact Bonuses |
|---|---|
 Instructor Instructor
|
2-PC: Increases Elemental Mastery by 80. 4-PC: Upon triggering an Elemental Reaction, increases all party members' Elemental Mastery by 120 for 8s. |
List of Artifacts and Set Bonuses
Lauma Best Weapons
Lauma Weapon Ranking
Nightweaver's Looking Glass is Lauma's overall best weapon as it will synergize fully with her kit by maximizing her Lunar-Bloom and team Bloom damage.
For F2Ps, Etherlight Spindlelute which you can get at R5 from the Clink Clank Clash event in Version Luna I is generally the best due to its Energy Recharge. If you're looking for a bit more damage, the craftable Blackmarrow Lantern is the next best weapon.
Otherwise, other EM weapons like A Thousand Floating Dreams, Sunny Morning Sleep-In, or even Sacrificial Fragments are great alternatives as EM stat-sticks, which is already more than enough to fuel Lauma's passives.
Best Weapons for Lauma
| Weapon | Weapon Information | |
|---|---|---|
| 1st |
 Nightweaver's Looking Glass Nightweaver's Looking Glass
|
Base ATK: 542 Bonus Stat: Elemental Mastery 265 Skill Effect: When the equipping character's Elemental Skill deals Hydro or Dendro DMG, Elemental Mastery is increased by 60 for 4.5s. When nearby party members trigger Lunar-Bloom reactions, the equipping character's Elemental Mastery is increased by 60 for 10s. When both effects are triggered, all nearby party members' Bloom DMG is increased by 120%, their Hyperbloom and Burgeon DMG is increased by 80%, and their Lunar-Bloom DMG is increased by 40%. This effect cannot stack. |
| 2nd |
 A Thousand Floating Dreams A Thousand Floating Dreams
|
Base ATK: 542 Bonus Stat: Elemental Mastery 265 Skill Effect: Equipping Character gains buffs based on other party members' elemental type. If their elemental type is the same as the equipping character, Elemental Mastery is increased by 32. If not, the equipping character's elemental DMG Bonus is increased by 10%. Each effect can stack by a maximum of 3. All nearby party members will also gain an additional 40 Elemental Mastery. |
| 3rd |
 Etherlight Spindlelute Etherlight Spindlelute
|
Base ATK: 510 Bonus Stat: Energy Recharge 45.9% Skill Effect: For 20s after using an Elemental Skill, the equipping character's Elemental Mastery is increased by 100. |
Best Free-to-Play Weapon for Lauma
| Weapon | Weapon Information |
|---|---|
 Etherlight Spindlelute Etherlight Spindlelute
|
Base ATK: 510 Bonus Stat: Energy Recharge 45.9% Skill Effect: For 20s after using an Elemental Skill, the equipping character's Elemental Mastery is increased by 100. |
 Blackmarrow Lantern Blackmarrow Lantern
|
Base ATK: 454 Bonus Stat: Elemental Mastery 221 Skill Effect: Bloom DMG is increased by 48%, and Lunar-Bloom DMG is increased by 12%. Moonsign: Ascendant Gleam: Lunar-Bloom DMG is increased by an additional 12%. |
All Recommended Weapons for Lauma
| Recommended Weapons | How to Get |
|---|---|
| Gacha | |
| Gacha | |
| Gacha | |
| Gacha | |
| Crafted | |
| Gacha | |
| Crafted | |
| Gacha | |
Lauma Best Team Comps
Lauma Teams and Building
Lauma excels as a Dendro support and sub-DPS with her Elemental Skill applying consistent Dendro damage and Dendro and Hydro RES shred. This lets her significantly boost team-wide Bloom damage while also dealing solid personal damage.
If she is paired with another Dendro unit, she can focus on her damage, but will otherwise function as the sole Dendro support unit if not paired with a strong Dendro applicator like Nahida.
Notable Teammates
| Character | Explanation |
|---|---|
|
|
DPS Nefer's Lunar-Bloom-centric playstyle fits especially well as a conduit for Lauma's buffs, as pairing these two together can skyrocket them to damage numbers that neither can achieve alone, making Nefer one of Lauma's best teammates. |
|
|
Support Columbina enables empowered Lunar damage to most teams she participates in, especially when Ascendant Gleam is enabled. Lauma greatly benefits from this as Lunar-Bloom gains more procs and deals more damage. |
|
|
Sub-DPS Nilou enables more powerful Lunar-Bloom attacks with Lauma, making her one of Lauma's best teammates when it comes to Bloom and Lunar-Bloom in general. |
|
|
DPS Neuvillette carries strong Hydro application that lets him match Lauma's Dendro application, triggering and enhancing Lunar-Bloom whenever possible. |
|
|
Sub-DPS Both Lauma and Furina can buff each other and enable Lunar-Bloom, even while Off-Field. If Lauma is at C1, this synergy further expands due to Lauma's healing. |
|
|
Sub-DPS Lauma and Yelan can benefit each other with Lunar-reaction damage and Elemental DMG buffs. Yelan is more of a DPS-oriented choice as her buffs directly impact the active character. |
|
|
Sub-DPS Xingqiu brings solid Hydro DMG and application that can help facilitate Lunar-Bloom. Xingqiu also has some form of healing that can help mitigate some of Bloom's damage. |
|
|
Sub-DPS/Support As a Catalyst user, Kokomi is able to dish out heavy Hydro application more than most due to her multiple sources, topping it off with healing that lets her sustain the team. |
|
|
Sub-DPS Nahida supports the team by functioning as a second Dendro unit to increase and complement Lauma's Dendro application. |
|
|
Support Baizhu brings Dendro application, shielding and healing, as well as being able to function as an On-Field driver, making him a good secondary Dendro unit. |
|
|
DPS Alhaitham is a more traditional On-Field Dendro DPS that is able to keep up Dendro uptime by simply dealing damage. He functions well along with Lauma due to the latter's Dendro RES shred, enabling his damage even more. |
|
|
DPS Kaveh's on-demand Bloom core detonation gives him the option of being an On-Field Dendro driver, along with being able to heal off of Bloom cores instead of taking damage from them. |
|
|
Sub-DPS Slotting Ineffa along with Lauma and another Hydro unit enables Lunar-Bloom, Lunar-Charge, and Hyperbloom. This comes at the cost of potentially needing both Dendro and Hydro application to maintain reaction uptime. |
|
|
Sub-DPS The Raiden Shogun functions mostly as a Hyperbloom trigger, being able to function as the sole Electro unit in these teams due to her highly-competent Electro application. |
|
|
DPS With Mavuika, Lauma and her Hydro teammates can enjoy Burgeon as an alternative team style to Lunar-Bloom. With enough Hydro application, Mavuika can also potentially trigger Vaporize off of them. |
|
|
Sub-DPS Similar to Mavuika, Thoma functions as a Burgeon trigger when placed with Lauma. Unlike Mavuika however, Thoma only functions as a Burgeon trigger and not as a proper Pyro DPS. |
Lauma Bloom Team
| Support | Main DPS/ Driver |
Sub-DPS/ Support |
Support |
|---|---|---|---|
|
|
|
|
|
|
|
|
|
|
|
|
|
|
|
|
|
|
|
|
Since Lauma has strong and frequent Dendro application, a dedicated Lunar-Bloom DPS like Nefer or someone like Nilou can allow them to benefit from each other due to how much they amplify the other's damage.
The next two slots need to be filled in by another Dendro unit like Nahida and Hydro unit like Columbina or Kokomi respectively in order to buff bountiful core damage even more, as well as increase the frequency of bountiful cores.
Lauma Hyperbloom Teams
| Support | Main DPS/ Driver |
Sub-DPS/ Support |
Support |
|---|---|---|---|
|
|
|
|
|
|
|
|
|
|
|
|
|
|
|
Lauma is also a prime candidate to act as a Support, Debuffer or On-field DPS for Hyperbloom teams with her Elemental Skill, especially when coupled with a Lunar-Charged support like Ineffa and strong hydro application units like Neuvillette.
Lauma Burgeon Teams
| Support | Main DPS/ Driver |
Sub-DPS/ Support |
Support |
|---|---|---|---|
|
|
|
|
|
|
|
|
|
|
Lauma can also function as a burgeon enabler by generating bloom cores for the Pyro trigger to detonate. In this case, a burgeon Driver like Thoma can benefit from Lauma's frequent Bloom core generation.
Lauma Constellations
| Cerva Nivea |
|---|
 |
Constellation and Effects
| Lauma's Constellations | |
|---|---|
| C1 |
"O Lips, Weave Me Songs and Psalms" After Lauma uses her Elemental Skill Runo: Dawnless Rest of Karsikko or her Elemental Burst Runo: All Hearts Become the Beating Moon, she will gain Threads of Life for 20s. During this time, when nearby party members trigger Lunar-Bloom reactions, nearby active characters will recover HP equal to 500% of Lauma's Elemental Mastery. This effect can be triggered once every 1.9s. Additionally, the Stamina cost for Lauma's Spirit Envoy Form will be reduced by 40%, and its Max Duration will be extended by 5s. |
| C2 |
"Twine Warnings and Tales From the North" The Elemental Burst Runo: All Hearts Become the Beating Moon is enhanced: · Pale Hymn effects are increased: All nearby party members' Bloom, Hyperbloom, and Burgeon DMG is further increased by 500% of Lauma's Elemental Mastery, and their Lunar-Bloom DMG is further increased by 400% of Lauma's Elemental Mastery. Moonsign: Ascendant Gleam: All nearby party members' Lunar-Bloom DMG is increased by 40%. |
| C3 |
"Seek Not to Tread the Sly Fox's Path" Increases the Level of Runo: All Hearts Become the Beating Moon by 3. Maximum upgrade level is 15. |
| C4 |
"Nor Yearn for the Great Bear's Might" When attacks from the Frostgrove Sanctuary summoned by her Elemental Skill Runo: Dawnless Rest of Karsikko hit opponents, Lauma will regain 4 Elemental Energy. This effect can be triggered once every 5s. |
| C5 |
"If Truth May Be Subject to Witness" Increases the Level of Runo: Dawnless Rest of Karsikko by 3. Maximum upgrade level is 15. |
| C6 |
"I Offer Blood and Tears to the Moonlight" When the Frostgrove Sanctuary attacks opponents, it will deal 1 additional instance of AoE Dendro DMG equal to 185% of Lauma's Elemental Mastery. This DMG is considered Lunar-Bloom DMG. This instance of DMG will not consume any Pale Hymn stacks and will provide Lauma with 2 stacks of Pale Hymn, as well as refreshing the duration of Pale Hymn stacks gained in this manner. This effect can occur up to 8 times during each Frostgrove Sanctuary. When using the Elemental Skill Runo: Dawnless Rest of Karsikko, all Pale Hymn stacks gained in this manner will be removed. Additionally, when Lauma uses a Normal Attack while she has Pale Hymn stacks, she will consume 1 stack to convert this to deal Dendro DMG equal to 150% of her Elemental Mastery. This DMG is considered Lunar-Bloom DMG. Moonsign: Ascendant Gleam: All nearby party members' Lunar-Bloom DMG is elevated by 25%. |
Best Constellation Rating and Explanation
| Rating | Constellation Effect / Merits | |
|---|---|---|
| C1 | ★★☆ |
• Lauma’s Skill or Burst grants Threads of Life, healing active characters when Lunar-Blooms trigger based on her Elemental Mastery. • During this effect, her Spirit Envoy Form costs less stamina and lasts longer, making it easier to maintain uptime. |
| C2 | ★★★ |
• Lauma’s Burst boosts all nearby party members’ Bloom, Hyperbloom, and Burgeon DMG based on her Elemental Mastery. • It also further increases Lunar-Bloom DMG, making her a strong reaction support in Dendro teams. |
| C4 | ★★☆ | • Lauma regains 4 Elemental Energy every 5s when her Elemental Skill hits an opponent. |
C2 Provides the Highest Benefits
Lauma's C2 gives her the highest supportive damage potential by increasing reaction damage by 500% of her Elemental Mastery.
To supplement this, Lauma's own Lunar-Bloom DMG is increased as well, giving her the ability to become more of a selfish DPS.
Lauma Talents and How to Use
Lauma's Rotations
General Gameplay Rotation
| Standard Rotation | Elemental Burst → Hold Elemental Skill → Swap to Hydro teammates to trigger Blooms → Repeat |
|---|
This combo keeps Lauma’s Frostgrove Sanctuary active while steadily building Verdant Dew stacks to convert into Lunar-Bloom damage.
Her Elemental Burst provides Pale Hymn buffs and RES shred, boosting Bloom, Hyperbloom, and Burgeon reaction damage for the entire team.
Pale Hymn Mechanics
Lauma’s abilities revolve around the Pale Hymn mechanic. This effect grants stacks when she uses her Burst or consumes Verdant Dew, which are then consumed whenever Bloom-related reactions are triggered.
Unlike other characters, Lauma does not focus on personal damage. Instead, her Pale Hymn stacks are used as a resource to greatly increase the damage of Bloom, Hyperbloom, Burgeon, and Lunar-Bloom reactions based on her Elemental Mastery. This makes her a powerful reaction buffer who amplifies the team’s overall damage output.
Normal Attack
| Peregrination of Linnunrata |
|---|
| Performs up to 3 attacks, dealing Dendro DMG.
Charge Attack Lauma transforms into an envoy of the tranquil forest and charges forward. After exiting the envoy state, the transformation will enter cooldown, during which Charged Attacks will deal AoE Dendro DMG to the front. |
Elemental Skill
| Runo: Dawnless Rest of Karsikko |
|---|
| • Summons a Frostgrove Sanctuary, which deals sustained Dendro DMG to opponents in the area and lowers their Dendro and Hydro RES. • Produces different effects depending on whether the skill is Tapped or Held. Tap: Deals AoE Dendro DMG. Hold: • Consumes all Verdant Dew to deal one instance of AoE Dendro DMG and one instance of AoE Dendro DMG considered as Lunar-Bloom DMG. • Each Verdant Dew consumed grants 1 stack of Moon Song, which can stack up to 3 times. |
Elemental Burst
| Runo: All Hearts Become the Beating Moon |
|---|
| • Using this skill grants 18 stacks of Pale Hymn and provides related enhancements.
• When Lauma uses her Elemental Burst while possessing Moon Song, or when she gains Moon Song within 15s of using her Elemental Burst, all of the available Moon Song are consumed and converted to Pale Hymn. Each Moon Song grants Lauma 6 Pale Hymn stacks. • This effect can only be triggered once for each Elemental Burst used, including the 15 seconds following its use. |
Pale Hymn Stack System
Using her Elemental Burst grants Lauma 18 Pale Hymn stacks. Each stack empowers Bloom, Hyperbloom, and Burgeon ticks with bonus Dendro DMG.
Generating Moon Songs (by holding Skill after Lunar Blooms) converts into more Pale Hymns, extending her uptime. At max, she can reach 36 stacks, turning her into a long-lasting sub-DPS.
Manage these stacks wisely to maximize team damage.
Managing Pale Hymn Stacks
Lauma’s strength depends on balancing her Pale Hymn stacks, using them too early wastes potential damage, while holding them too long risks losing uptime. Properly managing her rotations lets her team capitalize on her buffs without running dry.
Passive Talent 1
| Light for the Frosty Night |
|---|
| Depending on the party's Moonsign, different enhancements will take effect within 20s after Lauma uses her Elemental Skill Runo: Dawnless Rest of Karsikko. Enhancements provided by different Moonsign levels cannot stack.
Bloom, Hyperbloom, and Burgeon DMG dealt by all nearby party members can score CRIT hits, with CRIT Rate fixed at 15%, and CRIT DMG fixed at 100%. CRIT Rate from this effect stacks with CRIT Rate from similar effects that allow these Elemental Reactions to CRIT. All nearby party members' Lunar-Bloom DMG CRIT Rate +10%, CRIT DMG +20%. |
Moonsign's Teamwide Buffs
After using her Elemental Skill, Lauma grants a 20s Moonsign buff based on team setup:
• Nascent Gleam: Bloom, Hyperbloom, and Burgeon can CRIT with 15% CRIT Rate and 100% CRIT DMG.
• Ascendant Gleam: Increases Lunar-Bloom CRIT Rate by 10% and CRIT DMG by 20%.
Passive Talent 2
| Cleansing for the Spring |
|---|
| Every point of Elemental Mastery that Lauma has will grant her the following effects:
• Increases Elemental Skill DMG by 0.04%. Up to a maximum of 32% can be gained this way. • Reduces the cooldown of Charged Attack: Spirit Envoy Metamorphosis by 0.02%. Up to a maximum of 20% cooldown can be reduced this way. |
Passive Talent 3
| Moonsign Benediction: Nature's Chorus |
|---|
| When a party member triggers a Bloom reaction, it will be converted into the Lunar-Bloom reaction, with every point of Elemental Mastery that Lauma has increasing the Lunar-Bloom's Base DMG by 0.0175%, up to a maximum of 14% in total. In addition, when Lauma is in the party, the party's Moonsign will increase by 1 level. |
Bread and Butter
Lauma’s gameplay revolves around triggering Bloom reactions and converting them into Lunar Blooms, which scale with her Elemental Mastery. By rotating her Elemental Skill, Burst, and generating Pale Hymn stacks, she turns team reactions into devastating AoE Dendro damage.
Use her Bloom empowerment to constantly fuel her buffs while cycling through allies for reactions.
Lunar Bloom Empowerment
When Lauma is in the team, any Bloom reaction triggered by allies will convert into Lunar Blooms, dealing extra AoE Dendro damage based on her Elemental Mastery.
This allows her to act as a reaction driver while enabling her team’s Hydro and Dendro units to keep Bloom chains flowing.
Passive Talent 4
| Prayers for The Forest |
|---|
| Displays the location of nearby resources unique to Nod-Krai on the mini-map. Additionally, Lauma appears to have a special affinity with some small animals affected by kuuvahki... |
Lauma Ascension and Talent Materials
Lauma Ascension Materials
Below are the ascension materials needed for Lauma:
| Lv.20→Lv.40 |
|
|---|---|
| Lv.40→Lv.50 |
|
| Lv.50→Lv.60 |
|
| Lv.60→Lv.70 |
|
| Lv.70→Lv.80 |
|
| Lv.80→Lv.90 |
|
Lauma Talent Level-Up Materials
Below are the talent materials needed for Lauma:
| Daily Domain Drops | Enemy Drops | Weekly Boss Drops |
|---|---|---|
| Mon/Thu/Sun |
Fatui Oprichniki |
Lord of Eroded Primal Fire Boss Challenge Reward |
|
|
|
|
|
|
|
How to Get Lauma
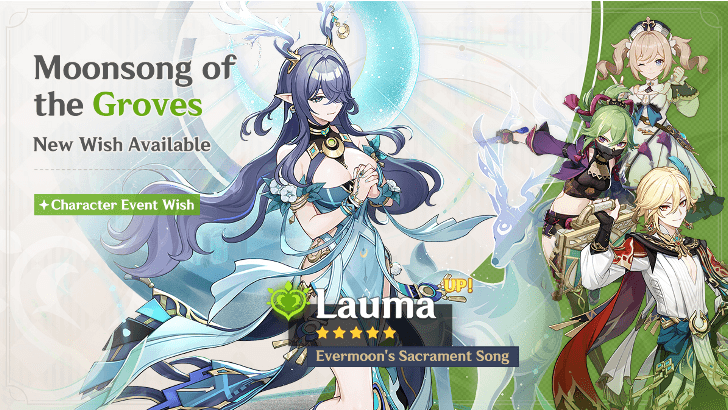
Wish From Her Version 6.0 Luna I Phase 1 Banner
|
|
| Banner Status | Inactive |
|---|---|
Lauma was available in her own debut banner during Phase 1 of Version 6.0 from September 10, 2025 until September 30, 2025. Alongside her was Nahida's rerun banner!
The 4-star characters Barbara, Kaveh, and Shinobu also received rate-ups during this period.
Lauma Rerun Dates and Characters
Lauma's In-Game Information
Lauma Character Profile
| Nation | |
|---|---|
| Title | Evermoon's Sacrament Song |
| Vision | |
| Gender | Female |
| Race |
|
| Height | Tall Girl |
| Faction | Frostmoon Scions |
| Constellation | Cerva Nivea |
| Birthday | March 1 |
| Special Dish | Whisper in the Woods |
| Story Quest |
|
Lauma Voicelines
Thoughts about Lauma
| Character | In-Game Thoughts |
|---|---|
 Aino Aino
|
You like her antlers? I could make you a pair just like them. Oh, and how about I make them glow and grow flowers? Or maybe shoot fireworks? It'd be a piece of cake for me. ...The Frostmoon Scions wouldn't take kindly to that? Okay fine, then I'll make some for them, too. |
 Columbina Columbina
|
Aiming a beam of moonlight at Lauma's head makes her antlers grow taller, and if you get the angle just right, you can even get them to stab a piece of fruit that's too high to reach... Hmm? What then? Oh, um... You get scolded. |
 Flins Flins
|
Hyperborea, the bygone golden elysium... That is what comes to mind whenever I see her. Her ancient and noble lineage are no doubt as heavy a burden to bear as the stunning antlers she wears on her head, and yet she takes it all in her stride. I commend her resilience and courage in doing so. |
 Illuga Illuga
|
Our friendship with the Frostmoon Scions goes all the way back to the days of the Torchforger himself. Truth is, though, even if it didn't, I'd still have nothing but admiration for the current Moonchanter. She's kind, gentle, and I end up learning something new every time I visit. In times like these, her job can't be any easier than ours — yet somehow, she always manages to stay so serene. I'd bet that she's been shouldering a lot more than she lets on. |
 Ineffa Ineffa
|
Lauma is the Moonchant Envoy of the Frostmoon Scions. Reviews by her people indicate that she is a wise and holy figure, well-respected in the community. The Frostmoon Scions worship the moon goddess... I wonder if there is any connection between the Moon Goddess and the existence of the Moon Wheel? |
 Jahoda Jahoda
|
Miss Lauma? Uhm... I don't really know too much about her, but I know she's kind of a big deal, and she's powerful... and she can talk to animals... Thinking about it, she must have eyes and furry little ears all over Hiisi Island. No wonder treasure hunters don't go "looking for treasure" there, you'd be walking straight into a trap... |
 Nefer Nefer
|
Our pure and merciful Lady... So kind, so full of compassion for all. It's no wonder that people are drawn to her. Even the looal wildlife can't help but nuzzle up against her hand as they walk by... But don't get too close, or you might just wake up one day to find she's charmed you into embracing a whole new religion... Oh, I see... She's won you over already, hasn't she? |
Lauma's Thoughts about Others
| Character | In-Game Thoughts |
|---|---|
 Aino Aino
|
About Aino She is a very precious child, but fate has not given her an easy ride. Her inventions have helped many people — Nod-Krai should feel honored to count her as one of their own. If she ever wished to come and live among the Frostmoon Scions, I would make sure that all her nutritional needs are met, starting with plenty of fresh fruit, vegetables, and spring water. |
 Columbina Columbina
|
About Kuutar No one teaches a newborn god how to live in harmony with their followers. She must have had a very difficult past... In the hopes of achieving some sort of reconciliation, I made a request of her that must have seemed a little rude. She claims that she prefers living alone, but I still dream of a day that Kuutar and the Frostmoon Scions, the moon and her believers, can come together and share a toast. |
 Flins Flins
|
About Flins He comes across as very polite and courteous, but for some reason the animals seem to fear him... I will keep my guard up around him — but since I barely know him and have no evidence of wrongdoing, I will also reserve judgment. Whenever he passes by the Frostmoon Enclave, I will share some of the daily harvest with him. ...What? His name's too long, but otherwise he's fine..? Uh... Are you sure? |
 Ineffa Ineffa
|
About Ineffa It's not unusual to come across prosthetically augmented people in Nod-Krai, but a wholly mechanical person from the inside out is quite a different story... And yet, she has far more humanity than many of the errant souls out there. She's gentle, kind, and full of curiosity. You could say she's as human as she can be. |
 Jahoda Jahoda
|
About Jahoda I didn't know much about her before we partnered up to infiltrate the Experimental Design Bureau — only that she worked for the Curatorium of Secrets as Nefer's trusted assistant. It can't be easy, being caught between Nefer on the one hand and all manner of clients on the other. I've always wished I could show her some proper Frostmoon Scions hospitality one day... Heh, I'm also a little curious to know what Nefer has said to her about me. |
 Nefer Nefer
|
About Nefer Clearly, we are different people with different ways of doing things, but I have never taken that to mean that we cannot get along. No matter what, the light of the moon will always fall favorably upon her. |
 Varka Varka
|
About Varka As cosmopolitan as Nod-Krai may be, it's rare to see an outsider integrate as readily as he has. There is a natural warmth to the way he treats people, which I highly admire. I remember the first time we met, he was full of praise for the Frostmoon Scions' delicious food... Oddly enough, I don't recall ever having shared any food with him, and yet I still believe he was being sincere. |
Lauma Release Date
| Genshin Impact Version 6.0 Luna I | |
|---|---|
 |
|
| Phase 1 Date | September 10, 2025 |
Lauma made her official debut as a playable character during Phase 1 of Version 6.0, which released on September 10, 2025.
Version 6.0 - Luna I Release Date and Banners
Genshin Impact Related Guides

All Characters and Voice Actors
List of All Characters
| Characters by Element | |||
|---|---|---|---|
Playable Characters
Upcoming Characters
| All Upcoming Characters |
 Alice Alice
|
 Capitano Capitano
|
 Dainsleif Dainsleif
|
 Dottore Dottore
|
|---|---|---|---|
 Linnea Linnea
|
 Lohen Lohen
|
 Nicole Nicole
|
 Pantalone Pantalone
|
 Pierro Pierro
|
 Pulcinella Pulcinella
|
 Rerir Rerir
|
 Sandrone Sandrone
|
 Tsaritsa Tsaritsa
|
|||
Character Lists
| Characters by Rarity | |
|---|---|
| 5-Star Characters | 4-Star Characters |
| Free Characters | |
| Characters by Weapon Used | |
| Sword Users | Claymore Users |
| Polearm Users | Bow Users |
| Catalyst Users | |
| Characters by Role | |
| Main DPS Characters | Sub DPS Characters |
| Support Characters | Healers |
| Shield Characters | Buff Providers |
| Best for Exploration | Local Specialty Passives |
| Double Reward Passives | |
| Characters by Gender | |
| Male Characters | Female Characters |
| Short Male Characters | Short Female Characters |
| Medium Male Characters | Medium Female Characters |
| Tall Male Characters | Tall Female Characters |
| Characters by Height | |
| Short Characters | Medium Characters |
| Tall Characters | |
| Characters by Region | |
| Mondstadt Characters | Liyue Characters |
| Inazuma Characters | Sumeru Characters |
| Fontaine Characters | Natlan Characters |
| Nod-Krai Characters | |
Comment
How strong is her C1 healing? Is her healing good enough for replacing a healer? I asking because i have columbina, shogun, fischl, nahida, kokomi and kuki for building a team with lauma and want to know which char i can use as healer in this team combs?
Author
Lauma Best Builds and Teams
Premium Articles
Rankings
Gaming News
Popular Games

Genshin Impact Walkthrough & Guides Wiki

Umamusume: Pretty Derby Walkthrough & Guides Wiki

Crimson Desert Walkthrough & Guides Wiki

Monster Hunter Stories 3: Twisted Reflection Walkthrough & Guides Wiki

Honkai: Star Rail Walkthrough & Guides Wiki

Pokemon Pokopia Walkthrough & Guides Wiki

The Seven Deadly Sins: Origin Walkthrough & Guides Wiki

Wuthering Waves Walkthrough & Guides Wiki

Zenless Zone Zero Walkthrough & Guides Wiki

Arknights: Endfield Walkthrough & Guides Wiki
Recommended Games

Fire Emblem Heroes (FEH) Walkthrough & Guides Wiki

Diablo 4: Vessel of Hatred Walkthrough & Guides Wiki

Cyberpunk 2077: Ultimate Edition Walkthrough & Guides Wiki

Yu-Gi-Oh! Master Duel Walkthrough & Guides Wiki

Super Smash Bros. Ultimate Walkthrough & Guides Wiki

Pokemon Brilliant Diamond and Shining Pearl (BDSP) Walkthrough & Guides Wiki

Elden Ring Shadow of the Erdtree Walkthrough & Guides Wiki

Monster Hunter World Walkthrough & Guides Wiki

The Legend of Zelda: Tears of the Kingdom Walkthrough & Guides Wiki

Persona 3 Reload Walkthrough & Guides Wiki
All rights reserved
Copyright© 2012-2024 HoYoverse — COGNOSPHERE. All Rights Reserved.
The copyrights of videos of games used in our content and other intellectual property rights belong to the provider of the game.
The contents we provide on this site were created personally by members of the Game8 editorial department.
We refuse the right to reuse or repost content taken without our permission such as data or images to other sites.
 Chasca
 Faruzan
 Heizou
 Ifa
Ifa Jean
Jean Kazuha
 Lan Yan
 Lynette
 Mizuki
 Sayu
Sayu Sucrose
 Traveler (Anemo)
 Venti
Venti Wanderer
 Xianyun
 Xiao
Xiao Aloy
Aloy Ayaka
Ayaka Charlotte
 Chongyun
 Citlali
 Diona
Diona Escoffier
 Eula
Eula Freminet
 Ganyu
Ganyu Kaeya
Kaeya Layla
Layla Mika
Mika Qiqi
Qiqi Rosaria
 Shenhe
 Skirk
Skirk Wriothesley
 Alhaitham
 Baizhu
 Collei
 Emilie
 Kaveh
Kaveh Kinich
 Kirara
 Lauma
Lauma
 Nahida
 Tighnari
 Traveler (Dendro)
 Yaoyao
 Beidou
 Clorinde
 Cyno
Cyno Dori
Dori Fischl
 Iansan
 Keqing
 Lisa
Lisa Ororon
 Raiden
 Razor
Razor Sara
Sara Sethos
 Shinobu
 Traveler (Electro)
 Varesa
 Yae Miko
 Albedo
 Chiori
 Gorou
Gorou Itto
Itto Kachina
 Navia
Navia Ningguang
 Noelle
 Traveler (Geo)
 Xilonen
 Yun Jin
 Zhongli
 Zibai
Zibai Ayato
Ayato Barbara
 Candace
 Dahlia
 Furina
 Kokomi
 Mona
Mona Mualani
 Neuvillette
 Nilou
Nilou Sigewinne
 Tartaglia
 Traveler (Hydro)
 Xingqiu
 Yelan
Yelan Amber
Amber Arlecchino
 Bennett
 Chevreuse
 Dehya
Dehya Diluc
Diluc Durin
Durin Gaming
 Hu Tao
 Klee
Klee Lyney
Lyney Mavuika
 Thoma
Thoma Traveler (Pyro)
 Xiangling
 Xinyan
 Yanfei
 Yoimiya





![Star Savior Review [First Impressions] | Engaging, Entertaining, and Expensive](https://img.game8.co/4447603/8f500e9bf666bdb8adb1af478e9dfdbd.png/show)

![Warframe Review [Switch 2] | Old Ninjas Can Learn New Tricks](https://img.game8.co/4455326/d5811d4c48e5fa4bbc3250cc4c10aedc.png/thumb)


Her C1 healing is quite good and she works fine as the team's only healer. Since Lauma is played with her E always active that also means her heals are always active. I used Lauma as the sole healer in a Raiden team while waiting for Nefer to come out and never felt like I needed more healing or a shielder.