Jahoda Best Builds and Teams
★ Exclusive: See results of the February 2026 Survey
◆ Hot: Version 6.4, 6.4 Codes, Version 6.5 Livestream
◆ Builds: Varka, Flins, Skirk, Escoffier
◆ Events: Operation Stronghold Defense
◆ Upcoming: Version 6.5, Linnea
Jahoda is a 4-star Anemo Bow character that best functions as an Anemo-infuser Support in Genshin Impact 6.2 Luna III. See her best builds, recommended weapons and artifacts, materials, and other information on Jahoda here!
| Jahoda's Character Guides | |||
|---|---|---|---|
|
|
|
|
|
List of Contents
Jahoda Character Information
Character Profile
| Jahoda | ||
|---|---|---|
 |
Rating |
|
| Rarity | ||
| Element | ||
| Weapon | ||
| Voice Actors |
Sonya Krueger (EN)
Inagaki Konomi (JP) |
|
Tier List Rankings
| Main DPS | Sub-DPS | Support | Exploration |
|---|---|---|---|
| - |
|
|
|
Tier Rating
|
Jahoda is similar to Lynette where she can apply swirled Pyro, Hydro, Electro, and Cryo. She can also heal, making her a good substitute for Sucrose teams should you need an Anemo sustain. She's also a good support for Lunar Teams albeit not the current best-in-slot especially at low cons. On the other hand, her long on-field time to fill her Elemental Skill can be a detriment especially on time-based challenges where every second counts, and may disrupt your rotations especially if she accidentally gets knocked off from attacks. She also has a high burst-cost solved by constellations. |
Jahoda's Stats
| Stat | Base Value |
|---|---|
| HP | 2078 |
| ATK | 48 |
| DEF | 125 |
| Healing Bonus% | 0% |
| Stat | Max Value |
|---|---|
| HP | 9646 |
| ATK | 223 |
| DEF | 580 |
| Healing Bonus% | 18.50% |
Base Stat Calculations
 | Stats indicated above are obtained from Jahoda's base values. These numbers also exclude the character's equipped weapon, artifacts, talents, or other passive effects that are not innate to the character. |
|---|---|
 | All characters start with 5% CRIT Rate, 50% CRIT DMG, 100% Energy Recharge, 0 Elemental Mastery, 0% Healing Bonus, and 0% Elemental DMG bonus before any additional stats are applied. The table above includes such values. |
 | The Level 20 stats indicated for this character are calculated before their first ascension. |
Jahoda's Ascension and Talent Material Summary
| All Ascension Materials Needed |
|---|
|
|
| All Talent Materials Needed |
|
|
Jahoda Ascension and Talent Materials
Jahoda Strengths and Weaknesses
| Strengths | |||
|---|---|---|---|
|
• Provides both Swirl and Healing capabilities while remaining mobile on the Field, with Constellations greatly improving on this benefit. • Her kit greatly benefits from the presence of Ascendant Gleam, giving her Elemental Skill and Elemental Burst elemental conversion to facilitate more reactions with. • Functions as one of the two Moonsign characters needed to trigger Ascendant Gleam in the first place. |
|||
| Weaknesses | |||
|
• Highly reliant on the Ascendant Gleam passive being in effect, as she loses out a large portion of her Elemental DMG and convenience otherwise. • Plays as a Jack-of-all-trades, meaning that she can function as a Moonsign flex slot, but does not stand out in any particular role. |
Jahoda Best Builds
Jahoda Sub-DPS/Support Builds
Jahoda primarily functions as an Anemo Sub-DPS with the ability to infuse her attacks to other elements, and can also function as a healer support thanks to her Elemental Burst.
With that in mind, Jahoda's general builds are mostly the same, focusing on ATK% to bump up both her DPS and healing capabilities.
General Anemo Build
| Best Weapon | |
|---|---|
| Replacement Weapons |
3.
5.
|
| Best Artifacts | |
| Artifact Main Stats | |
| Artifact Sub Stats | Energy Recharge, ATK, CRIT Rate, CRIT DMG, Elemental Mastery |
| Sample Teams | Arlecchino:
Clorinde:
|
Jahoda's artifact stat needs are very straightforward. You'll want Energy Recharge for her Sands to facilitate good uptime on her Burst, and ATK% on her Goblet in order to fuel her damage and healing.
For Circlet, you would still want ATK% to increase her personal damage but if you want to cater more to her healer build, Healing Bonus is an option. CRIT Rate is viable if you're using Favonius Warbow.
Lunar Teams Build
| Best Weapon | |
|---|---|
| Replacement Weapons |
3.
5.
|
| Best Artifacts | |
| Artifact Main Stats | |
| Artifact Sub Stats | Energy Recharge, ATK, Elemental DMG, CRIT Rate, CRIT DMG |
| Sample Teams | Lunar-Bloom:
Lunar-Charged:
|
In this build, you'll focus more on her capabilities as a Moonsign Character. In this scenario, you would still build relatively the same but opt for more Elemental Mastery stats.
For artifacts sets, Silken Moon's Serenade would be her BiS for these teams. However, Viridescent Venerer would still be good as an option, especially if another unit in the party already has Silken Moon equipped.
Jahoda Goal Stat Values
| Stat | Goal Value |
|---|---|
| Energy Recharge | 180%~200% |
| ATK | 1,800 or above |
| Elemental Mastery | 200 or above |
Jahoda wants to have as much ATK as possible for her off-field role. Energy Recharge bumped up to nearly 200% is recommended for consistent Burst, and Elemental Mastery nearly to 200 as well for triggering reactions.
CRIT Rate is an option only if you're playing her with Favonius Warbow.
Jahoda Talent Priority
| 1st | 2nd | 3rd |
|---|---|---|
| Elemental Burst | Elemental Skill | Normal Attack |
Jahoda's source of damage comes from her Burst and Skill for the off-field Anemo DMG.
Normal Attacks can be ignored as you won't use them as much.
Jahoda Best Artifacts
Viridescent Venerer in General, Silken Moon's Serenade for Lunar
As a general use case, Jahoda's best artifact set is Viridescent Venerer due to the consistency of its 4-pc. effect on her for both personal and supportive RES shred.
If slotted in a Lunar team, Silken Moon's Serenade becomes her best option due to its specific Moonsign buffs. It should be noted that Jahoda can use one or the other depending on which one is not present in the team yet.
Best Artifacts Ranked
| Artifact | Artifact Bonuses | |
|---|---|---|
| Best |
|
2-PC: Anemo DMG Bonus +15% 4-PC: Increases Swirl DMG by 60%. Decreases opponent's Elemental RES to the element infused in the Swirl by 40% for 10s. |
| 2nd |
|
2-PC: Energy Recharge +20% 4-PC: When dealing Elemental DMG, gain the Gleaming Moon: Devotion effect for 8s: Increases all party members' Elemental Mastery by 60/120 when the party's Moonsign is Nascent Gleam/Ascendant Gleam. The equipping character can trigger this effect while off-field. All party members' Lunar Reaction DMG is increased by 10% for each different Gleaming Moon effect that party members have. Effects from Gleaming Moon cannot stack. |
| 3rd |
|
2-PC: Elemental Skill DMG +20% 4-PC: Increases Elemental Skill DMG by 25%. Additionally when not on the field, Elemental Skill DMG will be further increased by 25%. This effect will be cleared 2s after taking the field. |
Alternative 4-Star Artifact
| Artifact | Artifact Bonuses |
|---|---|
 Instructor Instructor
|
2-PC: Increases Elemental Mastery by 80. 4-PC: Upon triggering an Elemental Reaction, increases all party members' Elemental Mastery by 120 for 8s. |
List of Artifacts and Set Bonuses
Jahoda Best Weapons
Energy Recharge or DPS Bows for Jahoda
Jahoda's role as a support can be enhanced by having a weapon that has supportive capabilities. Elegy for the End is a good option as one of her best.
Alternatively, Aqua Simulacra is a great option if you want to invest into Jahoda's personal damage, and you won't go wrong with Favonius Warbow as a general use case bow.
Support/Sub-DPS
| Weapon | Weapon Information | |
|---|---|---|
| 1st |
 Elegy for the End Elegy for the End
|
Base ATK: 608 Bonus Stat: Energy Recharge 55.1% Skill Effect: Increased Elemental Mastery by 60. Gain sigils when dealing damage with Elemental Skill or Burst every .2s even when off-field. At 4 sigils, all sigils will be consumed and Elemental Mastery is increased by 100 and ATK increased by 20% for 12s. Once the effect is triggered, you cannot gain Sigils for 20s. The same buffs from the Millennial Movement series does not stack. |
| 2nd |
 Aqua Simulacra Aqua Simulacra
|
Base ATK: 542 Bonus Stat: CRIT DMG 88.2% Skill Effect: HP is increased by 16%. When there are opponents nearby, the DMG dealt by the wielder of this weapon is increased by 20%. This will take effect whether the character is on-field or not. |
| 3rd |
 Favonius Warbow Favonius Warbow
|
Base ATK: 454 Bonus Stat: Energy Recharge 61.3% Skill Effect: CRIT Hits have a 60% chance to generate a small amount of Elemental Particles, which will regenerate 6 Energy for the character. Can only occur once every 12s. |
Best Free-to-Play Weapon for Jahoda
| Weapon | Weapon Information |
|---|---|
|
Favonius Warbow
|
Base ATK: 454 Bonus Stat: Energy Recharge 61.3% Skill Effect: CRIT Hits have a 60% chance to generate a small amount of Elemental Particles, which will regenerate 6 Energy for the character. Can only occur once every 12s. |
All Recommended Weapons for Jahoda
| Recommended Weapons | How to Get |
|---|---|
| Gacha | |
| Gacha | |
| Gacha | |
| Gacha | |
| Crafted | |
| Gacha | |
| Sumeru Fishing Association | |
| Event | |
Jahoda Best Team Comps
Ascendant Gleam Reliant
When it comes to Jahoda's team building, It's imperative to remember that most of her off-field capabilities are locked to her Ascendant Gleam requirement.
Aino as a free 4-star Moonsign character is a candidate as one of her core members. Other Moonsign characters like Nefer and Ineffa are viable options for Jahoda to be paired with.
Jahoda Lunar Bloom Teams
| Sub-DPS | Main-DPS Driver |
Sub-DPS/ Support |
Sub-DPS/ Support |
|---|---|---|---|
|
|
|
|
|
|
|
|
|
|
As a Moonsign unit that has healing capabilities, Jahoda can be slotted into Nefer and Lauma's Lunar Bloom teams.
Furina can now be slotted in as the Hydro unit, thanks to Jahoda's healing in her Burst.
Jahoda Lunar-Charged Teams
| Sub-DPS | Main-DPS Driver |
Sub-DPS/ Support |
Sub-DPS/ Support |
|---|---|---|---|
|
|
|
|
|
|
|
|
|
|
In a similar case, Jahoda can be slotted in Lunar-Charged Teams. She serves a role similar to Lunar-Bloom teams, providing the team with healing and off-field damage through her Burst and Skill.
Jahoda-Aino Core Teams
| Sub-DPS | Main-DPS Driver |
Sub-DPS/ Support |
Sub-DPS/ Support |
|---|---|---|---|
|
|
|
|
|
|
|
|
|
|
As 4-stars Moonsign Characters, Jahoda and Aino can function as core team for some teams.
For instance, Jahoda-Aino core can be slotted in Arlecchino teams as the latter can benefit a lot from Aino's Ascendant Gleam and appreciates Jahoda's off-field capabilities.
Jahoda Best Constellations
| Fragum |
|---|
 |
Constellation and Effects
| Jahoda's Constellations | |
|---|---|
| C1 |
One More Flask! When a Fluffy Meowball fired by the Purr-loined Treasure Flask from the Elemental Skill Savvy Strategy: Splitting the Spoils hits an enemy, there is a 50% chance for it to bounce, dealing the corresponding Elemental DMG to nearby opponents. • Purr-loined Treasure Flask A small elemental vessel that Jahoda retrieves after casting her Elemental Skill Savvy Strategy: Splitting the Spoils. While Jahoda is in the Shadow Pursuit state, if nearby opponents are affected by Pyro, Hydro, Electro, or Cryo, the Purr-loined Treasure Flask will convert to that element and begin filling up. The order of priority that determines which element will be converted to is: Pyro, Hydro, Electro, then Cryo. After each use of her Elemental Skill, the Purr-loined Treasure Flask can undergo one such conversion. When the Purr-loined Treasure Flask is full, Jahoda immediately drains it, exiting the Shadow Pursuit state and dealing a single instance of Anemo DMG to nearby opponents. Each time the Elemental Skill is cast, Jahoda takes out a brand-new Purr-loined Treasure Flask. Moonsign: Ascendant Gleam: When the Purr-loined Treasure Flask becomes full, Jahoda will not immediately discharge it. Instead, for a short duration, she steadily consumes the stored element inside and periodically fires Fluffy Meowballs at nearby opponents, dealing DMG of the corresponding element stored in the Purr-loined Treasure Flask. |
| C2 |
Rogue's Quick Thinking Moonsign: Ascendant Gleam: In the Ascension Talent "Plan to Get Paid," Jahoda can secretly track, in addition to the element with the highest number of characters, the element with the next highest number of characters among the remaining types. This allows up to two elemental effects to be active at once. You must first unlock the Ascension Talent "Plan to Get Paid." |
| C3 |
Rogue's Quick Thinking Moonsign: Ascendant Gleam: In the Ascension Talent "Plan to Get Paid," Jahoda can secretly track, in addition to the element with the highest number of characters, the element with the next highest number of characters among the remaining types. This allows up to two elemental effects to be active at once. You must first unlock the Ascension Talent "Plan to Get Paid." |
| C4 |
Wild Berry Amid the Dust When a Purrsonal Coordinated Assistance Robot from the Elemental Burst Hidden Aces: Seven Tools of the Hunter undergoes an Elemental Conversion, Jahoda will recover 4 Elemental Energy. • Purrsonal Coordinated Assistance Robots One of the gadgets that Jahoda — a former treasure hunter — carries around with her. It is deployed upon using her Elemental Burst Hidden Aces: Seven Tools of the Hunter. Purrsonal Coordinated Assistance Robots continuously restore HP to your active character. If the healed character's HP is above 70%, they also restore HP to the nearby party member with the lowest HP. Moonsign: Ascendant Gleam: If nearby opponents are affected by Pyro, Hydro, Electro, or Cryo, Purrsonal Coordinated Assistance Robots will convert to that element. The order of priority that determines which element will be converted to is: Pyro, Hydro, Electro, then Cryo. After each deployment, a Purrsonal Coordinated Assistance Robot can undergo one such conversion. After converting, the Purrsonal Coordinated Assistance Robot will periodically attack up to 3 nearby opponents, dealing damage of the corresponding element." |
| C5 |
The Greatest Treasure Increases the Level of Savvy Strategy: Splitting the Spoils by 3. Maximum upgrade level is 15." |
| C6 |
The Littlest Luck Moonsign: Ascendant Gleam: After the Purr-loined Treasure Flask from the Elemental Skill Savvy Strategy: Splitting the Spoils is full, nearby Moonsign characters in your party have their CRIT Rate increased by 5% and CRIT DMG increased by 40% for 20s. • Purr-loined Treasure Flask A small elemental vessel that Jahoda retrieves after casting her Elemental Skill Savvy Strategy: Splitting the Spoils. While Jahoda is in the Shadow Pursuit state, if nearby opponents are affected by Pyro, Hydro, Electro, or Cryo, the Purr-loined Treasure Flask will convert to that element and begin filling up. The order of priority that determines which element will be converted to is: Pyro, Hydro, Electro, then Cryo. After each use of her Elemental Skill, the Purr-loined Treasure Flask can undergo one such conversion. When the Purr-loined Treasure Flask is full, Jahoda immediately drains it, exiting the Shadow Pursuit state and dealing a single instance of Anemo DMG to nearby opponents. Each time the Elemental Skill is cast, Jahoda takes out a brand-new Purr-loined Treasure Flask. Moonsign: Ascendant Gleam: When the Purr-loined Treasure Flask becomes full, Jahoda will not immediately discharge it. Instead, for a short duration, she steadily consumes the stored element inside and periodically fires Fluffy Meowballs at nearby opponents, dealing DMG of the corresponding element stored in the Purr-loined Treasure Flask. |
Best Constellations Rating and Explanation
| Rating | Constellation Effect / Merits | |
|---|---|---|
| C2 | ★★☆ | • Enables Jahoda's Elemental Skill to track two elements at once, doubling the rate and damage types from her Elemental Skill. |
| C4 | ★★☆ | • Recovers Elemental Energy when Jahoda's Elemental Burst undergoes elemental conversion. |
| C6 | ★★★ | • Buffs Moonsign characters by increasing their CRIT Rate and CRIT DMG when Jahoda's Elemental Skill is full. |
C6 Provides the Most Benefits to Her Teammates
Jahoda wants to get to C6 due to the CRIT buffs that she provides to the team by virtue of being a Moonsign character.
Otherwise, C2 is her best value constellation for increasing her own uptime and damage potential.
Jahoda Ascension and Talent Materials
Jahoda Ascension Materials
Below are the ascension materials needed for Jahoda:
| Lv.20→Lv.40 |
|
|---|---|
| Lv.40→Lv.50 |
|
| Lv.50→Lv.60 |
|
| Lv.60→Lv.70 |
|
| Lv.70→Lv.80 |
|
| Lv.80→Lv.90 |
|
Jahoda Talent Level-Up Materials
Below are the talent materials needed for Jahoda:
| Daily Domain Drops | Enemy Drops | Weekly Boss Drops |
|---|---|---|
| Wed/Sat/Sun |
Landcruisers |
The Game Before the Gate Boss Challenge Reward |
|
|
|
|
|
|
|
Jahoda Talents and How to Use
Benefits Most From Ascendant Gleam
Jahoda benefits a lot from Moonsign: Ascendant Gleam. In fact, you need it in order for you to have access to her off-field capabilities.
When paired with another Moonsign Character:
• During her Elemental Skill, when Jahoda's Flush becomes full, she will not throw it immediately. Instead, she will continuously consume the stored element to deal damage based on that element. When she deals damage during this state, she gains 2 Elemental Energy.
• Her Elemental Burst can now convert corresponding elements that are applied to nearby enemies, the order of priority follows the PHEC Formula (Pyro → Hydro → Electro → Cryo)
Elemental Skill to Dash and Absorb
Pressing Jahoda allows her to enter Shadow Pursuit State. While in this state, Jahoda dash around and absorb elements that are applied to the enemy and follows the PHEC Formula in its absorbtion. Once full or recasted, she will throw towards her enemies, dealing Anemo DMG.
However, if the dash does not hit an enemy, she will opt to drop a Smoke Bomb instead, which deals Anemo DMG.
With Ascendant Gleam, Jahoda will deal off-field dmg based on the element that she absorbed with her flask.
Elemental Burst Heals and Deals Off-field DMG
Jahoda summons a two Cat-Shaped Domestic Assistantance Coordinators to aid the active member in her team, continuously healing them. The robots will also consistently deal anemo damage to nearby enemies, even while off-field.
Once the active character has reach above 70% of HP, they will gain an Elemental Mastery Buff and heals another member with the lowest HP.
How to Get Jahoda
Pull From Version 6.2 Phase 1 Banners
| Version 6.2 Luna II Banners | |
|---|---|
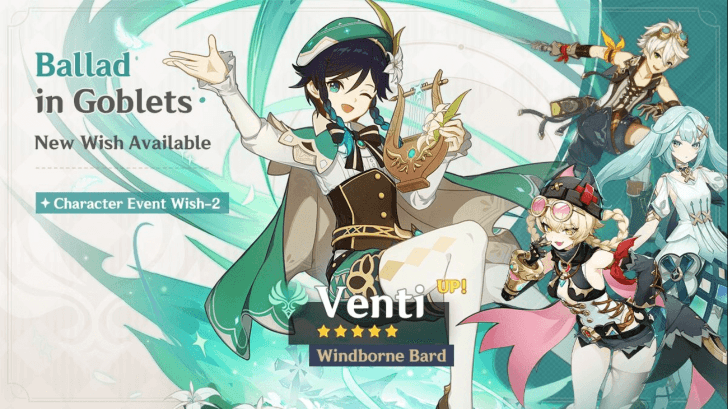 Ballad in Goblets Ballad in Goblets
|
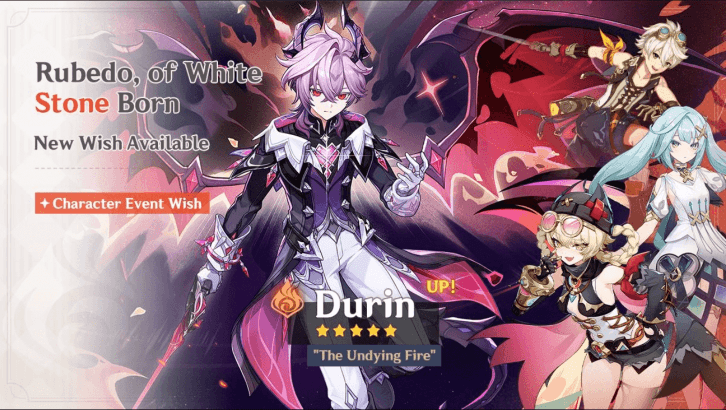 Rubedo, of White Stone Born Rubedo, of White Stone Born
|
Jahoda was featured as a rate-up character during Phase 1 of Version 6.2 Luna III from December 3, 2025 to December 23, 2025. She was featured in both Durin's debut banner and Venti's rerun banner!
In addition, she is sharing this rate-up period alongside Bennett and Faruzan.
Genshin Impact 6.2 Banners and Characters
Related Wish Banner Guides
| Click to view a Banner Guide! | ||
|---|---|---|
 Jahoda Jahoda |
 Wish Sim Wish Sim |
 All Wishes All Wishes |
Jahoda In-Game Information
Jahoda Character Profile
| Nation | |
|---|---|
| Title |
|
| Vision | |
| Gender | Female |
| Race | Human |
| Height | Medium Girl |
| Faction | Curatorium of Secrets |
| Constellation | Fragum |
| Birthday | January 5 |
| Special Dish | “After-Class Practice” |
| Story Quest |
|
Jahoda Voicelines
Thoughts About Jahoda
| Character | In-Game Thoughts |
|---|---|
 Aino Aino
|
Jahoda might bicker a lot with Ineffa, but they're actually really close. She was the first friend that Ineffa made. I'm not a controlling parent, so I don't tell Ineffa who she can and can't make friends with. Some friends just argue more than others — somehow, fighting it out brings them closer together. Oh, I almost forgot to mention, you know her robotic arm? It's pretty, right? I was the one who built that, although it's my student who handles the maintenance and repairs these days. |
 Flins Flins
|
Jahoda always seems to show up where you would least expect. One day, you'll find her by a scrap pile at the Krumkake Craftshop, another, you'll see her out on the balcony of some wealthy family's house in Nasha Town. She is a rapidly learning philosophy of survival... her teacher being the land of Nod-Krai itself. |
 Ineffa Ineffa
|
Jahoda is a legendary bounty hunter famed throughout the land, with an outstanding track record in battle. Her own words. The first time she visited Aino's workshop, she was extremely tense, and struck at me a few times after mistaking my freshly baked Krumkake for a weapon. But her muscles instantly relaxed after she tasted it. Since then, she stops by regularly to drop off mechanical components. Not to trade, as such — it's just that she always happens to be passing by whenever I've baked a fresh batch of treats. Again, her own words. |
 Lauma Lauma
|
I didn't know much about her before we partnered up to infiltrate the Experimental Design Bureau — only that she worked for the Curatorium of Secrets as Nefer's trusted assistant. It can't be easy, being caught between Nefer on the one hand and all manner of clients on the other. I've always wished I could show her some proper Frostmoon Scions hospitality one day... Heh, I'm also a little curious to know what Nefer has said to her about me. |
 Nefer Nefer
|
Jahoda is the most qapable — and frankly, the most valuable — of.the Curatorium's employees. Without her, the whole place would surely grind to a halt. Yes, stæ can be reckless and proud, but she is also brave and kind. Some might call her immature, but I see that as a blessing. After all, once you've reached maturity in life, it's all downhill from there... heh, and I'm counting on her to run my errands for a few years yet. |
Jahoda's Thoughts About Others
| Character | In-Game Thoughts |
|---|---|
|
Aino
|
About Aino Aino's got some serious skills. No matter what I put my arm through, she always gets it working again. It's just... every time she fixes it, she always doodles on it. Says it's cuter that way. I mean, it is kinda cute, but why doesn't she ever draw on Ineffa? |
 Columbina Columbina
|
About Kuutar That VIP... sigh Back in the day, if I came across someone with a background that murky, I'd have run for the hills! The farther the better! But... she saved me, so now I owe her, and debts are debts. Still, that's easy to say, but I've only got one life to lose, and at this rate, no amount of lives would be enough to cover the tab... O Boss Nef! Save me, you're my only hope... |
|
Flins
|
About Flins I've heard Nef talk about how the Lightkeepers are a really old organization, chock full of powerful, smart people who know tons of ancient secrets. Say... You think Flins has any leads on ancient treasures? Or maybe some untouched old ruins? Uh, I'm just thinking out loud here, I'd never actually ask! Otherwise, Nef'd chew me out again. |
|
Ineffa
|
About Ineffa Oh, that dumb clanker? She's good at baking krumkakes, but she's got a memory like a leaky sieve and zero humor. Every time I crack a joke she asks me to explain why it's funny. But her krumkakes are the bomb, you have got to try them. |
|
Lauma
|
About Lauma Miss Lauma? Uhm... I don't really know too much about her, but I know she's kind of a big deal, and she's powerful... and she can talk to animals... Thinking about it, she must have eyes and furry little ears all over Hiisi Island. No wonder treasure hunters don't go "looking for treasure" there, you'd be walking straight into a trap... |
|
Nefer
|
About Nefer Nef's the best boss in the whole world! Hehe, not only does she pay me on time, she even covers food and board! I might be her only actual employee... No, wait, I almost forgot about Ashru! Though he's not exactly an employee, right? He's never even completed a single commission! Hmph! Can't have anyone freeloading... Next job, he's coming with me! |
 Sandrone Sandrone
|
About Marionette I'm never going anywhere like that ever again! And... Okay, even if I did, Boss Nef would have to go with me. Between the Wild Hunt and Fatui... what's the point of making money if you're not alive to spend it!? |
 Varka Varka
|
About Varka Ohh, Varka? Yeah, he told me he was the Grand Master of the Knights of Favonius, but seriously, he sure doesn't seem like it. Shouldn't a Grand Master be all serious and dependable-looking? Uh, not trying to say he's not responsible! It's just... If the Grand Master of the Knights of Favonius is here, then who's back in Mondstadt actually managing the Knights...? Eh? Someone serious and dependable-looking? Well, okay, haha... The Knights of Favonius sure are something... |
Jahoda Release Date
| Genshin Impact Version 6.2 Luna III | |
|---|---|
 |
|
| Phase 1 Date | December 3, 2025 |
Jahoda was released as part of the Version 6.2 Luna III Phase 1 update on December 3, 2025!
Version 6.2 - Luna III Release Date
Genshin Impact Related Guides

All Characters and Voice Actors
List of All Characters
| Characters by Element | |||
|---|---|---|---|
Playable Characters
 Chasca
 Faruzan
 Heizou
 Ifa
Ifa Jahoda
 Jean
Jean Kazuha
 Lan Yan
 Lynette
 Mizuki
 Sayu
Sayu Sucrose
 Traveler (Anemo)
 Venti
Venti Wanderer
 Xianyun
 Xiao
Xiao Aloy
Aloy Ayaka
Ayaka Charlotte
 Chongyun
 Citlali
 Diona
Diona Escoffier
 Eula
Eula Freminet
 Ganyu
Ganyu Kaeya
Kaeya Layla
Layla Mika
Mika Qiqi
Qiqi Rosaria
 Shenhe
 Skirk
Skirk Wriothesley
 Alhaitham
 Baizhu
 Collei
 Emilie
 Kaveh
Kaveh Kinich
 Kirara
 Nahida
 Tighnari
 Traveler (Dendro)
 Yaoyao
 Beidou
 Clorinde
 Cyno
Cyno Dori
Dori Fischl
 Iansan
 Keqing
 Lisa
Lisa Ororon
 Raiden
 Razor
Razor Sara
Sara Sethos
 Shinobu
 Traveler (Electro)
 Varesa
 Yae Miko
 Albedo
 Chiori
 Gorou
Gorou Illuga
 Itto
Itto Kachina
 Navia
Navia Ningguang
 Noelle
 Traveler (Geo)
 Xilonen
 Yun Jin
 Zhongli
 Zibai
Zibai Ayato
Ayato Barbara
 Candace
 Dahlia
 Furina
 Kokomi
 Mona
Mona Mualani
 Neuvillette
 Nilou
Nilou Sigewinne
 Tartaglia
 Traveler (Hydro)
 Xingqiu
 Yelan
Yelan Amber
Amber Arlecchino
 Bennett
 Chevreuse
 Dehya
Dehya Diluc
Diluc Durin
Durin Gaming
 Hu Tao
 Klee
Klee Lyney
Lyney Mavuika
 Thoma
Thoma Traveler (Pyro)
 Xiangling
 Xinyan
 Yanfei
 Yoimiya
Upcoming Characters
| All Upcoming Characters |
 Alice Alice
|
 Capitano Capitano
|
 Dainsleif Dainsleif
|
 Dottore Dottore
|
|---|---|---|---|
 Linnea Linnea
|
 Lohen Lohen
|
 Nicole Nicole
|
 Pantalone Pantalone
|
 Pierro Pierro
|
 Pulcinella Pulcinella
|
 Rerir Rerir
|
Sandrone
|
 Tsaritsa Tsaritsa
|
|||
Character Lists
| Characters by Rarity | |
|---|---|
| 5-Star Characters | 4-Star Characters |
| Free Characters | |
| Characters by Weapon Used | |
| Sword Users | Claymore Users |
| Polearm Users | Bow Users |
| Catalyst Users | |
| Characters by Role | |
| Main DPS Characters | Sub DPS Characters |
| Support Characters | Healers |
| Shield Characters | Buff Providers |
| Best for Exploration | Local Specialty Passives |
| Double Reward Passives | |
| Characters by Gender | |
| Male Characters | Female Characters |
| Short Male Characters | Short Female Characters |
| Medium Male Characters | Medium Female Characters |
| Tall Male Characters | Tall Female Characters |
| Characters by Height | |
| Short Characters | Medium Characters |
| Tall Characters | |
| Characters by Region | |
| Mondstadt Characters | Liyue Characters |
| Inazuma Characters | Sumeru Characters |
| Fontaine Characters | Natlan Characters |
| Nod-Krai Characters | |
Comment
Another thing to note that Jahoda cannot absorb the Cat-meter aura without the off-field elemental attacks. Elemental-skill and running while Absorbing cat-meter on the left can be refilled once any off-fielder unit's attack are deployed. Columbina, Lauma, Kuki, Ororon, Mavuika, Fischl and few others that are off-field attack capable for Jahoda Cat-meter skill.
Author

Jahoda Best Builds and Teams
Premium Articles


Rankings
Gaming News


Popular Games

Genshin Impact Walkthrough & Guides Wiki
Umamusume: Pretty Derby Walkthrough & Guides Wiki
Crimson Desert Walkthrough & Guides Wiki
Monster Hunter Stories 3: Twisted Reflection Walkthrough & Guides Wiki
Honkai: Star Rail Walkthrough & Guides Wiki
Pokemon Pokopia Walkthrough & Guides Wiki
The Seven Deadly Sins: Origin Walkthrough & Guides Wiki
Wuthering Waves Walkthrough & Guides Wiki
Zenless Zone Zero Walkthrough & Guides Wiki
Arknights: Endfield Walkthrough & Guides Wiki


Recommended Games
Fire Emblem Heroes (FEH) Walkthrough & Guides Wiki
Diablo 4: Vessel of Hatred Walkthrough & Guides Wiki
Cyberpunk 2077: Ultimate Edition Walkthrough & Guides Wiki
Yu-Gi-Oh! Master Duel Walkthrough & Guides Wiki
Super Smash Bros. Ultimate Walkthrough & Guides Wiki
Pokemon Brilliant Diamond and Shining Pearl (BDSP) Walkthrough & Guides Wiki
Elden Ring Shadow of the Erdtree Walkthrough & Guides Wiki
Monster Hunter World Walkthrough & Guides Wiki
The Legend of Zelda: Tears of the Kingdom Walkthrough & Guides Wiki
Persona 3 Reload Walkthrough & Guides Wiki


All rights reserved
Copyright© 2012-2024 HoYoverse — COGNOSPHERE. All Rights Reserved.
The copyrights of videos of games used in our content and other intellectual property rights belong to the provider of the game.
The contents we provide on this site were created personally by members of the Game8 editorial department.
We refuse the right to reuse or repost content taken without our permission such as data or images to other sites.
useless