Komaki's Daily Fortune Telling Locations and Rewards | Watatsumi Island Guide
✉ Send your thoughts in our Genshin 6.4 Patch Survey!
★ Exclusive: Dive back in time with the Meta History
◆ Hot: Version 6.4, Luna 5 Codes
◆ Builds: Varka, Flins, Skirk, Escoffier
◆ Events: Travelers' Tales, He Who Caught the Wind
◆ Future: Linnea, Version 6.5 Luna VI
Komaki's Daily Fortune is a hidden daily task quest in Genshin Impact 2.1. Learn how to unlock Komaki's Daily Fortune Telling, the highest point in Watatsumi, where to find all five Fortune locations, and other information in this guide.
List of Contents
Komaki's Daily Fortune Telling Information
How to Unlock Daily Fortune Telling
Complete the Divine Plant of the Depths Quest

After completing the Divine Plant of the Depths World Quest, you can talk to Komaki again to get a Daily Fortune from the Spiritherb. Going to the area that Komaki will tell you will give you a puzzle to solve and lead to a Treasure Chest. There are a total of 5 days that you can get a fortune and chests from talking to Komaki.
Divine Plant of the Depths Quest Guide
Komaki's Daily Fortune Telling Walkthroughs
| All Daily Fortune Telling Walkthroughs | ||
|---|---|---|
| Day 1 | Day 2 | Day 3 |
| Day 4 | Day 5 | |
Day 1: Good Fortune
Day 1 Fortune Walkthrough
| Objectives | |
|---|---|
| 1 |  The highest point in Watatsumi Island is the Mouun Shrine, as hinted by Komaki on the first day. |
| 2 | 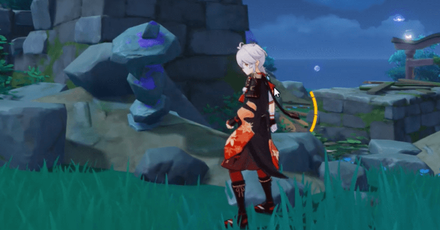 Go to the Mouun Shrine (Paimon will confirm you're at the right place). You have to light up four Electric Lamps with the Electro Seelie found around the Mouun Shrine. |
| 3 | 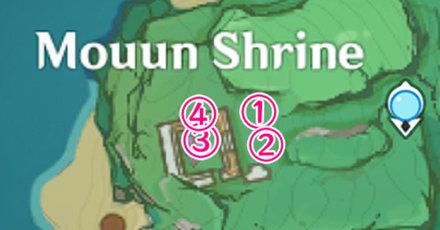 The four Electro Seelies can be easily seen from afar. Two Electro Seelies will be on top of a Torii gate, one inside the broken house, and the last on the roof. |
| 4 | 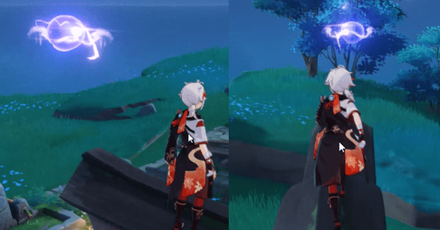 The 1st and 2nd Electro Seelies are right on top of the Torii closest to the shrine. |
| 5 | 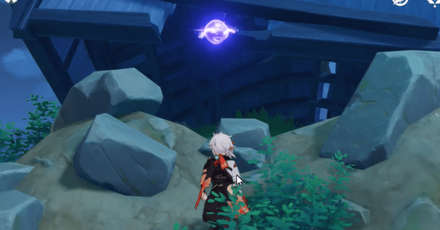 The 3rd Electro Seelie is just ahead under the shrine, accessible through a hole. |
| 6 | 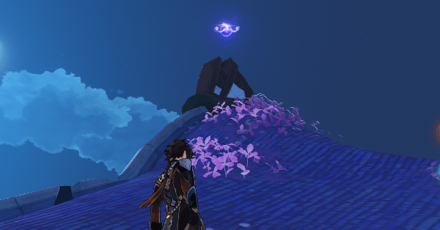 The 4th and last Electro Seelie will be on top of the roof just underneath the 3rd one. |
| 7 | 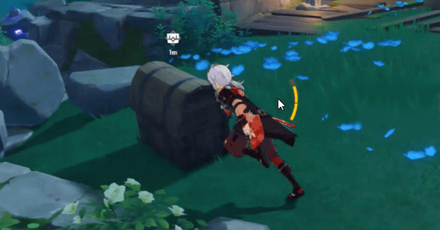 The Common Chest will appear after you have interacted with all seelies in the area. |
Light Up the Other Electric Lamps

If you have not done it already, there is another puzzle in Mouun Shrine where you can get a Luxurious Chest as a reward! Solve the Lightning Rod puzzle to the South of the shrine and the Cube puzzle to the North of the shrine.
Lightning Rod Puzzle Solution
| Objectives | |
|---|---|
| 1 | 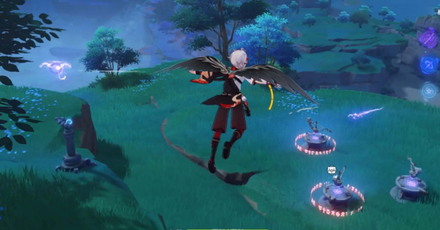 There will be an Electro Seelie moving around the Lightning Rods at certain intervals. Activate the Pillar to summon another Electro Seelie. |
| 2 |  You have to time it so that the two Electro Seelies will be activating two of the three Lightning Rods at one time. |
| 3 | 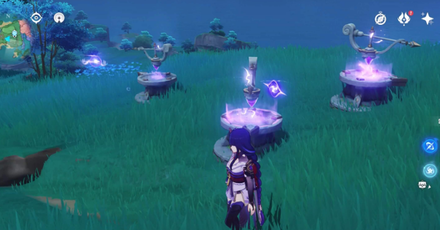 Apply the Electro element to yourself or use a character with an Electro Skill and activate the remaining Lightning Rod at the same time. |
Cube Puzzle
| Objectives | |
|---|---|
| 1 | 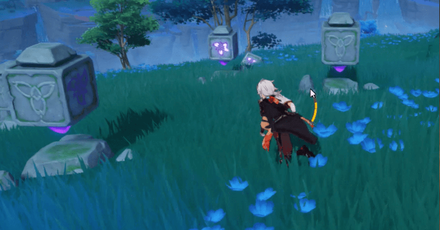 Solve the puzzle by hitting the cubes until the sides that are lit up are facing towards the center of all the cubes. |
| 2 | 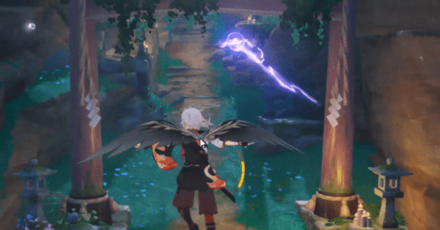 Follow the Electro Seelie until it has gone into an Electric Lamp. |
Day 2: Ill Fortune
Day 2 Fortune Walkthrough
| Objectives | |
|---|---|
| 1 |  Komaki will lead you towards a cave south of the Bourou Village, where the great pirate Rinzou once hid in, as hinted by Komaki on the second day. |
| 2 | 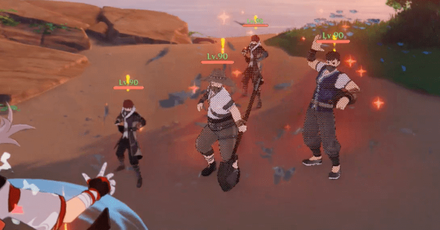 Head to the beach south of Bourou Village by teleporting to the Waypoint, then go southwest. Inside the cave, a group of Treasure Hoarders will spawn. |
| 3 |  After defeating the Treasure Hoarders, you will find the Treasure Hoarder's Notes which will point you towards a Treasure Hoarder camp. Note that if you have already done the succeeding mini-quest, you will not be able to read the notes again. At this point, Day 2 of the Fortune will end. |
| 4 | 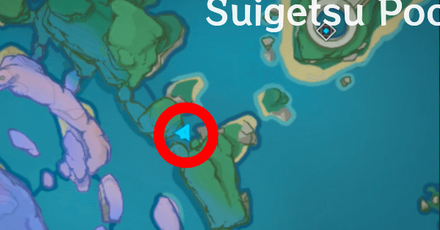 Go to the Treasure Hoarder camp south of the Suigetsu Pool and behind a waterfall below the surface, and defeat the Treasure Hoarders there. |
| 5 | 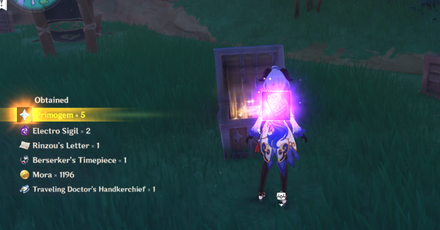 |
| 6 | 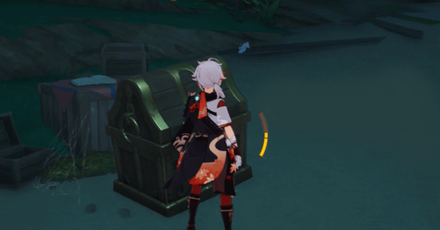 Go back to the cave and dig in front of the Treasure Hoarder's Notes to uncover the Precious Chest. |
Find All Strange Markings on the Wall
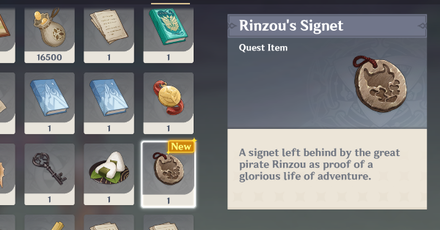
This Precious Chest will also give you Rinzou's Signet, which has a marking that matches the Strange Symbols on the walls all over Watatsumi Island.
Day 3: Pool of Good Luck
Day 3 Fortune Walkthrough
| Objectives | |
|---|---|
| 1 |  The Electro Seelie near the deep pool below Sangonomiya Shrine is located behind a waterfall just south of the Waypoint on Sangonomiya Shrine, as hinted by Komaki on the third day. |
| 2 | 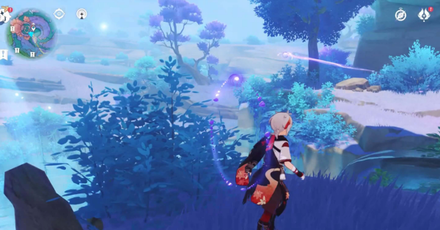 After teleporting, drop down to the South just before the Pool. Paimon will speak when you find the Electro Seelie. Then, follow the Electro Seelie carefully. |
| 3 | 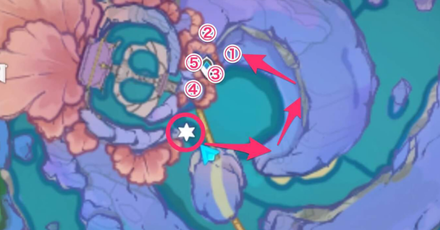 The Electro Seelie will lead you around the pond and at some point may be hard to follow. The map above may help you find the areas the Electro Seelie will go to. |
| 4 | 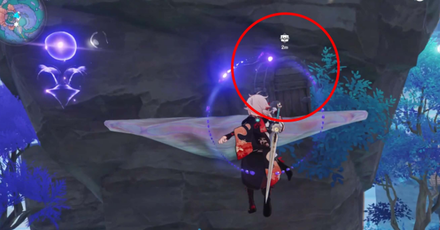 Once you get to the 5th area, a Common Chest will spawn. |
Day 4: Unlucky Shrine
Day 4 Fortune Walkthrough
| Objectives | |
|---|---|
| 1 | 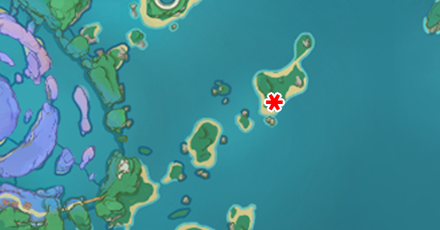 Komaki's Fortune will point you towards a ruined shrine on the east, which points to an abandoned shrine Southeast of the Suigetsu Pool, as hinted by Komaki on the fourth day. |
| 2 | 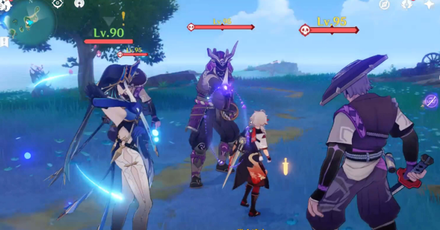 Teleport there through a Waypoint. Then there will be a Mirror Maiden standing by the shrine. Approaching the shrine will also spawn Kairagi and Nobushi enemies that you must defeat. |
| 3 | 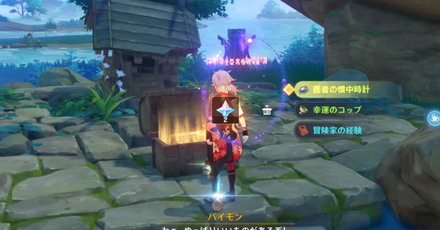 After defeating all enemies, the locked Common Chest will unlock. |
Day 5: Ancient City
Day 5 Fortune Walkthrough
| Objectives | |
|---|---|
| 1 | 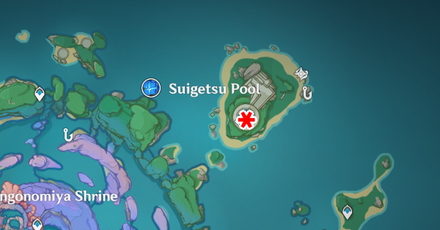 The fifth and final Fortune location will be the ancient city in the ruins to the northeast, which will lead you to the Suigetsu Pool as hinted by Komaki. |
| 2 | 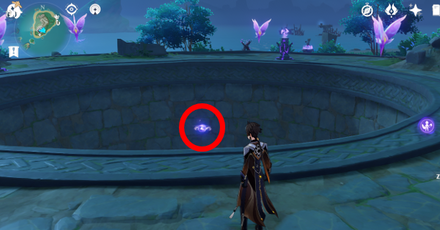 You will find an Electro Seelie in the air above the Palace in a Pool Domain. Note that the Suigetsu Pool must be drained first to interact with the Seelie. You can check how to solve the Suigetsu Pool Water Puzzle here. |
| 3 | 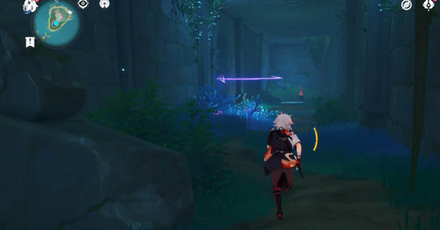 Follow the Seelie into the underground ruins of Suigetsu Pool. |
| 4 | 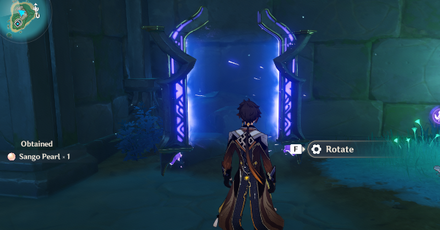 Use the Phase Gate to get to an upper platform where the Electro Seelie went. |
| 5 | 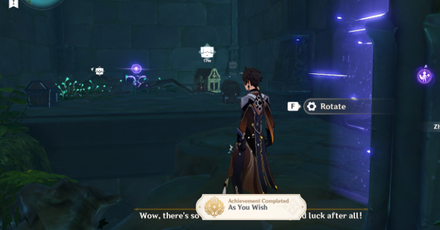 The final destination of the Seelie will lead you to your final rewards: a Common Chest, an Exquisite Chest, and a Precious Chest, as well as the As You Wish Achievement. At this point, Komaki will tell you that the Spiritherb will need to rest, which signals the end of Komaki's Daily Fortune Telling. |
All Achievements from Komaki's Daily Fortune Telling
| Achievement | Rank | Primogem Reward |
 A Distant Sea Shepherd's Treasure A Distant Sea Shepherd's Treasure
|
★ | 5 Primogems |
|---|---|---|---|
| Objective : Gain the most valued treasure of a great pirate from the ramblings of drunkards. |
 As You Wish As You Wish
|
★ | 5 Primogems |
| Objective : Have your fortune told five times by Granny Komaki while obtaining an ideal result | |||
Genshin Impact Related Guides
Guides to Inazuma Areas
| Inazuma Area Guides | |
|---|---|
| Narukami Island | Kannazuka |
| Yashiori Island | Seirai Island |
| Tsurumi Island | Watatsumi Island |
Guides to Inazuma Features
Guides to Inazuma Puzzles
| Inazuma Puzzle Guides | |
|---|---|
| Tatarasuna Barrier | Tatarasuna Keys |
| Watatsumi 9 Cube Puzzle | Seiraimaru Boat |
| Komaki's Daily Fortune | Yashiori Island Puzzle |
| Tsurumi Island Stone Slates | Tsurumi Island Mist |
| Tsurumi Conch Treasure | A Doctor's Odyssey Achievement |
Guides to Inazuma Domains
| Inazuma Domain Puzzle Guides | |
|---|---|
| Shakkei Pavilion | Formation Estate |
| Empty Boat to a Thousand Gates | Palace in a Pool |
| Moshiri Kara | |
Guides to Inazuma Quests
All Interactive Map Guides
Author
Komaki's Daily Fortune Telling Locations and Rewards | Watatsumi Island Guide
improvement survey
03/2026
improving Game8's site?

Your answers will help us to improve our website.
Note: Please be sure not to enter any kind of personal information into your response.

We hope you continue to make use of Game8.
Rankings
- We could not find the message board you were looking for.
Gaming News
Popular Games

Genshin Impact Walkthrough & Guides Wiki

Honkai: Star Rail Walkthrough & Guides Wiki

Umamusume: Pretty Derby Walkthrough & Guides Wiki

Pokemon Pokopia Walkthrough & Guides Wiki

Resident Evil Requiem (RE9) Walkthrough & Guides Wiki

Monster Hunter Wilds Walkthrough & Guides Wiki

Wuthering Waves Walkthrough & Guides Wiki

Arknights: Endfield Walkthrough & Guides Wiki

Pokemon FireRed and LeafGreen (FRLG) Walkthrough & Guides Wiki

Pokemon TCG Pocket (PTCGP) Strategies & Guides Wiki
Recommended Games

Fire Emblem Heroes (FEH) Walkthrough & Guides Wiki

Diablo 4: Vessel of Hatred Walkthrough & Guides Wiki

Yu-Gi-Oh! Master Duel Walkthrough & Guides Wiki

Super Smash Bros. Ultimate Walkthrough & Guides Wiki

Pokemon Brilliant Diamond and Shining Pearl (BDSP) Walkthrough & Guides Wiki

Elden Ring Shadow of the Erdtree Walkthrough & Guides Wiki

Monster Hunter World Walkthrough & Guides Wiki

The Legend of Zelda: Tears of the Kingdom Walkthrough & Guides Wiki

Persona 3 Reload Walkthrough & Guides Wiki

Cyberpunk 2077: Ultimate Edition Walkthrough & Guides Wiki
All rights reserved
Copyright© 2012-2024 HoYoverse — COGNOSPHERE. All Rights Reserved.
The copyrights of videos of games used in our content and other intellectual property rights belong to the provider of the game.
The contents we provide on this site were created personally by members of the Game8 editorial department.
We refuse the right to reuse or repost content taken without our permission such as data or images to other sites.



![Monster Hunter Stories 3 Review [First Impressions] | Simply Rejuvenating](https://img.game8.co/4438641/2a31b7702bd70e78ec8efd24661dacda.jpeg/thumb)


I accidentally followed a wrong seelie midway and it gave me 2 precious chests and 1 luxurious one 😃