Wing of Keres Puzzle Guide and Chests
★ Exclusive: Dive back in time with the Meta History
◆ Hot: Version 6.4, 6.4 Codes, Version 6.5 Livestream
◆ Builds: Varka, Flins, Skirk, Escoffier
◆ Events: Operation Stronghold Defense
◆ Upcoming: Version 6.5, Linnea
The Wing of Keres Treasure Chests in Genshin Impact can be unlocked by clearing out the nearby Evil Eyes, connecting the Solaris Core and Nycalyx, and clearing out the nearby monsters. See how to solve all the Wing of Keres Puzzles, and Chest locations here in this guide!
List of Contents
How to Open the Wing of Keres Treasure Chests
Clear Out the Evil Eye of Blightseep
| 1 | Start by getting to the center of the Wing of Keres area. Look for the nearby Glimmerfruit or Mandagora to suffuse the Super Sharp Spirebloom. |
|
|---|---|---|
| 2 | Absorb the Super Sharp Spirebloom's fruit to fight against an Evil Eye. When aiming the lightblade, you will need to shoot when the shield flashes to do a counterattack. |
|
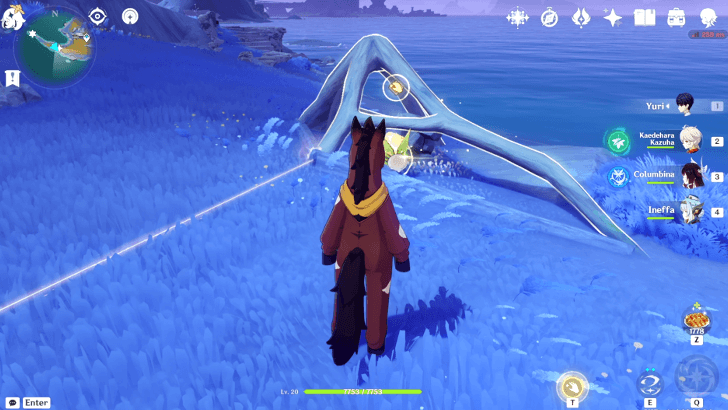
| 3 | 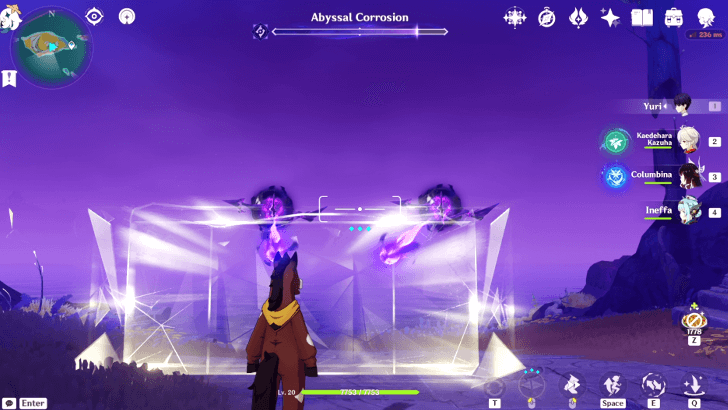 After defeating the one Evil Eye, two more will spawn. Try to aim the lightblade in between them to knock them out in one shot. |
|
| 4 | Beating those two, thre more will spawn above the two chests. Absorb the Spirebloom again if you're low and try to aim in between the eyes to take down more than one. |
|
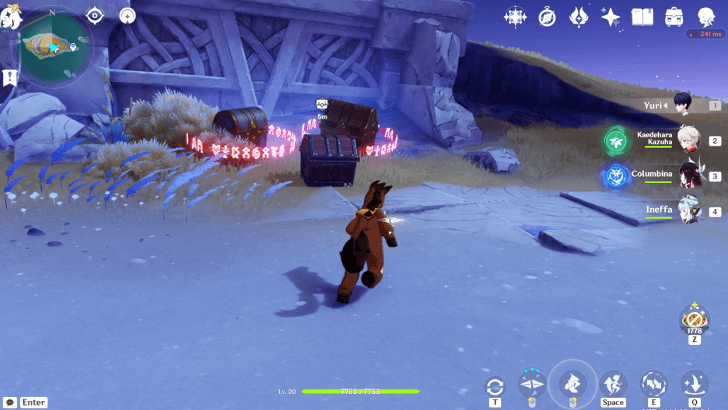
| 5 | 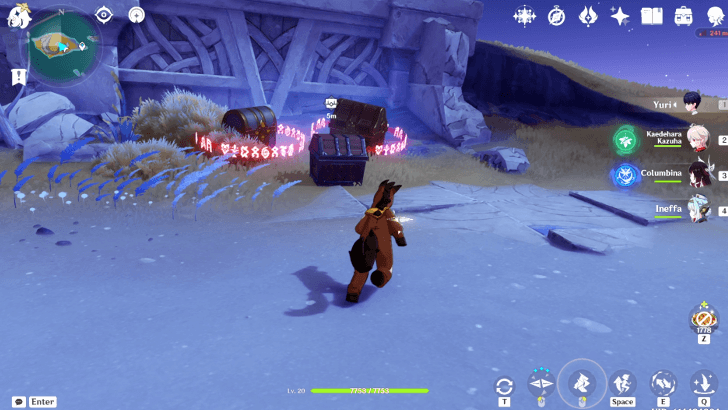 After clearing the Evil eyes a cutscene will play. The Abyssal Corruption will clear out and an Exquisite Chest will spawn in between the two chests. |
|
| 6 | 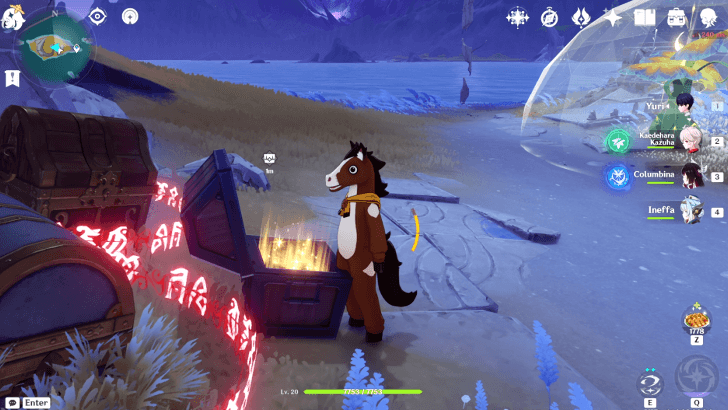 You can choose to pick up the Exquisite Chest, or clear out the other two objectives nearby to grab all three. |
|
Energize the Nycalyx
| 1 | 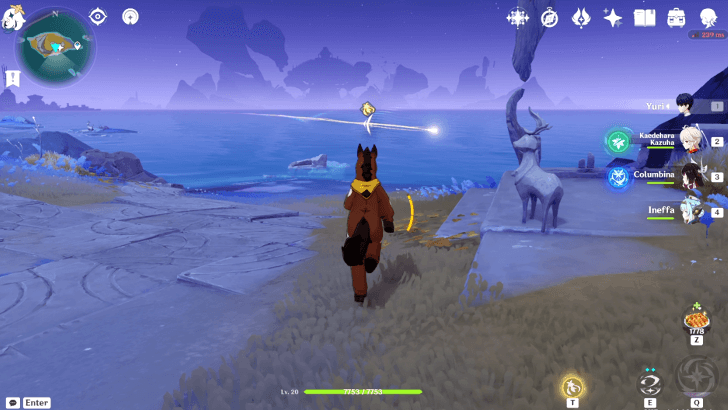 Use the Moonlane south of the island to go to the peninsula southeast of the Wing of Keres Teleport Waypoint. |
|
|---|---|---|
| 2 | Once you get there, grab two Mandagora and throw them to break the Lunar Conflux Barrier to your left. This should give you the last Mandagora you need to connect the Nycalyx. |
|
| * |  You can also break the Lunar Conflux Barrier near the triangular Kuuvahki structure, but that just gives you a Mora Chest. |
|
| 3 | Use the Mandagora to form a circuit between the triangular Kuuvahki structure and the Nycalyx. It will release a Kuuhenki that will fly back to the main island. |
|
| 4 | 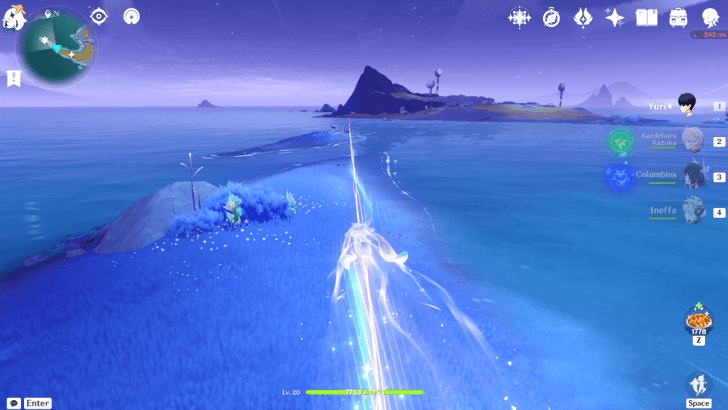 Pick up the Exquisite Chest, then follow the Kuuhenki back to the main island using the Moonlane. This should activate the moon pillar. |
|
Clear Out the Nearby Hilichurls
| 1 | 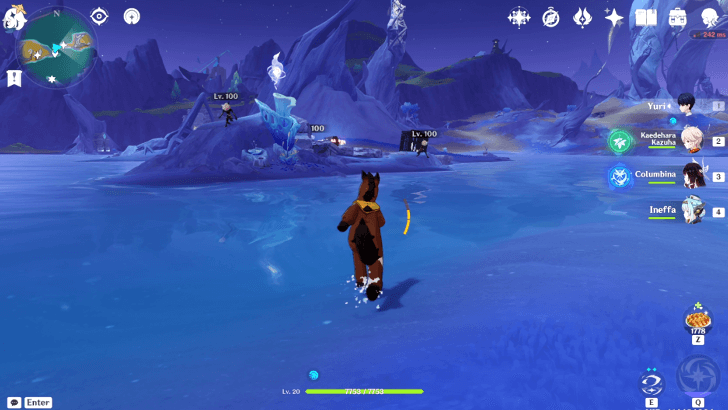 Head to the island northeast of the Wing of Keres Teleport Waypoint. |
|
|---|---|---|
| 2 | 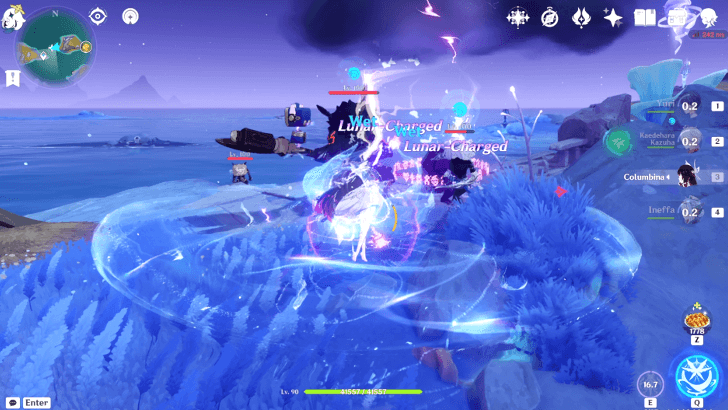 Defeat the Hillichurls and Mitachurl there. |
|
| 3 | 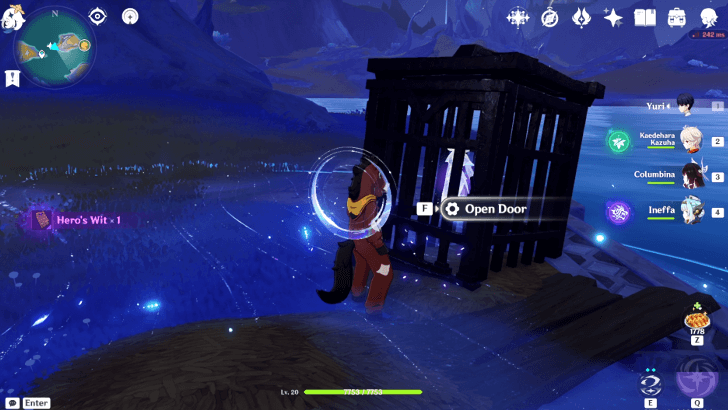 Find the Kuuhenki trapped in the cage. interact with it to open the cage. It will summon a Moonlane back to the main island. |
|
| 4 | 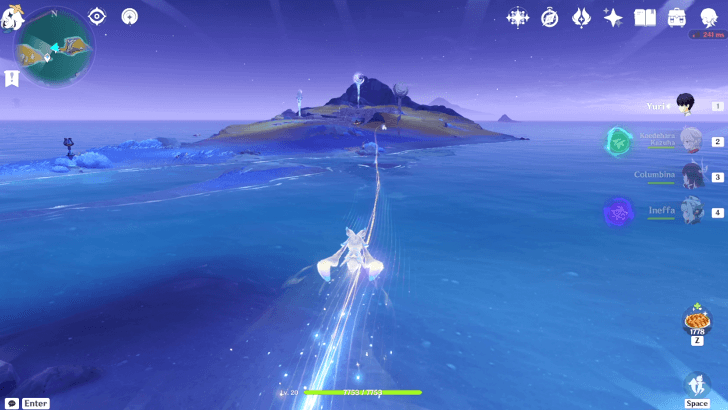 Pick up the Exquisite Chest, then follow the Kuuhenki back to the main island using the Moonlane. This should activate the moon pillar. |
|
| 5 | 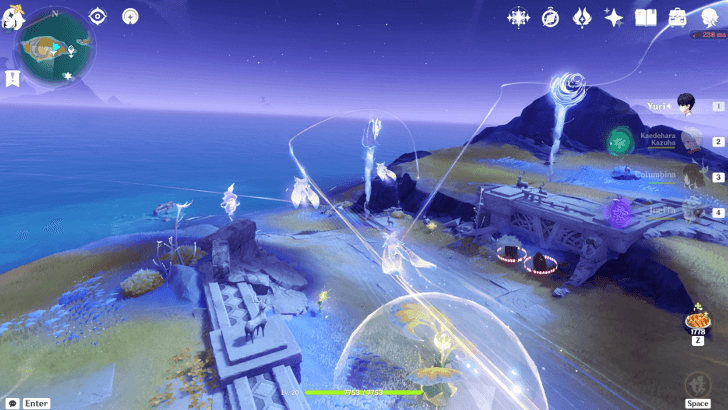 After freeing all three Kuuhenki, they will summon a Moonlane in the middle of the Wing of Keres. Ride this Moonlane, and the Chests should unlock after the ride. |
|
Wing of Keres Puzzle Rewards
Rewards Exquisite Chests, a Precious Chest, and a Luxurious Chest
You can open a few Exquisite Chests, a Precious Chest, and a Luxurious Chest by solving the various puzzles surrounding the Wing of Keres Puzzles. These chests can give you Primogems among other goodies, and may drop an Irismoon Seal which can be used to open treasure vaults within Nod-Krai.
The Mound in the Moonlight Achievement
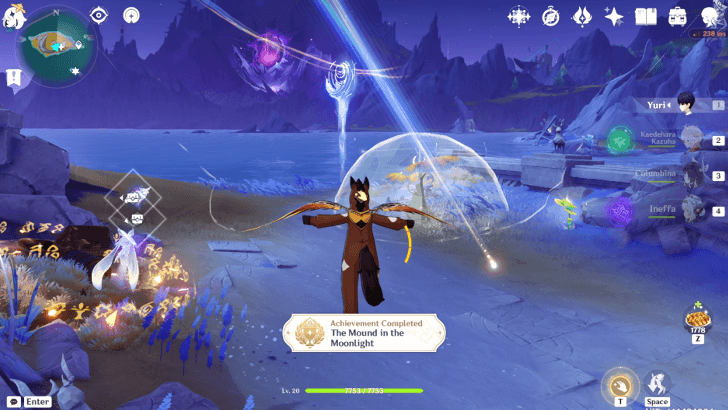
You will also get the achievement, "The Mound in the Moonlight". This will net you 5 Primogems.
Letter Buried in the Time Capsule
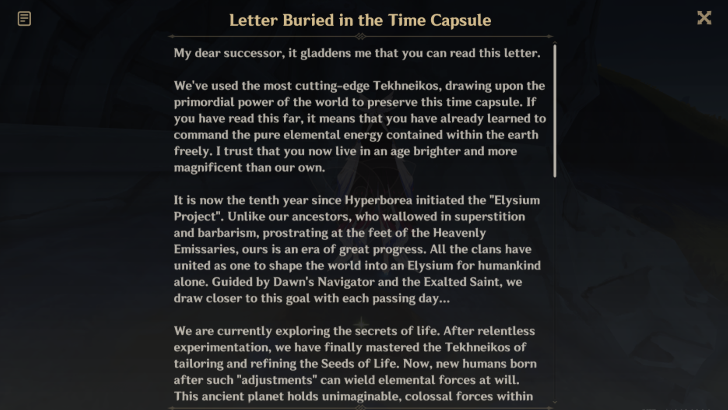
You can also find a small note inside a Time Capsule buried by the Hyperboreans. The note details more about the Elysium Project and the Seeds of Life.
Wing of Keres Information
Released in Version Luna IV
| Genshin Impact Version 6.3 Luna IV | |
|---|---|
 |
|
| Phase 1 Date | January 14, 2026 |
The Wing of Keres location was released in Version Luna IV of Genshin Impact, introducing the new northern map in Nod-Krai and its three major sub-regions.
Version 6.3 - Luna IV Release Date and Details
Genshin Impact Related Guides
All Tips and Tricks Guides

All Version Luna IV Tips & Tricks
| Other Tips & Tricks | ||
|---|---|---|
| Wing of Keres Puzzle Guide and Chests | How to Remove Lunar Conflux Barrier in Ashveil Peak | Mandragora Guide |
Other Regional Tips & Tricks
Comment
Author

Wing of Keres Puzzle Guide and Chests


Rankings
Gaming News


Popular Games

Genshin Impact Walkthrough & Guides Wiki
Umamusume: Pretty Derby Walkthrough & Guides Wiki
Crimson Desert Walkthrough & Guides Wiki
Monster Hunter Stories 3: Twisted Reflection Walkthrough & Guides Wiki
Honkai: Star Rail Walkthrough & Guides Wiki
Pokemon Pokopia Walkthrough & Guides Wiki
The Seven Deadly Sins: Origin Walkthrough & Guides Wiki
Wuthering Waves Walkthrough & Guides Wiki
Zenless Zone Zero Walkthrough & Guides Wiki
Arknights: Endfield Walkthrough & Guides Wiki


Recommended Games
Fire Emblem Heroes (FEH) Walkthrough & Guides Wiki
Diablo 4: Vessel of Hatred Walkthrough & Guides Wiki
Cyberpunk 2077: Ultimate Edition Walkthrough & Guides Wiki
Yu-Gi-Oh! Master Duel Walkthrough & Guides Wiki
Super Smash Bros. Ultimate Walkthrough & Guides Wiki
Pokemon Brilliant Diamond and Shining Pearl (BDSP) Walkthrough & Guides Wiki
Elden Ring Shadow of the Erdtree Walkthrough & Guides Wiki
Monster Hunter World Walkthrough & Guides Wiki
The Legend of Zelda: Tears of the Kingdom Walkthrough & Guides Wiki
Persona 3 Reload Walkthrough & Guides Wiki


All rights reserved
Copyright© 2012-2024 HoYoverse — COGNOSPHERE. All Rights Reserved.
The copyrights of videos of games used in our content and other intellectual property rights belong to the provider of the game.
The contents we provide on this site were created personally by members of the Game8 editorial department.
We refuse the right to reuse or repost content taken without our permission such as data or images to other sites.