6.4 Luna V Stygian Onslaught Best Teams and Stage Guide
★ Exclusive: See results of the February 2026 Survey
◆ Hot: Version 6.4, 6.4 Codes, Version 6.5 Livestream
◆ Builds: Varka, Flins, Skirk, Escoffier
◆ Events: Operation Stronghold Defense
◆ Upcoming: Version 6.5, Linnea

Here are the best teams for Stygian Onslaught Version 6.4 Luna V for Genshin Impact. See more about the Savage Onslaught event in March 2026, including challenge details, exalted ones, and how to beat it.
| Stygian Onslaught Guides | |
|---|---|
 Event Info Event Info |
 6.4 Luna V Stage Guide 6.4 Luna V Stage Guide |
Stygian Onslaught 6.4 Luna V Best Team Comps
Best Team Composition for All Stages
| Stage 1 |
|
|
|
|
|---|---|---|---|---|
| Stage 2 |
|
|
|
|
| Stage 3 |
|
|
|
|
Stygian Onslaught Exalted Ones
The Exalted Ones are a batch of 16 characters that are chosen to receive buffs to their ATK, DEF, and HP while fighting in Stygian Onslaught. These characters refresh every day based on what other players use for completion on Dire difficulty.
Take note that these characters only buff the characters you already have and will not grant you free access to all 16 characters if you do not personally own them.
Co-Op Teams Are Built With 4 Players In Mind
Stygian Onslaught's fights are easier to manage if you challenge its Co-Op mode with 4 players. On that note, each Co-Op team is based on this idea and assumes that you are running the challenge in full Co-Op.
If you are looking for people to team up with, then try our Co-Op boards here below to find others who are willing to take on the Stygian Onslaught challenge together.
| Genshin Co-Op Boards | ||
|---|---|---|
Stage 1 Team Comp
| Pyro Teams | |||
|---|---|---|---|
|
|
|
|
|
|
|
|
|
|
| Character Alternatives | |||
|
|
|||
|
|
|||
|
|
|||
|
|
|||
Pyro Carries and Anemo Grouping Teams
For the Mandragora, teams with frequent Pyro application, and Anemo characters like Venti who can group up multiple mobs are best to bring. If you don't have Venti, Kazuha is the next best alternative as he can frequently group up enemies to his center. Otherwise, Sucrose and her Elemental Burst can be enough.
Co-Op Teams
| Team Composition | |||
|---|---|---|---|
| DPS | DPS | Support/ DPS |
Support |
| Sample Teams | |||
|
|
|
|
|
|
|
|
|
|
In co-op, two Pyro carries with an Anemo grouper is ideal to get rid of the Pyro gauge and spores faster.
Stage 2 Team Comp
| Lunar-Charged or Electro-Charged | |||
|---|---|---|---|
|
|
|
|
|
| Character Alternatives | |||
|
|
|||
|
|
|||
|
|
|||
|
|
|||
Use Electro-Charged or Lunar Charged
As always, the Knuckle Duckle is best dealt with Lunar-Charged or Electro-Charged teams. If you don't have Flins or Ineffa, but have Columbina, you can still cause Lunar-Charged with an Electro carry like Raiden or Clorinde.
Co-Op Teams
| Sample Team | |||
|---|---|---|---|
|
|
|
|
|
When playing this stage in Co-Op, having just Columbina or Ineffa is enough to satisfy its conditions.
Stage 3 Team Comp
| Freeze Team | |||
|---|---|---|---|
|
|
|
|
|
| Character Alternatives | |||
|
|
|||
|
|
|||
|
|
|||
|
|
|||
Teams with Frequent Cryo Application
The Secret Source Automaton Boss requires fast Cryo application both on-field and off-field. As such, teams with a Cryo carry and ideally Escoffier are best to handle this boss. If you don't have Escoffier, you can make do with Rosaria and Layla combo, although the DPS must carry the team.
Co-Op Teams
| Co-Op Teams | |||
|---|---|---|---|
|
|
|
|
|
When playing this stage in Co-Op, especially with Skirk and Escoffier, make sure you only team up Cryo units with one Hydro applicator like Furina. With Escoffier, she should be able to support the entire team by herself.
Stygian Onslaught 6.4 Luna V Stage 1 Guide
Stage 1 Enemy Information
| Stage 1 Opponent | Boss Notes |
|---|---|
|
|
• Starts with high resistances. • Eventually switches to Split State, but can be accelerated with Pyro or Electro DMG. • Split State splits itself into multiple spores which can be gathered. • Chunks and reduces boss' RES when spores are defeated. |
| Special Boss Mechanics | |
| • Affected by the Ley Line disturbance, this Nemesis starts in the Agglomerated State, which comes with extremely high RES. After some time, the Nemesis then switches to the Split State. Deal Pyro or Electro DMG to this Nemesis to speed up this switch. • When this Nemesis enters the Split State, it splits in to a large number of spores. When these spores take damage, a certain percentage of the total damage is also dealt to the Nemesis. In this case, if the number of spores on the field falls below a certain number, the Nemesis will enter the Brittle Agglomerated State, during which all RES is greatly reduced and its combat abilities are diminished. Additionally, if all spores generated in the Split State are defeated, the Nemesis will exist the Split State early and go in to the Brittle Agglomerated State instead. |
|
| Special Boss Mechanics (Fearless and Above) | |
| • Affected by the Ley Line disturbance, when this Nemesis is in the Split State or the Brittle Agglomerated State, its Anemo RES is greatly reduced. | |
| Recommended Units/Elements | |
|
|
|
Stage 1 Strategy
Accelerate into Split State with Pyro Attacks
The boss starts with high resistances to all Elements until it goes to the Split State. Accelerate the process by constantly applying Pyro DMG to the boss with your on-field and off-field Pyro applicators until the gauge is removed and it splits itself into multiple spores.
Gather Up the Spores with Anemo Grouping
Once it becomes split, use your Venti, Kazuha, or Sucrose to collect and gather all spores in one place as they're placed far apart each other. Use AoE attacks to all of them as it also chunks and reduce the RES of the boss too!
Tip: Kazuha and Sucrose with Sacrificial Sword and Sacrificial Fragments is enough to gather all Spores at once!
Burst When Its Vulnerable
The Mandragora returns to the field after defeating all spores and significantly reduces its RES. Take advantage of this while it's stationary! The boss repeats its attack patterns afterwards.
Overload Can Work But Needs Anemo Grouping
While Electro can also satisfy the boss' conditions, you should still have strong groupers like Venti as Overload will knock back the spores.
Stage 1 Co-Op Strategy
Take Caution While in Agglomerated State
As long as the team are able to have the Anemo unit to group up all spores eventually, focusing on surviving and applying Pyro during the starting Agglomerated State is imperative.
Stygian Onslaught 6.4 Luna V Stage 2 Guide
Stage 2 Enemy Information
| Stage 2 Opponent | Boss Notes | ||
|---|---|---|---|
|
|
• Spawns multiple stamping devices which can only be damaged by Electro DMG. • Lunar-Charged or Electro-Charged are more efficient. • Each stamping device defeated crashes to the boss and chunks its Ward and health. • Decreases RES when shield is broken. |
||
| Special Boss Mechanics | |||
| • In battle, this Nemesis enters Duckstruction Mode, in which its aggression increases. It also generates a Ward for itself that increases all RES and summons the Stamping Devices. • Stamping devices are fairly resistant to all DMG except Electro DMG. Deal Electro-Charged or Lunar-Charged DMG repeatedly, or deal enough damage to destroy them to disrupt these devices. Disrupted stamping devices will go out of control, crash into the Kunckle Duckle, and deal a certain amount of damage to its Ward. By destroying the Nemesis's Ward this way, you can cause it to exit Duckstruction Mode and become incapacitated from Overloaded. |
|||
| Special Boss Mechanics (Fearless and Above) | |||
| • The boss starts in Heavy Duckstruction Mode which greatly increases all RES and summons the stamping devices. • Upon exiting Heavy Duckstruction Mode, it will also greatly reduce the Nemesis's Electro RES for a certain time. • Due to the effects of the Ley Line disturbance, more instances of Electro-Charged or Lunar-Charged DMG are needed to disrupt the stamping devices. Alternatively, deal more damage to these devices for the same effect. Electro-Charged or Lunar-Charged DMG causes damage to the stamping devices more effectively. The damage caused by the stamping devices to the Kunckle Duckle increases based on the total damage taken by the stamping devices. In particular, any Electro-Charged DMG, Lunar-Charged DMG, and Electro DMG receive a higher scaling bonus. |
|||
| Recommended Units/Elements | |||
| Lunar-Charged or Electro Charged |
|
|
|
Stage 2 Strategy
Lunar-Charged or Electro-Charged Against the Devices
Lunar-Charged or Electro-Charged attacks with mainly an Electro on-fielder are the best to deal with the Devices when the boss switches to Duckstruction Mode. There are five of these devices so AoE Lunar-Charged is ideal to defeat it quick.
If you have one of Columbina or Ineffa, they should be enough to defeat the devices with an Electro Carry without worry. Defeating these devices removes a ton of the Knuckle Duckle's HP and shield, which also makes it more susceptible to your damage!
Stage 2 Co-Op Strategy
Use Nod-Krai Electro Units for Lunar-Charged
Bring all sorts of Electro on-fielders as long as a Nod-Krai 5-star character like Flins, Ineffa, or Columbina are there to enable the better Lunar-Charged reaction.
Stygian Onslaught 6.4 Luna V Stage 3 Guide
Stage 3 Enemy Information
| Stage 3 Opponent | Boss Notes | ||
|---|---|---|---|
|
|
• Becomes stationary, massively increases its RES, and causes lasers to go around it. • Dealing and applying constant Cryo DMG during the phase cools it down. • Constantly depleting the gauge reduces its RES, enabling you to deal meaningful damage again. |
||
| Special Boss Mechanics | |||
| • Enters Sweeper Mode: All RES is greatly increased, and it will perform rotating attacks while generating Flow Momentum. It will lose Flow Momentum after taking Cryo DMG. Below a certain Flow Momentum value, it will temporarily stop rotating and attacking, and its All RES will be greatly decreased. • If an active character enters and maintains the Nightsoul's Blessing state for a time, this opponent will enter Forced Counterstrike Mode and switch to attacking with powerful tracking rays. At this time, its all RES will be greatly decreased. |
|||
| Special Boss Mechanics (Fearless and Above) | |||
| • Affected by the Ley Line disturbance, this great foe has its All RES further increased, and it loses less Flow Momentum when struck by Cryo DMG. When in Counterstrike Mode, it will launch even more powerful tracking ray attacks, and it will lose less RES. | |||
| Recommended Units/Elements | |||
| Freeze |
|
|
|
Stage 3 Strategy
Constant Cryo Damage and Application is Needed
Especially on Fearless mode, when the boss switches to Sweeper Mode, you must deal enough Cryo DMG and application to keep reducing the gauge and remove its exceptionally high RES.
If the gauge fills up, the boss' laser will become even more dangerous, so its best to cycle your teams so that Cryo DMG is always there and keep the boss defenseless.
Avoid Ground Attacks
Outside of its Sweeper Mode, the boss moves normally without the high RES. Stay away from the big AoE Hydro Circle as it may one-shot your carry if you're not careful.
Stage 3 Co-Op Strategy
Bring Multiple Cryo Units
A Co-Op team against the Overseer Device must consist of mainly Cryo units who have infused Cryo Attacks, or have frequent Cryo application off-field. If your team have Skirk and Escoffier, at least one Hydro is enough to fulfill their conditions.
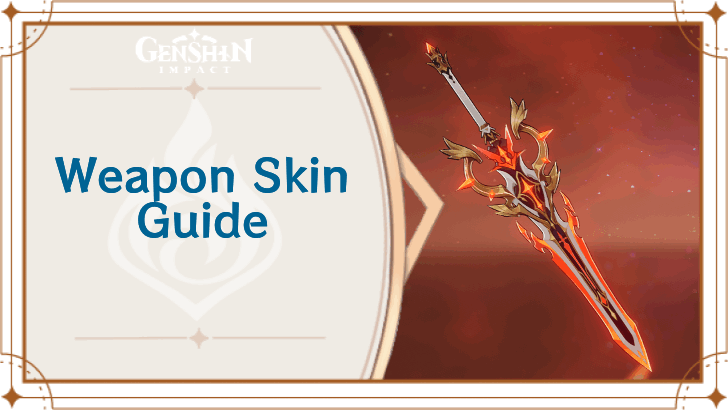
Stygian Onslaught 6.4 Luna V Rewards
Weapon Skin Rewards in Dire Difficulty

After completing Dire Difficulty, Players can obtain two new items that allow you to change any weapon's appearance!
The weapon skins come in two varieties:
• Radiant Phantasm: Incursion Repeller (4★) – rewarded for clearing Dire Difficulty.
• Radiant Phantasm: Incursion Repeller - Sublimation (5★) – rewarded for clearing Dire Difficulty within 180 seconds.
They have slight differences in Weapon Skin appearance, and will expire at the beginning of the next Stygian Onslaught season.
Weapon Skins – How to Get and Equip
All Stygian Onslaught Clear Rewards
| Objective | Rewards |
|---|---|
| Complete the challenge on Normal or higher difficulty | |
| Complete the challenge on Advancing or higher difficulty | |
| Complete the challenge on Hard or higher difficulty | |
| Complete the challenge on Menacing or higher difficulty |
|
| Complete the challenge on Fearless or higher difficulty in single-player mode |
|
| Complete the challenge on Dire difficulty in single-player mode | |
| Complete the challenge on Dire difficulty in single-player mode within 180s |
Genshin Impact Related Guides

Version 6.4 Luna V Stygian Onslaught Guide
| Version 6.4 Luna V Stygian Onslaught |
|---|
| Stygian Onslaught: Crush and Obliterate |
Stygian Onslaught Rewards
| Exclusive Event Rewards | |
|---|---|
 Exclusive Weapon Skin Exclusive Weapon Skin |
 Dire Commendation Dire Commendation |
| Weapon Skin Rewards | |
Other Events and Schedule

Comment
always this skill issue bullshit,ive seen people owning all character and even they struggle with v. if you have them all like on c6 + weapon of course you beat them easily on the highest level.. its like playing fifa with all players on 99. aint that hard pressing some buttons and switch around
Author

6.4 Luna V Stygian Onslaught Best Teams and Stage Guide
Premium Articles


Rankings
Gaming News

![Star Savior Review [First Impressions] | Engaging, Entertaining, and Expensive](https://img.game8.co/4447603/8f500e9bf666bdb8adb1af478e9dfdbd.png/show)

![Warframe Review [Switch 2] | Old Ninjas Can Learn New Tricks](https://img.game8.co/4455326/d5811d4c48e5fa4bbc3250cc4c10aedc.png/thumb)

Popular Games

Genshin Impact Walkthrough & Guides Wiki
Umamusume: Pretty Derby Walkthrough & Guides Wiki
Crimson Desert Walkthrough & Guides Wiki
Monster Hunter Stories 3: Twisted Reflection Walkthrough & Guides Wiki
Honkai: Star Rail Walkthrough & Guides Wiki
Pokemon Pokopia Walkthrough & Guides Wiki
The Seven Deadly Sins: Origin Walkthrough & Guides Wiki
Wuthering Waves Walkthrough & Guides Wiki
Zenless Zone Zero Walkthrough & Guides Wiki
Arknights: Endfield Walkthrough & Guides Wiki


Recommended Games
Fire Emblem Heroes (FEH) Walkthrough & Guides Wiki
Diablo 4: Vessel of Hatred Walkthrough & Guides Wiki
Cyberpunk 2077: Ultimate Edition Walkthrough & Guides Wiki
Yu-Gi-Oh! Master Duel Walkthrough & Guides Wiki
Super Smash Bros. Ultimate Walkthrough & Guides Wiki
Pokemon Brilliant Diamond and Shining Pearl (BDSP) Walkthrough & Guides Wiki
Elden Ring Shadow of the Erdtree Walkthrough & Guides Wiki
Monster Hunter World Walkthrough & Guides Wiki
The Legend of Zelda: Tears of the Kingdom Walkthrough & Guides Wiki
Persona 3 Reload Walkthrough & Guides Wiki


All rights reserved
Copyright© 2012-2024 HoYoverse — COGNOSPHERE. All Rights Reserved.
The copyrights of videos of games used in our content and other intellectual property rights belong to the provider of the game.
The contents we provide on this site were created personally by members of the Game8 editorial department.
We refuse the right to reuse or repost content taken without our permission such as data or images to other sites.
Imagine to have not a single of the Boss 1 recommended characters 👍