Heaven-Cast Thunder Stage 1 Guide
✉ Send your thoughts in our Genshin 6.4 Patch Survey!
★ Exclusive: Dive back in time with the Meta History
◆ Hot: Version 6.4, Luna 5 Codes
◆ Builds: Varka, Flins, Skirk, Escoffier
◆ Events: Travelers' Tales, He Who Caught the Wind
◆ Future: Linnea, Version 6.5 Luna VI
Heaven-Cast Thunder is the first stage of the Chronicle of Shifting Stratagems event in Genshin Impact 5.6. See the best teams for the first and second half, how to obtain 4000 points, and all rewards for it here!
| Chronicle of Shifting Stratagems Stages | ||
|---|---|---|
 Stage 1 Stage 1 |
 Stage 2 Stage 2 |
 Stage 3 Stage 3 |
 Stage 4 Stage 4 |
 Stage 5 Stage 5 |
 Stage 6 Stage 6 |
Best Teams For Heaven-Cast Thunder
Recommended Teams For Stage 1
| First Half Teams | |||
|---|---|---|---|
|
(Featured) |
(Trial) |
|
|
|
(Featured) |
(Trial) |
|
|
|
(Featured) |
(Trial) |
|
|
| Second Half Teams | |||
|
(Featured) |
(Trial) |
|
|
|
(Featured) |
(Trial) |
|
|
|
(Featured) |
(Trial) |
|
|
While the Featured character is locked to both stages, other characters alongside the Trial character can only be used once. This means that if you use the trial character from the first half, you won't be able to use it in the second half, and vice-versa.
Bring Off-Field Sub DPS For The First Half
Due to the Plunging Attack buff for Varesa, she needs to be on the field most of the time. So, you need to bring one or two off-field Sub DPS or Support to give you additional damage and buffs.
The recommended elements for the characters you can use in the first half are Electro, Hydro, and Anemo, like Furina, Xianyun, Iansan, or Ororon.
Bring Chevreuse For The Second Half
For the second half, you must bring Chevreuse to utilize the Overload buff you will obtain for free.
You also won't need to worry about the enemies getting blown off due to the Overload reaction, as a wind vortex buff will gather them as soon as you trigger the reaction.
Heaven-Cast Thunder Stage 1 Strategy
How to Obtain 4000 Points
| Stage Difficulty | Score Multiplier | Opponent Level |
|---|---|---|
| Normal | x1 | Lv. 40 |
| Hard | x4 | Lv. 70 |
| Very Hard | x10 | Lv. 90 |
| Fearless | x20 | Lv. 95 |
| Dire | x40 | Lv. 100 |
Complete Very Hard or Fearless Difficulty
You can obtain 4,000 points in Stage 1 by completing either Very Hard or Fearless difficulty, where the enemies can be defeated easily by utilizing the featured trial character and stage buffs.
16,000 Points is Strictly for Well Invested teams
The 16,000 points can only be achieved in Dire difficulty with a well invested team, having multiple character constellations, signature weapons, and high tier artifacts and builds.
Heaven-Cast Thunder First Half Strategy
Use Plunging Attacks Against the Mountain Weasel
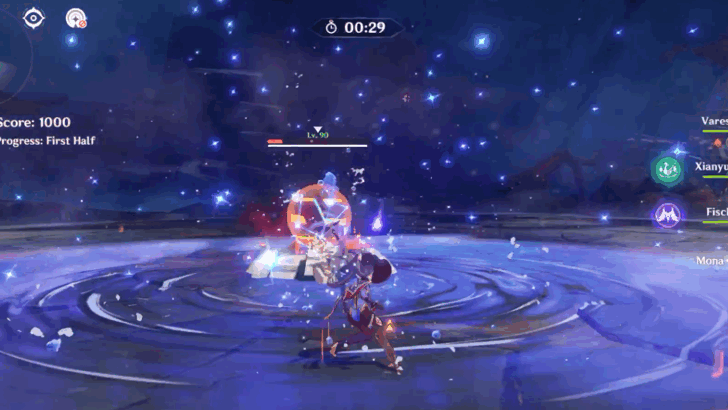
In the first half, you will encounter the Furnace Shell Mountain Weasel after you defeat the Grounded Geoshroom and Hydroshroom. While battling the Weasel, it will apply a shield onto itself that can be easily broken by using Plunging Attacks.
Luckily, you will have Varesa who utilizes Plunging Attacks by the use of her Elemental Skill, and Xianyun with her Elemental Burst.
Mountain Weasel Locations and Enemy Guide
Defeat the Specters As Fast As You Can
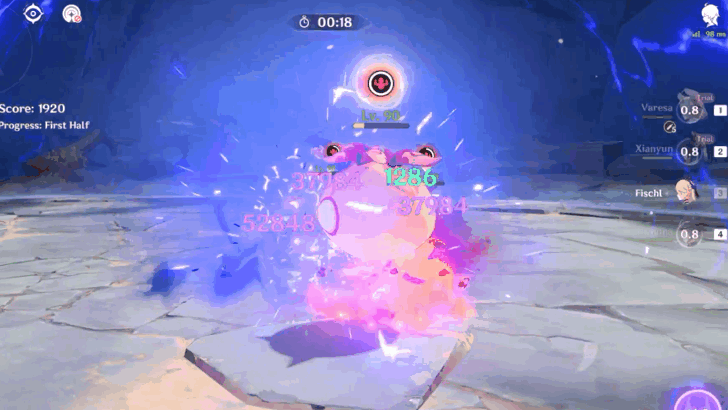
Defeating any kind of Specter takes a lot of time due to the explosion it does when its HP reaches zero. Being in a combat time trial makes defeating them much more critical.
A good way to earn a higher score is to defeat them immediately with a strong AoE attack, while also dodging the explosion they do afterward.
Specter Locations and Item Drops
Heaven-Cast Thunder Second Half Strategy
Keep an Eye on Your HP
The second half is easier compared to the first half due to the wind vortex buff that can group all the enemies when you trigger the Overload reaction. With this, you can just spam Varesa's whole kit along with Chevreuse's skill and buff.
With the stage buff and team comp combination, it is easy to forget that the enemies can still land an attack on you and defeat one of your characters. So, you always need to keep a close eye on your team's HP.
Heaven-Cast Thunder Stage Details
Stage 1 Trial Characters
| First Half Trial Characters | Elements | |
|---|---|---|
 Varesa Varesa
|
 Xianyun Xianyun
|
|
| Second Half Trial Characters | Elements | |
 Varesa Varesa
|
 Chevreuse Chevreuse
|
|
The trial characters will always be at level 80 and have the same stats regardless of the stage difficulty.
Stage 1 Buffs
| Stage 1 Buffs | After Varesa's Plunging Attack hits an opponent, her CRIT DMG will be increased by 45%. This effect lasts for 6s and stacks up to 2 times. |
|---|---|
| Challenge Buff | First Half: After a character's Plunging Attack hits an opponent, a shockwave will be unleashed at the character's position that deals True DMG to nearby opponents. This effect can be triggered once every 3s. |
| Second Half: DMG dealt from Overloaded reactions will be increased by 100%. After a character triggers Overloaded on an opponent, a Vortex will be generated at that opponent's position that pulls in nearby opponents for 5s. This effect can be triggered once every 6s. |
Stage 1 Enemies
| Heaven-Cast Thunder Enemies |
|---|
|
First Half:
Second Half: |
Part of the Chronicle of Shifting Stratagems Event
Heaven-Cast Thunder is the 1st stage of the Chronicle of Shifting Stratagems Event, where players must face and defeat powerful opponents as many times as they can.
Chronicle of Shifting Stratagems Event Guide
Heaven-Cast Thunder Rewards
All Chronicle of Shifting Stratagems Stage 1 Rewards
| Objective | Rewards |
|---|---|
| Obtain 1000 points |
|
| Obtain 2000 points |
|
| Obtain 4000 points |
|
| Obtain 8000 points |
|
| Obtain 16,000 points |
|
Genshin Impact Related Guides

Chronicle of Shifting Stratagems
Chronicle of Shifting Stratagems Stage Guides
| Chronicle of Shifting Stratagems Stages | |
|---|---|
 Heaven-Cast Thunder Heaven-Cast Thunder |
 Blazing Verdance Blazing Verdance |
 All-Binding Frost All-Binding Frost |
 All-Invigorating Flow All-Invigorating Flow |
 Boltborne Blitz Boltborne Blitz |
 Snowrending Sun Snowrending Sun |
Other Events and Schedule

Comment
Author
Heaven-Cast Thunder Stage 1 Guide
improvement survey
03/2026
improving Game8's site?

Your answers will help us to improve our website.
Note: Please be sure not to enter any kind of personal information into your response.

We hope you continue to make use of Game8.
Rankings
- We could not find the message board you were looking for.
Gaming News
Popular Games

Genshin Impact Walkthrough & Guides Wiki

Honkai: Star Rail Walkthrough & Guides Wiki

Umamusume: Pretty Derby Walkthrough & Guides Wiki

Pokemon Pokopia Walkthrough & Guides Wiki

Resident Evil Requiem (RE9) Walkthrough & Guides Wiki

Monster Hunter Wilds Walkthrough & Guides Wiki

Wuthering Waves Walkthrough & Guides Wiki

Arknights: Endfield Walkthrough & Guides Wiki

Pokemon FireRed and LeafGreen (FRLG) Walkthrough & Guides Wiki

Pokemon TCG Pocket (PTCGP) Strategies & Guides Wiki
Recommended Games

Diablo 4: Vessel of Hatred Walkthrough & Guides Wiki

Cyberpunk 2077: Ultimate Edition Walkthrough & Guides Wiki

Fire Emblem Heroes (FEH) Walkthrough & Guides Wiki

Yu-Gi-Oh! Master Duel Walkthrough & Guides Wiki

Super Smash Bros. Ultimate Walkthrough & Guides Wiki

Pokemon Brilliant Diamond and Shining Pearl (BDSP) Walkthrough & Guides Wiki

Elden Ring Shadow of the Erdtree Walkthrough & Guides Wiki

Monster Hunter World Walkthrough & Guides Wiki

The Legend of Zelda: Tears of the Kingdom Walkthrough & Guides Wiki

Persona 3 Reload Walkthrough & Guides Wiki
All rights reserved
Copyright© 2012-2024 HoYoverse — COGNOSPHERE. All Rights Reserved.
The copyrights of videos of games used in our content and other intellectual property rights belong to the provider of the game.
The contents we provide on this site were created personally by members of the Game8 editorial department.
We refuse the right to reuse or repost content taken without our permission such as data or images to other sites.


![Monster Hunter Stories 3 Review [First Impressions] | Simply Rejuvenating](https://img.game8.co/4438641/2a31b7702bd70e78ec8efd24661dacda.jpeg/thumb)


