This survey will take about 1 minute.
Your answers will help us to improve our website.
Genshin Impact
Saurian Sojourn Event Guide
✉ Send your thoughts in our Genshin 6.4 Patch Survey!
★ Exclusive: Dive back in time with the Meta History
◆ Hot: Version 6.4, Luna 5 Codes
◆ Builds: Varka, Flins, Skirk, Escoffier
◆ Events: Travelers' Tales, He Who Caught the Wind
◆ Future: Linnea, Version 6.5 Luna VI

Saurian Sojourn is the saurian puzzle event in Genshin Impact Version 6.1. See how to play this Sumeru event, how to unlock the event, and all event rewards in this guide!
Saurian Sojourn Stage Guides
All Saurian Sojourn Stages and Dates
| Stages | Unlock Dates |
|---|---|
| 1 - Dive Under Roiling Waves | October 24, 2025 |
| 2 - Climbing Up Precipitous Cliffs | October 25, 2025 |
| 3 - Swinging Across Narrow Passes | October 26, 2025 |
| 4 - Gazing Into Shadowed Chambers | October 27, 2025 |
| 5- Charging Through Immovable Rocks | October 28, 2025 |
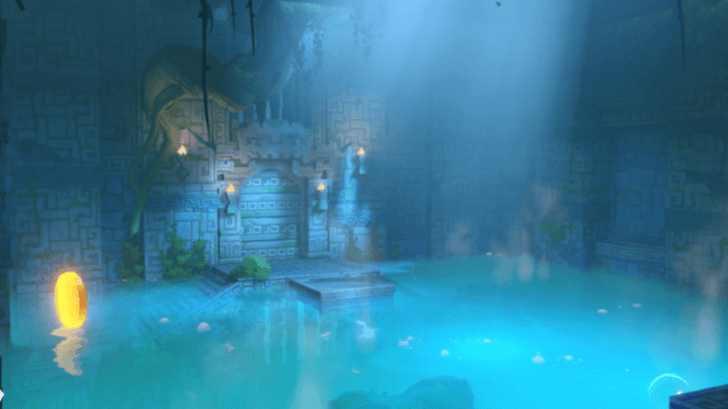
Stage 1 - Dive Under Roiling Waves
| Dive Under Roiling Waves | |
|---|---|
 |
|
| Trial Saurian |
|
| Objectives |
・Complete the challenge ・Complete the challenge and collect 3 Adventure Coins |
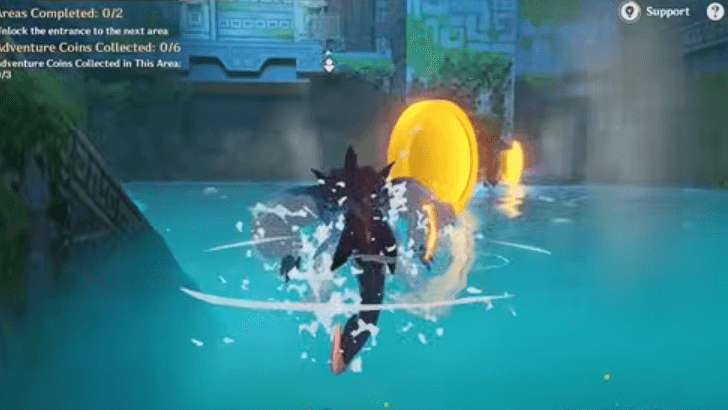
The first stage of the Saurian Sojourn event will have players working together with a Koholasaurus to navigate two rooms filled with boiling water that the Traveler cannot touch, but the Saurian can.
Dive Under Roiling Waves Walkthrough
| Steps | Walkthrough |
|---|---|
| 1 | 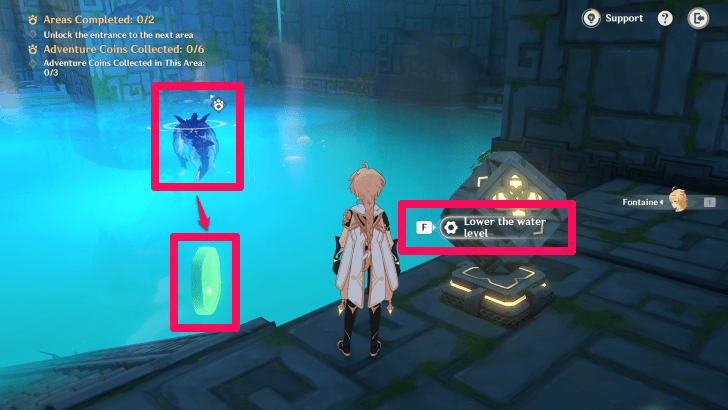 Swap to the Koholasaurus and move it above this Coin in the water, then swap back to the Traveler and lower the water level once using the mechanism. |
| 2 | 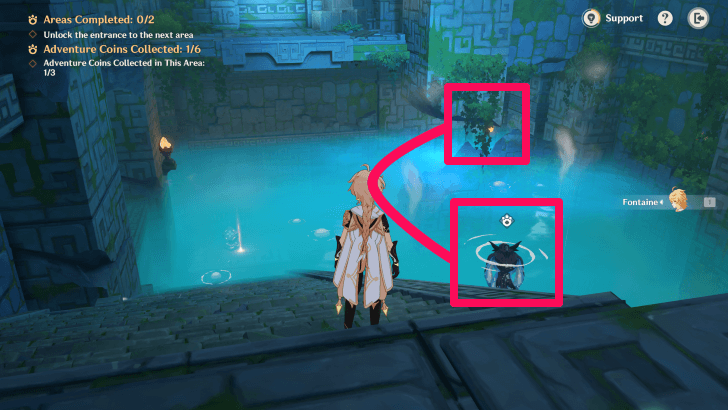 Retain the current water level and swap back to the Koholasaurus to swim over to this Adventure Coin. |
| 3 | 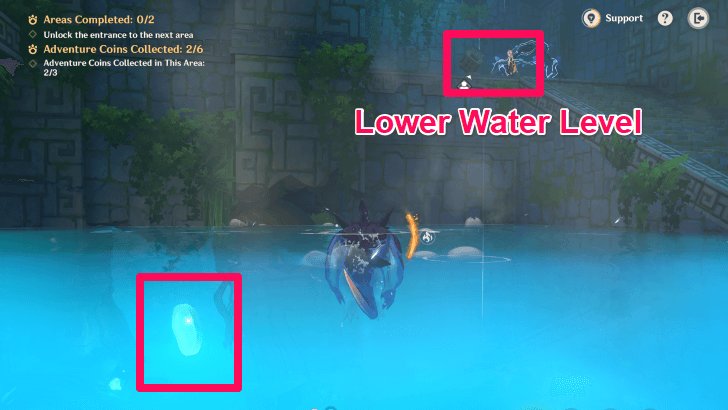 Then, swap back to the Traveler and lower the water level one last time to access this last Adventure Coin. |
| 4 |  Once you get the coin, use the Traveler to activate this mechanism and glide up to the second room. |
| 5 | 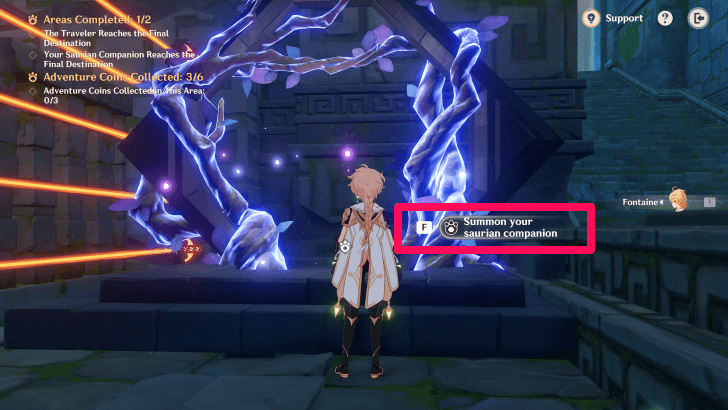 In the second room, use the nearby Door of Resurrection to bring the Koholasaurus into this room. |
| 6 |  Switch to the Koholasaurus and collect these two Adventure Coins as the water rises and falls. |
| 7 |  Wait for the water to lower completely, then enter this corner of the room and wait for the water to rise again. |
| 8 | 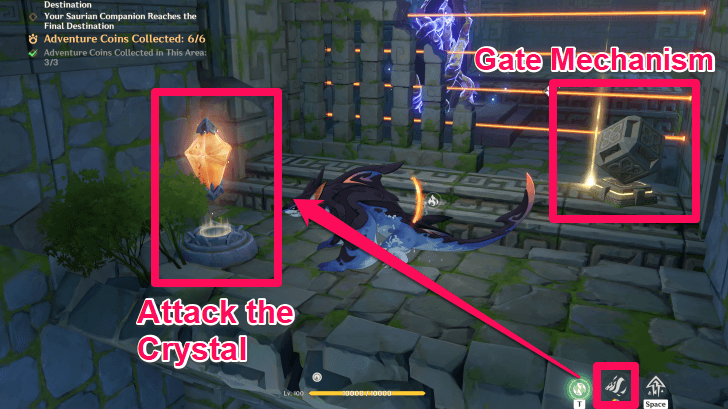 The water will rise and lift the Koholasaurus up. Collect the final Adventure Coin in the corner and use the Koholasaurus' Dash Attack to disable the rays. |
| 9 |  Once the rays are down, use the Traveler to interact with the mechanism to open the last gate. Use the floating platform to get the Traveler to the end, while the Koholasaurus can just swim over. |
Stage 2 - Climbing Up Precipitous Cliffs
| Climbing Up Precipitous Cliffs | |
|---|---|
 |
|
| Trial Saurian |
|
| Objectives |
・Complete the challenge ・Complete the challenge and collect 3 Adventure Coins |
The second stage lets players work together with a Tepetlisaurus to navigate rooms full of deadly blue and orange rays that can be switched using the ore mechanisms.
Climbing Up Precipitous Cliffs Walkthrough
| Steps | Walkthrough |
|---|---|
| 1 | 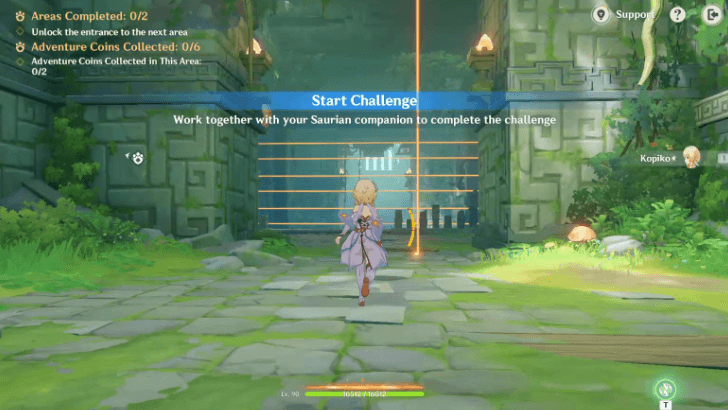 Slip past and avoid hitting the moving, singular ray first with the Traveler and then with the Tepetlisaurus. |
| 2 |  Switch to the Tepetlisaurus and burrow up the left-side wall to grab the Adventure Coin. |
| 3 | 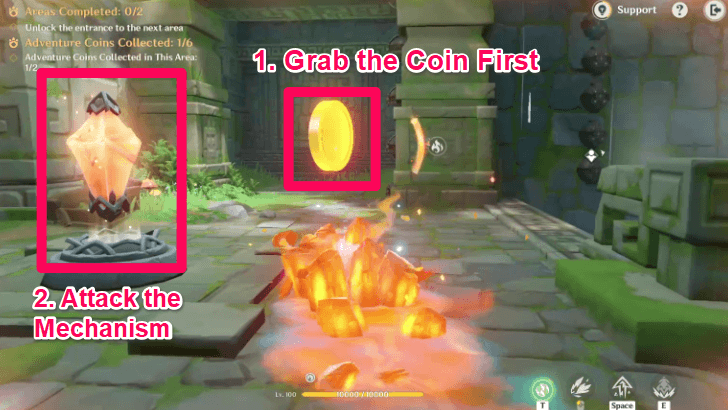 Cross the wall until you're at the other side of the room, where you can go down to the floor and grab the Adventure Coin in the alcove to the right. Afterwards, hit the orange ore mechanism with the Tepetlisaurus' attack. |
| 4 | 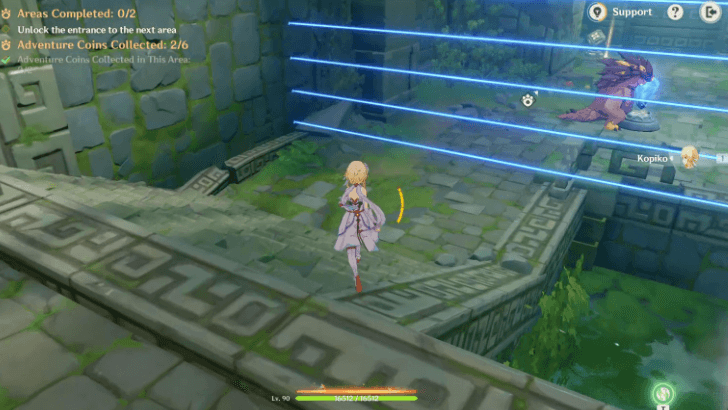 When the blue rays are active, switch back to the Traveler and go down the stairs until you're just in front of the blue rays. |
| 5 | 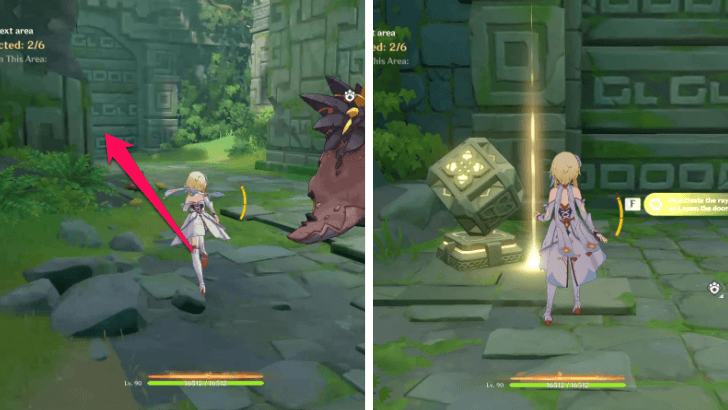 Switch to the Tepetlisaurus again and hit the ore mechanism to remove the blue rays. This way, you can switch to the Traveler and proceed to the mechanism that opens the next room. |
| 6 | 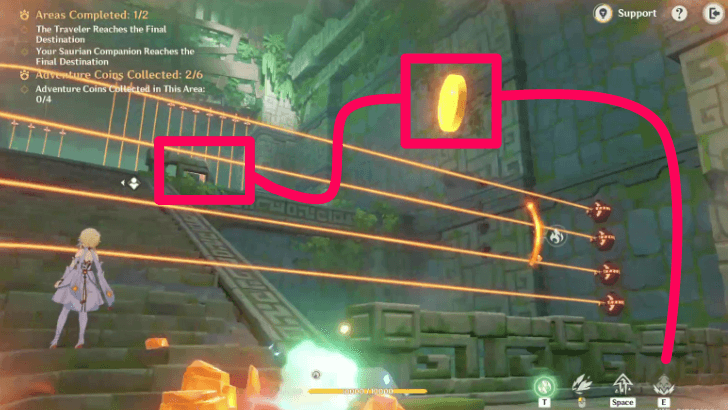 |
| 7 | 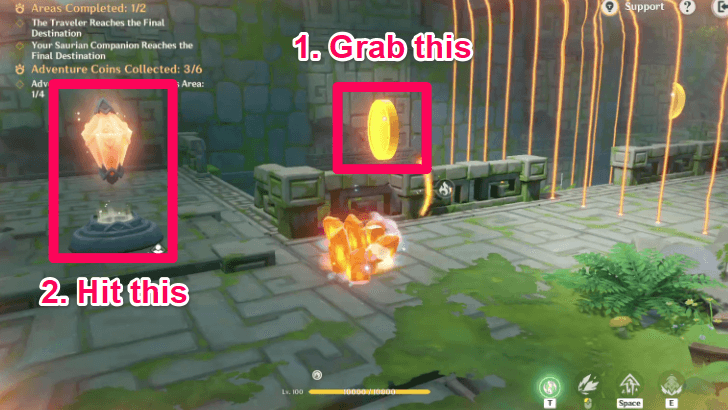 Cross over to the left-side wall and grab the fourth Adventure Coin before hitting the orange mechanism to switch the rays. |
| 8 | 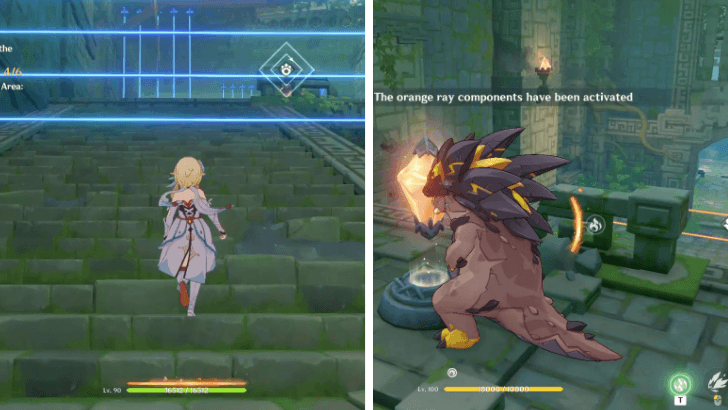 Go up the stairs as Traveler and then switch back to the Tepetlisaurus, hitting the mechanism again to let the Traveler catch up to the Tepetlisaurus. |
| 9 |  As the Tepetlisaurus, hit the mechanism again to turn on the blue rays. Switch back to the Traveler to grab the fifth Adventure Coin and stay in place. |
| 10 |  Hit the mechanism one last time as the Tepetlisaurus, removing the blue rays. As the Traveler, you'll be free to move forward and grab the last Adventure Coin, as well as open the final door. You can then bring over both Traveler and Tepetlisaurus to the finish line. |
Stage 3 - Swinging Across Narrow Passes
| Swinging Across Narrow Passes | |
|---|---|
 |
|
| Trial Saurian |
|
| Objectives |
・Complete the challenge ・Complete the challenge and collect 3 Adventure Coins |
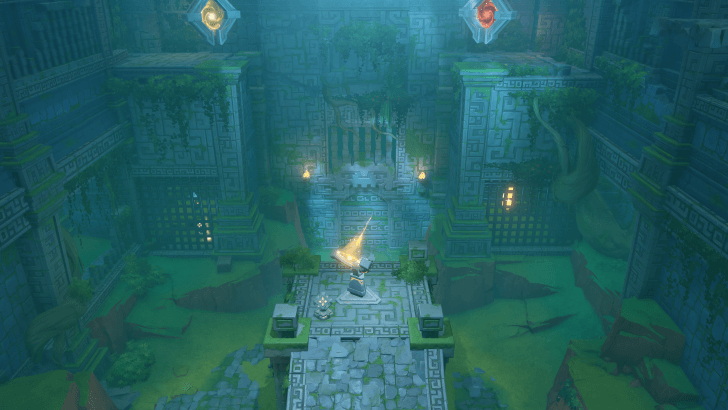
The third stage of the event has players working with a Yumkasaurus to utilize Relay Balls, Flamegranates, and Coilgrass Sigils to open the way forward.
Swinging Across Narrow Passes Walkthrough
| Steps | Walkthrough |
|---|---|
| 1 |  To start the stage, swap to the Yumkasaurus and grapple twice to collect this coin on the right-side ledge. |
| 2 | 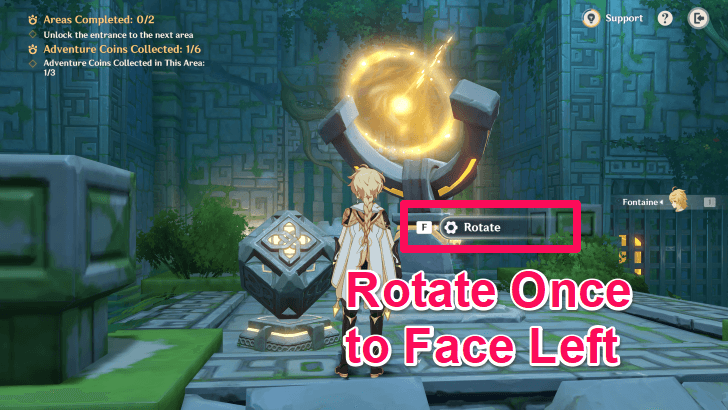 Then, swap to the Traveler and glide to the mechanism in the center of the room. Rotate it once to have it face the upper-left corner of the room. |
| 3 |  Switch back to the Yumkasaurus and pick up the Relay Ball by aiming at it and using the Saurian's Skill. Spit the ball at the yellow Relay Mechanism to open the left-side gate. |
| 4 | 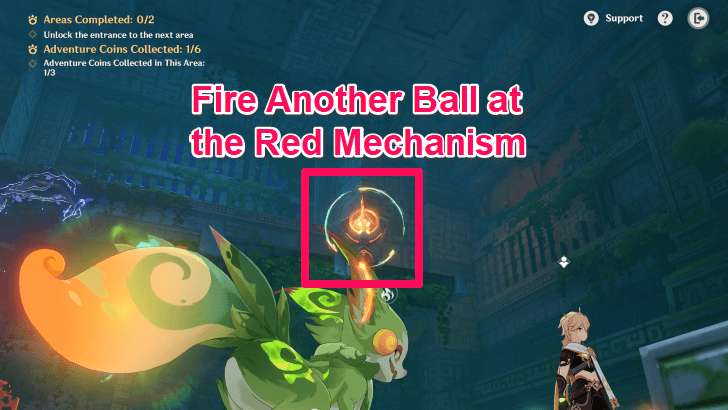 Pick the ball up again, then walk to the center of the room and fire at the red mechanism on the starting platform to open the right-side gate. |
| 5 | 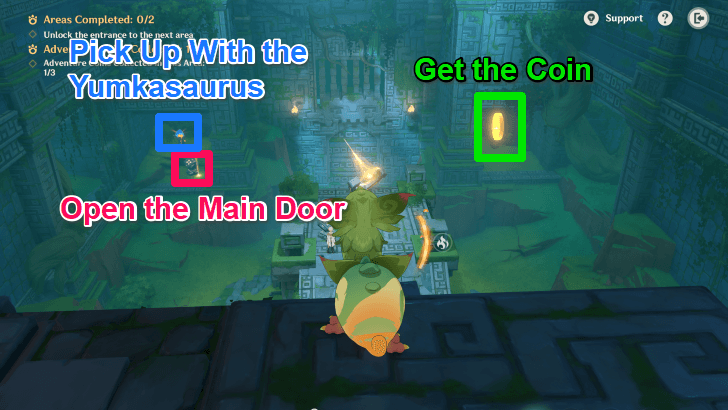 Switch to the Traveler, pick up the coin on the right, and use the mechanism on the left to open the door. Then switch back to the Yumkasaurus and pick up the Flamegranate. |
| 6 | 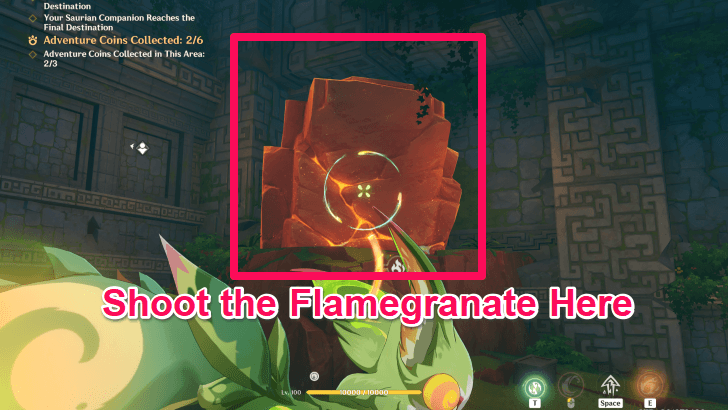 Aim at the large red rock in the corner of the room and spit the Flamegranate at it, causing it to explode and reveal the last coin. Pick it up and head into the next room. |
| 7 |  As the Yumkasaurus, pick up the Flamegranate in the center of the second room and spit at the rocks at the top of the right-side stairs. |
| 8 | 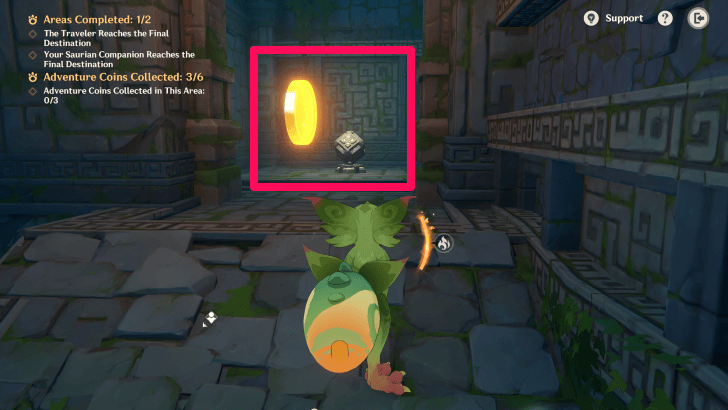 Collect the coin in the room behind the rocks and use the Traveler to activate the mechanism, summoning a Coilgrass Sigil. |
| 9 |  Activate the Coilgrass Sigil with the Yumkasaurus, then swap back to the Traveler without moving the Saurian. Use the Coilgrass Sigil to walk to a coin, then activate a mechanism on the other side of the room. |
| 10 |  Once the grate is lifted, switch back to the Yumkasaurus and fire this Relay Ball at the blue Relay mechanism to trigger a platform. |
| 11 |  Switch back to the Traveler, and walk to the new platform. Collect the final coin and activate the mechanism close to it to open the gate to the finish line, and complete the stage by bringing the Traveler and Yumkasaurus to the end of the stage. |
Stage 4 - Gazing Into Shadowed Chambers
| Gazing Into Shadowed Chambers | |
|---|---|
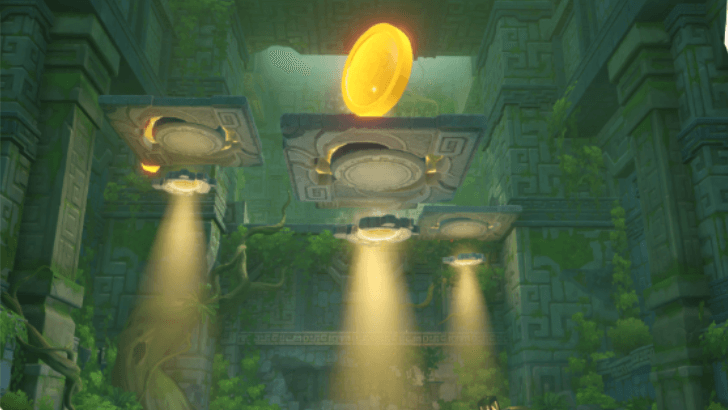 |
|
| Trial Saurian |
|
| Objectives |
・Complete the challenge ・Complete the challenge and collect 3 Adventure Coins |
In the fourth stage, you must work together with the Iktomisaurus to use Phlogiston Engravings and get through the stage.
Gazing Into Shadowed Chambers Walkthrough
| Steps | Walkthrough |
|---|---|
| 1 |  Take the Traveler across the room while avoiding the spotlights, and then switch to Iktomisaurus. |
| 2 | 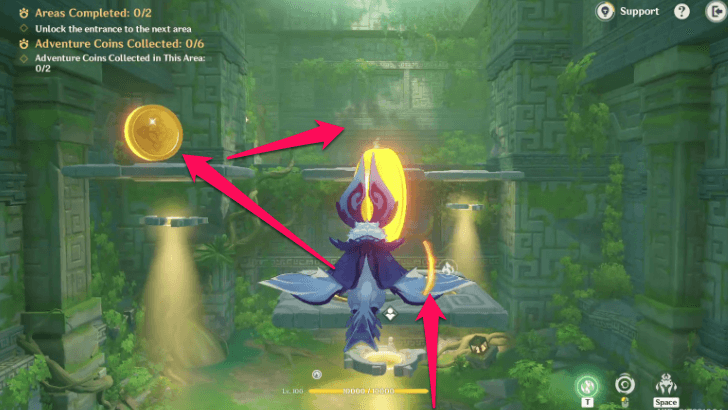 Use the Iktomisaurus to jump upwards and grab the first Adventure Coin. Afterwards, you can jump and glide above the spotlights to get the second coin and onto the raised area. |
| 3 | 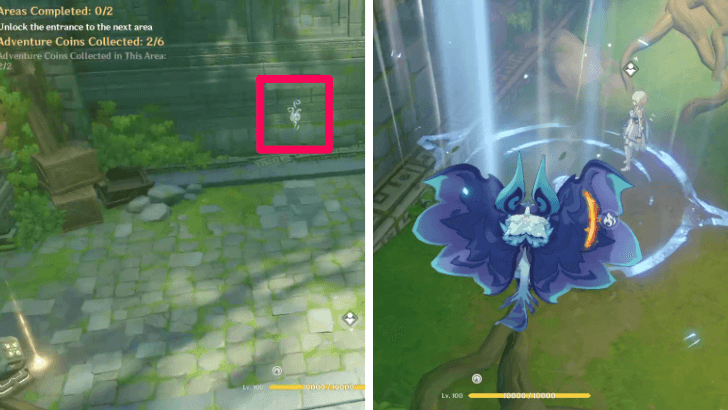 Use the Iktomisaurus' hold attack to grab the Phlogiston Engraving on the wall. Then go down to the Traveler and summon a Wind Current. |
| 4 | 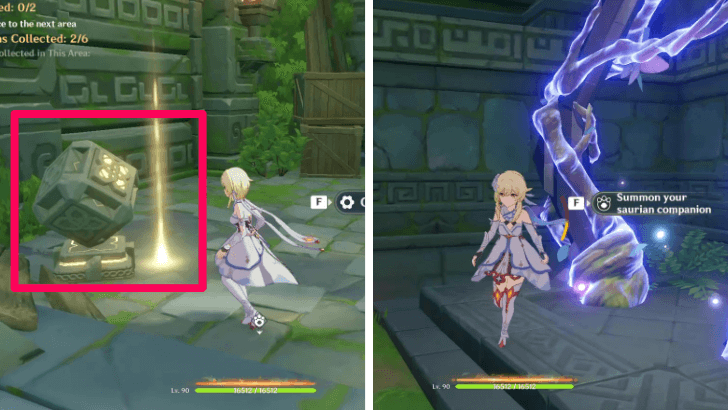 Ride the wind current upwards and open the door to the next room. You can summon the Iktomisaurus in the next room to proceed. |
| 5 | 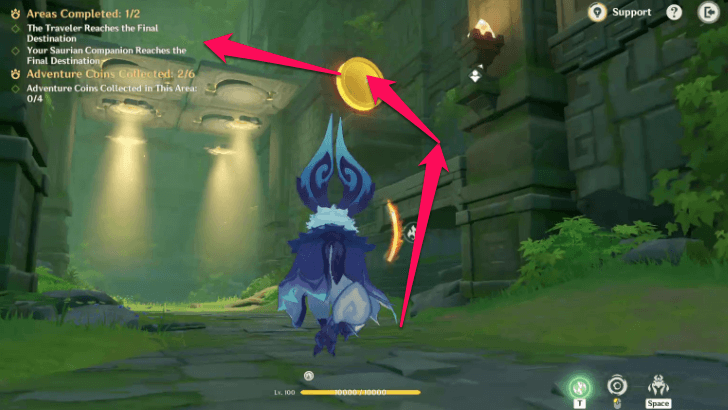 Switch to the Iktomisaurus and jump up the right-side platforms to reach the third coin. Then jump above the spotlights to continue forward. |
| 6 |  Still with the Iktomisaurus, head left and turn left again to find a pathway blocked by a Phlogiston wall. Grab the Barrel Engraving on the wall and place it by the Phlogiston. Use a Normal Attack to get rid of the wall. |
| 7 | 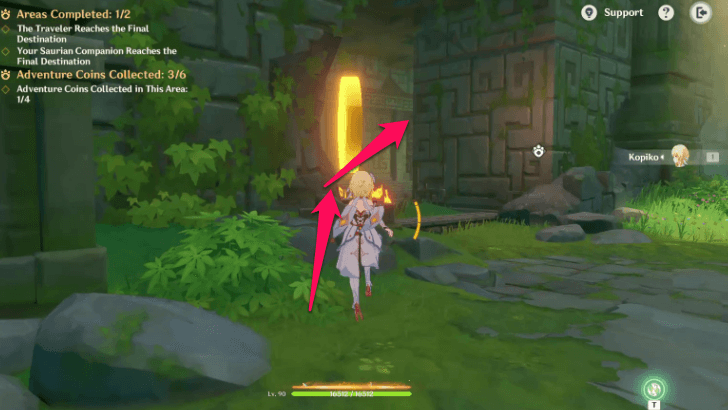 Switch back to the Traveler, and there should now be a pathway opened to the left with an Adventure Coin! Use the pathway to catch up to the Iktomisaurus. |
| 8 | 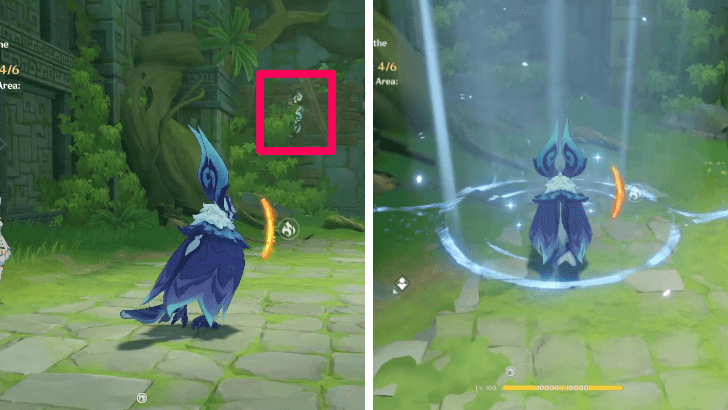 Use the Iktomisaurus to grab the Engraving on the wall just ahead and summon a wind current. The Traveler can then ride the wind current up. |
| 9 |  Grab the fifth Adventure Coin and use the mechanism to open the door to the last room. This door will be high up. |
| 10 | 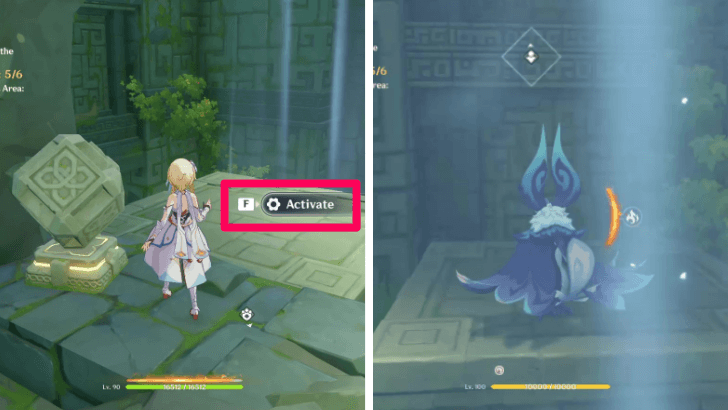 Activate the mechanism again to make the platform go down to the ground level. Then, switch to the Iktomisaurus and place them on the platform. |
| 11 | 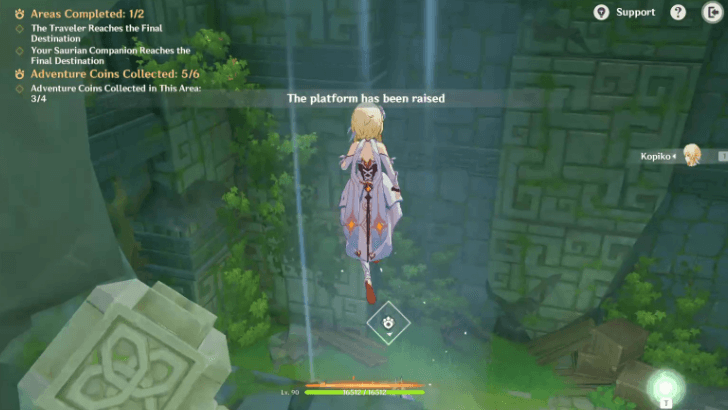 Switch back to the Traveler. Activate the mechanism again to make it go up and then immediately jump on the platform as it will not pause on your level. |
| 12 | 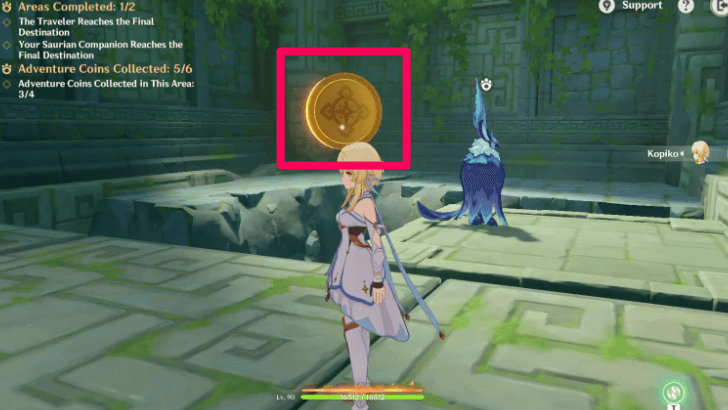 Finally on the highest level, grab the sixth coin on the ledge across from the last room. Then you can proceed to the last room with Traveler and the Iktomisaurus! |
Stage 5 - Charging Through Immovable Rocks
| Charging Through Immovable Rocks | |
|---|---|
 |
|
| Trial Saurian |
|
| Objectives |
・Complete the challenge ・Complete the challenge and collect 3 Adventure Coins |
The final stage requires teamwork with a Tatankasaurus to destroy Pulverite and Geothermal Vents. In this stage, gaseous Phlogiston will not deal damage.
Charging Through Immovable Rocks Walkthrough
| Steps | Walkthrough |
|---|---|
| 1 | 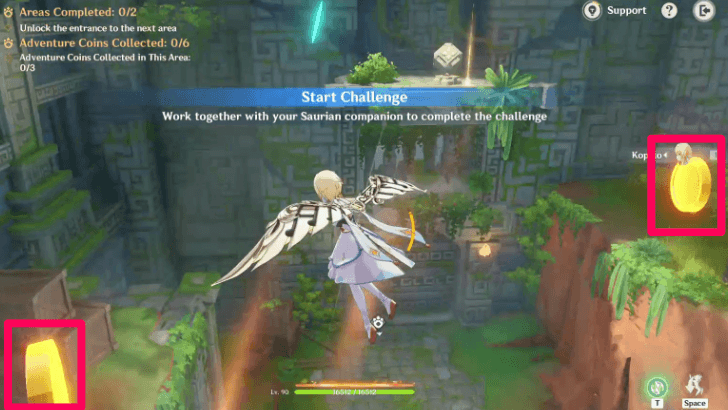 As the Traveler, use the nearby Geothermal Vent to glide upwards and take the Adventure Coins on the higher levels to your left and right. |
| 2 | 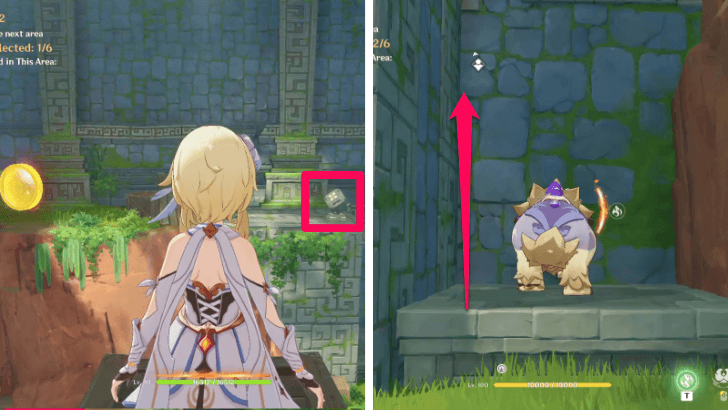 Go to the the right-side level as the Traveler. Switch to the Tatankasaurus and bring them to the platform on the ground right between two higher levels. |
| 3 | 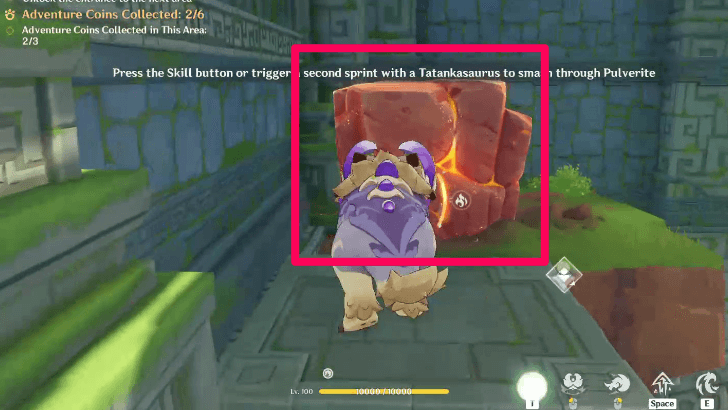 Activate the mechanism to bring the Tatankasaurus up and then use them to smash the Pulverite, summoning another Geothermal Vent. |
| 4 |  As the Traveler, ride the second Geothermal Vent to a ledge with the third Adventure Coin on it! Then you can glide to the mechanism on the other side of the room. This mechanism opens the path foward. |
| 5 | 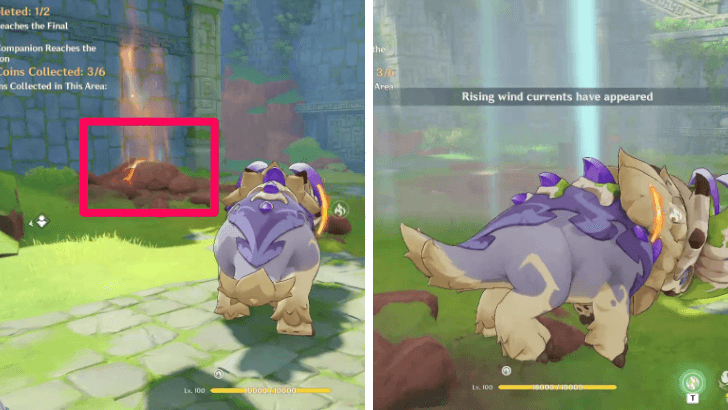 In the next room, summon and switch to the Tatankasaurus. Destroy the nearby Geothermal Vent to activate wind currents in the center of the room. |
| 6 | 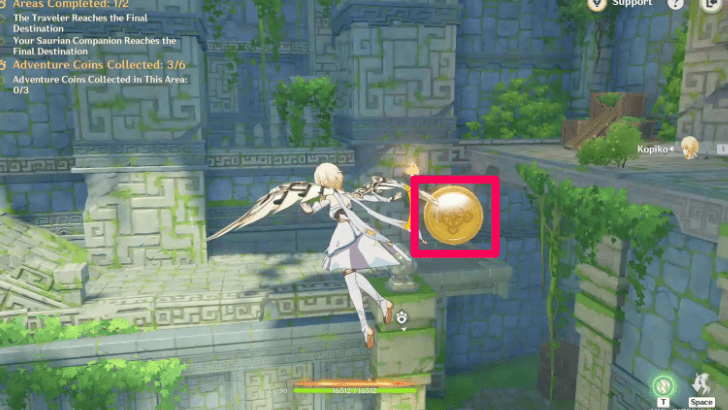 As the Traveler, ride the wind current up and glide to the ledge to the left, where an Adventure Coin is located beside a mechanism switch. |
| 7 |  Activate the mechanism to make the platform go up and down repeatedly. Use the Tatankasaurus to ride the platform up and sprint and jump up off the incline to get to the other side. |
| 8 | 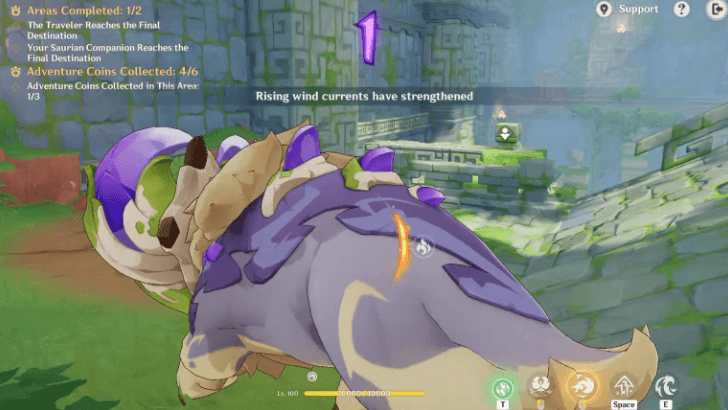 Destroy the Geothermal Vent on this ledge to strengthen the wind currents. |
| 9 | 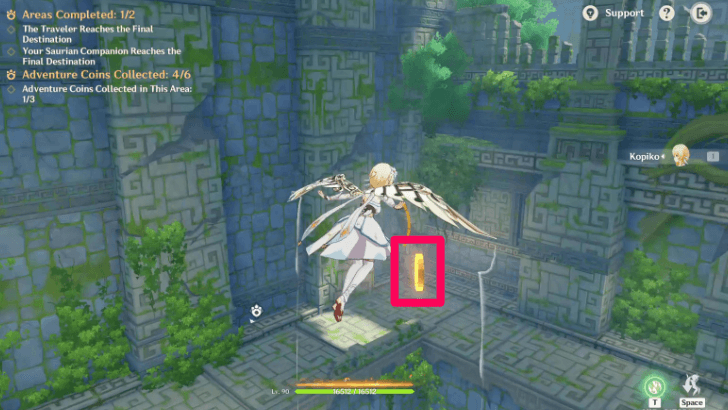 Ride the stronger wind currents as the Traveler to get the fifth Adventure Coin on a higher ledge. |
| 10 |  Afterwards, you can ride the wind currents again to get to the larger ledge where a coin and the mechanism to open the final door is located. |
| 11 |  Switching back to the Tatankasaurus, you need to sprint and enter Spirited state, and then Sprint again to take a running leap and reach the ledge. If it becomes too hard to achieve, you can activate Support Mode in the upper right corner. |
How to Play Saurian Sojourn
Collect Adventure Coins and Reach the Destination
Each stage in Saurian Sojourn requires Travelers to collect Adventure Coins along a route and reach the end destination of the stage within the time limit.
Switch Between the Traveler and Saurian Companion

You will need to alternate between your character and the Saurian companion in order to solve the puzzles and get past the obstacles during the challenge. To complete the challenge, both your character and the saurian must arrive at the final destination!
How to Unlock Saurian Sojourn
Complete Archon Quest Prologue Act 3

To unlock Saurian Sojourn, you must complete the Prologue Act 3 Archon Quest, Song of the Dragon and Freedom and reach at least Adventure Rank 20!
Prologue Act 3 Archon Quest Guide
Talk to Komina and Kweku to Unlock
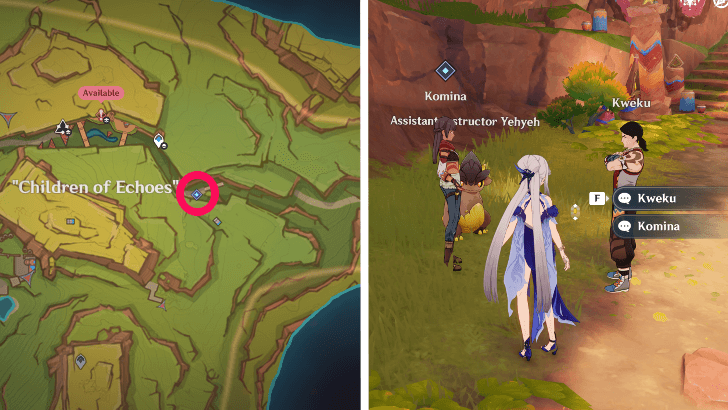
To start playing the Saurian Sojourn event, speak with Komina and Kweku in the Children of Echoes area in Natlan to gain acess to the event.
Saurian Sojourn Event Information
Saurian Sojourn Event Details

| Event Start | October 24, 2025 |
|---|---|
| Event End | November 3, 2025 |
| How to Unlock | Adventure Rank 20+ Complete Archon Quest Prologue Act 3 - Song of the Dragon and Freedom |
| Rewards |
What is the Saurian Sojourn Event?
Saurian Sojourn is the Saurian puzzle event in Version 6.1 where Travelers must work together with their Saurian companion to collect Adventure Coins and complete challenge stages!
Other Current & Upcoming Events
Saurian Sojourn Event Rewards
Total Ruins Exploration Event Rewards
| All Saurian Sojourn Rewards | ||
|---|---|---|
|
|
|
|
|
|
|
|
|
|
|
|
Saurian Sojourn Stage Rewards
| Stage | Objectives | Rewards |
|---|---|---|
| 1 | Complete the challenge |
|
| Complete the challenge and collect 3 Adventure Coins |
|
|
| 2 | Complete the challenge |
|
| Complete the challenge and collect 3 Adventure Coins |
|
|
| 3 | Complete the challenge |
|
| Complete the challenge and collect 3 Adventure Coins |
|
|
| 4 | Complete the challenge |
|
| Complete the challenge and collect 3 Adventure Coins |
|
|
| 5 | Complete the challenge |
|
| Complete the challenge and collect 3 Adventure Coins |
|
Genshin Impact Related Guides

Current Events
| Event Guide | Date and Rewards |
|---|---|
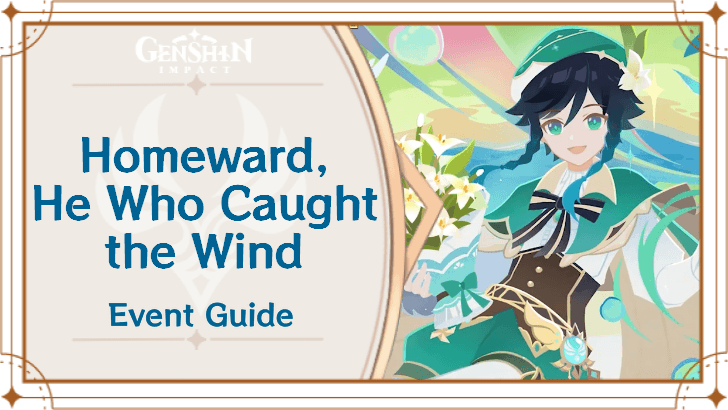 Homeward, He Who Caught the Wind Homeward, He Who Caught the Wind
|
02/27/2026 - 03/16/2026
+ Weapon and Talent Up Materials + Catalyst Weapon Skin |
Upcoming Events
| Event Guide | Date and Rewards |
|---|---|
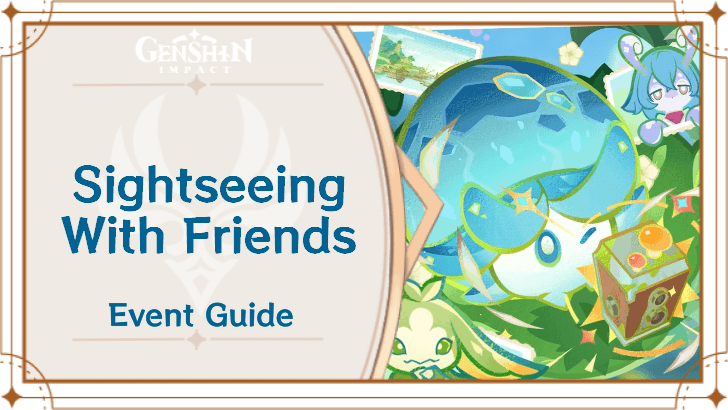 Sightseeing With Friends Sightseeing With Friends
|
03/16/2026 - 03/26/2026
|
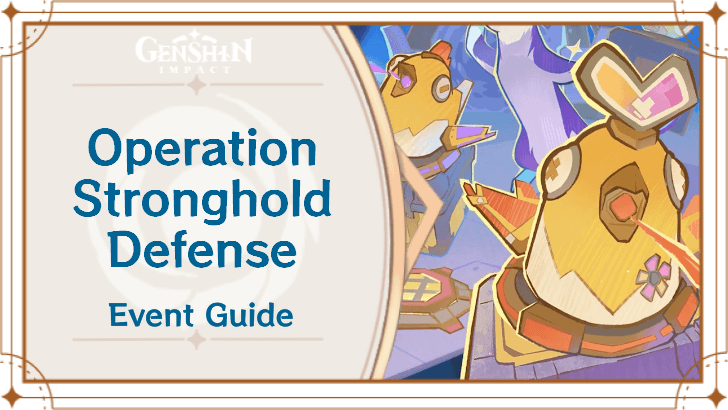 Operation Stronghold Defense Operation Stronghold Defense
|
03/23/2026 - 04/02/2026
|
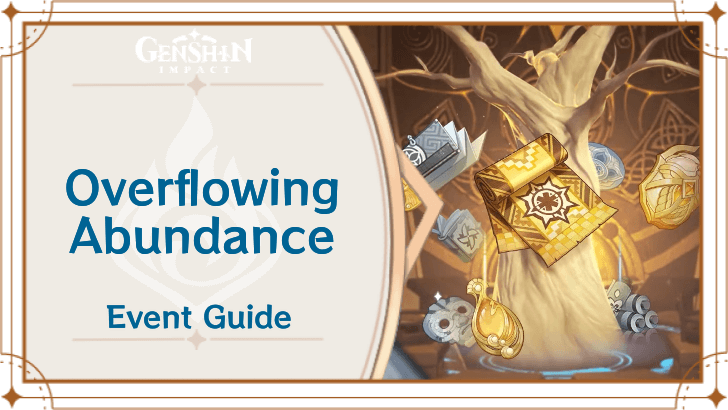 Overflowing Abundance 6.4 Rerun Overflowing Abundance 6.4 Rerun
|
03/30/2026 - 04/06/2026
Weapon and Talent Up Materials
|
Permanent/Recurring Events
| Event Guide | Date and Rewards |
|---|---|
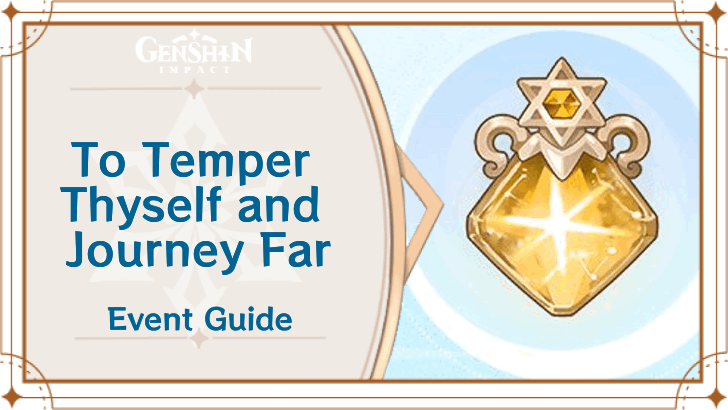 To Temper Thyself and Journey Far To Temper Thyself and Journey Far
|
02/23/2026 - 05/18/2026
+ 5-Star Stella Fortuna |
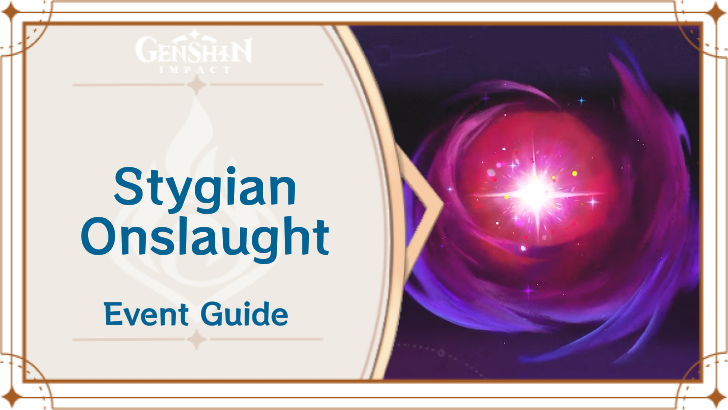 Stygian Onslaught Stygian Onslaught
|
03/04/2026 - 04/07/2026
+ Dust of Enlightenment |
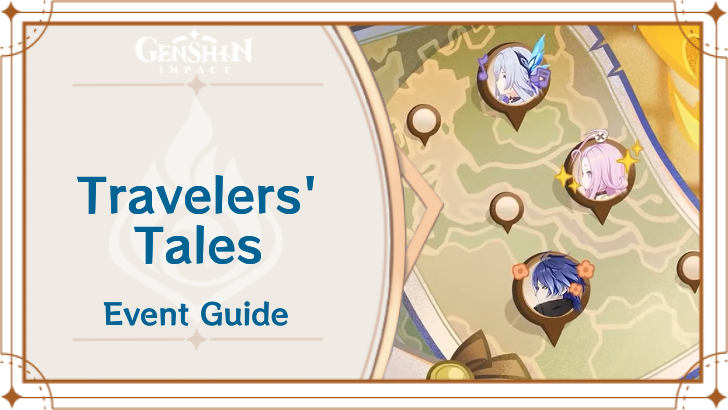 Travelers' Tales Travelers' Tales
|
Permanently Available after Version 6.0
|
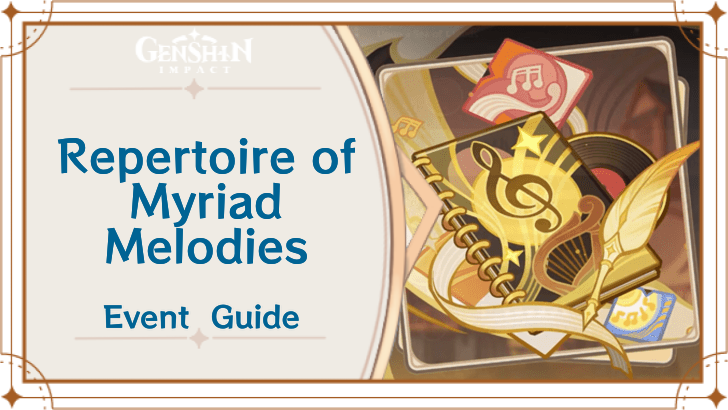 Repertoire of Myriad Melodies Repertoire of Myriad Melodies
|
Permanently Available
|
 Test Run Test Run
|
Permanently Available
+ Ascension Materials |
 Hangout Events Hangout Events
|
Permanently Available after Version 1.4
+ Talent Materials + Specialty Dish |
 Baptism of Song Baptism of Song
|
Permanently Available
+ Free Barbara
|
 Daily Check-In Daily Check-In
|
2021/03/01 - Permanently Available
|
 Stellar Reunion Returnee Event Stellar Reunion Returnee Event
|
Permanently Available
+ Prototype Rancour |
Past Events
Comment
Author

Saurian Sojourn Event Guide
Please participate in our site
improvement survey
03/2026
improvement survey
03/2026
Would you assist in
improving Game8's site?
improving Game8's site?

×
We are listening to our users' valuable opinions and discussing how to act on them.
The information collected through this survey will be used for the purpose of improving our services. In addition, the information will only be disclosed a part of a statistic in a format that will not allow identification of personal information.
Begin Survey
Not Now
×
Please rate each item regarding Game8.co's Advertisements.
Amount of Ads
Very Dissatisfied
Somewhat Dissatisfied
Fine
Somewhat Satisfied
Highly Satisfied
Placement of Ads
Timing of Ad Display
Ad Loading Speed
Safeness of Ads
Content of Ads
×
Please rate each item regarding Game8.co's Quality of Articles.
Amount of information
Very Dissatisfied
Somewhat Dissatisfied
Fine
Somewhat Satisfied
Highly Satisfied
Frequency of updates
Speed of new information
Accuracy of articles
Understandibility of articles
Readability of sentences
×
Please rate each item regarding Game8.co's Usability of the Site.
Ease of finding information
Very Dissatisfied
Somewhat Dissatisfied
Fine
Somewhat Satisfied
Highly Satisfied
Loading Speed
Use of Color
Font Size
Visibility of Images
Easy to Understand Layout
×
Please rate each item regarding Game8.co's Message Boards, Comments.
Ease of Writing
Very Dissatisfied
Somewhat Dissatisfied
Fine
Somewhat Satisfied
Highly Satisfied
Readability
Ease in Finding Information
Comment Quality
Comment Quantity
Admin Response
×
Please rate each item regarding Game8.co's Site's new design.
Please rate our site's new design
Very Dissatisfied
Somewhat Dissatisfied
Fine
Somewhat Satisfied
Highly Satisfied
Do you think that the website's design change makes the site easier to use?
Has the new design made it easier for you to find information on the site?
Has the new design improved the overall visual appeal of the site?
How would you rate your overall satisfaction with the new design of the site?
×
How likely are you to recommend Game8 to someone you know?
Very Unlikely
0
1
2
3
4
5
6
7
8
9
10
Very Likely
If you have other opinions regarding potential improvement to the website, please share them with us. We would appreciate your honest opinion.
Note: This is a free response section, so you can proceed without entering anything.
Note: Please be sure not to enter any kind of personal information into your response.
Note: Please be sure not to enter any kind of personal information into your response.
×
Thank You
×
Thank you for participating in our survey! Your answers will help us to improve the quality of our website and services.
We hope you continue to make use of Game8.
We hope you continue to make use of Game8.
Close


Rankings
Gaming News


Popular Games

Genshin Impact Walkthrough & Guides Wiki
Honkai: Star Rail Walkthrough & Guides Wiki
Umamusume: Pretty Derby Walkthrough & Guides Wiki
Pokemon Pokopia Walkthrough & Guides Wiki
Resident Evil Requiem (RE9) Walkthrough & Guides Wiki
Monster Hunter Wilds Walkthrough & Guides Wiki
Wuthering Waves Walkthrough & Guides Wiki
Arknights: Endfield Walkthrough & Guides Wiki
Pokemon FireRed and LeafGreen (FRLG) Walkthrough & Guides Wiki
Pokemon TCG Pocket (PTCGP) Strategies & Guides Wiki


Recommended Games
Diablo 4: Vessel of Hatred Walkthrough & Guides Wiki
Fire Emblem Heroes (FEH) Walkthrough & Guides Wiki
Yu-Gi-Oh! Master Duel Walkthrough & Guides Wiki
Super Smash Bros. Ultimate Walkthrough & Guides Wiki
Pokemon Brilliant Diamond and Shining Pearl (BDSP) Walkthrough & Guides Wiki
Elden Ring Shadow of the Erdtree Walkthrough & Guides Wiki
Monster Hunter World Walkthrough & Guides Wiki
The Legend of Zelda: Tears of the Kingdom Walkthrough & Guides Wiki
Persona 3 Reload Walkthrough & Guides Wiki
Cyberpunk 2077: Ultimate Edition Walkthrough & Guides Wiki


All rights reserved
Copyright© 2012-2024 HoYoverse — COGNOSPHERE. All Rights Reserved.
The copyrights of videos of games used in our content and other intellectual property rights belong to the provider of the game.
The contents we provide on this site were created personally by members of the Game8 editorial department.
We refuse the right to reuse or repost content taken without our permission such as data or images to other sites.