This survey will take about 1 minute.
Your answers will help us to improve our website.
Genshin Impact
The Forsaken Sea of Wisdom Quest Guide
✉ Send your thoughts in our Genshin 6.4 Patch Survey!
★ Exclusive: Dive back in time with the Meta History
◆ Hot: Version 6.4, Luna 5 Codes
◆ Builds: Varka, Flins, Skirk, Escoffier
◆ Events: Travelers' Tales, He Who Caught the Wind
◆ Future: Linnea, Version 6.5 Luna VI
The Forsaken Sea of Wisdom is the second quest under the Chronicler of the Crumbling City quest chain in Genshin Impact 5.5. See how to unlock it, how to charge the Astral Assemblage, how to use use the Iridescent Beam, the full quest walkthrough, and the rewards in this guide!
List of Contents
How to Unlock The Forsaken Sea of Wisdom
Progress Through The Frozen, Rekindling Land Quest

The Forsaken Sea of Wisdom can be unlocked while progressing through The Frozen, Rekindling Land world quest, which is also part of the Chronicler of the Crumbling City quest chain!
The Frozen, Rekindling Land Quest Guide
The Forsaken Sea of Wisdom Walkthrough
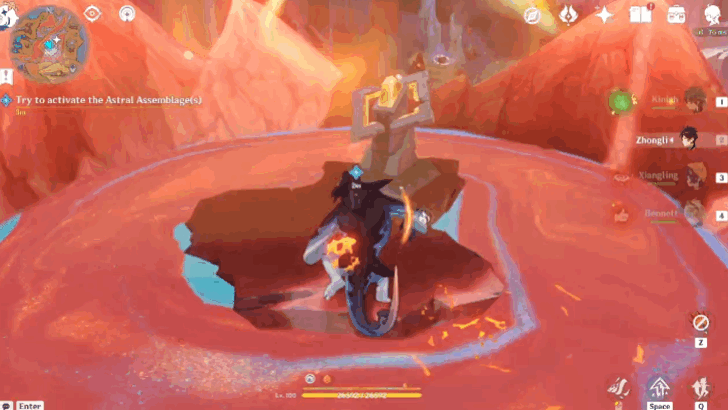
Try to activate the Astral Assemblage(s)

Head to the west area of the Ancient Sacred Mountain, at the Sea of Shifting Sentience. Upon arriving, you will see a huge ball made up of pure Phlogiston, which is the Astral Assemblage.
Natlan Interactive Map and Location
Charge the Astral Assemblage(s)
Approach the pedestal of the Astral Assemblage, then follow the objective marker to charge the Astral Assemblage three times to activate it while defeating enemies and solving puzzles.
You will also need to use the indwelling power of Saurians, thankfully there will be Spiritsconces spawned around the objective area.
How to Charge the First Astral Assemblage(s)
| Astral Assemblage(s) - First Charge Area | |
|---|---|
| 1 | Follow the objective marker to the first charging area. Then, defeat the two Pyro Slimes. After defeating the Pyro Slimes, a Spiritway will spawn near where they were located. |
| 2 | Ride the Spiritway to the top and dive into the middle of the Phlogiston pond to charge the Astral Assemblage. |
How to Charge the Second Astral Assemblage(s)
| Astral Assemblage(s) - Second Charge Area | |
|---|---|
| 1 | Follow the next objective marker to the second charging area. |
| 2 | Head to the little pond east of the second charging area, jump to the highest pond, and defeat the two Tenebrous Mimiflora to unlock the Spiritway. The two Tenebrous Mimifloras will be seen as Secret Source Automaton Hunter-Seekers. |
| 3 | Ride the Spiritway to the top of the second charging area. |
| 4 | Defeat the last Tenebrous Mimiflora at the very top, then dive into the middle of Phlogiston puddle to charge the Astral Assemblage. The Tenebrous Mimiflora at the very top will take form of a Hilichurl Rogue. |
How to Charge the Third Astral Assemblage(s)
| Astral Assemblage(s) - Third Charge Area | |
|---|---|
| 1 | From the top of the second charging area, ride the Spiritway to go to the third charging area. Remember to jump to the left Spiritway once you reach the point where there are two Spiritways. |
| 2 | Indwell with a Tatankasaurus and smash the Phlogiston rock beside the third charging area. |
| 3 | Indwell with the Koholasaurus Spiritsconces nearby and dive into the middle of the Phlogiston pond. |
Try to activate the Astral Assemblage(s)
Return to the Astral Assemblage and try to activate it. However, it will be covered in Abyssal armor.
Use the Iridescent Beam to clear out the Abyss
Indwell with the Koholasaurus Spirtconce in front of you and activate all the Iridescent Beams around the area. The Iridescent Beam can be activated by standing beside it and pressing the prompt on your screen.
Activating all the Iridescent Beams will remove the Abyssal armor surrounding the Astral Assemblage. The location of the Iridescent Beams will be marked on your map and can be easily seen by following the objective markers.
Re-activate the Astral Assemblage
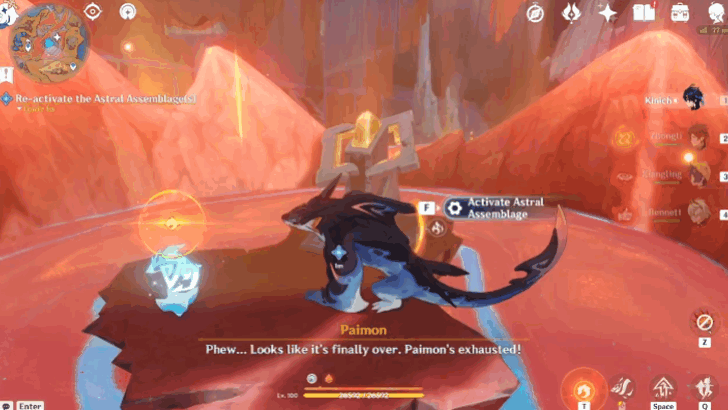
After clearing the Abyss surrounding the Astral Assemblage, return to its location and activate it using the pedestal beneath it.
The Forsaken Sea of Wisdom Information
Sub-Quest of Chronicler of the Crumbling City
The Forsaken Sea of Wisdom is the second part of the Chronicler of the Crumbling City world quest chain. This new World Quest is part of the Version 5.5 update.
Chronicler of the Crumbling City Quest Guide
The Forsaken Sea of Wisdom Rewards
Total Quest Rewards
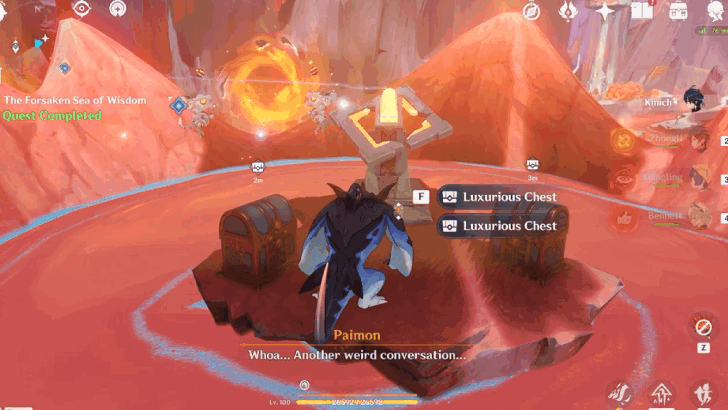
Completing The Forsaken Sea of Wisdom will give you two Luxurious Chests as a reward!
Natlan Treasure Chest Map and Locations
Genshin Impact Related Guides

Other Chronicler of the Crumbling City Quest Guides
| Chronicler of the Crumbling City World Quest Guides | ||
|---|---|---|
| The Frozen, Rekindling Land | The Forsaken Sea of Wisdom | The Sealed Site of Sacrifice |
| In Search of a Hidden Heart | Once, the Sacred Seat of Judgement | Where Once There Was a Calculation Array |
| Where Once Force Was Reversed | Where Once There Were Arms Aplenty | The End of the Road |
| As the Burning Sun Sears Shadows | ||
Author

The Forsaken Sea of Wisdom Quest Guide
Please participate in our site
improvement survey
03/2026
improvement survey
03/2026
Would you assist in
improving Game8's site?
improving Game8's site?

×
We are listening to our users' valuable opinions and discussing how to act on them.
The information collected through this survey will be used for the purpose of improving our services. In addition, the information will only be disclosed a part of a statistic in a format that will not allow identification of personal information.
Begin Survey
Not Now
×
Please rate each item regarding Game8.co's Advertisements.
Amount of Ads
Very Dissatisfied
Somewhat Dissatisfied
Fine
Somewhat Satisfied
Highly Satisfied
Placement of Ads
Timing of Ad Display
Ad Loading Speed
Safeness of Ads
Content of Ads
×
Please rate each item regarding Game8.co's Quality of Articles.
Amount of information
Very Dissatisfied
Somewhat Dissatisfied
Fine
Somewhat Satisfied
Highly Satisfied
Frequency of updates
Speed of new information
Accuracy of articles
Understandibility of articles
Readability of sentences
×
Please rate each item regarding Game8.co's Usability of the Site.
Ease of finding information
Very Dissatisfied
Somewhat Dissatisfied
Fine
Somewhat Satisfied
Highly Satisfied
Loading Speed
Use of Color
Font Size
Visibility of Images
Easy to Understand Layout
×
Please rate each item regarding Game8.co's Message Boards, Comments.
Ease of Writing
Very Dissatisfied
Somewhat Dissatisfied
Fine
Somewhat Satisfied
Highly Satisfied
Readability
Ease in Finding Information
Comment Quality
Comment Quantity
Admin Response
×
Please rate each item regarding Game8.co's Site's new design.
Please rate our site's new design
Very Dissatisfied
Somewhat Dissatisfied
Fine
Somewhat Satisfied
Highly Satisfied
Do you think that the website's design change makes the site easier to use?
Has the new design made it easier for you to find information on the site?
Has the new design improved the overall visual appeal of the site?
How would you rate your overall satisfaction with the new design of the site?
×
How likely are you to recommend Game8 to someone you know?
Very Unlikely
0
1
2
3
4
5
6
7
8
9
10
Very Likely
If you have other opinions regarding potential improvement to the website, please share them with us. We would appreciate your honest opinion.
Note: This is a free response section, so you can proceed without entering anything.
Note: Please be sure not to enter any kind of personal information into your response.
Note: Please be sure not to enter any kind of personal information into your response.
×
Thank You
×
Thank you for participating in our survey! Your answers will help us to improve the quality of our website and services.
We hope you continue to make use of Game8.
We hope you continue to make use of Game8.
Close


Rankings
Gaming News


![Everwind Review [Early Access] | The Shaky First Step to A Very Long Journey](https://img.game8.co/4440226/ab079b1153298a042633dd1ef51e878e.png/thumb)

![Monster Hunter Stories 3 Review [First Impressions] | Simply Rejuvenating](https://img.game8.co/4438641/2a31b7702bd70e78ec8efd24661dacda.jpeg/thumb)
Popular Games

Genshin Impact Walkthrough & Guides Wiki
Honkai: Star Rail Walkthrough & Guides Wiki
Umamusume: Pretty Derby Walkthrough & Guides Wiki
Pokemon Pokopia Walkthrough & Guides Wiki
Resident Evil Requiem (RE9) Walkthrough & Guides Wiki
Monster Hunter Wilds Walkthrough & Guides Wiki
Wuthering Waves Walkthrough & Guides Wiki
Arknights: Endfield Walkthrough & Guides Wiki
Pokemon FireRed and LeafGreen (FRLG) Walkthrough & Guides Wiki
Pokemon TCG Pocket (PTCGP) Strategies & Guides Wiki


Recommended Games
Diablo 4: Vessel of Hatred Walkthrough & Guides Wiki
Fire Emblem Heroes (FEH) Walkthrough & Guides Wiki
Yu-Gi-Oh! Master Duel Walkthrough & Guides Wiki
Super Smash Bros. Ultimate Walkthrough & Guides Wiki
Pokemon Brilliant Diamond and Shining Pearl (BDSP) Walkthrough & Guides Wiki
Elden Ring Shadow of the Erdtree Walkthrough & Guides Wiki
Monster Hunter World Walkthrough & Guides Wiki
The Legend of Zelda: Tears of the Kingdom Walkthrough & Guides Wiki
Persona 3 Reload Walkthrough & Guides Wiki
Cyberpunk 2077: Ultimate Edition Walkthrough & Guides Wiki


All rights reserved
Copyright© 2012-2024 HoYoverse — COGNOSPHERE. All Rights Reserved.
The copyrights of videos of games used in our content and other intellectual property rights belong to the provider of the game.
The contents we provide on this site were created personally by members of the Game8 editorial department.
We refuse the right to reuse or repost content taken without our permission such as data or images to other sites.