An Ancient Sacrifice of Sacred Brocade Quest Guide
✉ Send your thoughts in our Genshin 6.4 Patch Survey!
★ Exclusive: Dive back in time with the Meta History
◆ Hot: Version 6.4, Luna 5 Codes
◆ Builds: Varka, Flins, Skirk, Escoffier
◆ Events: Travelers' Tales, He Who Caught the Wind
◆ Future: Linnea, Version 6.5 Luna VI
An Ancient Sacrifice of Sacred Brocade is the third quest under the Chenyu's Blessings of Sunken Jade quest chain in the Chenyu Vale for Genshin Impact 4.4. See how to unlock the World Quest, its walkthrough, and the complete rewards here in this guide!
List of Contents
How to Unlock An Ancient Sacrifice of Sacred Brocade
Complete the Floating Jade, Treasure of Chenyu Quest
To unlock An Ancient Sacrifice of Sacred Brocade, you must have completed the previous subquest of Chenyu's Blessings of Sunken Jade, Floating Jade, Treasure of Chenyu!
Floating Jade, Treasure of Chenyu Quest
An Ancient Sacrifice of Sacred Brocade Walkthrough
Go to Fogbank River
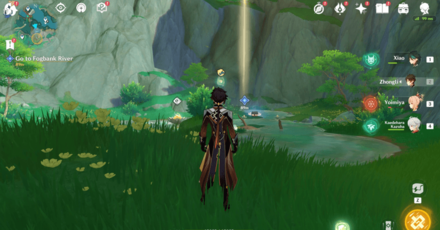
After restoring the Votive Rainjade, go to Fogbank River, to meet up with Fujin. However, before proceeding inside the cavern, you will be stopped by Bluey, the Adeptal friend of Little Mao.
Take care of the nearby miasma
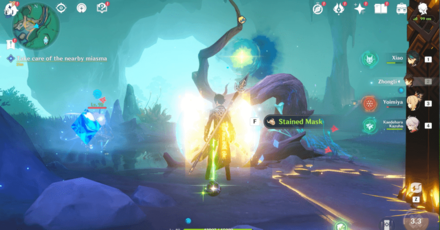
Afterwards, proceed inside the cave, and take care of the nearby miasma. The most efficient way to deal with it is by defeating the monster that has the blue light hovering above it, which then exposes the core of the Miasma!
Enter the cavern

Once you've cleansed the Miasma, enter and check the cavern. You will see another moss-covered mural inside, which you can easily clean using your Adeptal Energy.
Talk to Little Mao

Talk to Little Mao for a little while, until Fujin in her carp form appears. Follow the golden carp until you reach an area covered heavily with fog. There will be Hydro Mimic enemies along the way, fend them off by defeating them!
Prepare for the Rainjade Rite
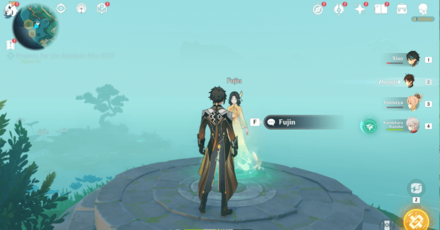
Once you've reached your destination with Fujin, she will tell to prepare for the Rainjade Rite. To prepare for the Rainjade Rite, move the Sacred Simulacra in their proper places, located just a couple of steps away from Fujin!
How to Prepare for the Rainjade Rite
| How to Prepare for the Rainjade Rite | |
|---|---|
| 1 |  There are a total of two Sacred Simulacra that you need to fix for this puzzle! There's no proper order with which you can solve them, but for the purpose of this guide, we'll follow the image above! |
| 2 |  To solve the first Sacred Simulacra, walk towards the islet to your right until you see a floating platform with an upward current beside it. Ride the current. |
| 3 |  Then, hop on to the platform just above, and use your Adeptal Energy on the nearby platform to move it closer. |
| 4 | 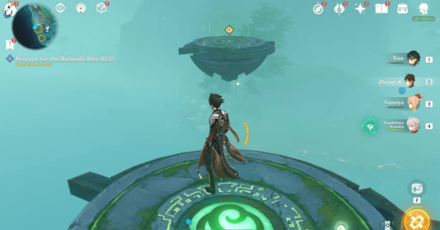 As soon as you complete the series of the platforms by stepping on them one by one, use the Golden Carp's Leap to reveal the last floating platform. |
| 5 |  Launch yourself to the Simulacrum's direction, and use your Adeptal Energy to capture it. A series of platforms will appear again, guiding you down toward the islet. Redirect your Adeptal Energy to the Simulacrum's altar to complete this puzzle! |
| 6 |  To get to the second Sacred Simulacrum, go to the islet directly across your position, or simply follow the marked location on your map. |
| 7 |  You will see an empty Seelie court a couple of steps away from the empty Sacred Simulacrum altar. To get the Seelie, walk towards the direction of Fujin, and it should be there. |
| 8 | 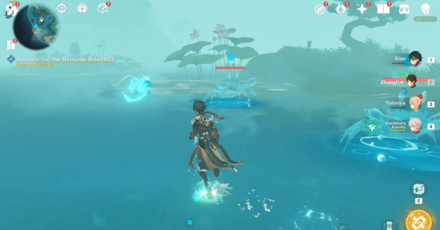 To guide the Seelie back to its court, investigate the movement underwater that keeps the poor Seelie from moving. After doing this two times, a Hydro Mimic enemy will appear. |
| 9 |  After defeating the Hydro Mimic enemy, guide the Seelie back to its court, and reveal the last Sacred Simulacrum! Capture it again using your Adeptal Energ, and place it on directly on top of its altar. |
How to Prepare for the Rainjade Rite
Talk to Fujin

After preparing for the Rainjade Rite, and placing the two Sacred Simulacra to their rightful places, talk to Fujin, and watch her attempt to start the rite. However, because of being dormant for a long time, the Adeptus needs Golden Carps to restore her power.
Go to Adeptus's Repose
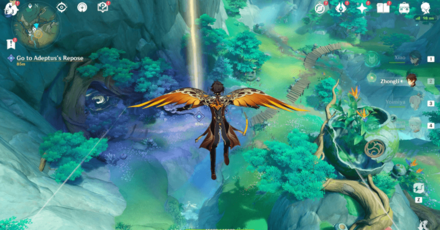
To grab another Golden Carp for Fujin, go to Adeptus's Repose in Yaodie Valley. Once you've arrived at the entrance of the cavern, take care of the nearby Miasma using the same method as before to dispel it!
Check the clues nearby

Afterwards, head inside the cave until you reach the Repose. Then, check the clues nearby. There are a number of things you can do around, but to progress the quest, simply walk towards the tiny hut at the end of the pathway to your right.
Keep in mind to get the Simulacra to your right before going to the hut to save time!
Examine the mural

After slotting in the Simulacrum to its altar beside the hut, touch the Stone Slate to get teleported to Chizhang Wall.
Examine the mural, and talk to Fujin afterwards. Then, use your Adeptal Energy on the stone slate once you've teleported out of Chizhang Wall to get the Golden Carp of Adeptus's Repose.
Go to Mt. Xuanlian

To get the last Golden Carp, go to Mt. Xuanlian, and look for the mountain-top Pavilion. To reach it, go towards the bridge under the mountain where a number of Golden Carp's Leap are located. Use them to easily climb the mountain, and reach the Pavilion!
Talk to Little Mao

Once you've reached the Pavilion, talk to Little Mao on how to obtain the Golden Carp. He then notices the Giant Carp Statues that look like can hold Carp Spirit Orbs within them, located all around Mt. Xuanlian!
Collect the Carp Spirit Orbs
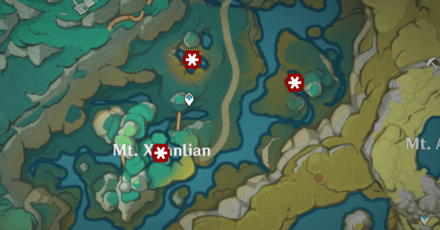
To collect the Carp Spirit Orbs, explore Mt. Xuanlian, and look for Spirit Carp statues that can be activated using your Adeptal Energy. There are a total of three Carp Spirit Orbs in Mt. Xuanlian you can use to get the Golden Carp from the Pavilion!
How to Collect the First Carp Spirit Orb
| First Carp Spirit Orb Location | |
|---|---|
| 1 | 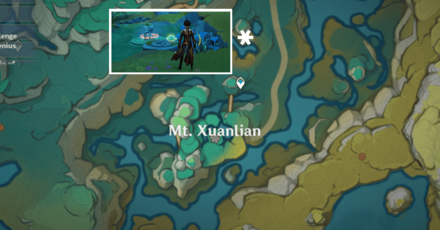 You can collect the first Carp Spirit orb from the Carp Statue located north of the Pavilion. To easily get there, simply glide down towards the location marked in the image above! |
| 2 | Once there, use your Adeptal Energy on the Jade Cascade to remove it from its slot. This will also remove the flow of Sacred Spring from the cascade, and will elevate the platform below it. |
| 3 | Then, move the Jade Cascade to the slot just beside it using your Adeptal Energy. The marker should be highlighted, otherwise it'll just go back to its original slot! Once done correctly, the Sacred Spring should gush down the incomplete Spirit Carp statue below it! |
| 4 | Next, using your Adeptal Energy, capture the nearby Simulacrum, and place it directly above the platform. If it doesn't work the first time, try to place it while standing on top of the platform to successfully slot in the Simulactrum! |
| 5 | After placing the Simulacrum on top of the platform, the Spirit Carp statue on the nearby lake will unlock. Grab it using your Adeptal Energy. |
| 6 | Then, use your Adeptal Energy again and direct it towards the statue below the Jade Cascade. Once activated, collect the first Carp Spirit Orb from the Carp Statue! |
How to Collect the Second Carp Spirit Orb
| Second Carp Spirit Orb Location | |
|---|---|
| 1 |  To collect the second Carp Spirit Orb, go to the lake located east of the map. This lake is hard to miss, as it's right beside Mt. Aocang! |
| 2 |  Once there, defeat the Hilichurl enemies, and move the Jade Cascade to the slot beside it. This will activate the Spirit Carp statue below it, for you to collect the second Carp Spirit Orb! |
How to Collect the Third Carp Spirit Orb
| Third Carp Spirit Orb Location | |
|---|---|
| 1 |  To collect the third Carp Spirit Orb, go to the bridge suspended directly underneath the Pavilion's location. |
| 2 | You'll notice a Jade Incense Cauldron puzzle beside the locked Spirit Carp statue. To solve this puzzle, you must light up all the censers using your Adeptal Energy, |
| 3 | To start, jump towards the floating boulder with a deactivated Cauldron atop it. Then, use your Adeptal Energy to interact with the other Cauldron behind it. This will activate the Cauldron beside you. |
| 4 | Then, jump back to the boulder where the Spirit Carp statue is, and activate the censers using the Jade Incense Cauldron located on a wooden ledge across you. Make sure to correctly align the censers and the cauldron before activating it, to light them all at once! |
| 5 | This should activate the Spirit Carp Statue behind you. Lastly, use your Adeptal Energy to collect the third Carp Spirit Orb! |
How to Collect the Carp Spirit Orb
Use your adeptal energy to activate the spirit pearl
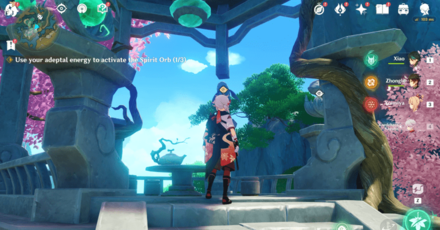
After collecting all three Spirit Orbs, go back to the Pavilion, and use your adeptal energy to activate the spirit orbs. Afterwards, spend time with Fujin and Little Mao, and reminisce over the past.
Talk to Fujin
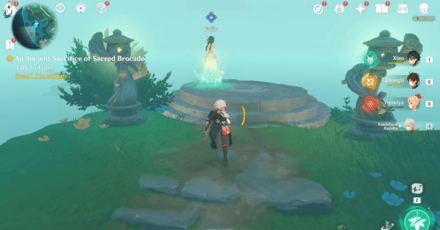
Once Fujin has left for the Rainjade Rite, go back to the foggy area where you first prepared for the Rainjade Rite. This time, when Fujin performs the first step of the Rite, the fog around the area will dissipate, and reveal the Sacred Mountain.
Climb the sacred mountain

Climb the sacred mountain using the Golden Carp mechanism left behind by Fujin. This will transfer you to the Waypoint near the base of the Sacred Mountain.
Accompany Fujin
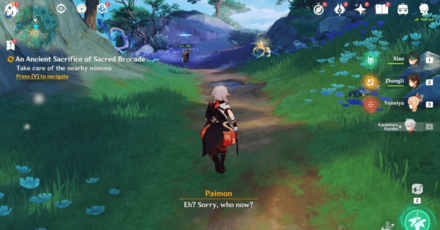
Once there, accompany Fujin who's in her Carp form, a couple of steps away from the Waypoint. As you trek towards the peak, take care of the nearby miasma using the same method we've covered in this guide!
Speak to Lingyuan

As you continue your journey with Junjin, Bluey, are now known as Lingyuan, stop you from pressing forward. After a brief exchange of words, Lingyuan will leave Luwu and Kaiming to stall you. Defeat the Xuanwen Beast enemies, and continue.
Take care of the nearby miasma
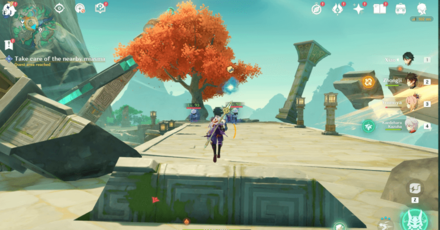
Press forward until you've arrived by the entrance to the Chiwang Terrace. Fujin will tell you that Lingyuan has already entered the Terrace, thus she will open the entrance for you to enter it. While doing so, take care of the nearby miasma, to protect the Adeptus.
Enter Chiwang Terrace
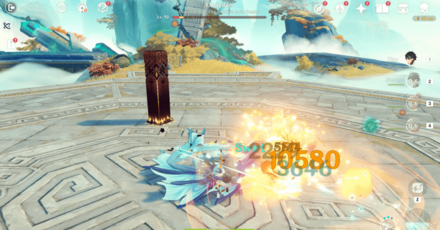
After defeating the enemies, enter Chiwang Terrace. Once inside, you need calm Lingyuan down, which essentially means you have to defeat the Beastlord of the Sunken Jade Realm to complete the challenge!
Check out our Solitary Suanni Boss guide to know how to effectively deal with this fight!
Talk to Fujin

Once Lingyuan has calmed down, Fujin will finally perform the complete Rainjade Rite ritual. Afterwards, talk to Fujin, who will excuse herself to rest. Then, escort Little Mao back to Qiaoying Village, and tell Grandpa Lu what happened!
An Ancient Sacrifice of Sacred Brocade Information
Sub-Quest of Chenyu's Blessings of Sunken Jade

An Ancient Sacrifice of Sacred Brocade is a subquest of the quest, Chenyu's Blessings of Sunken Jade, where we help the Adeptus Fujin to restore the balance between water and soil all throughout Chenyu Vale!
An Ancient Sacrifice of Sacred Brocade is the third part of the Chenyu's Blessings of Sunken Jade world quest chain.
Chenyu's Blessings of Sunken Jade Guide
An Ancient Sacrifice of Sacred Brocade Rewards
Total Quest Rewards
| Total Quest Rewards |
 Primogem x50 |
 Mora x50000 |
|---|---|---|
 Hero's Wit x5 |
 Adventure EXP x450 |
|
Genshin Impact Related Guides

Other Chenyu's Blessings of Sunken Jade Quest Guides
| Chenyu's Blessings of Sunken Jade World Quest Guides | ||
|---|---|---|
| Qiaoying of the Sacred Mountain | Floating Jade, Treasure of Chenyu | An Ancient Sacrifice of Sacred Brocade |
Comment
I also got stuck like this and you just need to through the hole on the right of the mountain that leads to the area. the hole is where the water hits the right of the mountain down from the teleport way point near the stone arch over the main river.
Author
An Ancient Sacrifice of Sacred Brocade Quest Guide
improvement survey
03/2026
improving Game8's site?

Your answers will help us to improve our website.
Note: Please be sure not to enter any kind of personal information into your response.

We hope you continue to make use of Game8.
Rankings
- We could not find the message board you were looking for.
Gaming News
Popular Games

Genshin Impact Walkthrough & Guides Wiki

Honkai: Star Rail Walkthrough & Guides Wiki

Umamusume: Pretty Derby Walkthrough & Guides Wiki

Pokemon Pokopia Walkthrough & Guides Wiki

Resident Evil Requiem (RE9) Walkthrough & Guides Wiki

Monster Hunter Wilds Walkthrough & Guides Wiki

Wuthering Waves Walkthrough & Guides Wiki

Arknights: Endfield Walkthrough & Guides Wiki

Pokemon FireRed and LeafGreen (FRLG) Walkthrough & Guides Wiki

Pokemon TCG Pocket (PTCGP) Strategies & Guides Wiki
Recommended Games

Diablo 4: Vessel of Hatred Walkthrough & Guides Wiki

Cyberpunk 2077: Ultimate Edition Walkthrough & Guides Wiki

Fire Emblem Heroes (FEH) Walkthrough & Guides Wiki

Yu-Gi-Oh! Master Duel Walkthrough & Guides Wiki

Super Smash Bros. Ultimate Walkthrough & Guides Wiki

Pokemon Brilliant Diamond and Shining Pearl (BDSP) Walkthrough & Guides Wiki

Elden Ring Shadow of the Erdtree Walkthrough & Guides Wiki

Monster Hunter World Walkthrough & Guides Wiki

The Legend of Zelda: Tears of the Kingdom Walkthrough & Guides Wiki

Persona 3 Reload Walkthrough & Guides Wiki
All rights reserved
Copyright© 2012-2024 HoYoverse — COGNOSPHERE. All Rights Reserved.
The copyrights of videos of games used in our content and other intellectual property rights belong to the provider of the game.
The contents we provide on this site were created personally by members of the Game8 editorial department.
We refuse the right to reuse or repost content taken without our permission such as data or images to other sites.


![Monster Hunter Stories 3 Review [First Impressions] | Simply Rejuvenating](https://img.game8.co/4438641/2a31b7702bd70e78ec8efd24661dacda.jpeg/thumb)


I died during the following the carp part and idk how to get back it! :(