Capturing Light and Shadow Quest Guide
✉ Send your thoughts in our Genshin 6.4 Patch Survey!
★ Exclusive: Dive back in time with the Meta History
◆ Hot: Version 6.4, Luna 5 Codes
◆ Builds: Varka, Flins, Skirk, Escoffier
◆ Events: Travelers' Tales, He Who Caught the Wind
◆ Future: Linnea, Version 6.5 Luna VI

Capturing Light and Shadow is a quest unlocked in the Veluriyam Mirage cave, where you have to restore the mural to complete it in Genshin Impact. See how to unlock this quest, its walkthrough, and all the rewards of this quest here in this guide!
List of Contents
Capturing Light and Shadow Quest Location
Southeast Cave in Veluriyam Mirage
| Capturing Light and Shadow How to Get There | |
|---|---|
 |
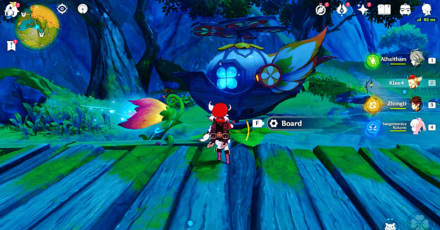 |
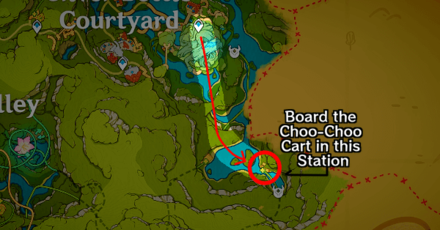
Capturing Light and Shadow is inside the southeastern cave in the Veluriyam Mirage map. The fastest way to reach this cave is to use the Teleport Waypoint nearest to the Central Hub in the Silver Bottle Courtyard, and glide all the way down to the Green Choo-Choo Rail that can directly access the cave.
Follow the highlighted area on the map above to know how to get there easily!
Alternate Route - Use the Choo-Choo Cart
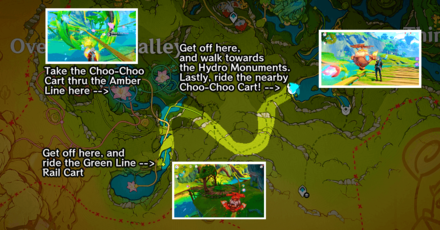
Alternatively, you can take the Choo-Choo Cart to go there—albeit a longer route to take. Go there from the Choo-Choo Cart Station in the Overgrown Valley, and ride South using the Amber Line.
Then, get off the cart at the rest point where the Green Line is also connected. Simply ride it all the way thru the end, and you should be able to see the connecting Green Rail on the opposite side, near the Hydro Monuments to access the Cave!
Near the Non-Outdoor Waypoint
| Non-Outdoor Waypoint in Bottleland | |
|---|---|
 |
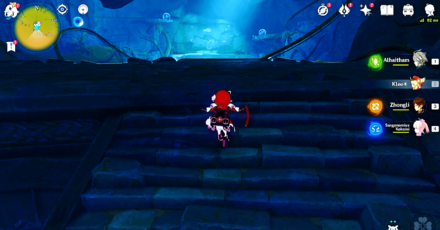 |
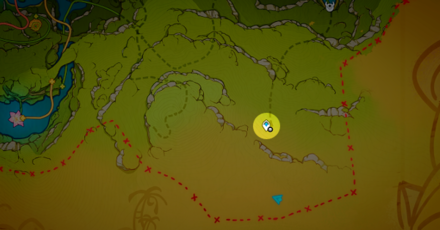
Once the Choo-Choo Cart has dropped you off, head towards the Waypoint and unlock it (if you haven't done so, yet). Taking the nearest flight of stairs should automatically trigger the Capturing Light and Shadow Quest!
How to Unlock Capturing Light and Shadow
Complete the Prerequisites
| Quest Unlock Requirements | |
|---|---|

|
An Invitation From Afar! |
Complete An Invitation From Afar! Quest
To be able to fully play and unlock the Capturing Light and Shadow quest, you must have first completed the first part of the Secret Summer Paradise Event Quest, An Invitation From Afar!
An Invitation From Afar Quest Guide
Capturing Light and Shadow Walkthrough
Explore the Mysterious Cave
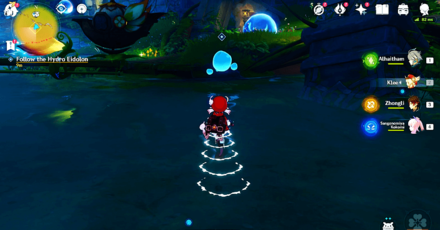
After initiating the quest, walk towards the cavern and explore the Mysterious Cave. Right in the middle of the chamber is a lone, and upset Hydro Eidolon.
Follow the Hydro Eidolon
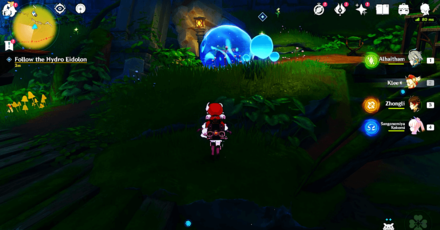
Follow the Hydro Eidolon until it brings you towards an abandoned camp with a chest trapped inside a water bubble. Read the diary fragment right beside it, afterwards.
Keep Following the Hydro Eidolon
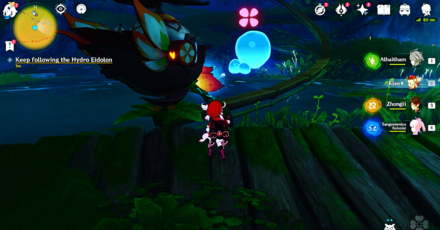
Once you're done reading, open the common chest, and obtain the goodies inside. Then, keep following the Hydro Eidolon until it powers up a nearby Choo-Choo Cart. Board it, and take the Choo-Choo Cart to the destination.
Break the Seal on the Streaming Projector
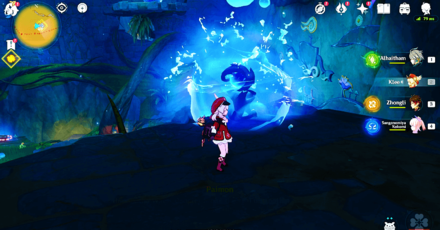
Get off the Choo-Choo Cart once it stops, then break the seal on the Streaming Projector using the Hydro Eidolon. Once done, it will stream towards the mural on the wall, and unlock the Swirling Cloud Mural Piece. You'll know a piece is unlocked when it's glowing!
Unseal the Remaining Three Streaming Projectors
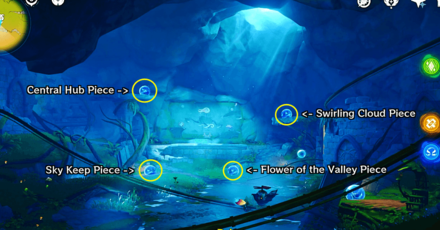
To unseal the remaining three streaming projectors, you need to ask the help of the three Hydro Eidolons scattered within the vicinity! Each Water Droplet will power-up a corresponding Choo-Choo Cart that goes straight to each sealed Projector.
How to Get the Central Hub Mural Piece
| How to Unseal the Central Hub Projector | |
|---|---|
| 1 | From the location of the first Streaming Projector you unsealed, jump down the ledge and walk forward until you see the Four-Leaf Sigil. Use it to easily go over the big hole in the wall. |
| 2 | Afterwards, make a sharp turn to your left, and press forward until you see a Hydro Eidolon trembling in fear! Simply attack the three torches with Hydro to extinguish them, then read the diary fragment nearby. |
| 3 | Once done, go to the opening right beside the diary fragment, and follow the Hydro Eidolon. The Water Droplet will pop a bubble encasing a chest, so open it while you're at it! |
| 4 | After getting the goodies inside the chest, the Eidolon continues pressing forward, until it reaches a dead-end. It then disappears, and reappear on the other side of the wall. |
| 5 | You can reach the Eidolon on the other side by panning your screen up—towards the ceiling—then using the Four-Leaf Sigil you first see. |
| 6 | Once you're on the other side, extinguish the three torches again by attacking them with Hydro. The Hydro Eidolon will cross to the other side again after extinguishing the flames. |
| 7 | To go to the other side of the wall, scale the wall on your left until you reach a ledge with a Common Chest and two crates. Make sure to open this chest as it contains a Joyeux Voucher! |
| 8 | Then, scale the wall in front of you again, and make a sharp turn towards the opening on the wall. Jump down, and the Water Droplet should be there. |
| 9 | Follow the Hydro Eidolon again until you see a Hilichurl mob sitting around a locked chest. Defeat them to open the chest! |
| 10 | Afterwards, continue following the Hydro Eidolon until you see the Choo-Choo Cart! Board the cart once the droplet fires it up. |
| 11 | Then, wait for the Choo-Choo Cart to finish its route. You'll notice as well that there's another lone Hydro Eidolon somewhere in your right, while you're aboard. Once the cart has dropped you off, the Eidolon will automatically unseal the Streaming Projector, granting you the Central Hub Mural Piece. |
How to Get the Sky Keep Mural Piece
| How to Unseal the Sky Keep Projector | |
|---|---|
| 1 | Go to the location of a sealed Common Chest surrounded by a bunch of Shroomkins, located a few steps away from the Mural. Defeat the Fungi enemies to unseal the chest, and to read the diary fragment beside it. |
| 2 | Afterwards, jump down the hole in the ground until you see a Hydro Eidolon surrounded by Hilichurls. Defeat the enemies, then follow the Hydro Eidolon below. It's directly sitting on the ground and not beside the cart, so jump down the platform if you're unable to see the droplet! |
| 3 | Defeat the enemies you encounter as you and the Droplet continue forward. The Hydro Eidolon will transform to a Hydro Mimic to assist you in combat! |
| 4 | Jump aboard the cart once the Hydro Eidolon fires it up. After finishing its course, the Eidolon will unseal the Streaming Projector and give you the Sky Keep Mural Piece! |
How to Get the Flower of the Valley Mural Piece
| How to Unseal the Flower of the Valley Projector | |
|---|---|
| 1 | Go back to the lone Hydro Eidolon you saw while riding the Choo-Choo Cart during your run to get the Central Hub Mural Piece. Alternatively, you can walk towards the Waypoint until you see the opening on the wall. The Hydro Eidolon should be inside! |
| 2 | Walk towards the Hydro Eidolon and open the Exquisite Chest beside it. Then, follow the Hydro Eidolon until it stops beside the diary fragment. |
| 3 | After reading the fragment, the Droplet then leads you to a room with a sealed Common Chest on the left, two Hydro Monuments, and another Hydro Monument locked behind a steel barrier. Hit the two totems with Hydro to activate them, then ask the Hydro Eidolon's help to activate the monument behind the locked area! |
| 4 | Once you've unsealed the Common Chest and unlocked the room, continue following the Hydro Eidolon to the other room. There's a bunch of Hilichurls inside, and defeating them should be easy enough! |
| 5 | Afterwards, walk towards the Eidolon and let it lead you to the next room filled with water, with the three Elemental Monuments spread out. |
| 6 | To solve the Monument Puzzle, ask the Hydro Eidolon to check the Hydro Monument, then activate it with Hydro. |
| 7 | Then, activate the remaining Elemental Monuments to lower down the water level in the room! |
| 8 | Once done, the Hydro Eidolon will power up the Choo-Choo Cart on the next room. Board it, and wait for it to finish its course. This will unseal the Streaming Projector at the end, and grant you the Flower of the Valley Mural Piece! |
Restore the Mural in the Cave
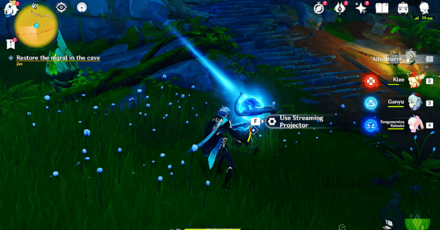
To restore the mural in the cave, you need to get inside the Mural Preprint World, and slot in the pieces to the correct places. You can enter the Preprint World with any of the four Streaming Projectors.
How to Restore the Mural in the Cave
| Restore the Mural in the Cave | |
|---|---|
| 1 | 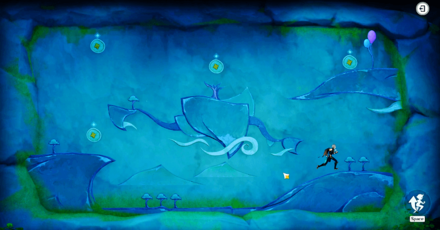 Collect all four pieces of the Mural first before re-slotting them in. This makes for an easier and smoother restoration of the mural! |
| 2 | Then, place the Central Hub piece on the tree on the floating island in the mural. |
| 3 | Next, walk to the right, and place the Sky Keep piece on the slot beside the balloon. |
| 4 | Afterwards, walk to your left, and place the Flower of the Valley piece on the slot right beside a small tree. This will activate a rainbow bridge you can use to reach the upper remaining slot. |
| 5 | Lastly, retrace your steps and head towards the bridge, and place the Swirling Clouds piece to its correct slot. |
Capturing Light and Shadow Rewards
Total Quest Rewards
| Total Quest Rewards |
 Primogem x40 |
 Mora x20000 |
|---|---|---|
 Hero's Wit x3 |
||
Genshin Impact Related Guides
Veluriyam Mirage Events
| Events in Veluriyam Mirage | |
|---|---|
 Secret Summer Paradise Secret Summer Paradise |
 Character Locations Character Locations |
 Kaeya Skin Kaeya Skin |
 Klee Skin Klee Skin |
Veluriyam Mirage Items
| Items in Veluriyam Mirage | |
|---|---|
 Joyeux Vouchers Joyeux Vouchers |
 Joyspar Gadgets Joyspar Gadgets |
 Mysterious Mora Pocketwatch Mysterious Mora Pocketwatch |
|
Veluriyam Mirage Quests
| Secret Summer Paradise Quests | |
|---|---|
 An Invitation From Afar! An Invitation From Afar! |
 Mirage Paradise in Crisis! Mirage Paradise in Crisis! |
 Dreams and First Encounters! Dreams and First Encounters! |
|
| An Invitation From Afar Sub Quests | |
 A Mysterious Missive on Paper Wings A Mysterious Missive on Paper Wings |
 Glaze Domain, Multum in Parvo Glaze Domain, Multum in Parvo |
 Zip Along Zip Along |
|
| Dreams and First Encounters Sub Quests | |
 Treehouse Theater Treehouse Theater |
 Back to Normal Back to Normal |
| Daiya's Three-Day Reverie World Quest Chain | |
 Daiya's Three-Day Reverie Daiya's Three-Day Reverie |
 The Black Nacre The Black Nacre |
 Petrifying Gaze Petrifying Gaze |
 Skycastle Saviors Skycastle Saviors |
| World Quests in Veluriyam Mirage | |
 Capturing Light and Shadow Capturing Light and Shadow |
 A Starry Night, as Remembered A Starry Night, as Remembered |
 Returning Curios Returning Curios |
|
| Quest Objectives in Veluriyam Mirage | |
 Unseal the Projectors Unseal the Projectors |
 How to Restore the Mural How to Restore the Mural |
 Unlock and Raise the Crystal Unlock and Raise the Crystal |
 Use the Preprints to Fix the Central Hub Use the Preprints to Fix the Central Hub |
Veluriyam Mirage Puzzles
All Genshin Impact Events

Comment
Author
Capturing Light and Shadow Quest Guide
improvement survey
03/2026
improving Game8's site?

Your answers will help us to improve our website.
Note: Please be sure not to enter any kind of personal information into your response.

We hope you continue to make use of Game8.
Rankings
- We could not find the message board you were looking for.
Gaming News
Popular Games

Genshin Impact Walkthrough & Guides Wiki

Honkai: Star Rail Walkthrough & Guides Wiki

Umamusume: Pretty Derby Walkthrough & Guides Wiki

Pokemon Pokopia Walkthrough & Guides Wiki

Resident Evil Requiem (RE9) Walkthrough & Guides Wiki

Monster Hunter Wilds Walkthrough & Guides Wiki

Wuthering Waves Walkthrough & Guides Wiki

Arknights: Endfield Walkthrough & Guides Wiki

Pokemon FireRed and LeafGreen (FRLG) Walkthrough & Guides Wiki

Pokemon TCG Pocket (PTCGP) Strategies & Guides Wiki
Recommended Games

Diablo 4: Vessel of Hatred Walkthrough & Guides Wiki

Cyberpunk 2077: Ultimate Edition Walkthrough & Guides Wiki

Fire Emblem Heroes (FEH) Walkthrough & Guides Wiki

Yu-Gi-Oh! Master Duel Walkthrough & Guides Wiki

Super Smash Bros. Ultimate Walkthrough & Guides Wiki

Pokemon Brilliant Diamond and Shining Pearl (BDSP) Walkthrough & Guides Wiki

Elden Ring Shadow of the Erdtree Walkthrough & Guides Wiki

Monster Hunter World Walkthrough & Guides Wiki

The Legend of Zelda: Tears of the Kingdom Walkthrough & Guides Wiki

Persona 3 Reload Walkthrough & Guides Wiki
All rights reserved
Copyright© 2012-2024 HoYoverse — COGNOSPHERE. All Rights Reserved.
The copyrights of videos of games used in our content and other intellectual property rights belong to the provider of the game.
The contents we provide on this site were created personally by members of the Game8 editorial department.
We refuse the right to reuse or repost content taken without our permission such as data or images to other sites.


 Treasure Chest Locations
 Choo-Choo Carts
 Hydro Eidolon
 Preprints
 Gleaming Lamps
 Silver Bottle Courtyard Luxurious Chest
 Overgrown Valley Luxurious Chest
 Pavilion of Hermits Luxurious Chest
 Time Trial Puzzle Locations
 Hydro Monument Puzzles
 Apple Hydro Eidolon
 Water Droplet Scene Note
 Thinker's Theater Chest by the Waypoint


![Monster Hunter Stories 3 Review [First Impressions] | Simply Rejuvenating](https://img.game8.co/4438641/2a31b7702bd70e78ec8efd24661dacda.jpeg/thumb)


