How to Defeat Marana's Avatar
✉ Send your thoughts in our Genshin 6.4 Patch Survey!
★ Exclusive: Dive back in time with the Meta History
◆ Hot: Version 6.4, Luna 5 Codes
◆ Builds: Varka, Flins, Skirk, Escoffier
◆ Events: Travelers' Tales, He Who Caught the Wind
◆ Future: Linnea, Version 6.5 Luna VI

Marana's Avatar is the final boss of the Aranyaka quest chain in Sumeru. See how to defeat Marana's Avatar, and tips on how to clear it here!
List of Contents
How to Defeat Marana's Avatar
Marana's Avatar Boss Fight Guide
- Follow Arama to the Withering Zones.
- Destroy one area of the Withering Zone.
- Return to the boss area.
- Reduce the HP of Marana's Avatar to a point.
- Repeat Steps 1 to 4.
- Defeat Marana's Avatar one final time.
Fight as Traveler

You will have to fight the Marana's Avatar with Traveler alone. Don't worry if your own Traveler is underleveled, as the fight will give you a Level 80 Traveler with an ascended Silver Sword and 22,000 HP. However, your Traveler will be aligned with whatever element you have before entering.
It's recommended to have your Traveler aligned to Dendro first. You can teleport back to the nearest waypoint anytime, so go to a nearest Statue of the Seven first!
Dendro Traveler Rating and Best Builds
Clear Withering Zones

At the start of the fight, you won't be able to damage Marana's Avatar. Instead, follow Arama behind you so it can transport you to one of the three Withering Zones.
As usual, use Charged Attacks (holding the Normal Attack) with a Healthy Dendrograna to destroy the Withering Branches. Enemies will appear during this, so stay in Arama's circle!
How to Clear the Withering Zones
Enter Arama's barrier to block the Withering Light

When the Marana's Avatar readies up its Withering Light attack. Go inside Arama's protective dome to nullify its effects!
Return to where Marana's Avatar is
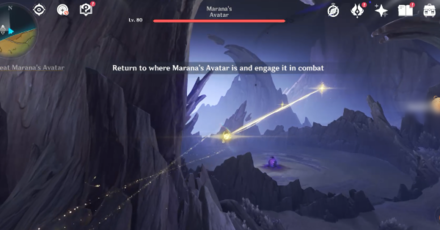
Once the Tumor has been destroyed, Four-Leaf Sigils will appear. You can use this to easily get back to the boss arena.
Engage the Marana's Avatar in Combat
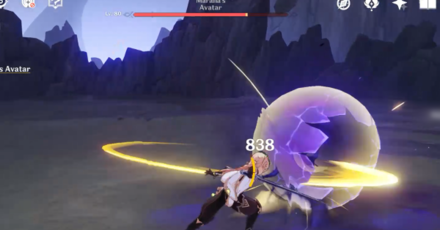
The boss will be defenseless during this period. Use your Elemental Skills, Burst, and Normal Attacks to reduce the boss's health by around 1/3. Marana's Avatar regenerates afterwards.
Repeat the process to all three Zones
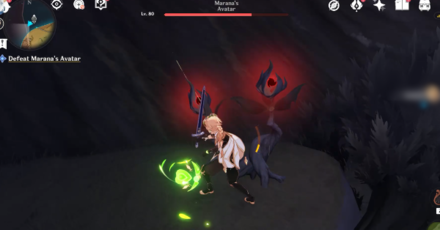
When the boss regenerates, follow Arama again and repeat the process. You only need to do this three times until a cutscene stops the fight momentarily.
Defeat the final enemy

This time, the Marana's Avatar will be guarded by several Rifthounds. You can simply focus on damaging Marana's Avatar's health to zero to defeat it! Arama will still support you from behind, so get healing from its zone if you need it!
Tips on Marana's Avatar Boss Fight
Follow Arama to where the spirit is
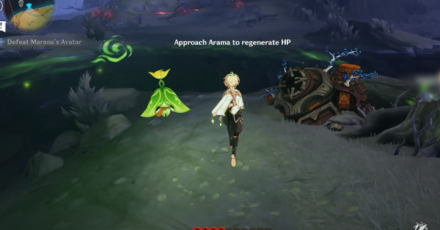
When the screen prompts you to follow Arama to where the spirit is, simply exit the arena and follow Arama. It will lead you to a Withering Zone.
Avoid Marana's Avatar AoE Attacks
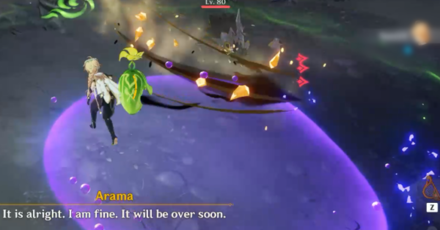
Be careful as the Marana's Avatar still attacks you from afar. Try to dodge the purple circles on the ground!
Stay within Arama's Circle of Healing
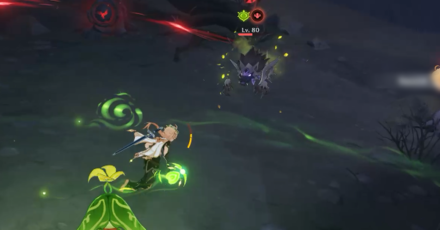
As much as possible, fight enemies within Arama's Area of Effect when dealing with the Tumor of the Withering. Standing outside of the zone will accumulate Decay, so you must lure all enemies in the circle. Staying within the circle also gives you healing.
If you're fighting the Avatar again, quickly run to Arama's side to reduce your Decay level!
Enemies in Each Withering Zones
| Withering Zone | Enemies |
|---|---|
| Zone 1 | |
| Zone 2 | |
| Zone 3 |
Marana's Avatar Information
Final Boss Fight in Aranyaka

Marana's Avatar is the final boss in the Aranyaka: Part IV quest, For All Children Who Long For Life. Cleanse the Withering that plagued Old Vanarana in this thrilling finale!
Genshin Impact Related Guides

Guides to Sumeru Areas
| Sumeru Area Guides | |
|---|---|
 Rainforest Area Rainforest Area |
 Desert Area Desert Area |
Guide to Desert Regions
| Sumeru Desert Guides | ||
|---|---|---|
 The Great Red Sand The Great Red Sand |
 Desert of Hadramaveth Desert of Hadramaveth |
 Girdle of the Sands Girdle of the Sands |
Guides to Important Sumeru Features
| Notable Sumeru Guides | |
|---|---|
| Dendroculus | Craftable Weapons |
| Tree of Dreams | Commission Unlock |
| Reputation | Shrine of Depths |
| Remarkable Chests | |
Guides to Sumeru Rainforest Domains
| Sumeru Domain Guides | |
|---|---|
| Spire of Solitary Enlightenment | Tower of Abject Pride |
| Steeple of Ignorance | Under the Umbrella's Shade |
| Fragment of Childhood Dreams | The Coordinates of Sun and Rain |
| The Dark Valley | |
Guides to Sumeru Rainforest Quests
Sumeru Rainforest Puzzles and Features
Enemies in the Sumeru Rainforest
| Enemy and Boss Guides | |||
|---|---|---|---|
 Eremites Eremites |
 Aeonblight Drake Aeonblight Drake
|
 Electro Regisvine Electro Regisvine |
 Jadeplume Terrorshroom Jadeplume Terrorshroom |
 Shroom-kin Shroom-kin |
 Ruin Drake Ruin Drake |
||
All Interactive Map Guides
Author
How to Defeat Marana's Avatar
improvement survey
03/2026
improving Game8's site?

Your answers will help us to improve our website.
Note: Please be sure not to enter any kind of personal information into your response.

We hope you continue to make use of Game8.
Rankings
- We could not find the message board you were looking for.
Gaming News
Popular Games

Genshin Impact Walkthrough & Guides Wiki

Honkai: Star Rail Walkthrough & Guides Wiki

Umamusume: Pretty Derby Walkthrough & Guides Wiki

Pokemon Pokopia Walkthrough & Guides Wiki

Resident Evil Requiem (RE9) Walkthrough & Guides Wiki

Monster Hunter Wilds Walkthrough & Guides Wiki

Wuthering Waves Walkthrough & Guides Wiki

Arknights: Endfield Walkthrough & Guides Wiki

Pokemon FireRed and LeafGreen (FRLG) Walkthrough & Guides Wiki

Pokemon TCG Pocket (PTCGP) Strategies & Guides Wiki
Recommended Games

Diablo 4: Vessel of Hatred Walkthrough & Guides Wiki

Fire Emblem Heroes (FEH) Walkthrough & Guides Wiki

Yu-Gi-Oh! Master Duel Walkthrough & Guides Wiki

Super Smash Bros. Ultimate Walkthrough & Guides Wiki

Pokemon Brilliant Diamond and Shining Pearl (BDSP) Walkthrough & Guides Wiki

Elden Ring Shadow of the Erdtree Walkthrough & Guides Wiki

Monster Hunter World Walkthrough & Guides Wiki

The Legend of Zelda: Tears of the Kingdom Walkthrough & Guides Wiki

Persona 3 Reload Walkthrough & Guides Wiki

Cyberpunk 2077: Ultimate Edition Walkthrough & Guides Wiki
All rights reserved
Copyright© 2012-2024 HoYoverse — COGNOSPHERE. All Rights Reserved.
The copyrights of videos of games used in our content and other intellectual property rights belong to the provider of the game.
The contents we provide on this site were created personally by members of the Game8 editorial department.
We refuse the right to reuse or repost content taken without our permission such as data or images to other sites.
 Dendrograna and Dendrogranum
 The Withering Zones and Decay
 Mysterious Clipboard
 Aranara Locations
 Forest Adventure Journal Chapters
 Underwater Waypoint
 Tri-Lakshana Creature
 Tri-Yana Seeds
 Four-Leaf Sigils and Clusterleaves of Cultivation
 Seed Mirrors
 Stone Pillar Seals
 Strange Energy Extraction Device
 Eremite Camp Locations
 Floating Dendro Puzzle
 Arrow Rune Puzzle
 Trial of the Phantasmal Gate
 Nurseries in the Wild
 Strange Parchment
 Broken Dendro Monuments
 Drusus's Bulletin Board Riddle
 Lost Energy Blocks
 Vanarana Luxurious Chest
  Shrine of Depths


![Everwind Review [Early Access] | The Shaky First Step to A Very Long Journey](https://img.game8.co/4440226/ab079b1153298a042633dd1ef51e878e.png/thumb)

![Monster Hunter Stories 3 Review [First Impressions] | Simply Rejuvenating](https://img.game8.co/4438641/2a31b7702bd70e78ec8efd24661dacda.jpeg/thumb)


Big correction here: The game does not automatically give you a Dendro Traveller for this fight. I had been leaving Aether on Ameno alignment, which is my preference, in Sumeru, and just using Collei for dendro puzzle solving. My Aether was unable to damage the withering zones at all until I hopped out of the area, went to a Statue of the Seven, and set his alignment to dendro.