All Shirikoro Peak Puzzle Locations and Solutions
✉ Send your thoughts in our Genshin 6.4 Patch Survey!
★ Exclusive: Dive back in time with the Meta History
◆ Hot: Version 6.4, Luna 5 Codes
◆ Builds: Varka, Flins, Skirk, Escoffier
◆ Events: Travelers' Tales, He Who Caught the Wind
◆ Future: Linnea, Version 6.5 Luna VI
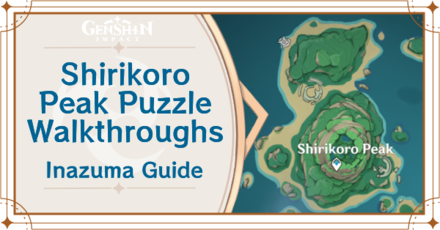
Shirikoro Peak is a Tsurumi Island area in Genshin Impact. Learn how to solve the Fire Torch puzzles, the Relay Stone puzzles for the Shirikoro Peak, Star-Shaped Gem puzzles, Stone Slate puzzles, and other Shirikoro Peak Puzzles in this guide!
| Tsurumi Island Map Guide | ||
|---|---|---|
 Tsurumi Fog Quests Tsurumi Fog Quests |
 Ghosts Guides & Locations Ghosts Guides & Locations |
 Remarkable Chest Locations Remarkable Chest Locations |
 Stone Slate Locations Stone Slate Locations |
 Star-Shaped Gem Puzzle Star-Shaped Gem Puzzle |
 Shirikoro Peak Puzzles Shirikoro Peak Puzzles |
List of Contents
All Shirikoro Peak Puzzle Guides
| Are we missing some puzzles? Let us know in the comments and we'll solve them for you! |
List of Puzzles in Shirikoro Peak
How to Remove the Fog from Shirikoro Peak

After your initial trip to Tsurumi Island, Shirikoro Peak is one of the places that will remain foggy. Remove the fog and mist by playing through the Particular Author Quest and solving the puzzles in Shirikoro Peak!
A Particularly Particular Author Guide
Shirikoro Peak Fire Torch Puzzle
| Torch Types & Guides | |
|---|---|
| Pyro Torch 1 Puzzle | Pyro Torch 2 Puzzle |
| Pyro Torch Illusions | |
How to Solve Fire Torch Puzzle 1
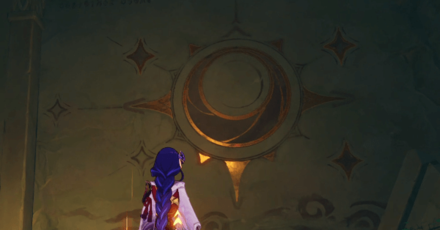
This Fire Torch puzzle can be found in the second area of the underground ruins, only accessible after completing the first Relay Stone puzzle. Although there are five Pyro Torches in the room, the mural on the wall will only tell you to light three.
The diamond icons on the mural represent the Pyro Torch formation in the room. The blacked out ones should be lit, while the empty ones should stay unlit.
Which Fire Torches to Light
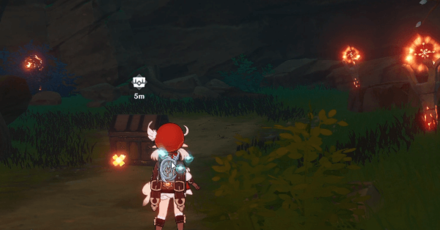
Deploy a Pyro Character and use an Elemental Attack on the torches in the image above. Once those three are lit and the other two remain unlit, all Pyro torches will light up and a chest will spawn!
Back to List of Puzzles ▲
How to Solve Fire Torch Puzzle 2

How to Solve the Pyro Torch Puzzle
This Pyro Torch puzzle is found behind a Thunderbird Wall in the underground ruins. It's the wall on a slightly lower level than the others, accessible by a short flight of stairs downward. Use the Peculiar Pinion on the wall to open it.
You only need to light the 4 Pyro Torches marked in the image above to solve this puzzle. This hint was shown on the room's Ruin Mural!
Back to List of Puzzles ▲
How to Solve the Pyro Torch Illusions Puzzle
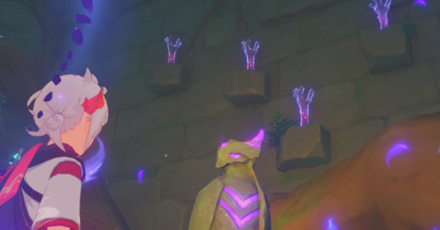
Go to the third room of the ruins, where you get the third perch in the Particularly Particular Author Quest. Head right to where the Bird Statue is, near the group of Fluorescent Fungus.
Use your Peculiar Pinion to summon the 5 Illusion Torches. You light these up the same way as regular Pyro Torches.
Only light three of the Fire Torches
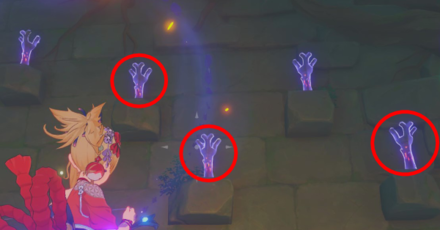
Use a Pyro Archer like Yoimiya or Amber to light the torches. Only hit the ones with the markings on this image to solve the puzzle because hitting the other two will reset the puzzle!
This will unlock another challenge!
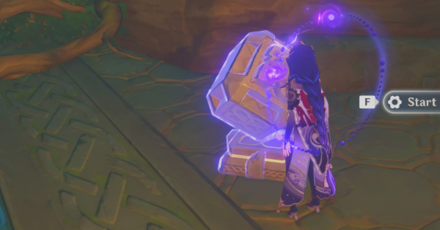
If you open the Exquisite Chest that spawns after the puzzle, another Bird Statue will activate. Use your Peculiar Pinion once again to summon a mechanism. Activate that mechanism to drain the water and get to the underground room with a Time Trial Challenge!
Time Trial Challenge Guide
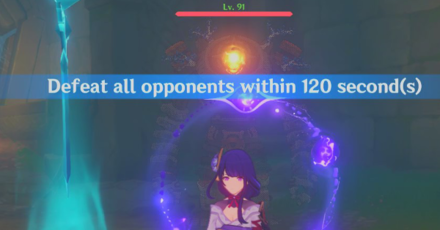
Head to the underground for a Time Trial Challenge. Activate it and defeat 2 Ruin Guards and 1 Ruin Grader within 2 minutes. Look at our Tier List for the list of best characters to use in-game:
Character Tier List
This will unlock another door!
After completing the Time Trial challenge, another door will become unlocked! This door will lead you to the second room of the ruins, with a Precious Chest waiting to be opened.
Back to List of Puzzles ▲
Shirikoro Peak Relay Stone Puzzles
Relay Stone Puzzle Information
The Relay Stone puzzles in Shirikoro Peak are part of the Particularly Particular author quest. You'll need to solve them to get the last two Perch Feathers.
A Particularly Particular Author Guide
How to Solve Relay Stone Puzzle 1
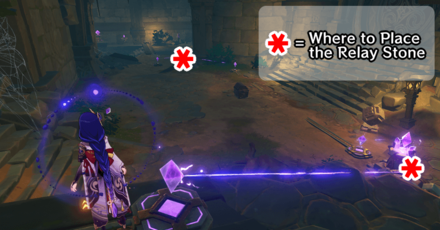
Full Relay Stone Puzzle Walkthrough
| Shirikoro Peak Puzzle Guide | |
|---|---|
| 1 | 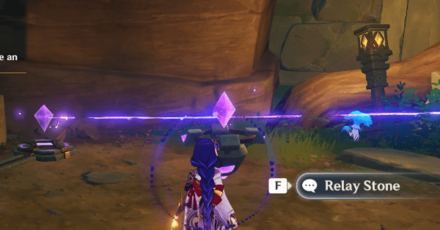 Take the Relay Stone by the entrance of the area, the one beside the Fantastic Fungus. The Electro Stones will stay connected even if you remove it. |
| 2 | 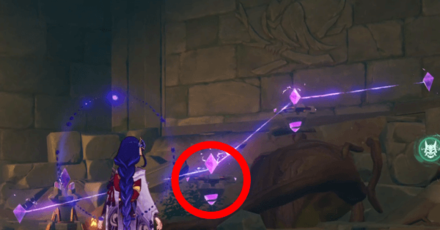 Go to the Stones near the wall with an Owl on it, then place the Relay Stone to extend the stones' connection. |
| 3 | 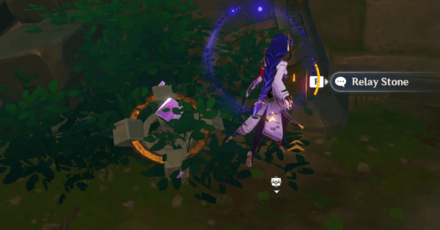 Pick up the Relay Stone hidden in a bush. |
| 4 | 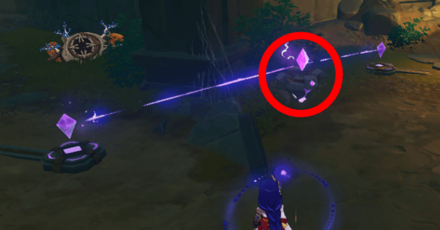 From the bush and facing the circular door, use this last Relay Stone to connect the Electro Stones on your left side. You can use the image above as a reference. |
| 5 | 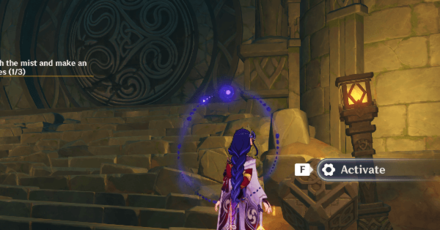 Once all the Electro Stones have been connected, you can activate the mechanism to open the door and collect Perch 2. Keep reading for the next Relay Stone Puzzle guide! |
How to Solve Relay Stone Puzzle 2

Full Relay Stone Puzzle Walkthrough
| Shirikoro Peak Puzzle Guide | |
|---|---|
| 1 | 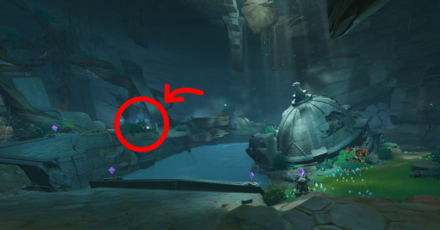 At the marked location in the image above, there are three Seelie Courts. You have to guide three Seelie home to lower the water level and get access to the complete Relay Stone Puzzle. |
| 2 | 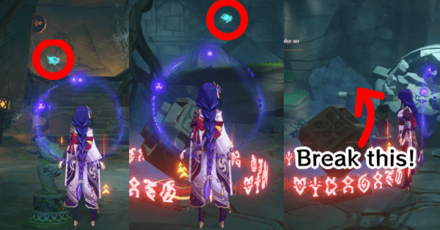 Two of the Seelies are easily seen from the courts. However, one Seelie is trapped under a large breakable stone pile. |
| 3 | 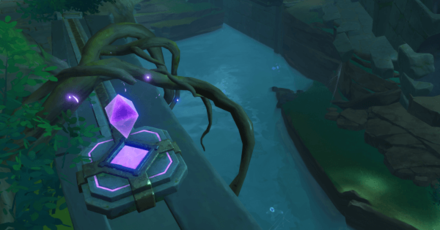 After lowering the water level, you will need to connect all the Electro Stones to open the circular door. |
| 4 | 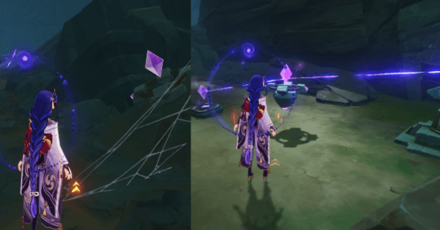 Pick up the two Relay Stones in the area you just unlocked. One is in the middle of the area, right beside a spider web. The other one connects two Electro Stones, but you can take it without disconnecting them. |
| 5 | 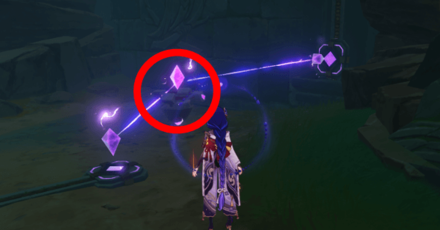 Go a little northwest and place a Relay Stone between an Electro Stone on the floor and an Electro Stone sticking out of the wall. |
| 6 | 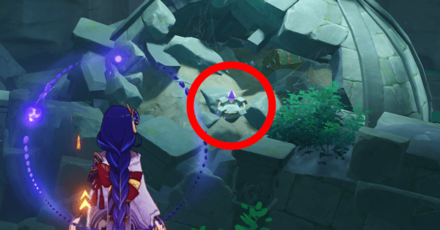 Climb out of the hole and collect another Relay Stone inside a the ruins of a building. There will also be a Remarkable Chest there! |
| 7 | 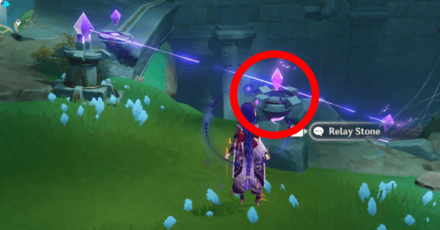 Place one of your Relay Stones between the two stones in the image above. |
| 8 | 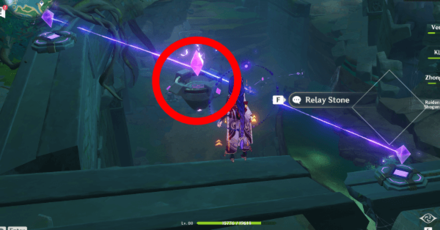 Place your final Relay Stone in the middle of the next set of stones, exactly like in the image above. It can be a little hard to connect these two stones. |
| 9 | 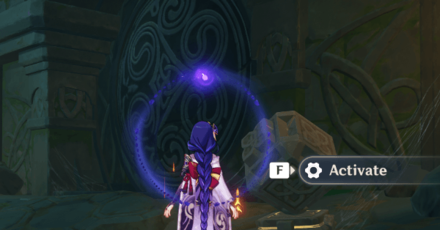 Once the whole Relay Stone Puzzle is connected, a chest will spawn and the circular door will be unlocked. |
| 10 | 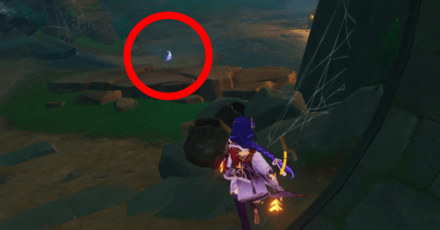 Collect the 3rd and final Perch Feather and go back to Ruu and the Perch in Shiriko Peak. |
Shirikoro Peak Star-Shaped Gems
Star-Shaped Gems Information
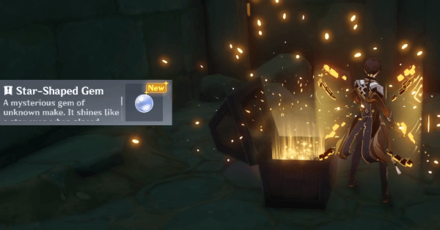
Star-Shaped Gems are hidden behind walls that have Thunderbird Paintings on them. These Thunderbird walls are found in the first area of the underground ruins in Shirikoro Peak.
Back to List of Puzzles ▲
How to Get Star-Shaped Gems for Shirikoro Peak

Use the Peculiar Pinion on Walls with Thunderbird Carvings
You will first need to turn your Peculiar Pinion into a gadget. Using the Peculiar Pinion Gadget on these walls will magically open them. Open the Treasure Chests inside to get the Star-Shaped gems.
How to Get & Use the Peculiar Pinion
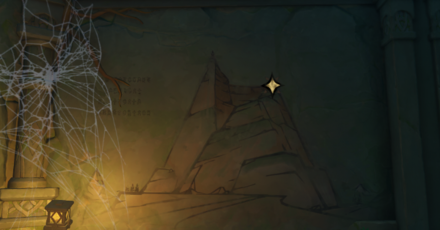
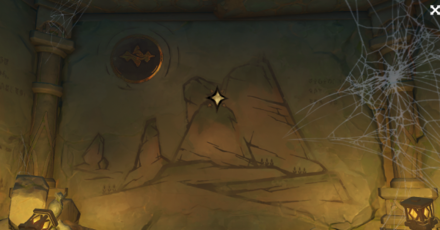
How to Use Star-Shaped Gems
| Where to Use Star-Shaped Gems | |
|---|---|
 |
 |
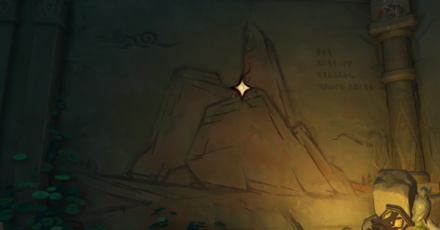 |
You use the Star-Shaped Gems in the second area of the underground ruins. Doing this will spawn Electro Seelie right after you use the Star-Shaped gems in the walls.
These Electro Seelie will run off to locations outside of Shirikoro Peak, so check out our full guide on Star-Shaped Gems here:
Star-Shaped Gems Guide
Shirikoro Peak Stone Slates
Stone Slate Information
In the underground Shirikoro Peak ruins that lead to Chirai Shrine, there's an area with seven ruin mechanisms. When you try and open these, they will ask you for a Stone Slate.
Two of the Stone Slates can be found on Shirikoro Peak, but the other five are scattered around Tsurumi Island. Take a look at our full Stone Slate guide to see all locations and puzzle walkthroughs!
How to Get All 7 Stone Slates
How to Get Stone Slates for Shirikoro Peak
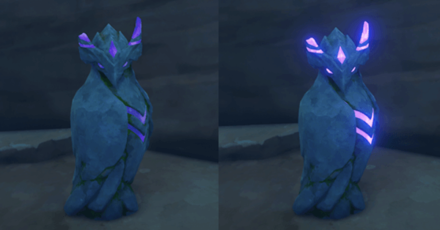
You need the Peculiar Pinion
Before you can get any of the Stone Slates in Tsurumi Island, you'll need to unlock the Peculiar Pinion to activate the Mysterious Carvings.
How to Get & Use the Peculiar Pinion
Shirikoro Peak Stone Slate 1

Simply use the Stone Slates on the Mysterious Carving in this area to get the first Stone Slate in Shirikoro Peak. Follow the pattern and hit the stones in the correct order to spawn a chest with the Stone Slate inside.
Shirikoro Peak Stone Slate 2

You can find this Stone Slate puzzle on the lowest level inside the mountain formation. Just use the Peculiar Pinion on the Mysterious Carving again, follow the pattern, and hit the stones in the correct order.
Back to List of Puzzles ▲
Shirikoro Electro Seelie and Lightning Strike Probe Puzzle
Video Walkthrough of the Puzzle
How to Solve the Puzzle
This puzzle is is found behind a Thunderbird Wall in the ruins. It's the wall on a slightly lower level than the others, accessible by a short flight of stairs downward. Use the Peculiar Pinion on the wall to open it.
You will need to approach the Electro Seelie in the room so they move around. The Lightning Strike Probes will point to the nearest Electro Seelie it's facing. You'll need to move the Seelie to make the Lightning Strike Probes align correctly!
Back to List of Puzzles ▲
Shirikoro Peak Electroculus Puzzles
How to Get Electroculus 1
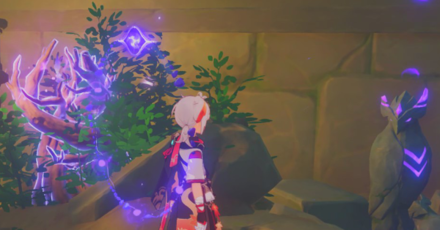
Use the Pinion on a Bird Statue
You can find this Electroculus on the left side of the entrance to the second room of the ruins. Look for the Bird Statue nearby and use your Peculiar Pinion on it. It will summon an Electrogranum once done.
Look for a Small Window
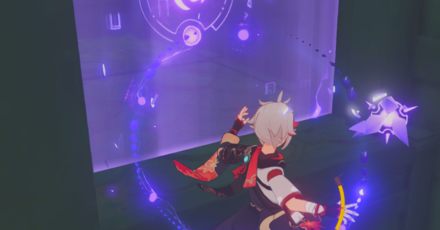
Climb over the small window on the right side of where the Bird Statue is. Get past the Thunder Barrier using the Electrogranum and collect the Electroculus!
How to Get Electroculus 2
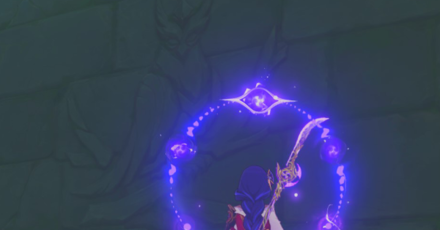
Use the Pinion on a Bird Painting
Look for the Bird Carving near the Relay Stones in the second room of the ruins. Use your Peculiar Pinion to open up a hidden room where you can find the Electroculus.
The Electroculus is in the middle of the room

Jump and grab the Electroculus floating in the middle of the room. You can head out immediately as there are no more hidden chests or puzzles in there!
Back to List of Puzzles ▲
Shirikoro Peak Symbol Puzzle
Where to Find Shirikoro Peak's Ishine Script Puzzle
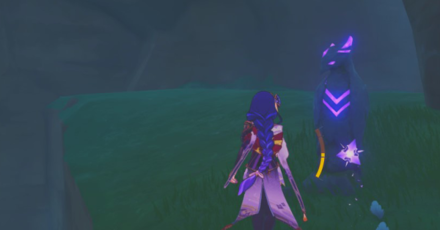
Teleport to the Shirikoro Peak waypoint and glide down to a Bird Statue near an Electrogranum Sakura Bough. Use your Peculiar Pinion near the Bird Statue to activate the puzzle.
Interact with 4 Symbols
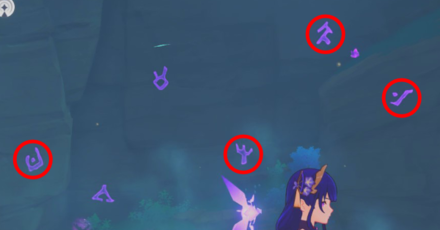
Go to the other side and interact with all the marked symbols in the image above. The order you do it in doesn't matter, as long as you interact with them. An Exquisite Chest will then spawn nearby!
Back to List of Puzzles ▲
Shirikoro Peak Thunder Barrier Puzzle
Where to Find Shirikoro Peak's Thunder Barrier Puzzle
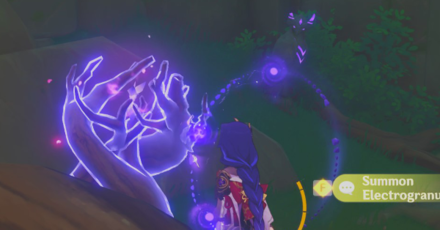
You can find this puzzle near the entrance to the ruins. Find the Bird Statue in the corner and use the Peculiar Pinion on it to summon an Electrogranum.
Enter the Thunder Barrier
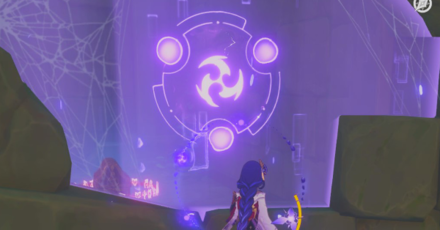
Proceed to the Thunder Barrier on the right side to get access to a room with a locked Precious Chest and a Time Trial Challenge.
Time Trial Challenge Guide
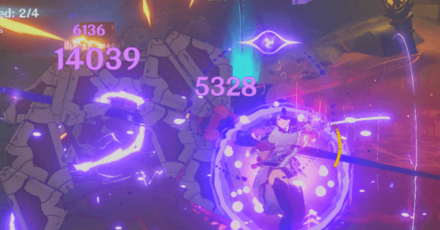
Activate the challenge further inside the room. You will need to defeat 4 Ruin Sentinels under 1 minute and 10 seconds. Beat them in time, and the Precious Chest nearby will be unlocked!
Back to List of Puzzles ▲
Genshin Impact Related Guides
Guides to Inazuma Areas
| Inazuma Area Guides | |
|---|---|
| Narukami Island | Kannazuka |
| Yashiori Island | Seirai Island |
| Tsurumi Island | Watatsumi Island |
Guides to Inazuma Features
Guides to Inazuma Puzzles
Guides to Inazuma Domains
| Inazuma Domain Puzzle Guides | |
|---|---|
| Shakkei Pavilion | Formation Estate |
| Empty Boat to a Thousand Gates | Palace in a Pool |
| Moshiri Kara | |
Guides to Inazuma Quests
All Interactive Map Guides
Comment
for those who need the puzzle at the bottom of Shirikoro peak its 23514 from left to right
Author
All Shirikoro Peak Puzzle Locations and Solutions
improvement survey
03/2026
improving Game8's site?

Your answers will help us to improve our website.
Note: Please be sure not to enter any kind of personal information into your response.

We hope you continue to make use of Game8.
Rankings
Gaming News
Popular Games

Genshin Impact Walkthrough & Guides Wiki

Honkai: Star Rail Walkthrough & Guides Wiki

Umamusume: Pretty Derby Walkthrough & Guides Wiki

Pokemon Pokopia Walkthrough & Guides Wiki

Resident Evil Requiem (RE9) Walkthrough & Guides Wiki

Monster Hunter Wilds Walkthrough & Guides Wiki

Wuthering Waves Walkthrough & Guides Wiki

Arknights: Endfield Walkthrough & Guides Wiki

Pokemon FireRed and LeafGreen (FRLG) Walkthrough & Guides Wiki

Pokemon TCG Pocket (PTCGP) Strategies & Guides Wiki
Recommended Games

Diablo 4: Vessel of Hatred Walkthrough & Guides Wiki

Fire Emblem Heroes (FEH) Walkthrough & Guides Wiki

Yu-Gi-Oh! Master Duel Walkthrough & Guides Wiki

Super Smash Bros. Ultimate Walkthrough & Guides Wiki

Pokemon Brilliant Diamond and Shining Pearl (BDSP) Walkthrough & Guides Wiki

Elden Ring Shadow of the Erdtree Walkthrough & Guides Wiki

Monster Hunter World Walkthrough & Guides Wiki

The Legend of Zelda: Tears of the Kingdom Walkthrough & Guides Wiki

Persona 3 Reload Walkthrough & Guides Wiki

Cyberpunk 2077: Ultimate Edition Walkthrough & Guides Wiki
All rights reserved
Copyright© 2012-2024 HoYoverse — COGNOSPHERE. All Rights Reserved.
The copyrights of videos of games used in our content and other intellectual property rights belong to the provider of the game.
The contents we provide on this site were created personally by members of the Game8 editorial department.
We refuse the right to reuse or repost content taken without our permission such as data or images to other sites.


![Everwind Review [Early Access] | The Shaky First Step to A Very Long Journey](https://img.game8.co/4440226/ab079b1153298a042633dd1ef51e878e.png/thumb)

![Monster Hunter Stories 3 Review [First Impressions] | Simply Rejuvenating](https://img.game8.co/4438641/2a31b7702bd70e78ec8efd24661dacda.jpeg/thumb)


its 41253 numbering each pillar from 1-5 from left to right