Domain of Furious Thunder | Twisted Realm Guide
✉ Send your thoughts in our Genshin 6.4 Patch Survey!
★ Exclusive: Dive back in time with the Meta History
◆ Hot: Version 6.4, Luna 5 Codes
◆ Builds: Varka, Flins, Skirk, Escoffier
◆ Events: Travelers' Tales, He Who Caught the Wind
◆ Future: Linnea, Version 6.5 Luna VI
This is a guide to Domain of Furious Thunder, a Twisted Realm Domain in Genshin Impact. Read on to learn about the domain information, tips and strategies, and recommended characters.
List of Contents
Domain of Furious Thunder Information
| First-Clear Rewards | |
|---|---|
| Ley Line Disorder | • A Plasma Field will be generated at the edge of the challenge area once the challenge begins. While within the fields, characters will be hit by a lightning strike once every 2s and take Electro DMG. The area covered by the field will gradually expand as the challenge proceeds. |
| Monster List |
Recommended Characters
| Main DPS | |
|---|---|
| Sub-DPS | |
| Support |
Energy Amplifier Options
Recommended Fractured Fruit Cores
| Name | Effect |
|---|---|
| After using an Elemental Burst, all party members on the field will unleash one shockwave that scales on 600% of the ATK of the character that unleashed that shockwave, and which deals DMG to nearby opponents. This effect can occur once every 2s and its CD is shared between all characters in the party. |
Recommended Fractured Fruit Splinters
| Name | Effect |
|---|---|
| Character Normal and Charged Attack DMG against opponents affected by Cryo are increased by 30%. | |
| When a character obtains an Elemental Shard created by a Geo Elemental Reaction, they gain 30% Elemental DMG Bonus for 10s. | |
| When a character obtains an Elemental Shard created by a Geo Elemental Reaction, they will regenerate 2 Energy for all members of the party. This effect can be triggered once every 2s and this CD is shared between all party members. | |
| When a character's Plunging Attack hits an opponent, it will generate Elemental Particles that regenerate 6 energy and an Anemo Amber that will generate a wind current. This effect can be triggered once per 8s, and this CD is shared between all characters in the party. | |
| If the current character is a bow user, hitting opponents' weak spots with Charged Attacks will grant the Ironblow effect, which will increase the CRIT Rate of Normal and Charged Attacks by 50% for 8s. | |
| Defeating oppoents with a character's Charged Attack will create a Vacuum Field that pulls nearby opponents in and deals DMG based on 500% of the character's ATK. This effect can be triggered once every 2s, and this effect's CD is shared between all characters in the party. | |
| While protected by a shield, characters gain a 40% incoming healing bonus. | |
| When an opponent is defeated, it will release a shockwave that deals AoE DMG to other opponents. | |
| When a character hits an opponent with an Elemental Burst, a Hydro Amber that will create falling rain in an AoE when shattered will be generated. This Effect can be triggered once every 6s and this CD is shared between all party members. | |
| For 8s after a character uses an Elemental Burst, Normal Attacks that hit opponents have a 50% chance to generate an Elemental Particle that regenrates 2 Energy. Each character can generate this effect once every 1.7s. | |
| When Normal Attacks hit opponents, they have a 50% chance to regenerate 5 Energy for themselves. This effect can be triggered once every 4s per character. | |
| Elemental Skills will regenrate 8 Energy. | |
| Elemental Burst DMG dealt by all party members increased by 30%. | |
| All party members' Shield Strength increased by 35%. | |
| All characters in the party have their Elemental Mastery Increased by 100. | |
| All party member's Energy Recharge increased by 30%. | |
| All party members' Plunging Attack DMG increased by 40%. |
Domain of Furious Thunder Tips and Strategies
Gather Enemies in the Safe Zone using Anemo
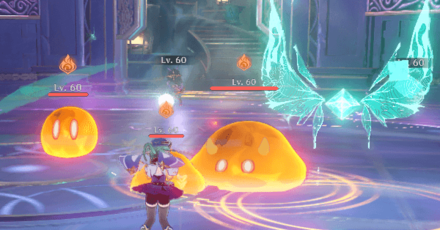
Use Anemo characters like Venti or Sucrose to gather enemies into the safe zone. That way, you can hit most of the enemies without getting out of the safe zone.
Keep your Distance and Attack
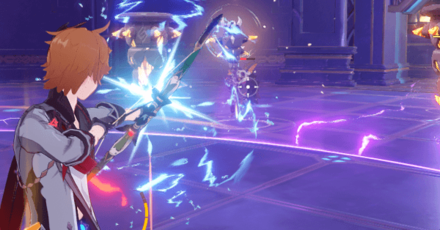
Use ranged attacks from bows or catalysts to deal damage without getting out of the safe zone.
Freeze Enemies to Immobilize Them
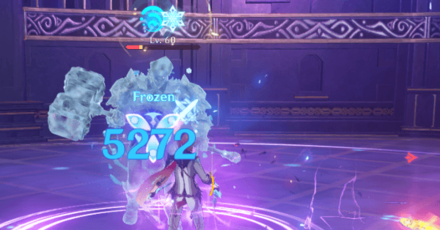
Use a combination of Hydro and Cryo attacks to inflict Freeze on enemies to keep them from getting out of the safe zone.
Domain of Furious Thunder Difficulty Options
| Recommended Difficulty |
|---|
| Expert |
| Difficulty Options | Points |
|---|---|
| Opponents' Electro RES increased by 50%. | 25 |
| Opponents' Pyro RES increased by 50%. | 25 |
| Opponents' ATK increased by 50%. | 50 |
| All party members' Movement SPD decreased by 15%. | 50 |
| All party members' Energy Recharge decreased by 30%. | 25 |
| After sprinting, all characters in your own party take 35% increased DMG for 10s. | 25 |
| Using an Elemental Burst increases the DMG taken by all characters in that player's party by 25%. This effect stacks up 4 times. | 25 |
| When active character's HP is lower than 50%, ATK is decreased by 50%. | 25 |
| When active character's HP is lower than 50%, Movement SPD is decreased by 20%. | 25 |
| Large Pyro Slimes possess the Smoldering Flames ability: they will periodically release smoldering ley lines pulses that will inflict Pyro on nearby characters. These characters will take Pyro DMG until the inflicted element is removed. | 50 |
| Fatui Skirmisher - Electrohammer Vanguard have been infected with Engulfing Storm. They will periodically release engulfing ley line pulses that will inflict nearby character with Electro. This will continuously drain characters' Energy until the inflicted element is removed. | 50 |
| When hit by a lightning bolt from the plasma field, all characters in the party will lose 15 Energy. | 50 |
| The initial area of the safe zone is smaller. | 25 |
Genshin Impact Related Guides

All Energy Amplifier Events
| All Energy Amplifier Events | ||
|---|---|---|
 Initiation (1.5) Initiation (1.5) |
 Fruition (2.3) Fruition (2.3) |
 Lemma (4.8) Lemma (4.8) |
Energy Amplifier: Lemma Stage Guides
Other Energy Amplifier Guides
2.3 Fruition Stage Guides
| Energy Amplifier Fruition Stages | |
|---|---|
| Act 1 Places of Interest: West of Wangshu Inn |
Deceitful Domain: Sea of Wandering Souls |
| Act 2 Places of Interest: Tianqiu Valley |
Deceitful Domain 2: Where Bloodhounds Gather |
| Act 3 Places of Interest: Yaoguang Shoal |
Deceitful Domain 3 Whirling Judgement |
1.5 Initiation Stage Guides
| All Twisted Realm Domain Guides | |
|---|---|
 Domain of Deceit Domain of Deceit |
 Domain of Furious Thunder Domain of Furious Thunder |
 Domain of Chaos Domain of Chaos |
 Domain of Heresy Domain of Heresy |
Energy Amplifier Quest Guides
 Energy Amplifier Initiation Quest Guide |
All Genshin Impact Events

Comment
Author
Domain of Furious Thunder | Twisted Realm Guide
improvement survey
03/2026
improving Game8's site?

Your answers will help us to improve our website.
Note: Please be sure not to enter any kind of personal information into your response.

We hope you continue to make use of Game8.
Rankings
Gaming News
Popular Games

Genshin Impact Walkthrough & Guides Wiki

Honkai: Star Rail Walkthrough & Guides Wiki

Umamusume: Pretty Derby Walkthrough & Guides Wiki

Pokemon Pokopia Walkthrough & Guides Wiki

Resident Evil Requiem (RE9) Walkthrough & Guides Wiki

Monster Hunter Wilds Walkthrough & Guides Wiki

Wuthering Waves Walkthrough & Guides Wiki

Arknights: Endfield Walkthrough & Guides Wiki

Pokemon FireRed and LeafGreen (FRLG) Walkthrough & Guides Wiki

Pokemon TCG Pocket (PTCGP) Strategies & Guides Wiki
Recommended Games

Diablo 4: Vessel of Hatred Walkthrough & Guides Wiki

Cyberpunk 2077: Ultimate Edition Walkthrough & Guides Wiki

Fire Emblem Heroes (FEH) Walkthrough & Guides Wiki

Yu-Gi-Oh! Master Duel Walkthrough & Guides Wiki

Super Smash Bros. Ultimate Walkthrough & Guides Wiki

Pokemon Brilliant Diamond and Shining Pearl (BDSP) Walkthrough & Guides Wiki

Elden Ring Shadow of the Erdtree Walkthrough & Guides Wiki

Monster Hunter World Walkthrough & Guides Wiki

The Legend of Zelda: Tears of the Kingdom Walkthrough & Guides Wiki

Persona 3 Reload Walkthrough & Guides Wiki
All rights reserved
Copyright© 2012-2024 HoYoverse — COGNOSPHERE. All Rights Reserved.
The copyrights of videos of games used in our content and other intellectual property rights belong to the provider of the game.
The contents we provide on this site were created personally by members of the Game8 editorial department.
We refuse the right to reuse or repost content taken without our permission such as data or images to other sites.
 1 - Interference: Overgrowth


![Monster Hunter Stories 3 Review [First Impressions] | Simply Rejuvenating](https://img.game8.co/4438641/2a31b7702bd70e78ec8efd24661dacda.jpeg/thumb)


