Variations on the Song of the Dragon and Freedom Quest Guide
★ Exclusive: Dive back in time with the Meta History
◆ Hot: Version 6.4, 6.4 Codes, Linnea, Version 6.5
◆ Builds: Varka, Flins, Skirk, Escoffier
◆ Events: Operation Stronghold Defense
◆ Endgame: Spiral Abyss (March 2026)

Variations on the Song the Dragon and Freedom is the third quest for the 2026 Windblume event in Genshin Impact 6.4 Luna V. See how to unlock this quest, its walkthrough and how to collect the tears and find your companions in this guide!
List of Contents
How to Unlock Variations on the Song of the Dragon and Freedom
Complete the Second Quest
Complete the For a Reunion Without Tears second quest of the Homeward, He Who Caught the Wind event to unlock the third and final act of the Windblume event.
Variations on the Song of the Dragon and Freedom Walkthrough
Go to the Grandmaster's Office
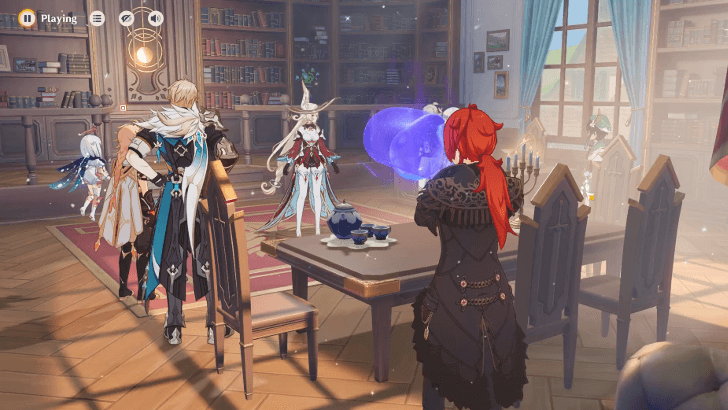
Assemble with the Knights of Favonius and Nicole and Alice inside the Grandmaster's Office in the Favonius Headquarters. When entering the office, a cutscene regarding the bubble which turned anomalous will start.
Note: The entire sequence afterwards will last around 20~30 minutes, so it's best to set a time to complete the whole quest. You can also leave anytime by clicking the top-left exit icon if you need to do so, but may reset the progress.
Enter the Anomalous Bubble and Defeat the Monsters
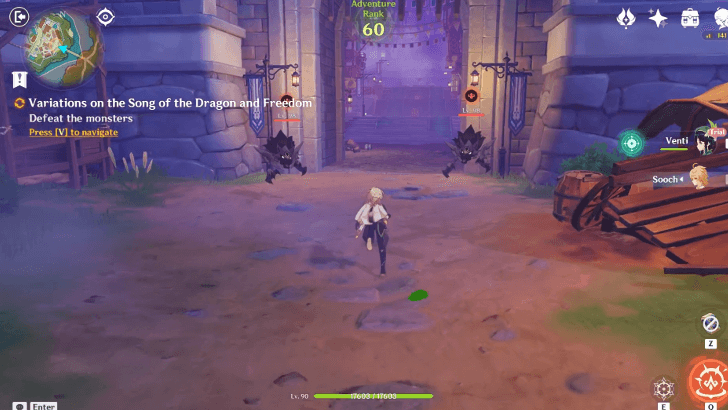
After entering the bubble, you'll find yourself and Paimon separated from everyone in an Abyss-ridden Mondstadt. Find Venti as he joins your team as a Trial unit and defeat the Rifthounds at the gate of Mondstadt.
Collect the Tears and Find Your Companions
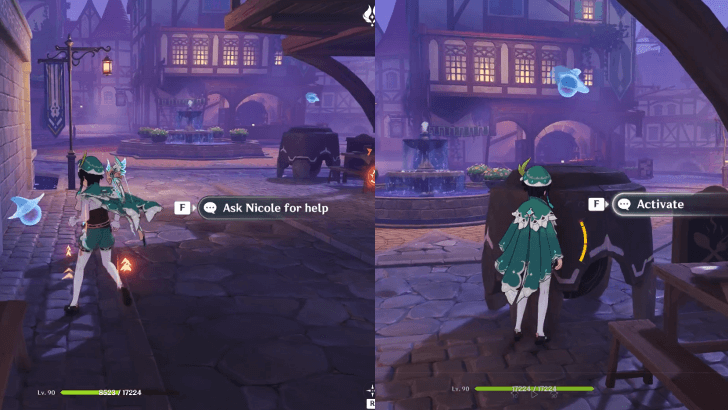
For this part of the quest, you will be tasked in finding Jean, Diluc, and 4 Teardrop Crystals in this long objective. If you need assistance, you can call for Nicole's help by interacting the small bubble scattered all over Mondstadt.
Fire mechanisms around the area can also be activated to roast and apply Pyro to your enemies. Once you find Jean, heal with her burst against the Rifthounds' Corrosion status.
| Objective | |
|---|---|
| 1 | 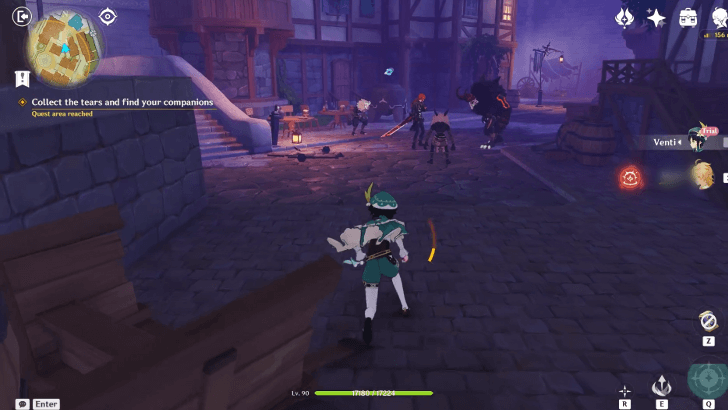 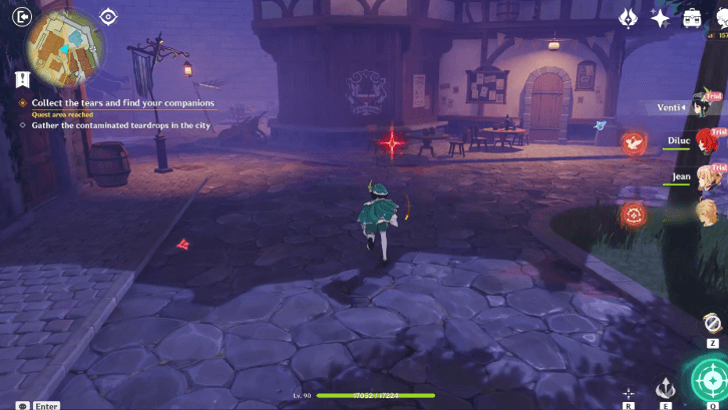 Find Diluc in front of the Angel's Share just north of the gate. Diluc joins your team afterwards. The first Teardrop Crystal is also found in front of the tavern. |
| 2 | 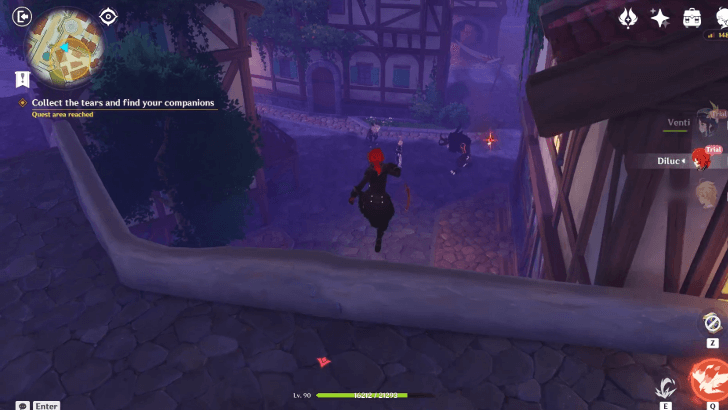 Find Jean on the south side of Mondstadt, down the ledge after passing the fountain. Jean joins your team afterwards. The second Teardrop Crystal can also be obtained here. |
| 3 | 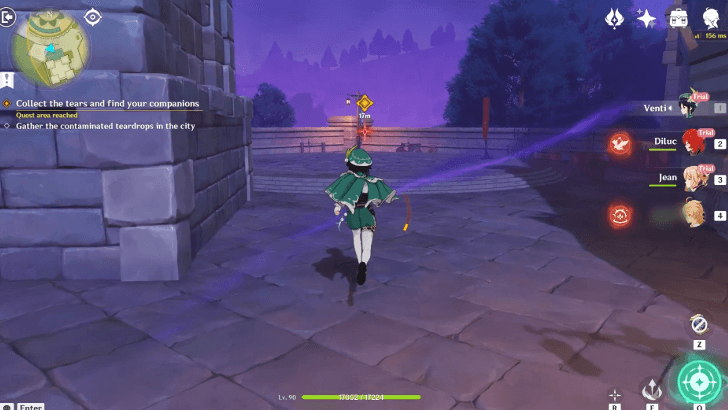 The third Teardrop Crystal is found at the training area beside the Favonius Headquarters. |
| 4 | 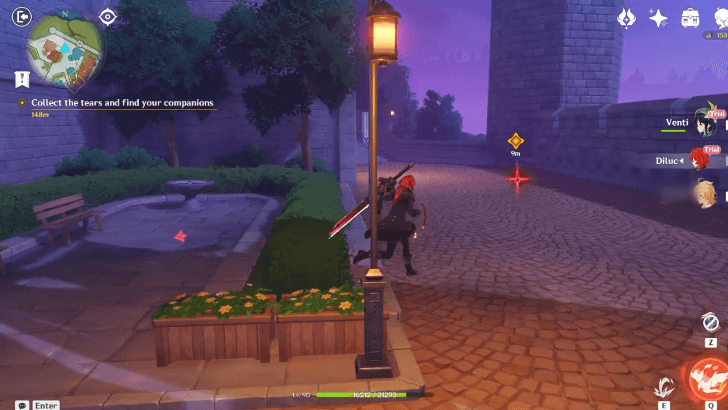 The fourth and last Teardrop Crystal is found northside before the stairs leading to the Barbatos statue plaza, just a bit north of the Goth Grand Hotel. |
Go to the Plaza in Front of the Cathedral
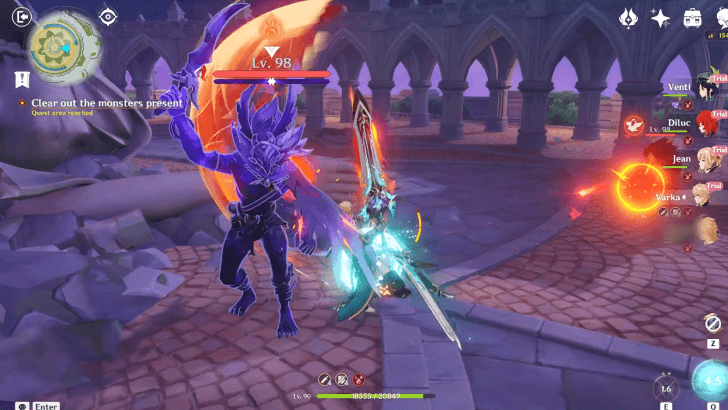
Once you've collected all 4 Teardrop Crystals, head to the Barbatos statue plaza in front of the Cathedral and join forces with Varka.
With all 5 powerful figures in your team, defeat all hordes of enemies including a Tenebrous Mimiflora, whose shield can be broken by frequent Elemental Application.
Defeat Dvalin, Who Has Been Corrupted by the Abyss
After a cutscene, you will now be tasked in defeating the Abyss-Corrupted Dvalin. This boss is virtually the same as the original Dvalin, but his neck is protected with another layer of a corrupted shield. Using Varka is ideal to defeat the boss.
If you need to remember how Dvalin's mechanics work, read these tips:
| Objective | |
|---|---|
| 1 | 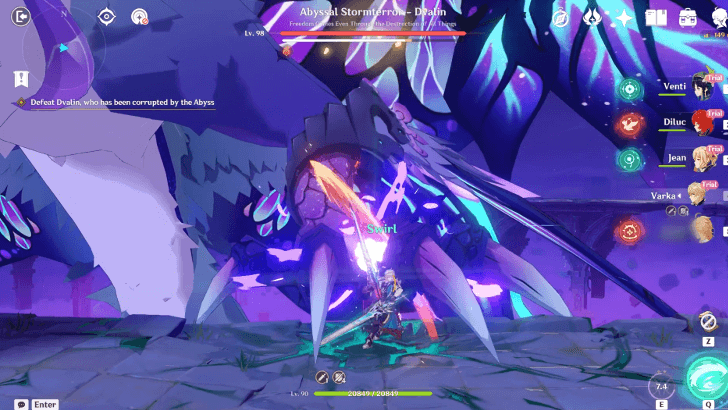 Avoid Dvalin's attacks and wait for him to land with his claws resting on the platform, making him targettable by attacks. This is your cue to start breaking the white shield with strong attacks. Repeat this process until the gauge is depleted. |
| 2 | 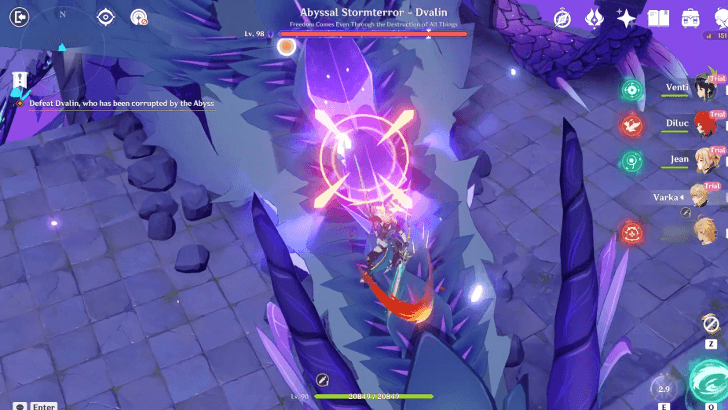 Once the shield is broken, Dvalin's head will rest on the platform making it climbable. Climb on top of its neck and attack the corrupted crystal. This time, the crystal is protected by a corrupted purple shield that requires strong attacks to remove before you're able to deal damage to Dvalin himself. |
| 3 | 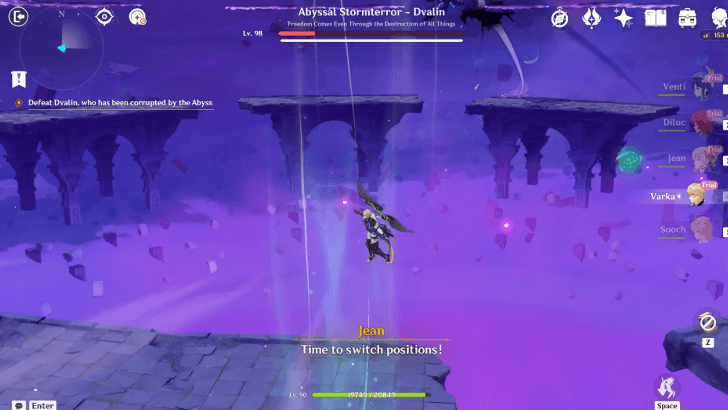 Whenever Dvalin prepares a strong attack, or if Jean says to switch positions. Touch the Anemograna found on opposite sides of each platforms to create a Wind Current. Glide up the current and switch to the other platform to prevent his attacks. |
Wait for Alice in the Library
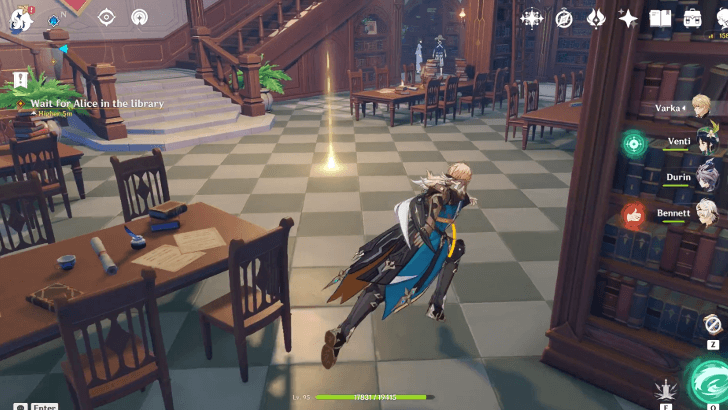
After a long cinematic cutscene, you and the entire Favonius gang will be thrown out of the bubble world, which completes this entire sequence! After talking with the whole group, head inside the library and meet Alice below.
Variations on the Song of the Dragon and Freedom Rewards
Total Quest Rewards
| Total Quest Rewards |
 Primogem x20 |
 Mora x20000 |
|---|
Genshin Impact Related Guides

Homeward, He Who Caught the Wind
Homeward, He Who Caught the Wind Event Guides
| Homeward, He Who Caught the Wind Event Guides | |
|---|---|
 Echoes of Memory Echoes of Memory |
 A Chat Over Fine Drinks A Chat Over Fine Drinks |
 Favonius Falcon's Recon Log Favonius Falcon's Recon Log |
 Lionfang's Radiant Onslaught Lionfang's Radiant Onslaught |
Homeward, He Who Caught the Wind Quest Guides
| Homeward, He Who Caught the Wind Event Guides | |
|---|---|
 The Outlander Who Caught the Wind The Outlander Who Caught the Wind |
Variations on the Song of the Dragon and Freedom |
Other Events and Schedule

Comment
Author

Variations on the Song of the Dragon and Freedom Quest Guide


Rankings
Gaming News

![Death Stranding 2: On The Beach [PC] Review | A Port That Delivers](https://img.game8.co/4447392/15310a0c9aa1b6843bb713b2ea216930.jpeg/show)


Popular Games

Genshin Impact Walkthrough & Guides Wiki
Umamusume: Pretty Derby Walkthrough & Guides Wiki
Crimson Desert Walkthrough & Guides Wiki
Monster Hunter Stories 3: Twisted Reflection Walkthrough & Guides Wiki
Honkai: Star Rail Walkthrough & Guides Wiki
Pokemon Pokopia Walkthrough & Guides Wiki
The Seven Deadly Sins: Origin Walkthrough & Guides Wiki
Wuthering Waves Walkthrough & Guides Wiki
Zenless Zone Zero Walkthrough & Guides Wiki
Arknights: Endfield Walkthrough & Guides Wiki


Recommended Games
Fire Emblem Heroes (FEH) Walkthrough & Guides Wiki
Diablo 4: Vessel of Hatred Walkthrough & Guides Wiki
Cyberpunk 2077: Ultimate Edition Walkthrough & Guides Wiki
Yu-Gi-Oh! Master Duel Walkthrough & Guides Wiki
Super Smash Bros. Ultimate Walkthrough & Guides Wiki
Pokemon Brilliant Diamond and Shining Pearl (BDSP) Walkthrough & Guides Wiki
Elden Ring Shadow of the Erdtree Walkthrough & Guides Wiki
Monster Hunter World Walkthrough & Guides Wiki
The Legend of Zelda: Tears of the Kingdom Walkthrough & Guides Wiki
Persona 3 Reload Walkthrough & Guides Wiki


All rights reserved
Copyright© 2012-2024 HoYoverse — COGNOSPHERE. All Rights Reserved.
The copyrights of videos of games used in our content and other intellectual property rights belong to the provider of the game.
The contents we provide on this site were created personally by members of the Game8 editorial department.
We refuse the right to reuse or repost content taken without our permission such as data or images to other sites.