Whisper Beneath the Waves Quest Guide
✉ Send your thoughts in our Genshin 6.4 Patch Survey!
★ Exclusive: Dive back in time with the Meta History
◆ Hot: Version 6.4, 6.4 Codes, Linnea, Version 6.5
◆ Builds: Varka, Flins, Skirk, Escoffier
◆ Events: Travelers' Tales, Sightseeing With Friends
◆ Endgame: Spiral Abyss (March 2026)
Whisper Beneath the Waves is a World Quest under the East of the Moon, West of the Sun quest chain found in the Eye of Katti within Nod-Krai for Genshin Impact Luna I. See how to unlock this quest, its walkthrough, how to break the central energy field with Kuuvahki Dewdrops in the underground area, and all the rewards of this quest here in this guide!
List of Contents
How to Unlock Whisper Beneath the Waves
Go to Eye of Kratti
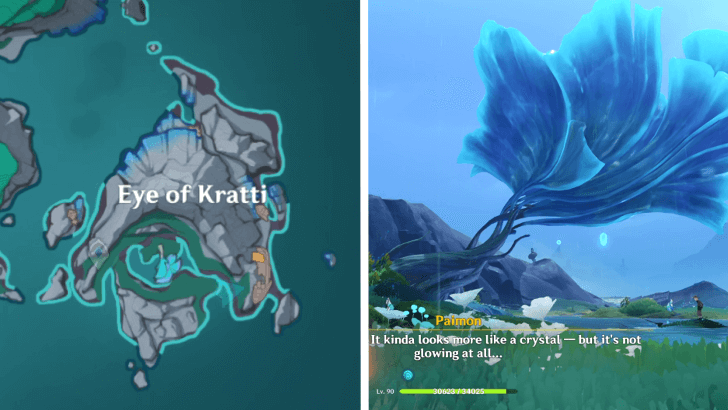
Whisper Beneath the Waves is located at the Eye of Kratti, found east from the Blue Amber Lake in the nation of Nod-Krai.
For players who have done the quest The Tale-Telling Heart, players can do this immediately as they are already in Blue Amber Lake for the quest.
How to Get to Nod-Krai and Map Guide
Whisper Beneath the Waves Walkthrough
Arrive at Eye of Kratti
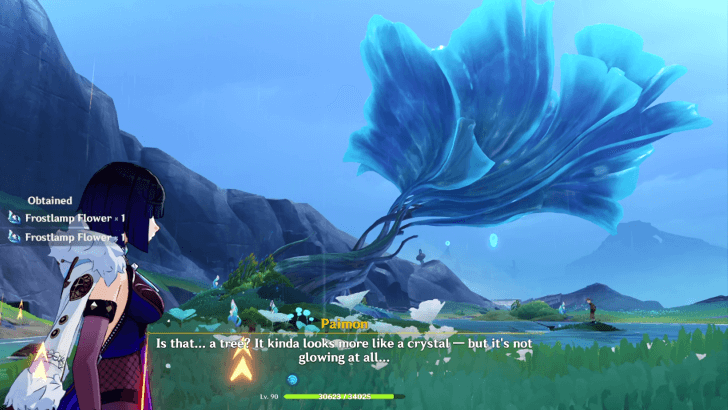
When you first arrive at the Eye of Kratti, the camera will focus on the tree in the center of the island while Paimon mentions it looks like a crystal but it is not shining.
Check out the shipwreck
There is no quest marker for this part, but to proceed with the quest you have to check out the shipwreck found on the eastern side of Eye of Kratti.
Destroy the rubble using Bipolar energy
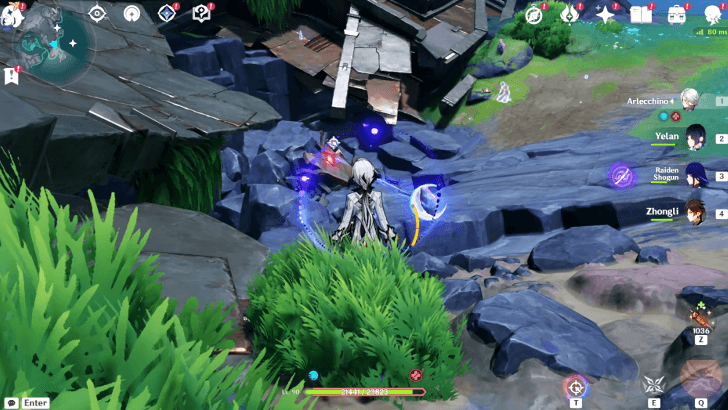
After witnessing the ghosts of the crew from the shipwreck, appraoch a plant nearby that will get you empowered. Use your Bipolar energy to pick up a nearby rock and throw it at the rubble.
This will open up a hole on the ground that will unlock an underground area in the Eye of Kratti. Jumping down the new hole marks the official start of this World Quest.
Continue deeper
When you begin your investigation of the underground region, you remain empowered during the exploration. Use this to pull down the wall in the starting area to continue progress.
Solve Bipolar Energy Puzzle
Down the line, you will encounter a bit of a dead end where you have to take down a wall using Bipolar energy in a quick puzzle.
Bipolar and Unipolar Objects Guide
How to Solve Bipolar Puzzle
| How to Solve Bipolar Puzzle | |
|---|---|
| 1 |  Interact with this plant that seems to glow. Once you do, a group of smaller kuuhenki will fly out. |
| 2 | 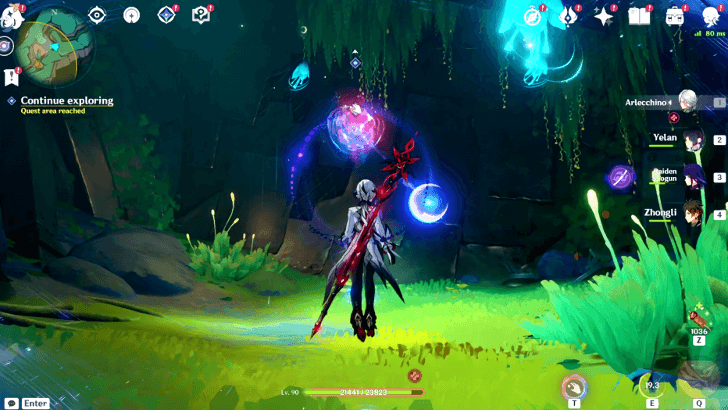 The kuuhenki will eventually reach a point mid-air that will transform them into Bipolar energy, which you can grab while empowered. |
| 3 | 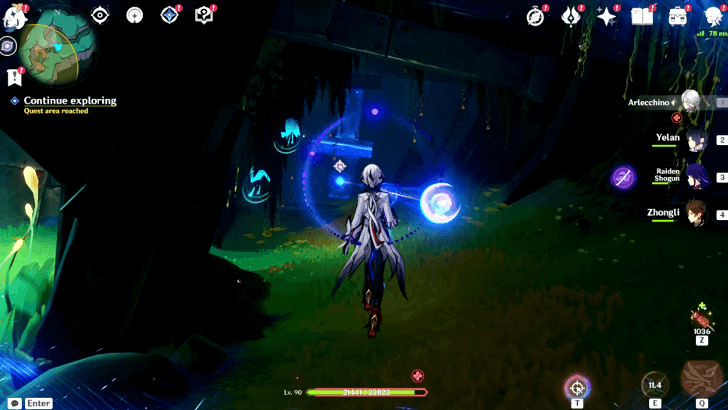 Using the Bipolar energy collected in Step 2, fire it at the wall that was blocking the path. |
Go down the crevice

After going through the path opened up by destoying the wall in the previous step, you will come across a giant crevice. Do not worry; you can jump and hover down safely with your glider, as there is a body of water waiting at the bottom.
Mid-way, make sure to collect the Bipolar Energy hovering above the water. You will need it for the next step.
Open the route
After passing by a couple of obstacles, you will find the route blocked again. The path can open up by using the Bipolar Energy you collected in the previous step.
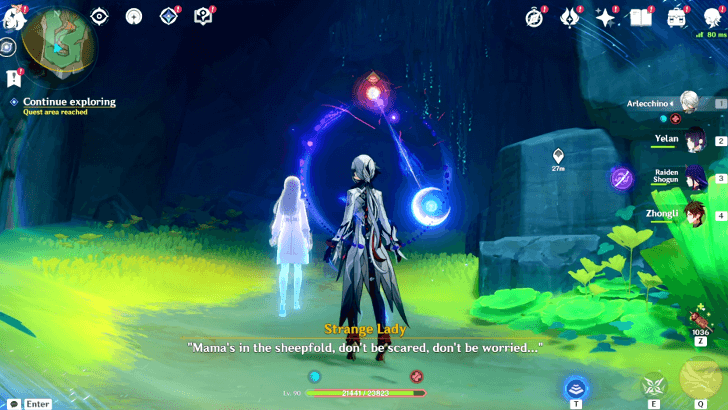
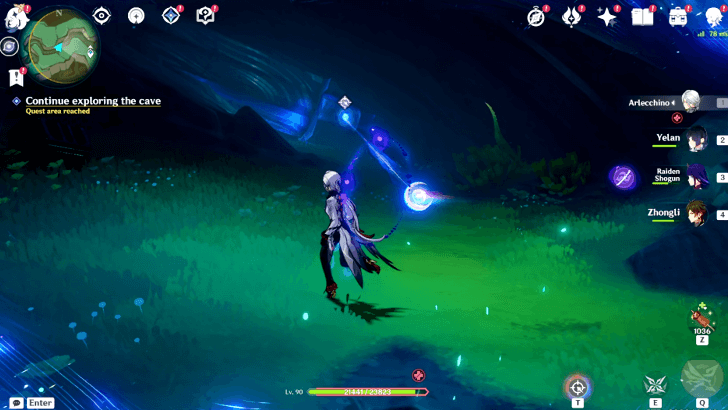
Find a way to collect Kuuvahki Dewdrops
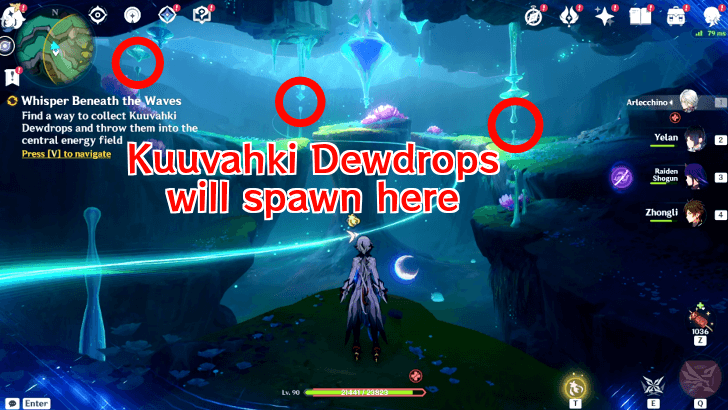
Once you get to the main area of the underground of Eye of Katti, this is where the main puzzle begins. The goal here is to find a way to get three specific nodes to spawn Kuuvahki Dewdrops, then throw them towards the center that is protected by a central energy field.
How to get Kuuvahki Dewdrops
The nodes where the Kuuvahki Dewdrops are lacking in energy to spawn them, so the main mission here is to send them some energy. Think of the kuuhenki you saw in the Bipolar puzzle earlier.
Take note that the game will not show nodes on your map as hints for where to go and check. Instead, you have to pay close attention as you go around the area for certain wisps of energy you have to interact with.
| How to Get Kuuvahki Dewdrops | |
|---|---|
| 1 | 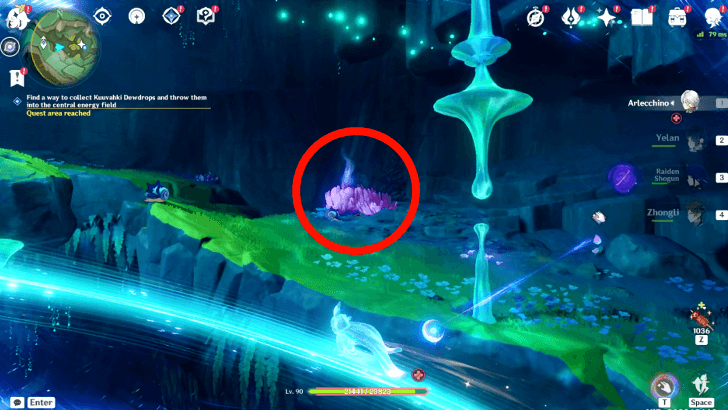 The first one can be found immediately near the nearest Kuuvahki Dewdrope node from where you entered the area. |
| 2 | 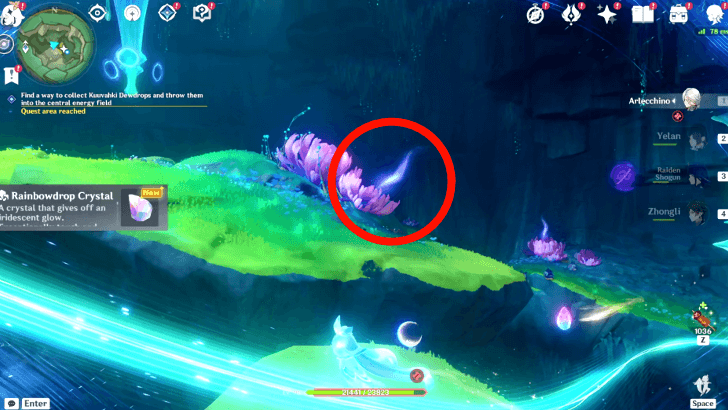 The second one is found on the same floating island where the central energy field is. |
| 3 | 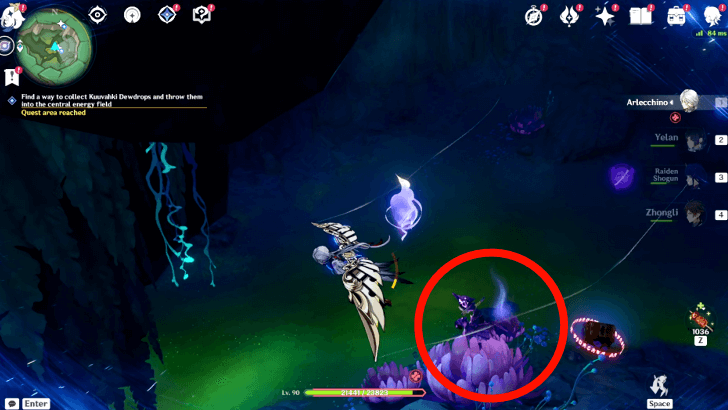 The third location is at the bottom of the underground map, nearby a Raidant Antelope. |
| 4 | 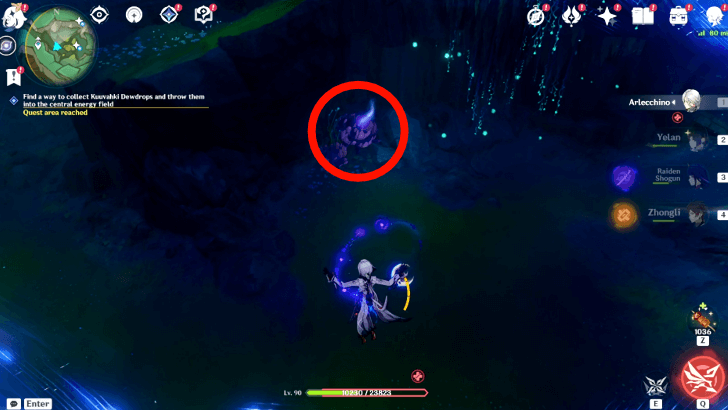 The fourth location is found a little to the west from where the third wisp of energy can be found. |
| 5 |  The fifth and final one is at the highest explorable point of the underground area, and is very close to a Lunoculus. |
Throw the 3 Kuuvahki Dewdrops to the central energy field
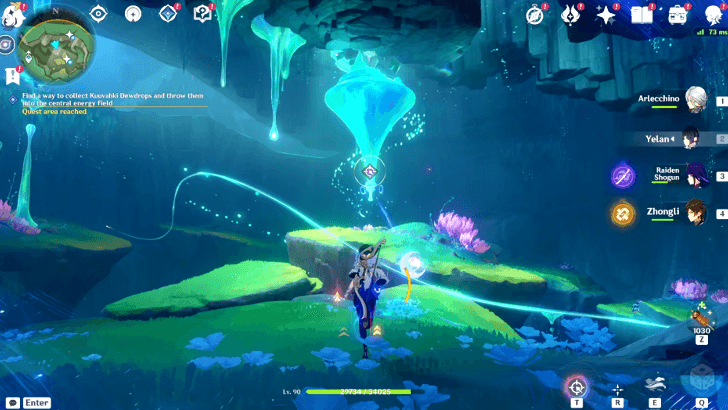
Once you have the Dewdrops spawning, go nearby each of the Dewdrops, collect them using your empowerwed state, and throw them at the central energy field in them iddle of the area.
Return to the Surface
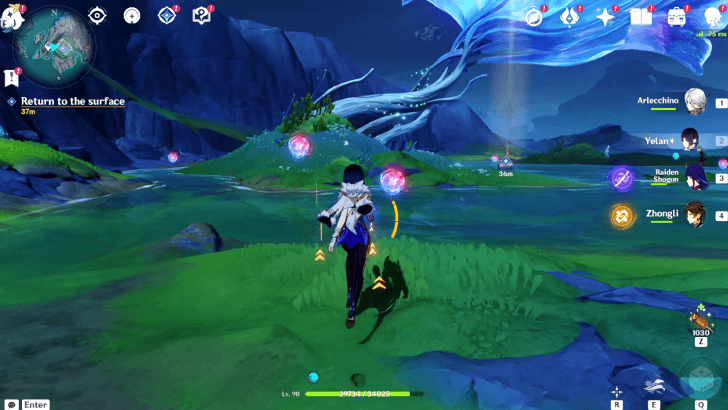
After a quick ruckus in a cutscene, head back to the surface via Teleport Waypoint, and head towards the middle area under the now-glowing tree.
Open the Exquisite Chest that floated up from the water to collect one of the pieces of the Proofs of Cognoscenti and finish the quest!
Whisper Beneath the Waves Information
Sub-Quest of East of the Moon, West of the Sun

The Shoemaker's Children Go Barefoot is a subquest of the World Quest chain, East of the Moon, West of the Sun.
Although a sub-quest, this quest does not directly continue from the other quests from the same quest chain, and can be done in any order from the other sub-quests.
East of the Moon, West of the Sun World
Whisper Beneath the Waves Rewards
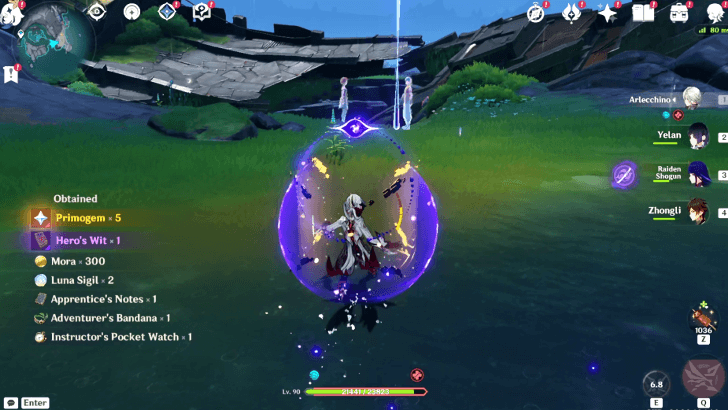
Total Quest Rewards
| Total Quest Rewards |
 Primogem x40 |
 Mora x33000 |
|---|---|---|
 Hero's Wit x2 |
||

Special Rewards
| Quest Rewards | |
|---|---|
 |
The Quest Item Inscripta-Cognoscenti's Feather, which is part of the Proof of Cognoscenti and one of Reed Miller's treasures, will be added to the player's inventory as special rewards upon completion of the Quest.
How to Get the Proof of Cognoscenti
Genshin Impact Related Guides
Other East of the Moon, West of the Sun Quest Guides
| East of the Moon, West of the Sun World Quest Guides | ||
|---|---|---|
| The Tale-Telling Heart | The Shoemaker's Children Go Barefoot | Whisper Beneath the Waves |
| Return to Sender | The Raven's Legacy | |
Comment
Is it just me or do the veteran sailors still spawn after the quest is done?
Author

Whisper Beneath the Waves Quest Guide


Rankings
Gaming News


![The Liar Princess and the Blind Prince Review [PC] | Lovely to Look at but Tedious to Play](https://img.game8.co/4442586/8d95f5faf05780f1765ce7e0938bd825.jpeg/thumb)
![Marathon Cryo Archive Map Teased as [REDACTED] on Selection Screen](https://img.game8.co/4442236/6357203e58172f6de57f1991e7c39b22.png/thumb)

Popular Games

Genshin Impact Walkthrough & Guides Wiki
Umamusume: Pretty Derby Walkthrough & Guides Wiki
Pokemon Pokopia Walkthrough & Guides Wiki
Honkai: Star Rail Walkthrough & Guides Wiki
Monster Hunter Stories 3: Twisted Reflection Walkthrough & Guides Wiki
Arknights: Endfield Walkthrough & Guides Wiki
Wuthering Waves Walkthrough & Guides Wiki
Zenless Zone Zero Walkthrough & Guides Wiki
Pokemon TCG Pocket (PTCGP) Strategies & Guides Wiki
Monster Hunter Wilds Walkthrough & Guides Wiki


Recommended Games
Diablo 4: Vessel of Hatred Walkthrough & Guides Wiki
Cyberpunk 2077: Ultimate Edition Walkthrough & Guides Wiki
Fire Emblem Heroes (FEH) Walkthrough & Guides Wiki
Yu-Gi-Oh! Master Duel Walkthrough & Guides Wiki
Super Smash Bros. Ultimate Walkthrough & Guides Wiki
Pokemon Brilliant Diamond and Shining Pearl (BDSP) Walkthrough & Guides Wiki
Elden Ring Shadow of the Erdtree Walkthrough & Guides Wiki
Monster Hunter World Walkthrough & Guides Wiki
The Legend of Zelda: Tears of the Kingdom Walkthrough & Guides Wiki
Persona 3 Reload Walkthrough & Guides Wiki


All rights reserved
Copyright© 2012-2024 HoYoverse — COGNOSPHERE. All Rights Reserved.
The copyrights of videos of games used in our content and other intellectual property rights belong to the provider of the game.
The contents we provide on this site were created personally by members of the Game8 editorial department.
We refuse the right to reuse or repost content taken without our permission such as data or images to other sites.
yeah me too