Team Rigor or Team Intuition Quest Guide
✉ Send your thoughts in our Genshin 6.4 Patch Survey!
★ Exclusive: Dive back in time with the Meta History
◆ Hot: Version 6.4, 6.4 Codes, Linnea, Version 6.5
◆ Builds: Varka, Flins, Skirk, Escoffier
◆ Events: Travelers' Tales, Sightseeing With Friends
◆ Endgame: Spiral Abyss (March 2026)
Team Rigor or Team Intuition is a World Quest in Genshin Impact Luna I. See where to find this quest, how to unlock it, its walkthrough, how to solve its box puzzles, and all the rewards of this quest here in this guide!
List of Contents
Team Rigor or Team Intuition Quest Location
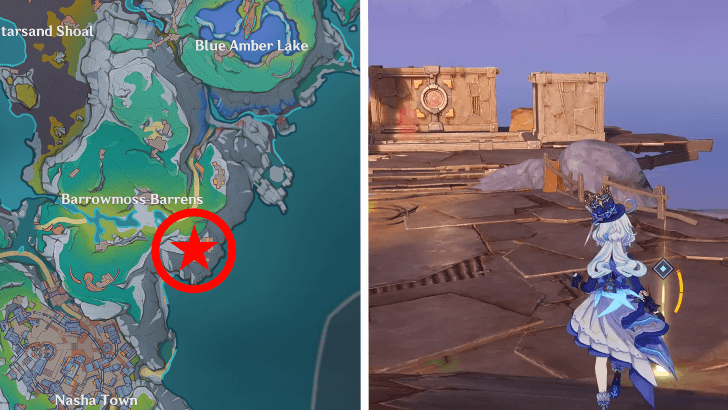
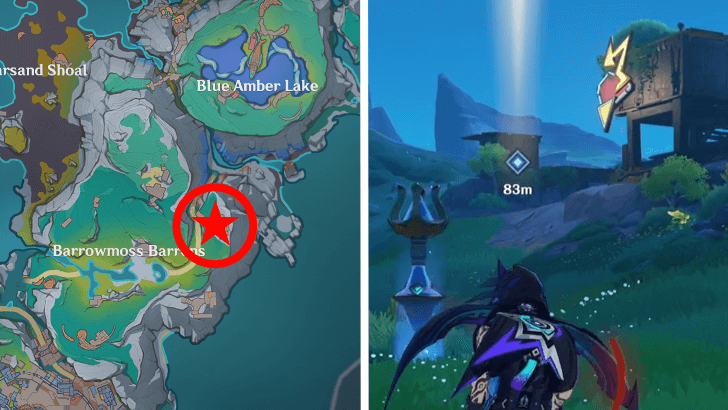
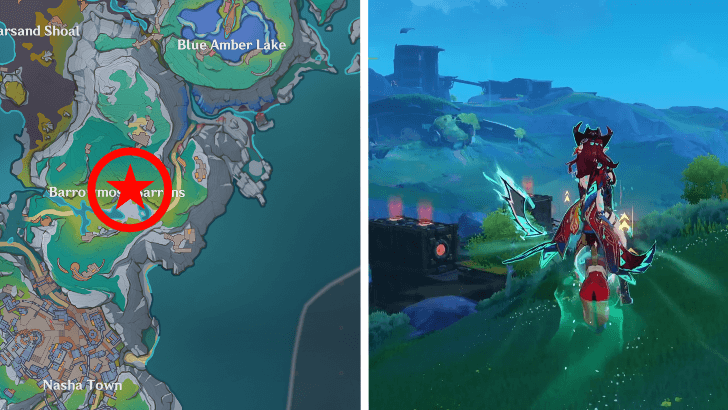
Go to Barrowmoss Barrens
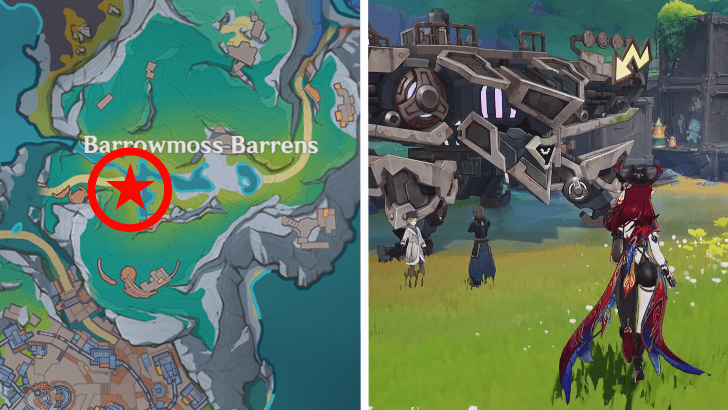
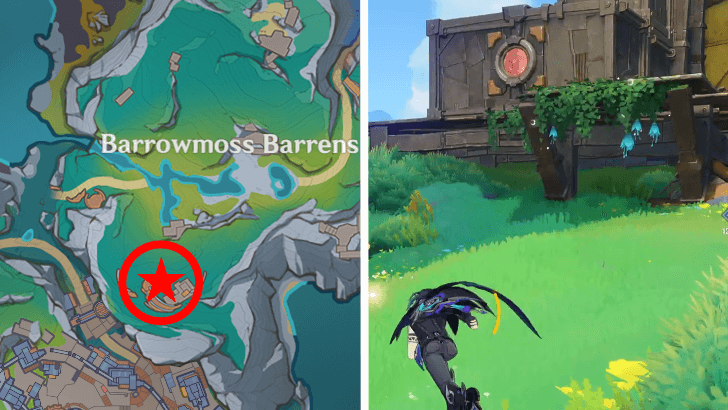
Team Rigor or Team Intuition is located at Barrowmoss Barrens, in the nation of Nod-Krai. Speak to Anezka and Macola by a lake just west of the Barrowmoss Barrens' central Teleport Waypoint.
How to Unlock Team Rigor or Team Intuition
Complete the Prerequisites
| Quest Unlock Requirements | |
|---|---|
 |
Aha! Looks like Team Rigor or Team Intuition is not locked behind any quest! |
The Team Rigor or Team Intuition world quest is not locked behind any other quest and is automatically unlocked upon reaching Nod-Krai!
Nod-Krai Location and How to Unlock
Team Rigor or Team Intuition Walkthrough
Speak to Anezka and Macola
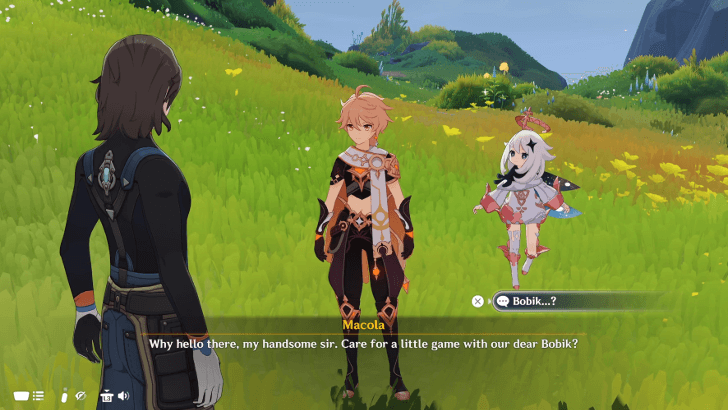
Upon spotting the giant mech, approach it and speak to its operators, Anezka and Macola, and they will introduce you to Bobik, the giant robot.
They'll ask you to hop on it and test its capabilities out, so happily comply.
Solve the First Box Puzzle
Hop on Bobik and solve the first box puzzle. Afterwards, speak to Anezka and Macola again to proceed to the next objective.
Bipolar and Unipolar Objects Guide
How to Solve the First Box Puzzle
| Steps | |
|---|---|
| 1 |  There will only be two boxes: the small one and the large one. Pick up the small one first and set it just next to the boxes that are already in place. |
| 2 | 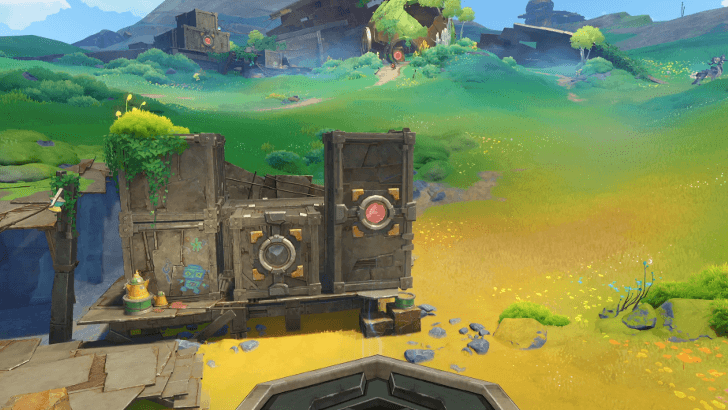 Pick up the large box and turn it to its side, then place it next to the small box. |
Solve the Second Box Puzzle
Go to the next puzzle's location, which is just to the south of the first one. You'll know you're there when you see the boxes waiting for you.
Hop on Bobik and solve the second puzzle. A cutscene will then ensue upon the puzzle's completion.
How to Solve the Second Box Puzzle
| Steps | |
|---|---|
| 1 | 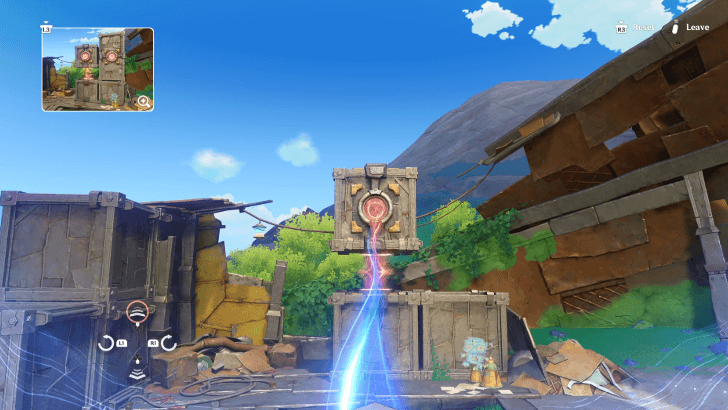 Grab the smaller box and keep turning it until its unipolar field is below it. Afterwards, set it on top of the other unipolar field already in place. |
| 2 | 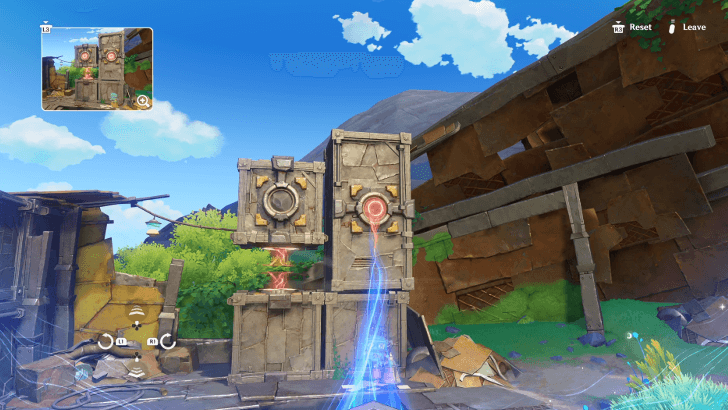 Grab the larger box, turn it on its side, and place it to the right of the floating box arrangement you previously made. |
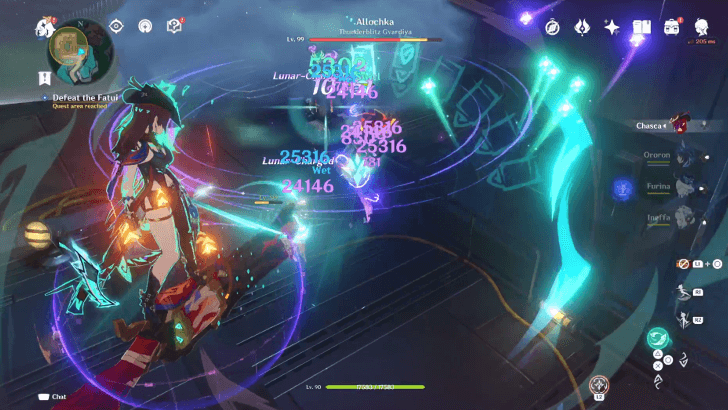
Defeat the Fatui

Prepare to engage in battle and defeat the Fatui standing in your way. Another cutscene will play upon successfully doing so.
Solve the Third Box Puzzle
The third box puzzle is located on some cliffs to the east. There should be some cranes along with the boxes that are waiting for you.
To solve the third box puzzle, you're going to have to set the stage by using the crane to the right before proceeding.
How to Solve the Third Box Puzzle
| Steps | |
|---|---|
| 1 | 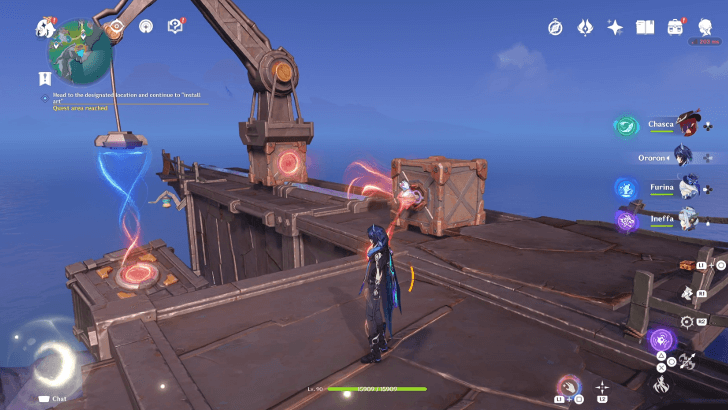 Before anything else, look to the crane on the right-hand side of the stage. Go near the Kuuvahki Affected Plant and pick up the core nearby. Place it on the relay to repel the crane and push it forward, allowing it to pick up the missing box for the puzzle. |
| 2 | 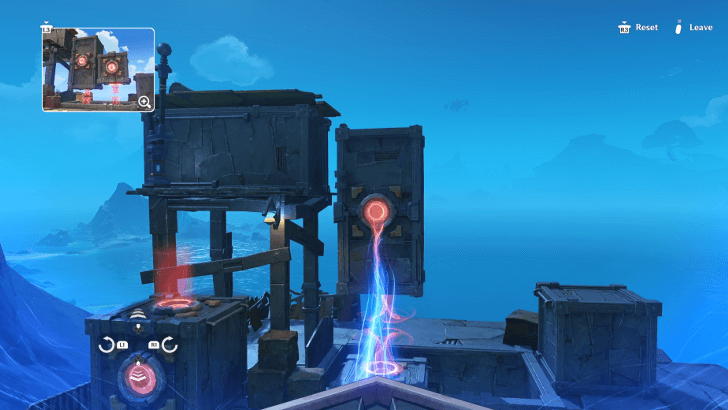 Hop onto Bobik and pick up the large box in front of you. Turn it so that its unipolar beam is below it, then set it on top of the unipolar beam already in place. |
| 3 | 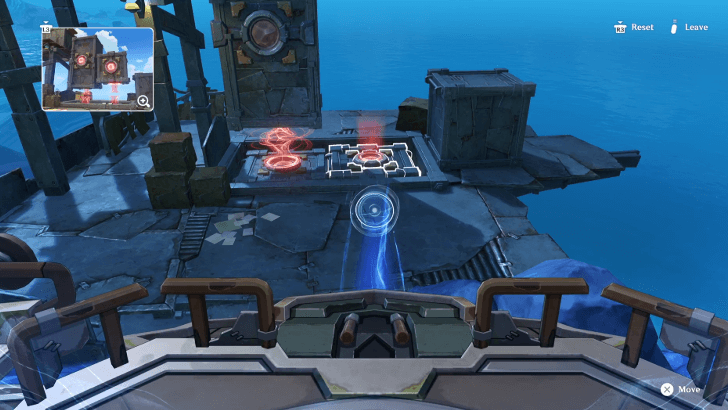 Look to the left and pick up the smaller box. Don't turn it over. Instead, simply insert it into the slot next to the first preset box with the unipolar beam. |
| 4 | 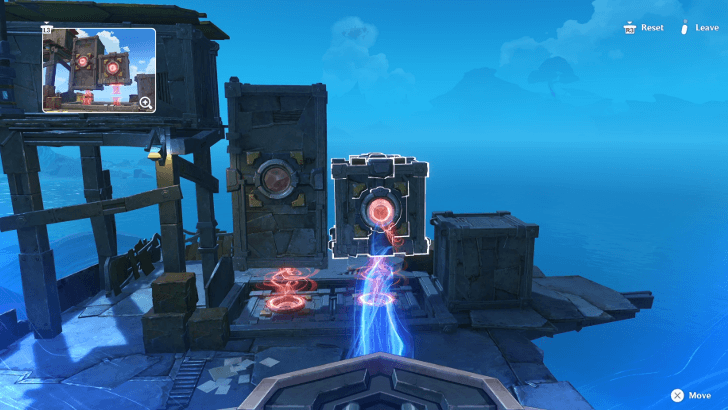 Grab the box picked up by the crane earlier and turn it over so that its unipolar beam is facing down. Place it on top of the previous box you inserted and have them repel each other. |
Head to the Fourth Puzzle's Location
The fourth box puzzle is located just north of the third one. It should look like a small shantytown-looking area where the boxes are scattered about.
How to Solve the Fourth Box Puzzle
Go ahead and solve the fourth box puzzle. This one may confuse Travelers as the actual setting for the boxes is all the way to the left and not in front of you.
How to Solve the Fourth Box Puzzle
| Steps | |
|---|---|
| 1 |  To start, climb the stairs and spot a little Kuuvahki robot hiding in one of the boxes to the right. Opt to guide it out and put you in the Empowered State.. |
| 2 | 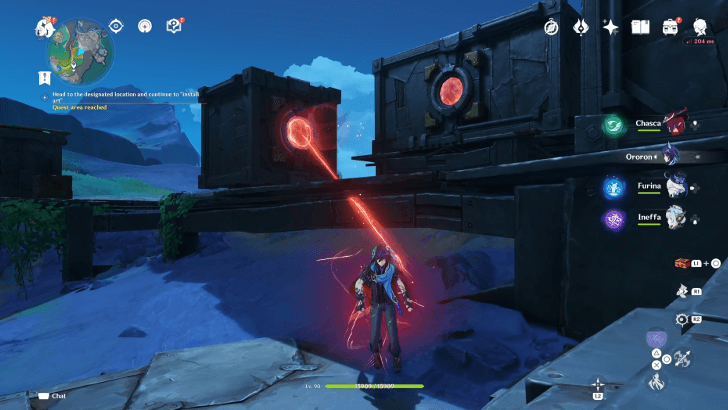 Then, once you're close enough while Empowered by the Amazing 'Bot, push the misplaced box back to set the stage. |
| 2 | 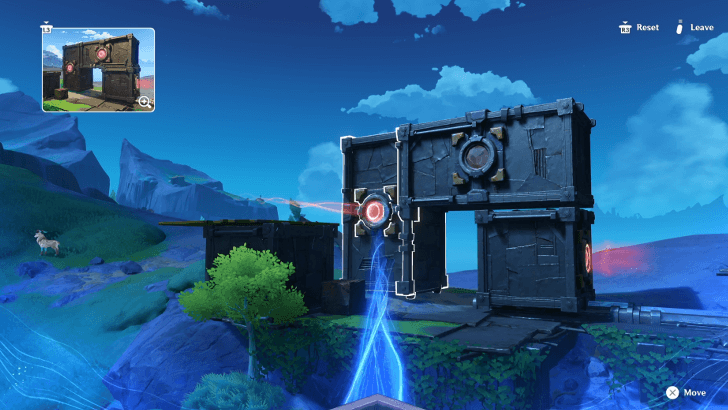 Hop onto Bobik and pick up the large box in front of you. No need to turn it. Just place the right side of it on top of the smaller box you pushed earlier. |
| 3 | 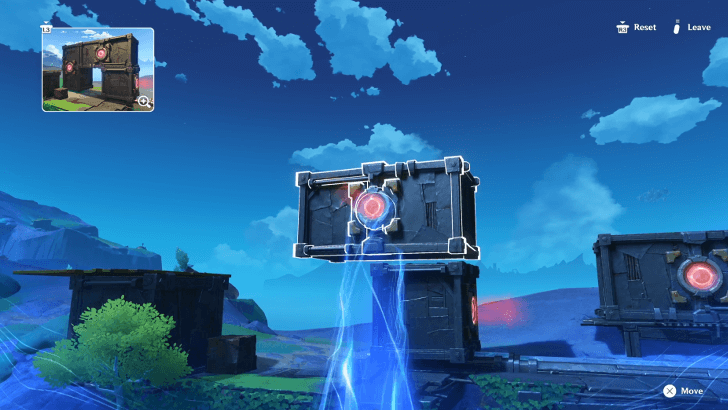 Pick up the large box to the far right. No need to flip it. Just place it the left the arrangement you made and this should complete the puzzle. |
Solve the Fifth Box Puzzle
The fifth box puzzle is located just south of the fourth one. Do beware as Fatui troops will be guarding the place.
To solve the fifth box puzzle, you must once again set the stage by pushing some of the boxes in the proper place before proceeding.
How to Solve the Fifth Box Puzzle
| Steps | |
|---|---|
| 1 | 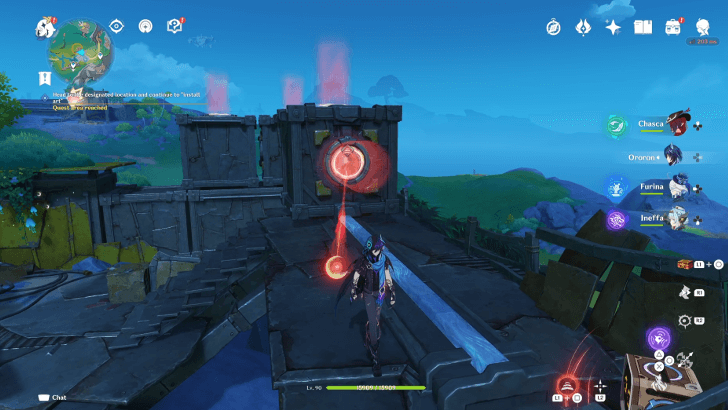 Before anything else, be sure to push the small box in the center all the way to the left to set everything up properly. |
| 2 | 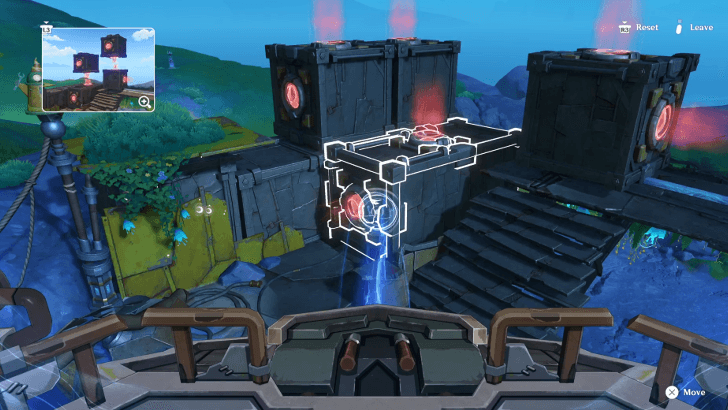 Operate Bobik and grab the large box all the way to the right of the screen. Turn it so that its unipolar beam is facing downward, then insert it in the gap between the platforms housing the smaller boxes. |
| 3 |  Grab one of the small boxes to the left, turn it over so that its unipolar beam faces downward, then put in on top of the small box you pushed in Step 1. |
| 4 | 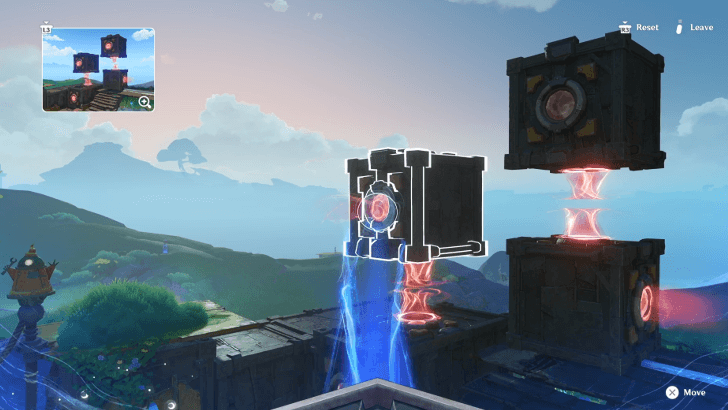 Grab the other small box to the left, turn it over to have its unipolar beam face downward, then place it on top of the large box's beam. |
Defeat the Fatui and Chase After the Stolen Bobik
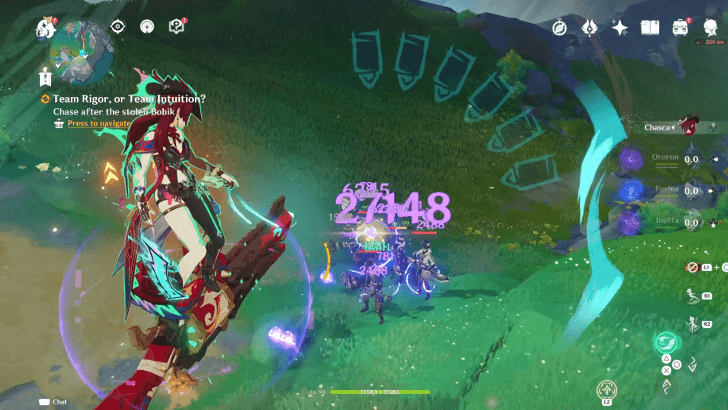
After the fifth puzzle, the group will be attacked by the Fatui, and Bobik will be overridden and stolen. Defeat the Fatui troops and chase after Bobik for a cutscene.
Once you get to the barrier, your task will be to find a way around it via a ventilation shaft, which is just above the entrance. However, the ventilation is blocked by a fallen box.
Solve the Ventilation Puzzle
After the cutscenes, solve the ventilation puzzle. This time, you won't have Bobik by your side and must instead rely on your own wits and the resources provided before you.
How to Solve the Ventilation Puzzle
| Steps | |
|---|---|
| 1 | 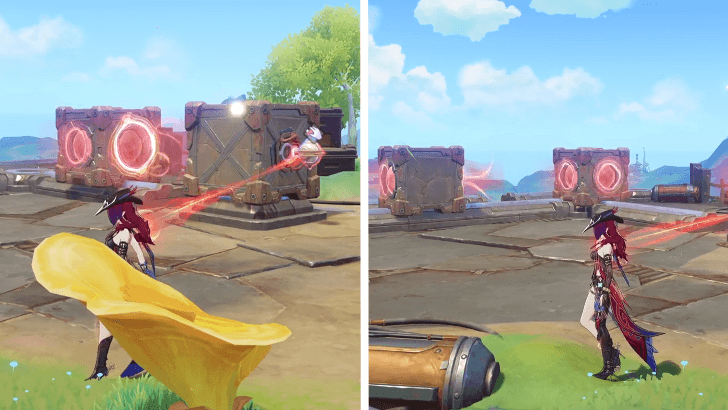 Go near the Kuuvahki Affected Plant and grab the power core nearby. Plant it on the box to the right to activate its unipolar beam. This will start a repelling chain, pushing the box in front of it, which will in turn push the next box to the left and have it magnetize with the crane. |
| 2 | 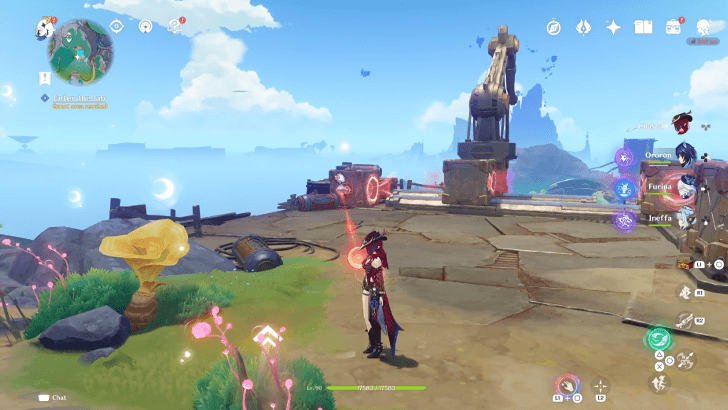 Retrieve the core and plant it onto the box to the left to repel the box connected to the crane, effectively moving the crane above the fallen box and having it lift the obstruction up. |
Enter the Facility and Defeat the Fatui
After the cutscenes, storm the Fatui facility and defeat all the Fatui in sight. Then, talk to Macola and access the panel nearby.
Where to Find the Backup Module
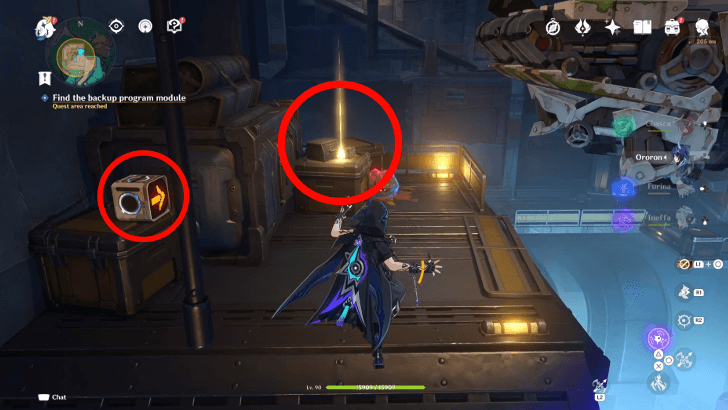
In order to restore Bobik back to its original state, you will need to find its backup module. The clue near Anezka will tell you that the backup module is near a robot projecting an arrow.
Find this robot and the module near Macola on the other side of the room. After finding the module, return to the panel and operate it.
Follow Bobik and the Group to the Entrance
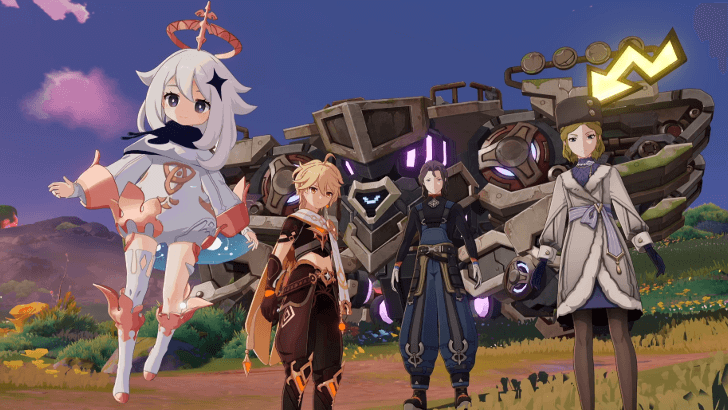
With Bobik restored, it will disable the barrier and the group will exit the cave. After several cutscenes and one final picture, you will part ways and the quest will conclude!
Team Rigor or Team Intuition Rewards
Total Quest Rewards
| Total Quest Rewards |
 Primogem x40 |
 Mora x33500 |
|---|---|---|
 Hero's Wit x4 |
||

Genshin Impact Related Guides

Other Nod-Krai Quest Guides
Comment
just go back to the barrier after talking to his friends, theres a gold spot to call him to deactivate the barrier
Author

Team Rigor or Team Intuition Quest Guide


Rankings
- We could not find the message board you were looking for.
Gaming News

![The Liar Princess and the Blind Prince Review [PC] | Lovely to Look at but Tedious to Play](https://img.game8.co/4442586/8d95f5faf05780f1765ce7e0938bd825.jpeg/show)
![The Liar Princess and the Blind Prince Review [PC] | Lovely to Look at but Tedious to Play](https://img.game8.co/4442586/8d95f5faf05780f1765ce7e0938bd825.jpeg/thumb)
![Marathon Cryo Archive Map Teased as [REDACTED] on Selection Screen](https://img.game8.co/4442236/6357203e58172f6de57f1991e7c39b22.png/thumb)

Popular Games

Genshin Impact Walkthrough & Guides Wiki
Umamusume: Pretty Derby Walkthrough & Guides Wiki
Pokemon Pokopia Walkthrough & Guides Wiki
Honkai: Star Rail Walkthrough & Guides Wiki
Monster Hunter Stories 3: Twisted Reflection Walkthrough & Guides Wiki
Arknights: Endfield Walkthrough & Guides Wiki
Wuthering Waves Walkthrough & Guides Wiki
Zenless Zone Zero Walkthrough & Guides Wiki
Pokemon TCG Pocket (PTCGP) Strategies & Guides Wiki
Monster Hunter Wilds Walkthrough & Guides Wiki


Recommended Games
Diablo 4: Vessel of Hatred Walkthrough & Guides Wiki
Cyberpunk 2077: Ultimate Edition Walkthrough & Guides Wiki
Fire Emblem Heroes (FEH) Walkthrough & Guides Wiki
Yu-Gi-Oh! Master Duel Walkthrough & Guides Wiki
Super Smash Bros. Ultimate Walkthrough & Guides Wiki
Pokemon Brilliant Diamond and Shining Pearl (BDSP) Walkthrough & Guides Wiki
Elden Ring Shadow of the Erdtree Walkthrough & Guides Wiki
Monster Hunter World Walkthrough & Guides Wiki
The Legend of Zelda: Tears of the Kingdom Walkthrough & Guides Wiki
Persona 3 Reload Walkthrough & Guides Wiki


All rights reserved
Copyright© 2012-2024 HoYoverse — COGNOSPHERE. All Rights Reserved.
The copyrights of videos of games used in our content and other intellectual property rights belong to the provider of the game.
The contents we provide on this site were created personally by members of the Game8 editorial department.
We refuse the right to reuse or repost content taken without our permission such as data or images to other sites.
In the fourth puzzle every l log in the little robot is not there what should I do?