Once, the Sacred Seat of Judgement Quest Guide
✉ Send your thoughts in our Genshin 6.4 Patch Survey!
★ Exclusive: Dive back in time with the Meta History
◆ Hot: Version 6.4, Luna 5 Codes
◆ Builds: Varka, Flins, Skirk, Escoffier
◆ Events: Travelers' Tales, He Who Caught the Wind
◆ Future: Linnea, Version 6.5 Luna VI
Once, the Sacred Seat of Judgement is the fifth part of the Chronicler of the Crumbling City Quest chain in Genshin Impact 5.5. See how to unlock this quest, its walkthrough, how to raise the Phlogiston Barrier, and all the rewards of this quest here in this guide!
List of Contents
How to Unlock Once, the Sacred Seat of Judgement
Unlocked During the In Search of a Hidden Heart Quest

To unlock the Once, the Sacred Seat of Judgement quest, you must start the In Search of a Hidden Heart quest first. You must complete this quest to finish the In Search of a Hidden Heart quest.
When you see the big Secret Source Servant among the others, it'll tell you that to continue you must go to the Chamber of Deliberation and obtain a permit. This will unlock the quest.
In Search of a Hidden Heart Quest Guide
How to Raise the Phlogiston Barrier
Raise the Phlogiston Barrier Steps
- Get the Pearl on the Left Side
- Go to the Next Coagulation Pearl
- Remove Pulverite With Yumkasaur
- Defeat the Slimes to Round Up the Servants
- Use the Coagulation Pearl to Lower the Barrier
- Remove Pulverite With Yumkasaur Again
- Get Coagulation Pearl Through the Wall
- Walk Through the Lake of Phlogiston
- Walk on the Path Made by the Pearl
Raising the Phlogiston Barrier is the most puzzle-heavy quest objective in Once, the Sacred Seat of Judgement. Check out a detailed guide on how to raise the Phlogiston Barrier below!
Get the Pearl on the Left Side
Use the Yumkasaur to grapple to the left side platforms and interact with the Coagulation Pearl. Throw the pearl to its pedestal using the Yumkasaur and the barrier will rise.
Go to the Next Coagulation Pearl
An Exquisite Chest will appear on the lower platform once you're done. Get it and grapple up to the right side platforms to get to the next Coagulation Pearl. However, it will be blocked by a barrier so you have to find a way around it.
Some servants show up so follow them and grapple up to the platform with the pedestals on it.
Remove Pulverite With Yumkasaur

Here, you'll see that there's Pulverite blocking the way where the servants went. Use the Yumkasaur and grab a Flamegranate nearby then use it to remove the Pulverite. Go through the opening and you'll see the servants from earlier.
Defeat the Slimes to Round Up the Servants
After following them, the servants will be distracted by slimes. Defeat the slimes and round up the servants to continue. You can use Flamegranates or your characters to take them out.
Use the Coagulation Pearl to Lower the Barrier
Follow the servants and they will lead you back to the Coagulation Pearl with the barrier from earlier. They will remove it and you can shoot the pearl into its rightful pedestal. Next, go back onto the platform of the pedestals and grapple to the next one.
Remove Pulverite With Yumkasaur Again

This leads you to another area blocked off by Pulverite. Use the Flamegranates nearby to remove it and you'll see another Coagulation Pearl. Ignore this pearl and head down the path for now.
Get Coagulation Pearl Through the Wall

At the end of the path, you'll see another Pulverite. Destroy it and you'll see a Pyroculus, along with a gap in the wall which you can use to get the Coagulation Pearl. Take it and keep moving forward until you see a lake of Phlogiston.
Walk Through the Lake of Phlogiston
While you have the Coagulation Pearl, walking through the lake of liquid Phlogiston creates a path. Walk through it until you get to the other side. Go up the path until you reach the main room again.
Walk on the Path Made by the Pearl
Back in the main room, you'll have to get across to get to the last pedestal. Once you approach the ledge, you'll see a path made of Phlogiston. Follow the path to the pedestal and shoot the pearl into it. This triggers a short cutscene where the barrier raises fully.
▼ Go to the Main Walkthrough ▼
Once, the Sacred Seat of Judgement Walkthrough
Go to the Chamber of Deliberation to Obtain the Permit

After the dialogue with the big Secret Source Servant, move forward and glide to see a small lake of Phlogiston. Near it, you'll see another servant being attacked by Rifthounds. Defeat the Rifthounds and the servant will start moving.
It will remove the Phlogiston and allow you to go down the stairs. Follow it and you'll see a Coagulation Pearl nearby.
Use Coagulation Pearl to Open the Door
Indwell into a Yumkasaur and use its ability to take the Coagulation Pearl then shoot it at the pedestal near the door to open it. Once it's opened, go inside and approach another servant to continue.
Activate the Purification Device
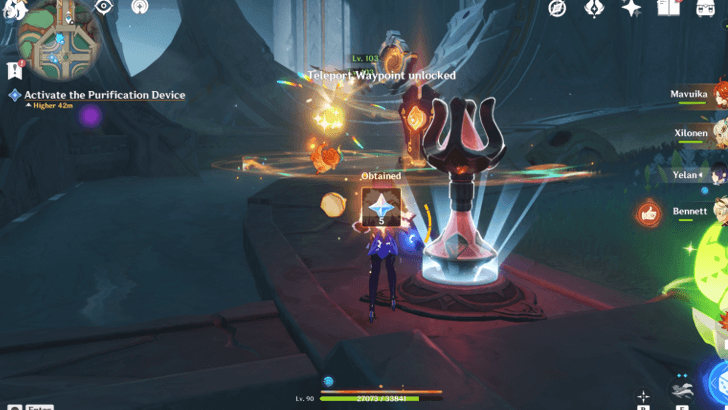
After the dialogue, you'll be asked to activate the Purification Device to proceed. You'll need to use Coagulation Pearls to activate it, so head to the one near the Teleport Waypoint first.
Use Coagulation Pearl to Defeat Rifthounds
Indwell into a Yumkasaur and approach the Coagulation Pearl to get it, then throw it at the pedestal near the Rifthounds. This triggers a short cutscene and raises the barrier, which kills the Rifthounds.
Raise the Phlogiston Barrier

After the dialogue, you need to raise the Phlogiston Barrier to proceed. The Phlogiston Barrier can be raised bit by bit as you collect a series of Coagulation Pearls in the area. Jump to the detailed guide on how to raise the Phlogiston Barrier with the link below!
▲ How to Raise the Phlogiston Barrier ▲
Receive the Permit Receptacle

With the barrier raised completely, grapple using the green orbs that appear and you'll get to the permit. Interact with it and Rifthounds will show up. You'll have to get down without the barriers hitting you.
Watch Out for the Phlogiston Barrier as it Sweeps Down
Go down by jumping onto the platforms below but be careful not to fall into the lower barrier. Do this until you get to the ground then move to the objective marker to be safe.
Activate the Permit
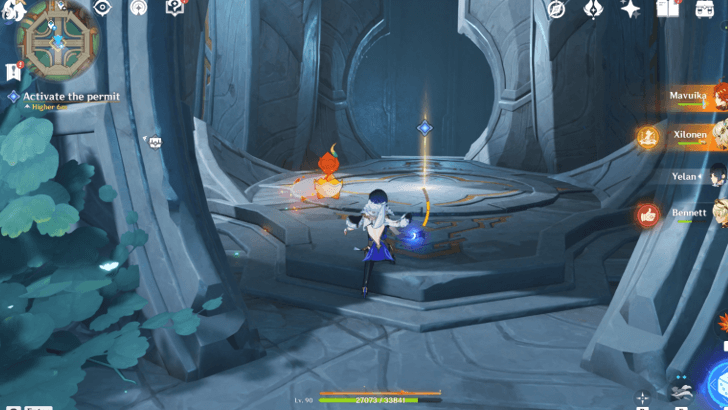
After the dialogue, head to the elevator in the middle of the Chamber of Deliberation. This triggers the elevator and allows you to ride to the very top of the chamber. At the top, the servant will talk to you and then the quest is over!
Once, the Sacred Seat of Judgement Information
Part of the Chronicler of the Crumbling City Quest Chain
Once, the Sacred Seat of Judgement is the fifth part of the Chronicler of the Crumbling City World Quest. This new World Quest is part of the Version 5.5 update.
Chronicler of the Crumbling City Quest Guide
Once, the Sacred Seat of Judgement Rewards
Two Luxurious Chests
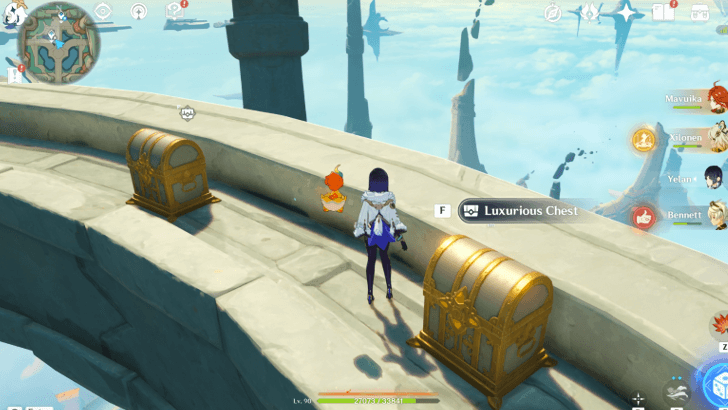
Completing the Once, the Sacred Seat of Judgement quest rewards you with two Luxurious Chests for your efforts!
Genshin Impact Related Guides

Other Chronicler of the Crumbling City Quest Guides
| Chronicler of the Crumbling City World Quest Guides | ||
|---|---|---|
| The Frozen, Rekindling Land | The Forsaken Sea of Wisdom | The Sealed Site of Sacrifice |
| In Search of a Hidden Heart | Once, the Sacred Seat of Judgement | Where Once There Was a Calculation Array |
| Where Once Force Was Reversed | Where Once There Were Arms Aplenty | The End of the Road |
| As the Burning Sun Sears Shadows | ||
Comment
I won't be attempting this any further,the flogiston pathway won't appear and life is too short to keep trying over and over again.
Author
Once, the Sacred Seat of Judgement Quest Guide
improvement survey
03/2026
improving Game8's site?

Your answers will help us to improve our website.
Note: Please be sure not to enter any kind of personal information into your response.

We hope you continue to make use of Game8.
Rankings
Gaming News
Popular Games

Genshin Impact Walkthrough & Guides Wiki

Honkai: Star Rail Walkthrough & Guides Wiki

Umamusume: Pretty Derby Walkthrough & Guides Wiki

Pokemon Pokopia Walkthrough & Guides Wiki

Resident Evil Requiem (RE9) Walkthrough & Guides Wiki

Monster Hunter Wilds Walkthrough & Guides Wiki

Wuthering Waves Walkthrough & Guides Wiki

Arknights: Endfield Walkthrough & Guides Wiki

Pokemon FireRed and LeafGreen (FRLG) Walkthrough & Guides Wiki

Pokemon TCG Pocket (PTCGP) Strategies & Guides Wiki
Recommended Games

Diablo 4: Vessel of Hatred Walkthrough & Guides Wiki

Fire Emblem Heroes (FEH) Walkthrough & Guides Wiki

Yu-Gi-Oh! Master Duel Walkthrough & Guides Wiki

Super Smash Bros. Ultimate Walkthrough & Guides Wiki

Pokemon Brilliant Diamond and Shining Pearl (BDSP) Walkthrough & Guides Wiki

Elden Ring Shadow of the Erdtree Walkthrough & Guides Wiki

Monster Hunter World Walkthrough & Guides Wiki

The Legend of Zelda: Tears of the Kingdom Walkthrough & Guides Wiki

Persona 3 Reload Walkthrough & Guides Wiki

Cyberpunk 2077: Ultimate Edition Walkthrough & Guides Wiki
All rights reserved
Copyright© 2012-2024 HoYoverse — COGNOSPHERE. All Rights Reserved.
The copyrights of videos of games used in our content and other intellectual property rights belong to the provider of the game.
The contents we provide on this site were created personally by members of the Game8 editorial department.
We refuse the right to reuse or repost content taken without our permission such as data or images to other sites.


![Everwind Review [Early Access] | The Shaky First Step to A Very Long Journey](https://img.game8.co/4440226/ab079b1153298a042633dd1ef51e878e.png/thumb)

![Monster Hunter Stories 3 Review [First Impressions] | Simply Rejuvenating](https://img.game8.co/4438641/2a31b7702bd70e78ec8efd24661dacda.jpeg/thumb)


It must be broken,the final,midair flogiston path won't materialise...walked across the flogiston lake with no problem. It only means a few chests left to get anyway.Hoping this isn't keeping me from progressing further.