Unburden, Source of Vengeful Spite Stage 4 Guide
★ Exclusive: See results of the February 2026 Survey
◆ Hot: Version 6.4, 6.4 Codes, Version 6.5 Livestream
◆ Builds: Varka, Flins, Skirk, Escoffier
◆ Events: Operation Stronghold Defense
◆ Upcoming: Version 6.5, Linnea

Unburden, Source of Vengeful Spite is Stage 4 of the Realm of Tempered Valor combat event in Genshin Impact 5.4. See the best teams, how to beat floor 15 to 20, event rewards, and all the stage details here!
| Realm of Tempered Valor Guides | ||||
|---|---|---|---|---|
 Stage 1 Stage 1 |
 Stage 2 Stage 2 |
 Stage 3 Stage 3 |
 Stage 4 Stage 4 |
 Stage 5 Stage 5 |
Best Teams in Stage 4
Bond of Life Teams are Best to Use
| Stage 4 Best Team Comps | |||
|---|---|---|---|
|
|
|
|
|
|
|
|
|
|
|
|
|
|
|
|
|
|
|
|
|
|
|
|
|
For Stage 4, you can use team comps that uses Bond of Life, especially Arlecchino and Clorinde. This is due to a stage buff that can increase ATK when a character has a Bond of Life.
You could also use characters with high overall DMG, like Mavuika or Neuvillette, and pair them with healers, like Furina or Sigewinne, due to the other stage buff that can increase ATK when receiving healing.
How to Beat Floor 15 to 20 in Stage 4
Use Healers or Bond of Life Users
| Highly Recommended Characters for Stage 4 | ||
|---|---|---|
|
|
|
|
|
|
|
|
Take advantage of the stage buff that can increase ATK after getting healed or when you obtain a Bond of Life. Note that you could also receive healing when you use characters with Bond of Life due to their kit, which can give them self-healing, like Arlecchino.
You Can Get Bond of Life From Enemies
| Enemies That Deal Bond of Life Attacks | |
|---|---|
|
|
|
You can also obtain a Bond of Life by defeating an enemy due to other stage buffs in Stage 4. So, you can substitute characters who has Bond of Life with others who has high damage outputs like Mavuika or Neuvillette.
Other ways of getting Bond of life is by getting hit by the Fatui Operatives' attacks, which you can use to your advantage to gain the stage buff. However, do remember to use a shielder when you're going to do this strategy.
Floor Skip Recommendations
| Recommended Skips | Seconds Remaining |
|---|---|
| Floor 15 → Floor 18 → Floor 20 | Floor 15: 16~19 Seconds Remaining Floor 18: +12 Seconds Remaining |
| Floor 15 → Floor 19 → Floor 20 | Floor 15: +20 Seconds Remaining Floor 19: Clear under 30 |
| Floor 15 → Floor 17→ Floor 19 → Floor 20 | Floor 15: 12~15 Seconds Remaining Floor 17: +12 Seconds Remaining Floor 19: Clear under 30 |
| Floor 15 → Floor 16 → Floor 17 → Floor 19 → Floor 20 | Floor 15: - 11 Seconds Remaining Floor 16: -11 Seconds Remaining Floor 17: +12 Seconds Remaining Floor 19: Clear under 30 |
As Floor 15 have two waves, you may need to do Floor 16~17 first before trying to skip to Floor 18 or 19. Skip either Floor 18 or 19 if you don't wish to bother with the deft Meks or Fatui Operatives.
| Remaining Seconds / Floors Skipped | ||||||
|---|---|---|---|---|---|---|
| Floor | ~11s | +12s | +16s | +20s | +23s | +25s |
| ~13 | 0 | 1 | 2 | 3 | 4 | 5 |
| 14 | 0 | 1 | 2 | 3 | 4 | 4 |
| 15 | 0 | 1 | 2 | 3 | 3 | 3 |
| 16 | 0 | 1 | 2 | 2 | 2 | 2 |
| 17 | 0 | 1 | 1 | 1 | 1 | 1 |
| 18 | 0 | 1 | 1 | 1 | 1 | 1 |
| 19 | 0 | 1 | 1 | 1 | 1 | 1 |
| 22+ | 0 | 0 | 0 | 0 | 0 | 0 |
Floor 15 Has Two Waves
Note that on Floor 15 of Stage 4, there will be two waves of Serpent Knights, with only one spawning each wave. So, remember not to go all out with your attacks on the first wave and save some for the second wave.
You could also pick up the Energy Regen and HP Recovery buffs during combat to further help you beat the 30-second timer.
Floor 19 is Easier to Clear in Stage 4
Surprisingly, Floor 19 of Stage 4 is easier to clear compared to previous stages, however the enemies move around quickly. Floor 19 consists of a Frost and Wind Operative, both at high levels.
A good tactic is to hit them with AoE attacks to burst them immediately or you can group them in one place. You also don't need to worry about having a high remaining time, all you need to do is defeat them within 30 seconds to get to Floor 20.
Floor 18 Might be Too Much to Handle
Completing Floor 18 in Stage 4 with at least 12 seconds remaining would still be viable. However, the enemies might be too much to handle for everyone and somewhat annoying.
Floor 18 consists of two Specialist Meks and one Recon Mek. All of these three enemies move far away from each other, causing you to lose time defeating each one.
Food Buffs Can be Used in this Event
| Recommended Food for this Event | ||
|---|---|---|
|
(ATK and Crit Rate) |
(ATK and Crit Rate) |
(CRIT Rate and DMG, Diluc Specialty) |
|
(HP, Dehya Specialty) |
(DEF) |
(Phys DMG and CRIT Rate) |
|
|
|
|
|
|
|
|
|
|
||
Food Items can be used in this event, so you could use the ones that give you buffs that enhance your DMG. You can do this by using the NRE while inside the event area.
List of Food and Recovery Items
Stage 4 Event Information
Part of the Realm of Tempered Valor Event

Unburden, Source of Vengeful Spite is Stage 4 of the Realm of Tempered Valor Event, a combat event where you need to defeat different opponents in different floors in exchange for rewards.
Realm of Tempered Valor Event Guide
Monster List
| Enemy Combination 1 | |
|---|---|
|
|
|
| Enemy Combination 2 | |
|
|
|
Enemy Combination 3 |
|
|
|
|
|
Enemy Combination 4 |
|
|
|
Enemy Combination 5 |
|
|
|
Stage 4 Buffs
| Stage 4 Buffs |
|---|
|
When a character receives healing, ATK is increased by 100% for 8s. When a character obtains Bond of Life, ATK is increased by 100% for 12s. After a character in your party defeats an opponent, the current active character in your party is granted a Bond of Life worth 40% of their Max HP. This effect can be triggered once very 5s. |
| After completing Floor 10, a one-time HP recovery buff will be made available to restore 50% of all party members' Max HP. After completing Floor 15, a one-time Energy regeneration buff will be made available to restore 50% of all party members' Energy and Fighting Spirit. |
| After receiving a Boon of Friendship, all party members' Max HP, ATK, and DEF +25% and Elemental Mastery +200. |
Boon of Friendship Buff is Gained With Your Friends
You can gain the Boon of Friendship buff if you have a friend who has completed Floor 20 in their corresponding single-player challenge. This buff can be picked up while inside the event area and is permanently activated.
| Genshin Co-Op Boards | ||
|---|---|---|
Stage 4 Rewards
Total Unburden, Source of Vengeful Spite Stage Rewards
| Objective | Rewards |
|---|---|
| Clear Floor 2 |
|
| Clear Floor 9 |
|
| Clear Floor 15 |
|
| Clear Floor 20 in a single-player challenge |
|
Genshin Impact Related Guides

Current Events
| Event Guide | Date and Rewards |
|---|---|
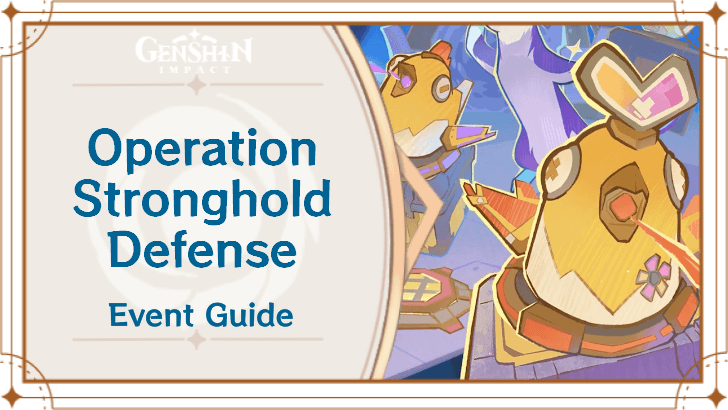 Operation Stronghold Defense Operation Stronghold Defense
|
03/23/2026 - 04/02/2026
|
 Sightseeing With Friends Sightseeing With Friends
|
03/16/2026 - 03/26/2026
+ Talent Up Materials |
Upcoming Events
| Event Guide | Date and Rewards |
|---|---|
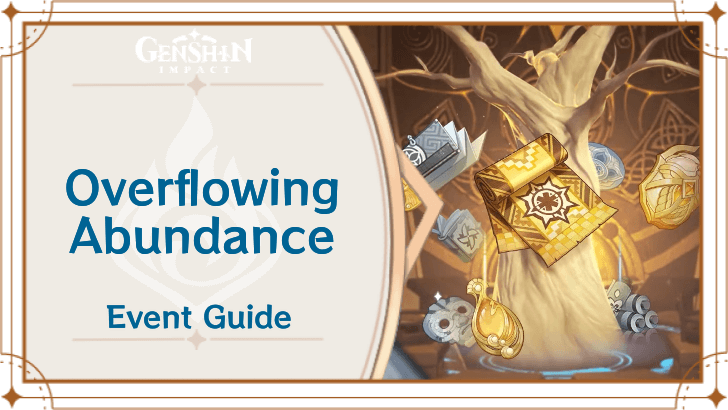 Overflowing Abundance 6.4 Rerun Overflowing Abundance 6.4 Rerun
|
03/30/2026 - 04/06/2026
Weapon and Talent Up Materials
|
Permanent/Recurring Events
| Event Guide | Date and Rewards |
|---|---|
 To Temper Thyself and Journey Far To Temper Thyself and Journey Far
|
02/23/2026 - 05/18/2026
+ 5-Star Stella Fortuna |
 Stygian Onslaught Stygian Onslaught
|
03/04/2026 - 04/07/2026
+ Dust of Enlightenment |
 Travelers' Tales Travelers' Tales
|
Permanently Available after Version 6.0
|
 Repertoire of Myriad Melodies Repertoire of Myriad Melodies
|
Permanently Available
|
 Test Run Test Run
|
Permanently Available
+ Ascension Materials |
 Hangout Events Hangout Events
|
Permanently Available after Version 1.4
+ Talent Materials + Specialty Dish |
 Baptism of Song Baptism of Song
|
Permanently Available
+ Free Barbara
|
 Daily Check-In Daily Check-In
|
2021/03/01 - Permanently Available
|
 Stellar Reunion Returnee Event Stellar Reunion Returnee Event
|
Permanently Available
+ Prototype Rancour |
Past Events
Comment
this whole event is a mavuika premium team check cause even on day3 she clears faster than literal swirl teams i cant do this anymore LMAO. wish they'd stop pushing this "you NEED this character or you CANT CLEAR ANYTHING" because why are endgame modes easier than a literal event...
Author

Unburden, Source of Vengeful Spite Stage 4 Guide
Premium Articles


Rankings
Gaming News


Popular Games

Genshin Impact Walkthrough & Guides Wiki
Umamusume: Pretty Derby Walkthrough & Guides Wiki
Crimson Desert Walkthrough & Guides Wiki
Monster Hunter Stories 3: Twisted Reflection Walkthrough & Guides Wiki
Honkai: Star Rail Walkthrough & Guides Wiki
Pokemon Pokopia Walkthrough & Guides Wiki
The Seven Deadly Sins: Origin Walkthrough & Guides Wiki
Wuthering Waves Walkthrough & Guides Wiki
Zenless Zone Zero Walkthrough & Guides Wiki
Arknights: Endfield Walkthrough & Guides Wiki


Recommended Games
Fire Emblem Heroes (FEH) Walkthrough & Guides Wiki
Diablo 4: Vessel of Hatred Walkthrough & Guides Wiki
Cyberpunk 2077: Ultimate Edition Walkthrough & Guides Wiki
Yu-Gi-Oh! Master Duel Walkthrough & Guides Wiki
Super Smash Bros. Ultimate Walkthrough & Guides Wiki
Pokemon Brilliant Diamond and Shining Pearl (BDSP) Walkthrough & Guides Wiki
Elden Ring Shadow of the Erdtree Walkthrough & Guides Wiki
Monster Hunter World Walkthrough & Guides Wiki
The Legend of Zelda: Tears of the Kingdom Walkthrough & Guides Wiki
Persona 3 Reload Walkthrough & Guides Wiki


All rights reserved
Copyright© 2012-2024 HoYoverse — COGNOSPHERE. All Rights Reserved.
The copyrights of videos of games used in our content and other intellectual property rights belong to the provider of the game.
The contents we provide on this site were created personally by members of the Game8 editorial department.
We refuse the right to reuse or repost content taken without our permission such as data or images to other sites.
not really. people are clearing it w Arle, Neuv or Clorinde. there was also someone who did it w 4* only. BUT Mavuika and her supports certainly make it easier