Gaseous Flow Deflection Day 1
★ Exclusive: See results of the February 2026 Survey
◆ Hot: Version 6.4, 6.4 Codes, Version 6.5 Livestream
◆ Builds: Varka, Flins, Skirk, Escoffier
◆ Events: Operation Stronghold Defense
◆ Upcoming: Version 6.5, Linnea
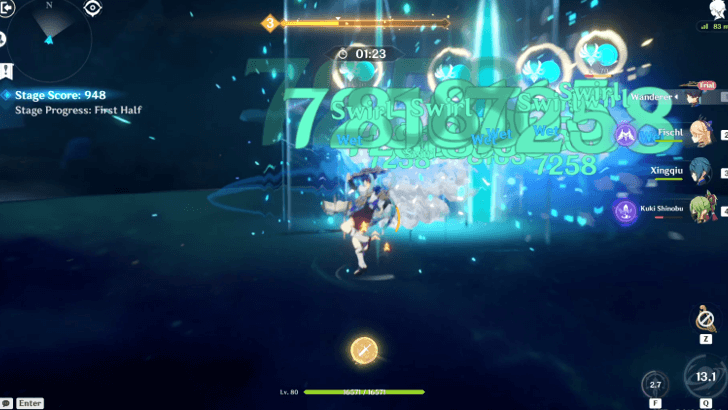
Gaseous Flow Deflection is the Day 1 challenge for Vibro-Crystal Applications in Genshin Impact 4.6. See the recommended team compositions for Day 1, best Vibro-Crystal Setup, all the enemies, and the total rewards here!
| Vibro-Crystal Applications Guides | ||
|---|---|---|
How to Beat Gaseous Flow Deflection
Best Team for Vibro-Crystal Applications Day 1
| First Half Team for Gaseous Flow Deflection | |||
|---|---|---|---|
|
|
|
|
|
| Second Half Team for Gaseous Flow Deflection | |||
|
|
|
|
|
Other Teams for the Trial Characters
| Trial Character | Recommended Party Members |
|---|---|
|
|
|
|
|
|
|
|
|
|
|
The trial characters are free to use within this event domain!
Day 1 Best Vibro-Crystal Setup
| Best Vibro-Crystal Connections | |
|---|---|
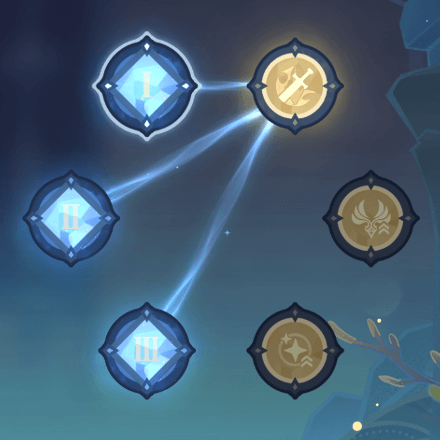 First Half |
Second Half |
TEAM AND VIBRO-CRYSTAL SETUP EXPLANATION
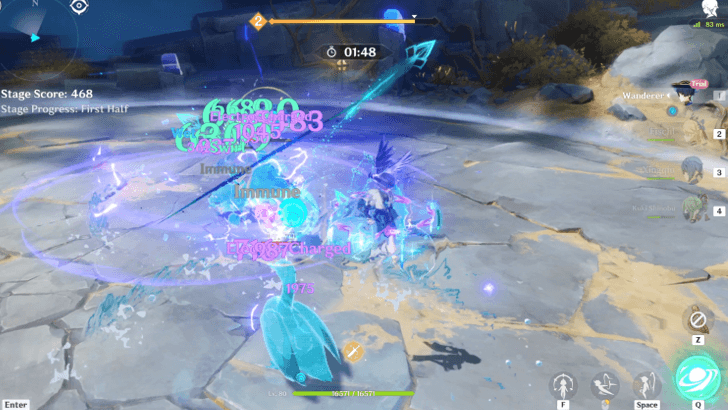
Gaseous Flow Deflection: First Half
We recommend this Vibro-Crystal setup for the first half due to how many fodder mobs there are on the field. This setup improves the damage of Wanderer as he drives Electro-Charged damage forward as well as his own.
An alternative to running Wanderer is Heizou as he can also perform the same role. If you opt to run this and save Wanderer for the second half, we recommend switching the vibro-crystal setup to the Anemo DMG Bonus one.
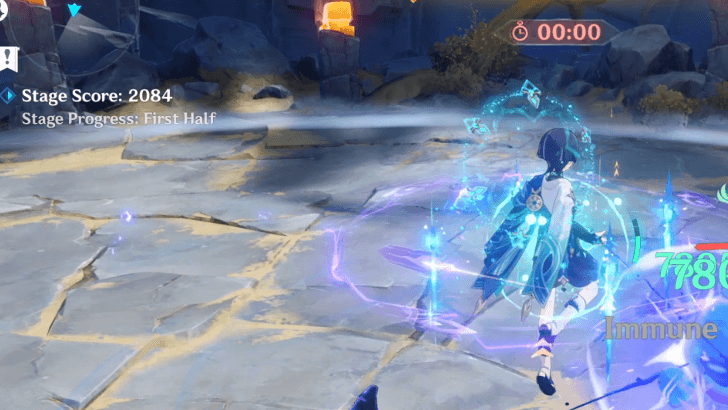
Gaseous Flow Deflection: Second Half
In the second half, the enemies are fewer in numbers and bulkier in size and HP, so bringing a heavy damage dealer that can make use of the same vibro-crystal setup as the first is recommended.
For this, we ran a Xiao team as he can easily take out enemies with his powerful Elemental Burst, especially when paired with Faruzan and Bennett.
It is also worth noting that most of the enemies here are Elemental in nature, swirling should not be an issue.
All Available Vibro-Crystals for Day 1
| Transmitter Crystal | Vibro-Crystal Effect |
|---|---|
| Transmission will be triggered up to once every 3s after a character triggers the Swirl reaction | |
| Transmission will be triggered up to once every 3s after a character uses an Elemental Skill | |
| Transmission will be triggered up to once every 3s after a character's Normal Attack, Charged Attack, or Plunging Attack hits an opponent | |
| Receiver Crystal | Vibro-Crystal Effect |
| You gain a maximum of 1 Assailing Receiver effect. When you gain 1/2/3 stacks of this effect, the DMG of your characters' Normal Attacks, Charged Attacks, and Plunging Attacks is increased by 30%/55%/75% respectively for 12s. |
|
| You gain a maximum of 1 Gust Receiver effect. When you gain 1/2/3 stacks of this effect, your characters gain an Anemo DMG Bonus of 30%/55%/75% respectively for 12s. | |
| You gain a maximum of 1 Mastery Receiver effect. When you gain 1/2/3 stacks of this effect, characters gain 100/180/245 Elemental Mastery respectively for 12s. |
How to Get 4000 Points in Day 1 Gaseous Flow Deflection
Focus on Swirl Reactions
Plenty of the opponents on this day are either elemental in nature, or are prone to being grouped up and taken out, so Swirl is extra effective here as the main reaction, and the trial characters reflect that.
Another thing to note is that the Domain itself rewards Swirl Reactions by giving your Anemo Characters 20% extra CRIT Rate, so make use of Swirl as best as you can.
Defeat as Much Enemies as Possible in the First Half
Most of the fodder opponents will be present in the first half, and can be easily eliminated by AoE attacks.
Use this to try and rack up at least 2000 points or more on this half to ensure that you can get the 4000 by the end of the second half.
Keep up the Receiver Effect
Maintain the Receiver Effect by triggering the Transmitters and gaining continuous buffs that improve your damage, reducing your clear time and thus improve your overall score!
Vibro-Crystal Applications Day 1 Enemies
Gaseous Flow Deflection Domain Details
| Ley Line Disorder |
|---|
| After a character triggers a Swirl reaction on an opponent, the CRIT Rate for the Anemo attacks of all party members is increased by 20% for 6s. |
Gaseous Flow Deflection First Half Enemies
| First Half Enemies | |
|---|---|
| 22 | |
| 12 | |
| 12 | |
| 12 | |
| 12 | |
| 5 | |
| 4 | |
| 4 | |
| 4 | |
| 4 | |
| 4 | |
| 4 | |
| 4 | |
| 4 | |
| 4 | |
Gaseous Flow Deflection Second Half Enemies
| Second Half Enemies | |
|---|---|
| 10 | |
| 20 | |
| 20 | |
| 20 | |
| 20 | |
| 20 | |
| 20 | |
| 11 | |
| 10 | |
| 10 | |
Vibro-Crystal Applications Day 1 Rewards
Total Gaseous Flow Deflection Rewards
| Objective | Rewards |
|---|---|
|
|
|
|
|
|
|
|
Genshin Impact Related Guides
All Vibro-Crystal Event Runs
| Vibro-Crystal Event Guides | |
|---|---|
| 4.6 Vibro-Crystal Applications | 3.5 Vibro-Crystal Verification |
| 2.6 Vibro-Crystal Research | |
Vibro-Crystal Applications Guides
| Vibro-Crystal Stage | Trial Characters and Unlock Dates |
|---|---|
Unlocks April 28, 2024 |
|
Unlocks April 29, 2024 |
|
Unlocks April 30, 2024 |
|
Unlocks May 1, 2024 |
|
Unlocks May 2, 2024 |
|
Unlocks May 3, 2024 |
All Genshin Impact Events

Comment
Author

Gaseous Flow Deflection Day 1
Premium Articles


Rankings
Gaming News

![Death Stranding 2: On The Beach Review [PC] | A Port That Delivers](https://img.game8.co/4447392/15310a0c9aa1b6843bb713b2ea216930.jpeg/show)

![Death Stranding 2: On The Beach Review [PC] | A Port That Delivers](https://img.game8.co/4447392/15310a0c9aa1b6843bb713b2ea216930.jpeg/thumb)

Popular Games

Genshin Impact Walkthrough & Guides Wiki
Umamusume: Pretty Derby Walkthrough & Guides Wiki
Crimson Desert Walkthrough & Guides Wiki
Monster Hunter Stories 3: Twisted Reflection Walkthrough & Guides Wiki
Honkai: Star Rail Walkthrough & Guides Wiki
Pokemon Pokopia Walkthrough & Guides Wiki
The Seven Deadly Sins: Origin Walkthrough & Guides Wiki
Wuthering Waves Walkthrough & Guides Wiki
Zenless Zone Zero Walkthrough & Guides Wiki
Arknights: Endfield Walkthrough & Guides Wiki


Recommended Games
Fire Emblem Heroes (FEH) Walkthrough & Guides Wiki
Diablo 4: Vessel of Hatred Walkthrough & Guides Wiki
Cyberpunk 2077: Ultimate Edition Walkthrough & Guides Wiki
Yu-Gi-Oh! Master Duel Walkthrough & Guides Wiki
Super Smash Bros. Ultimate Walkthrough & Guides Wiki
Pokemon Brilliant Diamond and Shining Pearl (BDSP) Walkthrough & Guides Wiki
Elden Ring Shadow of the Erdtree Walkthrough & Guides Wiki
Monster Hunter World Walkthrough & Guides Wiki
The Legend of Zelda: Tears of the Kingdom Walkthrough & Guides Wiki
Persona 3 Reload Walkthrough & Guides Wiki


All rights reserved
Copyright© 2012-2024 HoYoverse — COGNOSPHERE. All Rights Reserved.
The copyrights of videos of games used in our content and other intellectual property rights belong to the provider of the game.
The contents we provide on this site were created personally by members of the Game8 editorial department.
We refuse the right to reuse or repost content taken without our permission such as data or images to other sites.