An Eye for An Eye Quest Guide
✉ Send your thoughts in our Genshin 6.4 Patch Survey!
★ Exclusive: Dive back in time with the Meta History
◆ Hot: Version 6.4, Luna 5 Codes
◆ Builds: Varka, Flins, Skirk, Escoffier
◆ Events: Travelers' Tales, He Who Caught the Wind
◆ Future: Linnea, Version 6.5 Luna VI
An Eye for An Eye is the second part of the World Quest Chain, Unfinished Comedy, in Genshin Impact 4.1. See how to unlock this quest, its walkthrough, and all the rewards of this quest here in this guide!
List of Contents
How to Unlock An Eye for An Eye
Complete the Previous Quest
To unlock An Eye for An Eye, you must have completed the previous subquest of Unfinished Comedy, Game of the Rich!
An Eye for An Eye Walkthrough
Leave the Fortress of Meropide
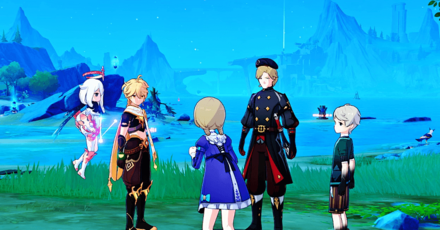
Leave the Fortress of Meropide after the events unfold during the Couple Millionaire, escort Lanoire and the gang outside. After a few while, Noeilles appears with a mob of Gardemeks to seize the group.
Defeat the Gardemeks
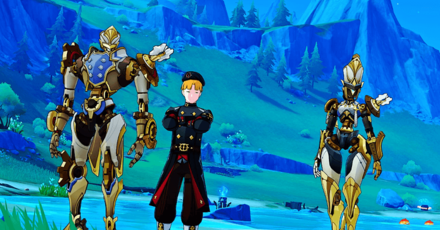
Defeat the Gardemeks, and afterwards, see the true nature of Caterpilar's identity. After a few while, get dragged by Noailles back to the Fortress of Meropide.
Look for Caterpillar and Lanoire
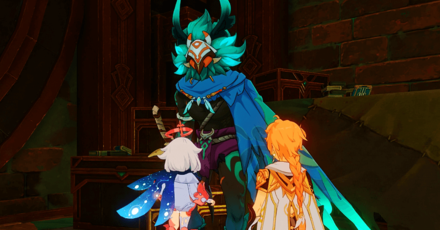
After Noailles readmitted the pair to the Fortress, talk to Monglane, and look for Caterpillar and Lanoire. Head back to the dormitory block, where a lone Caterpillar is standing. You can ask him any question during this time, so ask away!
Prepare to leave the Fortress of Meropide
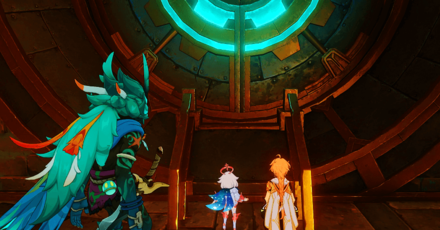
Once Maupoil has escorted Lanoire back to the dormitory block, and has confirmed that she's prepared for another break-out attempt, prepare to leave the Fortress again with the duo.
Go to the abandoned production area without being noticed
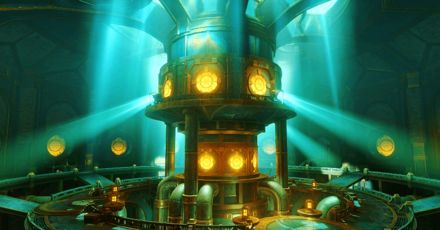
To leave the Fortress, you'll have to go to the abandoned area without being noticed! This means going to the lifts connecting the Administrative Area down to the Production Zone!
How to Go to the Abandoned Production Area
| Objectives | |
|---|---|
| 1 | 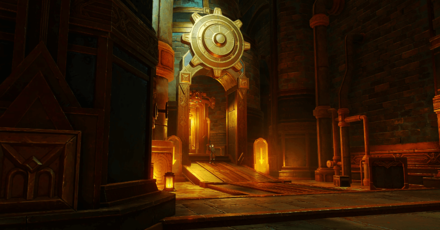 To go to the Abandoned Production Zone without being noticed, you'll have to sneak your way into the lifts, or glide down to the Production Zone without triggering the Gardemeks, or the guards. |
| 2 | You can opt to use the lift to your right, but the easier way to go down is to simply go to your left, jump across the platform, and glide down towards the lift. Avoid the searchlight by all means! The quest automatically triggers the next part of the puzzle so long as the lift is visible! |
| 3 | Next, use the searchlight to draw away the guards. It should be fixed just across the lift, so you can access it by gliding down towards it, or if you've used the lift, simply strut your way towards it. |
| 4 | After switching the searchlight on, the guard walk towards its direction. Use this time-frame to quickly (and stealthily) head towards the lift, to reach the lower level of the Production Zone. |
| 5 | Once you're on the lower level of the Production Zone, go to your left to reach the lift that take you down to the Abandoned Production Zone. Stick by the wall as much as you can while reaching it, to avoid detection! |
| 6 | 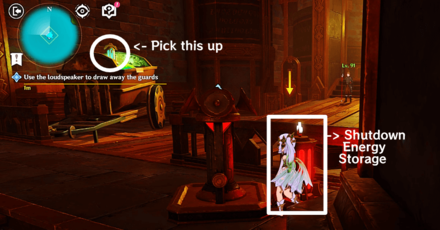 To draw away the guards on this floor, use the loudspeaker this time. However, you need to power up the shutdown Energy Storage in front of you to do so! |
| 7 | To power the storage, get behind the Energy Terminal, and work your way towards the cart with the yellow-green ores located to your left. There should be a filled Energy Storage sitting atop it, so pick it up! |
| 8 | Then, quickly run towards the shutdown Energy, and drop the Storage you just picked up. This automatically switches on the loudspeaker that will draw the guard towards it! |
| 9 | To avoid being detected, do not run across and cut towards the lift. Instead, run towards the pathwalk in front of the Energy Storage and jump down to hide! |
| 10 | Once the Detection Meter of the guard has gone away, run towards the Energy Terminal, going to the cart, then quickly use the lift to reach the Abandoned Production Zone! |
Operate the drive valve leading to the Geode Mine Shaft
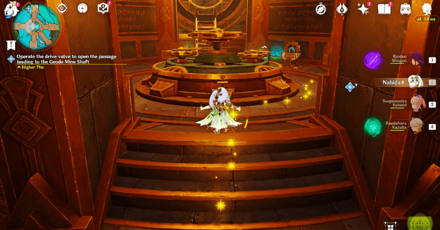
Once you're in the Abandoned Production Area, operate the same Drive Valve you dabbled with during the Safe Operation Scenes From Life in Meropide quest. Although this time, Paimon noticed the valve has changed!
How to Operate the Drive Valve to the Mine Shaft
| Objectives | |
|---|---|
| 1 | 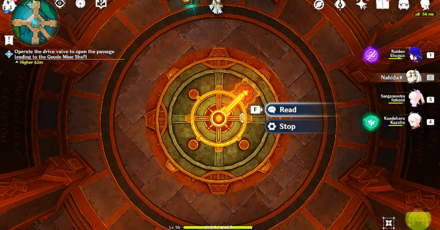 To operate the Drive Valve, you still need to align the Core Drive with the Gear Drivetrain, and have them face the direction of the door that you want to get into. To reach the Geode Mine Shaft, have them both face Northeast! |
| 2 | To do this, simply run the Drive Valve until both inner and outer arm faces the Northeast direction. Fortunately, the Gear Drivetrain is fixed, which means you simply have to press run then stop immediately once it faces Northeast! |
| 3 | Then, head towards the ladder, then through the tunnel to reach a small room with the small valve mechanism in the middle. Install one Drivetrain to this valve, which you pick up from the original Drive Valve. |
| 4 | Afterwards, pick-up the nearby Energy Storage, and drop it beside the Energy Terminal. Then activate it, and run the valve, until the Drivetrain points towards the door leading to the Mine Shaft! |
Go to the Geode Mine Shaft
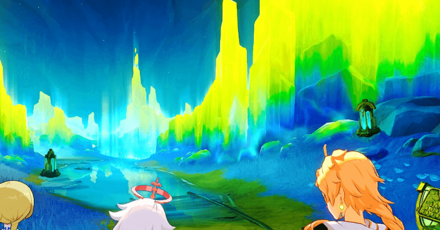
Once the Drive Valve was operated, go to the Geode Mine Shaft by heading deeper within the tunnel.
Acquire the energy storage device and unlock the research terminal ahead
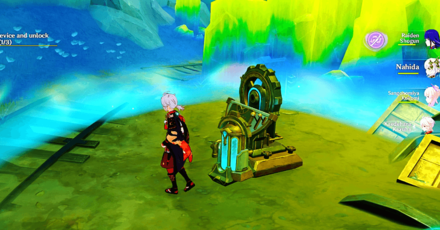
After talking to Caterpillar, acquire the energy storage device and unlock the research terminal ahead. There are three storage devices laying around, one each for the locked terminals scattered around the Mine Shaft!
You can only break the seal of each terminal in a specific order, going from the one to your right, then the one to the far left, then lastly the one in the middle!
How to Unlock the Research Terminals Ahead
| Objectives | |
|---|---|
| 1 | To break the seal on the first Energy Terminal, run straight ahead, then make a sharp turn to your right. |
| 2 | Then, turn left and pick up the Mysterious Ore floating by the corner. |
| 3 | Afterwards, face to your right, then run towards the left. Once done, the first Energy Terminal should be few paces to your right! |
| 4 | To break the seal on the second Energy Terminal, go back to your original location beside Caterpillar, and pick up another Storage Device. From there, go straight ahead, then turn left. |
| 5 | At this point, the second Energy Terminal should be visible, but a Flying Energy Thief might block your way, so simply circle around the Yellow-Green wall to escape it! Otherwise, simply push forward. |
| 6 | Once you've reached the terminal, drop the Storage Device, then break the seal of the second Energy Terminal! |
| 7 | To break the seal on the third Energy Terminal, simply run forward from Caterpillar's location, then make a sharp turn to your left until you see the third Energy Terminal! Lastly, drop the storage beside it to break the seal! |
Keep moving
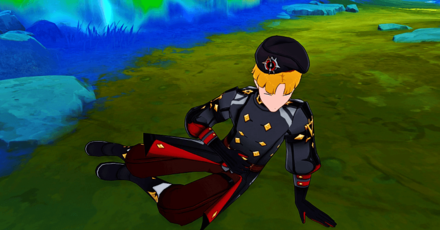
Afterwards, keep moving, until you notice that the barrier has come up again. After a while, it's because of Noailles, who has caught up with your small group. Then, defeat him, and go dive through the Fontaine Current to leave the Fortress of Meropide!
An Eye for An Eye Information
Sub-Quest of Unfinished Comedy
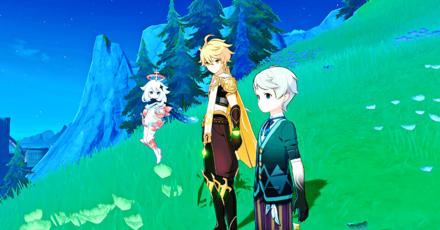
An Eye for An Eye is a subquest of the world quest, Unfinished Comedy, where you need to escape the Fortress of Meropide without being detected!
An Eye for An Eye is the second part of the Unfinished Comedy world quest chain.
Unfinished Comedy World Quest Guide
An Eye for An Eye Rewards
Total Quest Rewards
| Total Quest Rewards |
 Primogem x50 |
 Mora x30000 |
|---|---|---|
 Hero's Wit x5 |
 Adventure EXP x400 |
|
Genshin Impact Related Guides

Other Unfinished Comedy Quest Guides
| Unfinished Comedy World Quest Guides | ||
|---|---|---|
| Game of the Rich | An Eye for An Eye | Hereafter... |
Comment
Author
An Eye for An Eye Quest Guide
improvement survey
03/2026
improving Game8's site?

Your answers will help us to improve our website.
Note: Please be sure not to enter any kind of personal information into your response.

We hope you continue to make use of Game8.
Rankings
Gaming News
Popular Games

Genshin Impact Walkthrough & Guides Wiki

Honkai: Star Rail Walkthrough & Guides Wiki

Umamusume: Pretty Derby Walkthrough & Guides Wiki

Pokemon Pokopia Walkthrough & Guides Wiki

Resident Evil Requiem (RE9) Walkthrough & Guides Wiki

Monster Hunter Wilds Walkthrough & Guides Wiki

Wuthering Waves Walkthrough & Guides Wiki

Arknights: Endfield Walkthrough & Guides Wiki

Pokemon FireRed and LeafGreen (FRLG) Walkthrough & Guides Wiki

Pokemon TCG Pocket (PTCGP) Strategies & Guides Wiki
Recommended Games

Diablo 4: Vessel of Hatred Walkthrough & Guides Wiki

Fire Emblem Heroes (FEH) Walkthrough & Guides Wiki

Yu-Gi-Oh! Master Duel Walkthrough & Guides Wiki

Super Smash Bros. Ultimate Walkthrough & Guides Wiki

Pokemon Brilliant Diamond and Shining Pearl (BDSP) Walkthrough & Guides Wiki

Elden Ring Shadow of the Erdtree Walkthrough & Guides Wiki

Monster Hunter World Walkthrough & Guides Wiki

The Legend of Zelda: Tears of the Kingdom Walkthrough & Guides Wiki

Persona 3 Reload Walkthrough & Guides Wiki

Cyberpunk 2077: Ultimate Edition Walkthrough & Guides Wiki
All rights reserved
Copyright© 2012-2024 HoYoverse — COGNOSPHERE. All Rights Reserved.
The copyrights of videos of games used in our content and other intellectual property rights belong to the provider of the game.
The contents we provide on this site were created personally by members of the Game8 editorial department.
We refuse the right to reuse or repost content taken without our permission such as data or images to other sites.


![Everwind Review [Early Access] | The Shaky First Step to A Very Long Journey](https://img.game8.co/4440226/ab079b1153298a042633dd1ef51e878e.png/thumb)

![Monster Hunter Stories 3 Review [First Impressions] | Simply Rejuvenating](https://img.game8.co/4438641/2a31b7702bd70e78ec8efd24661dacda.jpeg/thumb)


