 3.6 Dendroculus
 3.6 Shrine of Depths
 Amrita Pool
 Plume of Purifying Light
 Fravashi Trees
 Udumbara Pistils
 Power of Khvarena
 Gray Crystals
 Kory Drums
 Drum's Score Performance
 Sunyata Flowers
 Purple Mist
 3.6 Fishing Spots
 Bright Flame Altar
 3.6 Remarkable Chests
 Gate to Khaenri'ah
 Special Four-Leaf Sigils
 Amrita Mayflies
 Vourukasha Oasis Heart Pool
 Elemental Totems
 3.6 Treasure Chests
 3.6 Time Trials
 Ruebright Blooms
 Soul Bells
 3.6 Seelies
 3.6 Torch Puzzles
 3.6 Cave Entrances
 3.6 Viewpoints
 Asipattravana Swamp Puzzle
 Great Songs of Khvarena
 Other Kory Drums
 Find Energy Block
 Connect the Circuit
  Open the Ruins' Gate
 Show Julien a Special Sight
 Destroy the Golem's Core
 How to Use the Farrwick
 Khvarena Mayfly
 Activate the Control Device
 Defiled Chambers
This survey will take about 1 minute.
Your answers will help us to improve our website.
Genshin Impact
Farrwick Locations and Puzzle Guide
✉ Send your thoughts in our Genshin 6.4 Patch Survey!
★ Exclusive: Dive back in time with the Meta History
◆ Hot: Version 6.4, Luna 5 Codes
◆ Builds: Varka, Flins, Skirk, Escoffier
◆ Events: Travelers' Tales, He Who Caught the Wind
◆ Future: Linnea, Version 6.5 Luna VI

Farrwicks are green spirits that hold the power of Khvarena in Genshin Impact 3.6. See the location of Farrwicks and how to use them here!
List of Contents
All Farrwick Locations
Farrwick Full Location Map
| All Farrwick Locations | ||
|---|---|---|
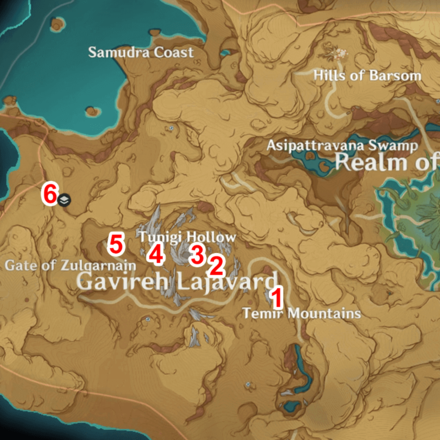 View Full Image |
||
| Click to Jump to a Farrwick Guide | ||
| Farrwick #1 | Farrwick #2 | Farrwick #3 |
| Farrwick #4 | Farrwick #5 | Farrwick #6 |
Farrwick #1 Puzzle Guide
| Farrwick 1 Puzzle Guide | |
|---|---|
| 1 | 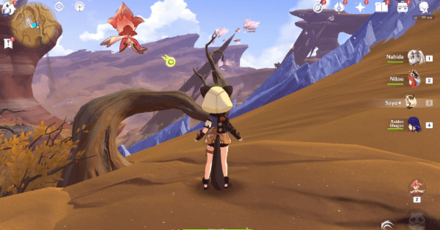 The Farrwick is located on top of a withered tree near it's edge. Get close to it and it will lead you to Dendro Elemental Monuments. |
| 2 | 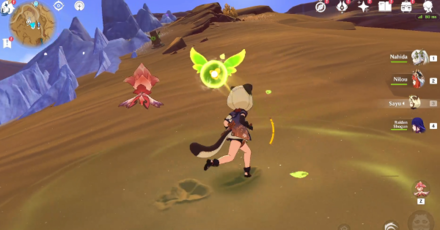 Use a Dendro Character's attacks to light up the monuments as you either see them or be led to them! |
| 3 | 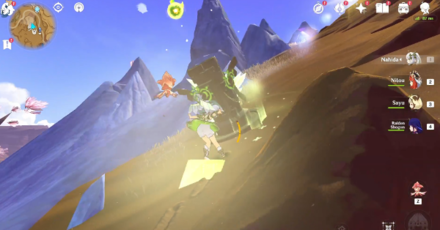 The first Dendro Elemental Monument can be seen even from the distance located near the the Gray Cystals! |
| 4 | 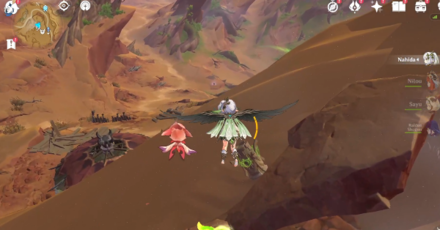 Follow the Farrwick to the other side of the large Gray Crystals where the second Dendro Monument is located! |
| 5 | 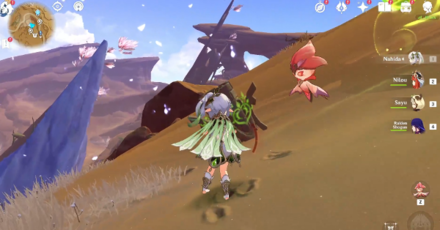 Climb to where the Farrwick is and located the third Dendro Monument north of the Gray Crystals. |
| 6 | 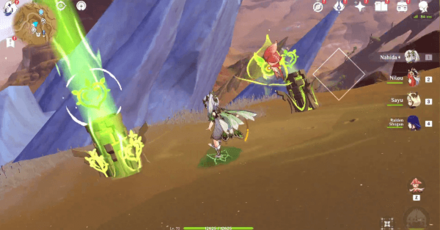 Near that monument is the fourth one! |
| 7 | 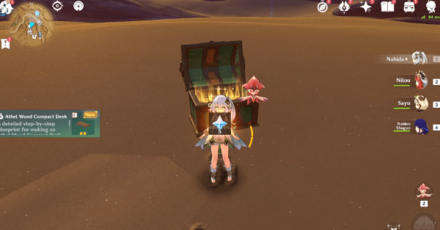 Once you light up all Dendro Monuments, you will get a Remarkable Chest! |
Farrwick #2 Puzzle Guide

Bring a Pyro Bow Character and choose at all the Pyro Torches you see in the area. There's a hidden Pyro Torch undernearth a clump of Gray Crystals. The Farrwick will periodically circle it to reveal the torch, you can shoot when it's revealed!
Farrwick #3 Puzzle Guide
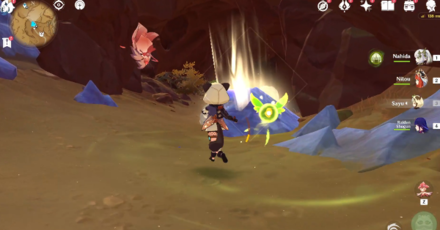
Follow the Farrwick until it reveals enemies to you as you pass by areas. Some of the enemies are even Rifthounds so best bring a healer with you to fight the corrosion status these enemies can inflict!
Farrwick #4 Puzzle Guide
| Farrwick 4 Puzzle Guide | |
|---|---|
| 1 | 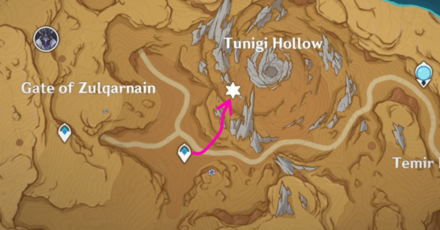 Teleport to the waypoint near the Tunigi Hollow. |
| 2 | 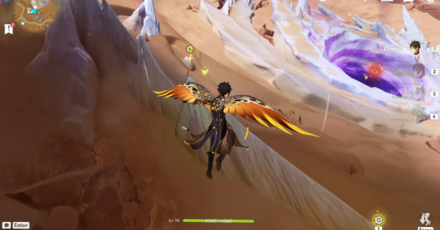 Head to the marked area through the Gray Crystals.Use the Four-Leaf Sigil to get there fast. |
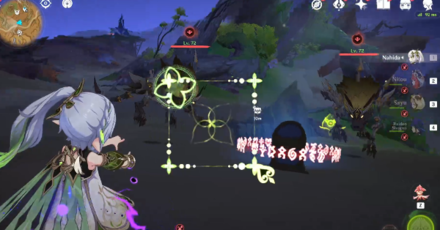
| 3 | 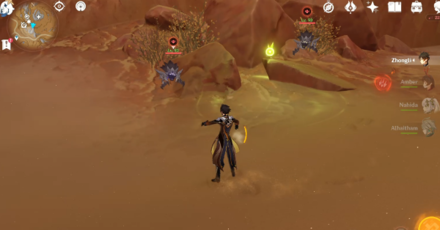 Follow the Farrwick until it spawns Rifthound enemies. Defeat them then continue following the Farrwick. |
| 4 | 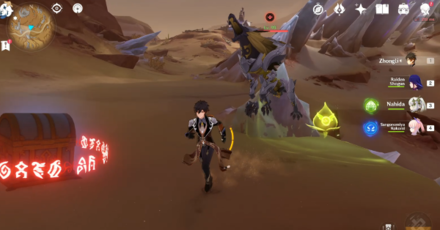 Follow the Farrwick again until it releases a monster from the Gray Crystals. It's a Rifhound. |
| 5 | 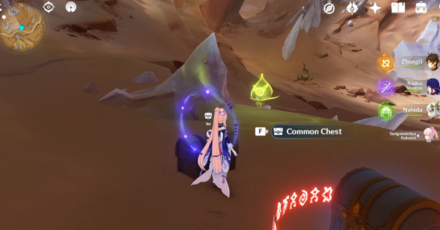 Defeat the Rifhound and get the normal chest reward afterward! |
Farrwick #5 Puzzle Guide
Follow the Farrwick until it reveals a Normal Chest underneath Gray Crystals!
Farrwick #6 Puzzle Guide
| Farrwick Puzzle 6 Guide | |
|---|---|
| 1 | 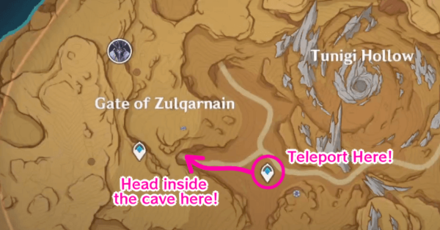 Teleport southeast Waypoint of the Iniquitous Baptist Boss. Enter the cave and head straight until you see the arena where you fight the boss. Pass by the boss' arena without fighting it. |
| 2 | 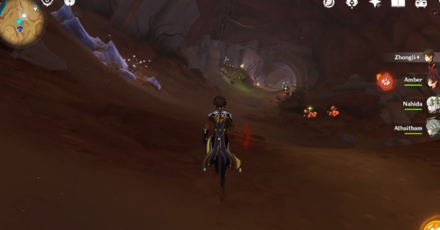 Just past the boss' arena is the Farrwick! |
| 3 | 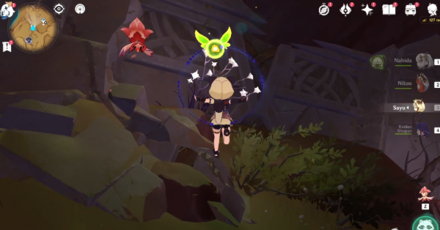 Follow the Farrwick inside the tunnel. |
| 4 | 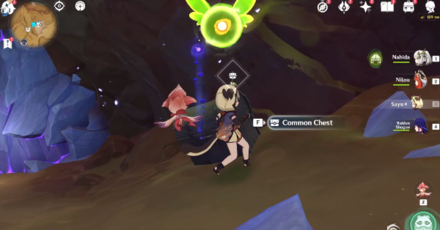 Keep following it until it dissolves a Gray Crystal to reveal a Normal Chest! |
How to Use Farrwick
Clear Out Gray Crystals
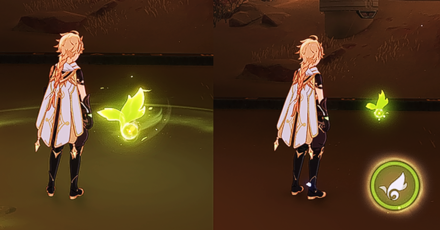
Farrwicks hold the power of Khvarena, which means you can use them to clear out Gray Crystals. You can also reposition Farrwicks after picking them up to solve puzzles in the Sumeru Desert!
How to Destroy Gray Crystals with Khvarena
Farrwick Release Date in 3.6
| Genshin Impact Version 3.6 | |
|---|---|
 |
|
| Release Date | April 12, 2023 |
Farrwick is a new exploration mechanic in the 3.6 Sumeru Desert area! This mechanic was released on Version 3.6 last April 12, 2023!
3.6 Release Date and Patch Notes
Genshin Impact Related Guides

Guides to Sumeru Areas
| Sumeru Area Guides | |
|---|---|
 Rainforest Area Rainforest Area |
 Desert Area Desert Area |
Guide to Desert Regions
| Sumeru Desert Guides | ||
|---|---|---|
 The Great Red Sand The Great Red Sand |
 Desert of Hadramaveth Desert of Hadramaveth |
 Girdle of the Sands Girdle of the Sands |
Guide to 3.6 Desert Regions
| 3.6 Sumeru Desert Guides | ||
|---|---|---|
 Gavireh Lajavard Gavireh Lajavard |
 Realm of Farakhkert Realm of Farakhkert |
|
Girdle of the Sands Desert Features and Puzzles
Girdle of the Sands Quests
Girdle of the Sands Quest Puzzle Guides
Girdle of the Sands Domains
| Girdle of the Sands Domain Guides | ||
|---|---|---|
 Molten Iron Fortress Molten Iron Fortress |
 Purification Spring Domain Purification Spring Domain |
 Somalata Inland Sea Somalata Inland Sea |
Girdle of the Sands Desert Items
| 3.6 Desert Items | ||
|---|---|---|
 Mourning Flower Mourning Flower |
 Trishiraite Trishiraite |
 Sorush Gadget Sorush Gadget |
Creatures in the Girdle of the Sands Desert
Enemies in the 3.6 Desert
| 3.6 Desert Enemies | ||
|---|---|---|
 Guardian of Apep's Oasis Guardian of Apep's Oasis |
 Iniquitous Baptist Iniquitous Baptist |
 Hydro Hilichurl Rogue Hydro Hilichurl Rogue |
 Anemo Hilichurl Rogue Anemo Hilichurl Rogue |
 Consecrated Fanged Beast Consecrated Fanged Beast |
 Consecrated Horned Crocodile Consecrated Horned Crocodile |
Animals in the 3.6 Desert
| 3.6 Desert Animals |
|---|
 Tent Tortoise Tent Tortoise |
All Interactive Map Guides

Comment
Author

Farrwick Locations and Puzzle Guide
Please participate in our site
improvement survey
03/2026
improvement survey
03/2026
Would you assist in
improving Game8's site?
improving Game8's site?

×
We are listening to our users' valuable opinions and discussing how to act on them.
The information collected through this survey will be used for the purpose of improving our services. In addition, the information will only be disclosed a part of a statistic in a format that will not allow identification of personal information.
Begin Survey
Not Now
×
Please rate each item regarding Game8.co's Advertisements.
Amount of Ads
Very Dissatisfied
Somewhat Dissatisfied
Fine
Somewhat Satisfied
Highly Satisfied
Placement of Ads
Timing of Ad Display
Ad Loading Speed
Safeness of Ads
Content of Ads
×
Please rate each item regarding Game8.co's Quality of Articles.
Amount of information
Very Dissatisfied
Somewhat Dissatisfied
Fine
Somewhat Satisfied
Highly Satisfied
Frequency of updates
Speed of new information
Accuracy of articles
Understandibility of articles
Readability of sentences
×
Please rate each item regarding Game8.co's Usability of the Site.
Ease of finding information
Very Dissatisfied
Somewhat Dissatisfied
Fine
Somewhat Satisfied
Highly Satisfied
Loading Speed
Use of Color
Font Size
Visibility of Images
Easy to Understand Layout
×
Please rate each item regarding Game8.co's Message Boards, Comments.
Ease of Writing
Very Dissatisfied
Somewhat Dissatisfied
Fine
Somewhat Satisfied
Highly Satisfied
Readability
Ease in Finding Information
Comment Quality
Comment Quantity
Admin Response
×
Please rate each item regarding Game8.co's Site's new design.
Please rate our site's new design
Very Dissatisfied
Somewhat Dissatisfied
Fine
Somewhat Satisfied
Highly Satisfied
Do you think that the website's design change makes the site easier to use?
Has the new design made it easier for you to find information on the site?
Has the new design improved the overall visual appeal of the site?
How would you rate your overall satisfaction with the new design of the site?
×
How likely are you to recommend Game8 to someone you know?
Very Unlikely
0
1
2
3
4
5
6
7
8
9
10
Very Likely
If you have other opinions regarding potential improvement to the website, please share them with us. We would appreciate your honest opinion.
Note: This is a free response section, so you can proceed without entering anything.
Note: Please be sure not to enter any kind of personal information into your response.
Note: Please be sure not to enter any kind of personal information into your response.
×
Thank You
×
Thank you for participating in our survey! Your answers will help us to improve the quality of our website and services.
We hope you continue to make use of Game8.
We hope you continue to make use of Game8.
Close


Rankings
Gaming News


![Monster Hunter Stories 3 Review [First Impressions] | Simply Rejuvenating](https://img.game8.co/4438641/2a31b7702bd70e78ec8efd24661dacda.jpeg/thumb)
Popular Games

Genshin Impact Walkthrough & Guides Wiki
Honkai: Star Rail Walkthrough & Guides Wiki
Umamusume: Pretty Derby Walkthrough & Guides Wiki
Pokemon Pokopia Walkthrough & Guides Wiki
Resident Evil Requiem (RE9) Walkthrough & Guides Wiki
Monster Hunter Wilds Walkthrough & Guides Wiki
Wuthering Waves Walkthrough & Guides Wiki
Arknights: Endfield Walkthrough & Guides Wiki
Pokemon FireRed and LeafGreen (FRLG) Walkthrough & Guides Wiki
Pokemon TCG Pocket (PTCGP) Strategies & Guides Wiki


Recommended Games
Diablo 4: Vessel of Hatred Walkthrough & Guides Wiki
Cyberpunk 2077: Ultimate Edition Walkthrough & Guides Wiki
Fire Emblem Heroes (FEH) Walkthrough & Guides Wiki
Yu-Gi-Oh! Master Duel Walkthrough & Guides Wiki
Super Smash Bros. Ultimate Walkthrough & Guides Wiki
Pokemon Brilliant Diamond and Shining Pearl (BDSP) Walkthrough & Guides Wiki
Elden Ring Shadow of the Erdtree Walkthrough & Guides Wiki
Monster Hunter World Walkthrough & Guides Wiki
The Legend of Zelda: Tears of the Kingdom Walkthrough & Guides Wiki
Persona 3 Reload Walkthrough & Guides Wiki


All rights reserved
Copyright© 2012-2024 HoYoverse — COGNOSPHERE. All Rights Reserved.
The copyrights of videos of games used in our content and other intellectual property rights belong to the provider of the game.
The contents we provide on this site were created personally by members of the Game8 editorial department.
We refuse the right to reuse or repost content taken without our permission such as data or images to other sites.