All Hadramaveth Desert Torch Puzzle Locations
★ Exclusive: Check out the State of Meta for Nod-Krai!
◆ Hot: Luna 5 Livestream & Luna 5 Livestream Codes
◆ Builds: Columbina, Zibai, Illuga, Ineffa, Neuvillette
◆ Luna 4, Lantern Rite 2026, Moonlit Patrol Exercise
◆ Future: Version 6.4, Varka, Lohen
Torch puzzles are one type of puzzle that Travelers may encounter while exploring the 3.4 Desert of Hadramaveth. Find out where to look for them and how to solve the puzzles in this Genshin Impact guide.
List of Contents
Hadramaveth Torch Puzzle Locations
Torch Puzzle Map Locations
| All Torch Puzzle Locations | |||
|---|---|---|---|
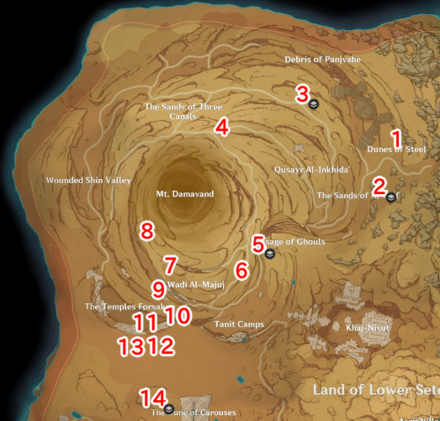 |
|||
| Click to Jump on a Torch Puzzle Solution | |||
| Torch #1 | Torch #2 | Torch #3 | Torch #4 |
| Torch #5 | Torch #6 | Torch #7 | Torch #8 |
| Torch #9 | Torch #10 | Torch #11 | Torch #12 |
| Torch #13 | Torch #14 | ||
Torch Puzzle #1
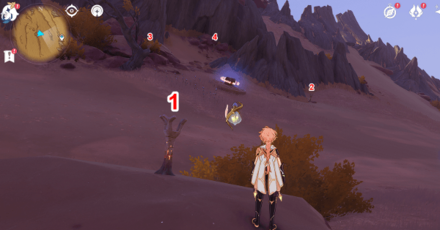
Teleport to the Dunes of Steel waypoint, then glide east to find the puzzle just behind the tree wall. Light up the torches using Pyro Characters.
Back to All Locations ▲
Torch Puzzle #2
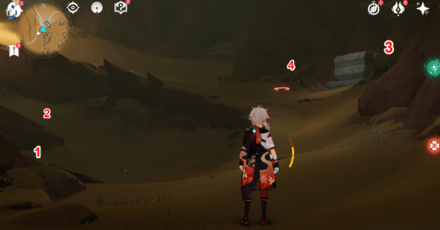
Teleport to the Qusayr Al-Inkhida' waypoint, then glide east into the cave below. Continue deeper into the cave until you reach the Ruin Guard; the torch puzzle and domain should be located past the ruin guard. Then light the torches using Pyro.
When you finish this puzzle, you will be able to unlock the City of Deceased Domain.
Back to All Locations ▲
Torch Puzzle #3
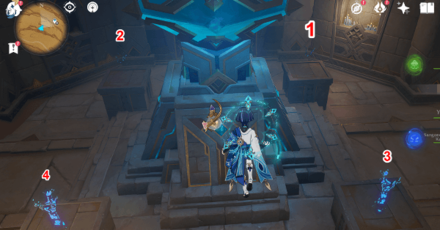
Teleport to the Debris of Panjvahe waypoint and enter the ruins near the Primal Obelisk.
| Torch #3 Puzzle Step-by-Step Guide | |
|---|---|
| 1 | 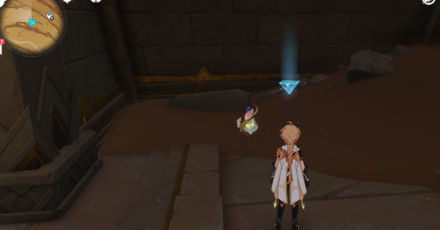 Pickup the Forged Light that is located at the rightside of the ruin. |
| 2 | 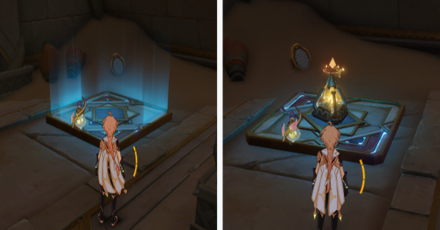 Bring the Forged Light to the Replicator Keystone to make a Verity Cell. |
| 3 | 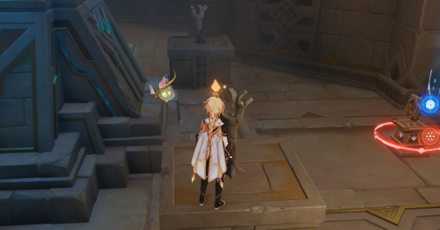 Pick up the Verity Cell and walk up to the invisible torches, then light it up. |
Torch Puzzle #4
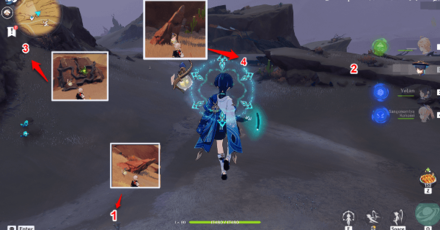
Teleport to the Sands of Three Canal's east waypoint, then turn north to find the lock chest and the torch puzzle.
| Torch #4 Puzzle Step-by-Step Guide | |
|---|---|
| 1 | 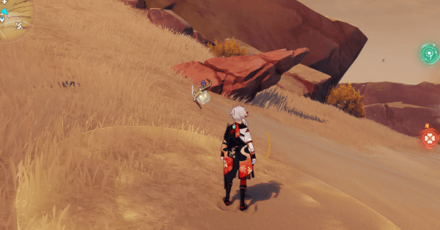 The torches #1 and #4 are hidden beneath the Weathered Rocks. |
| 2 | Lure the roaming Wenut to the location of the rock and wait for it to attack in order to destroy it and reveal the torches. |
| 3 | 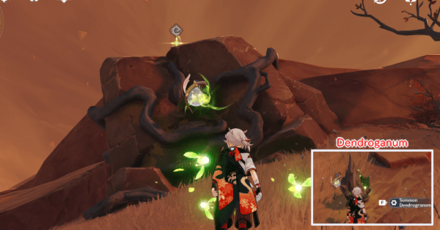 The Torch #3 is hidden under the Dendro Rock. Summon a Dendrogranum and use Charged Attacks to break the Dendro Rock. |
| 4 | Torch #2 is located just ahead of Torch #1; use pyro to light all of the torches. |
Torch Puzzle #5
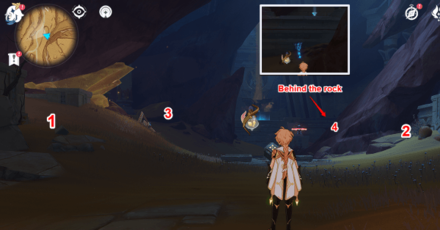
This area can be unlocked during the Dirge of Bilqis world quest. Teleport to the underground waypoint near Qusayr Al-Inkhida'. Enter the ruins and proceed to the room beyond the Flying Serpents.
| Torch #5 Puzzle Step-by-Step Guide | |
|---|---|
| 1 | 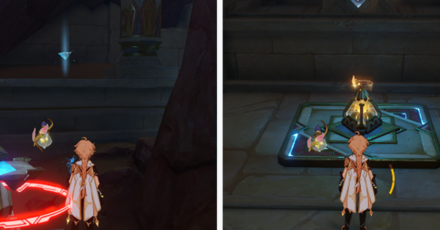 Pick up the Forged Light that is located at the right corner of the room. Take it to the Replicator to create a Verity Cell. |
| 2 | Use the Verity Cell and approach the torches to reveal them. |
| 3 | 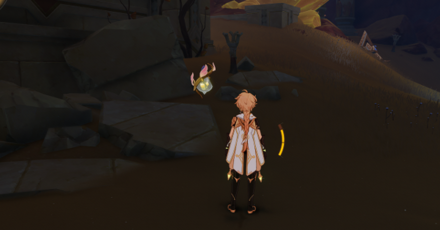 The #1 Torch is located left side near the entrance. |
| 4 | 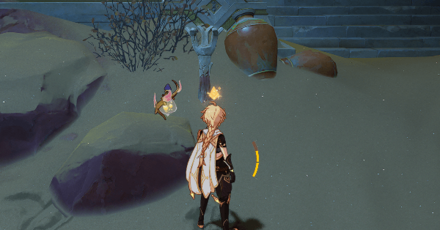 The #2 Torch is right across #1 near the entrance of the central area. |
| 5 | 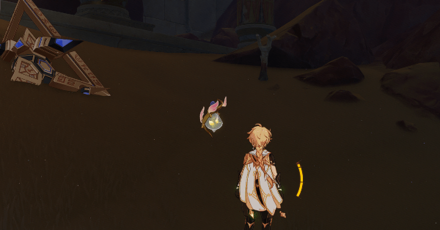 The #3 is located near the broken Primal Construct. |
| 6 | 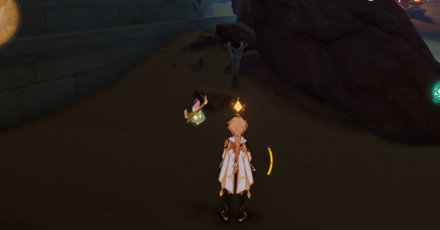 The #4 is right behind the rock near where the Forged Light is located. Light them up using Pyro. |
Torch Puzzle #6
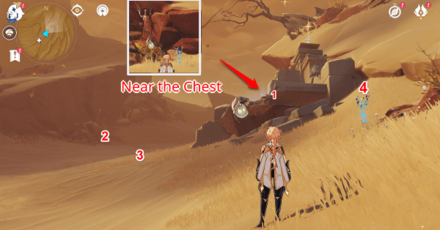
Teleport to the Wadi Al-Majuj waypoint and head north until you see the locked chest or the Replicator Keystone.
| Torch #6 Puzzle Step-by-Step Guide | |
|---|---|
| 1 | 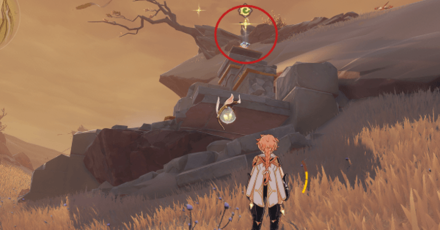 Pick up the Forged Light that is located at the top of the big torch. Use the Four-Leaf Sigil to climb the torch. |
| 2 | 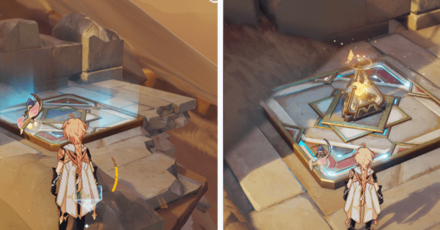 Take it to the Replicator to create the Verity Cell. Use the Verity Cell and approach the torches to reveal the torches. |
| 3 | 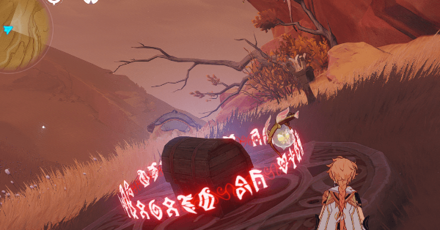 The #1 Torch is located near the locked chest. |
| 4 | 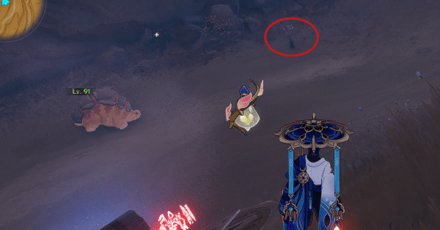 The #2 Torch is right across #1 near the cactus. |
| 5 | 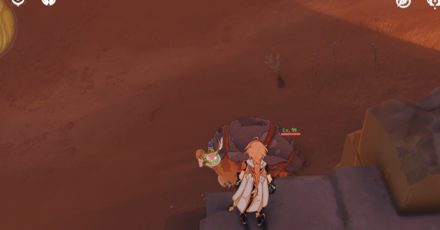 The #3 is located at the front of the Replicator Forged Light. |
| 6 | 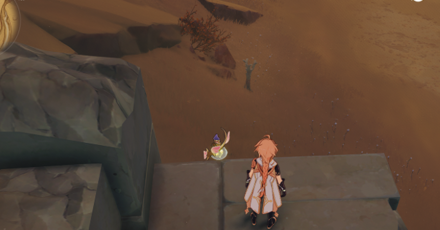 The #4 is just below the Replicator to the east. Light them up using Pyro. |
Torch Puzzle #7
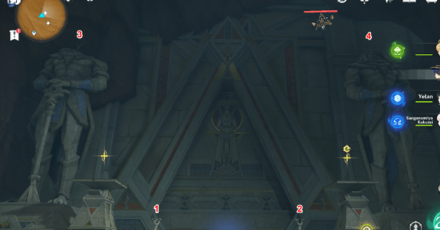
This area is accessible through the Apocalypse of Lost quest. Teleport to the Wadi Al-Majuj east waypoint and glide down to the cave containing the Primal Obelisk. Enter the room with the two torches on the entrance beyond the Primal Obelisk.
| Torch #7 Puzzle Step-by-Step Guide | |
|---|---|
| 1 | 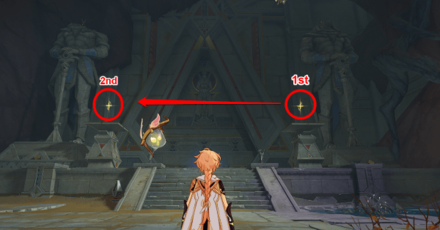 Use the Four-Leaf Sigil in this order to access the invisible path. |
| 2 | Use the invisble path to light up the torches above. |
Torch Puzzle #8
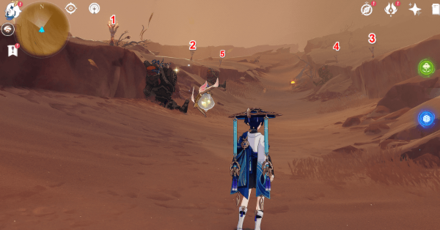
Teleport to the Wadi Al-Majuj east waypoint and head north; the torch puzzle is located near the Ruin Guards, past the Pyro Slimes.
Back to All Locations ▲
Torch Puzzle #9
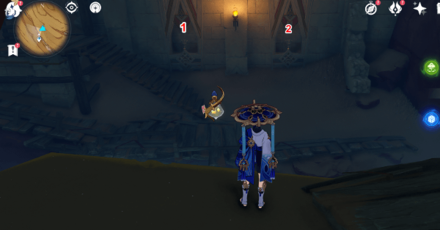
Teleport to the Wadi Al-Majuj east waypoint and glide down to the Primal Obelisk; the torch is beneath the statue.
Back to All Locations ▲
Torch Puzzle #10
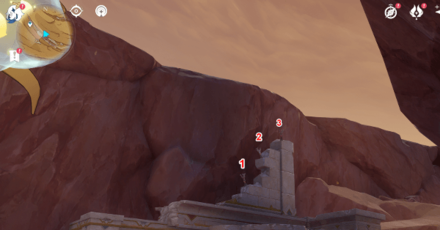
#10 is situated on the broken wall at the top of the ruin where #9 is located.
Back to All Locations ▲
Torch Puzzle #11
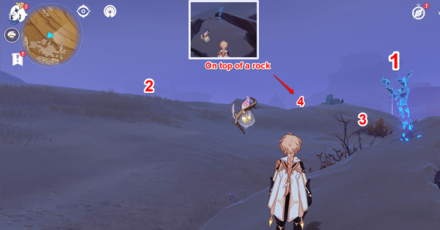
Head south from the Wadi Al-Majuj east waypoint to find the torch puzzle on the cliff overlooking the Temples Forsaken/Safhe Shatranj ruin.
| Torch #11 Puzzle Step-by-Step Guide | |
|---|---|
| 1 | 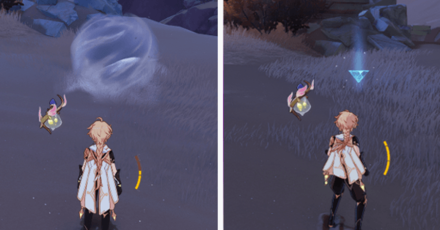 Take the Forged Light hidden behind the small vortex. Remove the vortex with the Liloupar to reveal the Forged Light. |
| 2 | 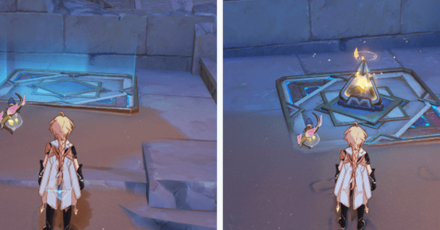 Bring the Forged Light to the Replicator that is located near the Primal Construct to create a Verity Cell. |
| 3 | 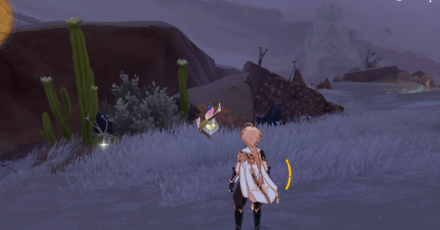 The #1 Torch is located west of the Replicator near the Cactus. |
| 4 | 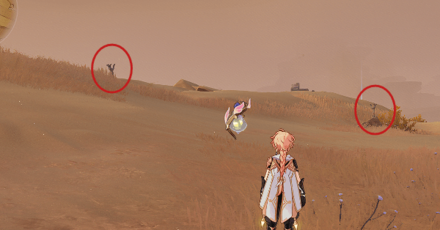 The #2 Torch is located east of #1, while the #3 is right across situated on a rock. |
| 5 | 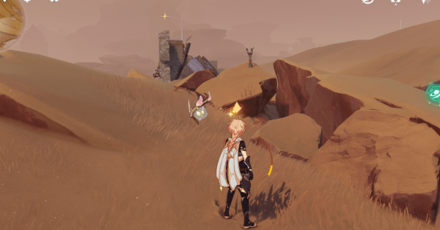 The #4 Torch is located east of #2 near the Eremite camp. |
Torch Puzzle #12
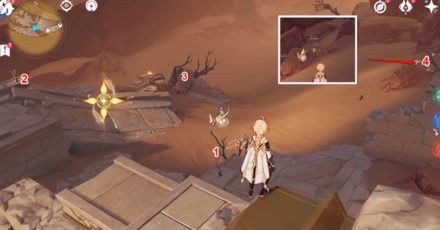
This puzzle is accessible after completing the first part of Dirge of Bilqis world quest. Glide down near the chessboard from the Temples Forsaken/Safhe Shatranj waypoint.
Back to All Locations ▲
Torch Puzzle #13
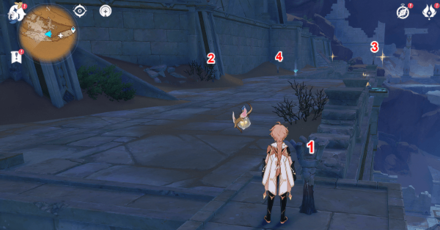
The #13 torch puzzle is located near the Primal Construct in front of the Temples Forsaken/Safhe Shatranj ruin.
| Torch #13 Puzzle Step-by-Step Guide | |
|---|---|
| 1 | 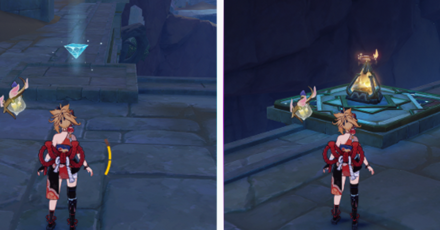 Pickup the Forged Light and bring it to Replicator Keystone to create a Verity Cell |
| 2 | 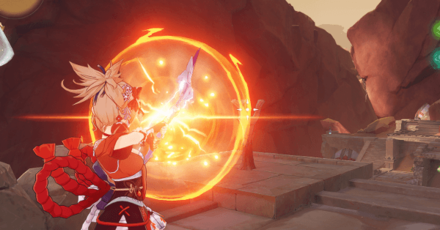 Use the Cell to reveal the invisible torches. |
| 3 | The torches are located on top of the pillars in both corners of the ledge, with the remaining two at the back near the wall. Use pyro and light them up. |
Torch Puzzle #14
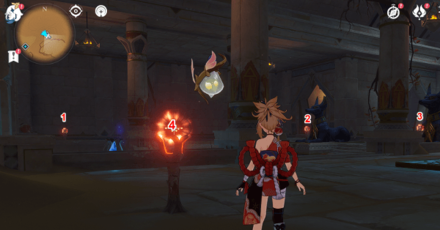
This puzzle can be found during the world quest Dirge of Bilqis. Enter the left room from the center of the ruin to find the puzzle.
| Torch #14 Puzzle Step-by-Step Guide | |
|---|---|
| 1 | 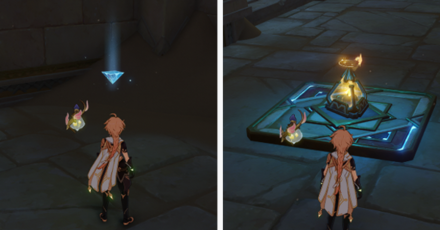 Pickup the Forged Light that is located at the right corner of the room. Bring it to Replicator Keystone to create a Verity Cell |
| 2 | 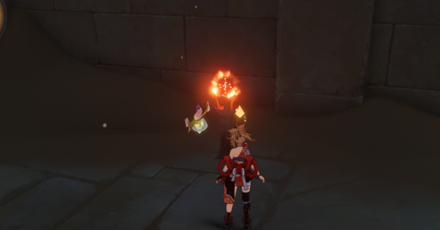 Use the Cell to reveal the invisible torches. |
| 3 | The torches are located in both corners of the room, while the remaining two are in front of the statue. Lit them up using pyro. |
Hadramaveth Torch Puzzle Details
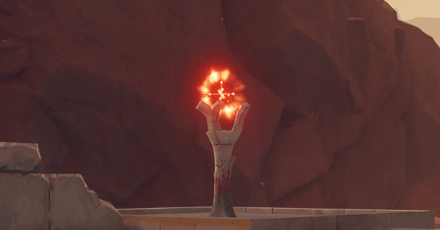
Torch Puzzles are puzzles that can be found throughout the Hadramaveth Desert. Solving these puzzles may reward you with treasures or lead you to new locations. Some torchers are hidden behind other puzzles or are completely invisible. The torch puzzles can be solved by lighting them up using Pyro Characters.
Genshin Impact Related Guides

Guides to Sumeru Areas
| Sumeru Area Guides | |
|---|---|
 Rainforest Area Rainforest Area |
 Desert Area Desert Area |
Guide to Desert Regions
| Sumeru Desert Guides | ||
|---|---|---|
 The Great Red Sand The Great Red Sand |
 Desert of Hadramaveth Desert of Hadramaveth |
 Girdle of the Sands Girdle of the Sands |
Map Features in Desert of Hadramaveth
| Notable Hadramaveth Desert Guides | |
|---|---|
 Dendroculus Locations Dendroculus Locations |
 Shrine of Depths Shrine of Depths |
 Hidden Waypoints Hidden Waypoints |
 Fishing Spots Fishing Spots |
 Hadramaveth Clearance Hadramaveth Clearance |
|
Desert of Hadramaveth Domains
| Hadramaveth Desert Domains | |
|---|---|
 Fane of Panjvahe Fane of Panjvahe |
 City of the Deceased City of the Deceased |
Desert of Hadramaveth World Quests
Desert of Hadramaveth Exploration Guides
Tips and Tricks
| Tips and Tricks for Things in Hadramaveth Desert | |
|---|---|
 How to Open the Ancient Gate How to Open the Ancient Gate |
 How to Restore Power to the Left Arm How to Restore Power to the Left Arm |
 Activate the Device and Open the Gate Activate the Device and Open the Gate |
 Debris of Panjvahe Teleport Waypoint Debris of Panjvahe Teleport Waypoint |
 Jinni in the Magic Bottle Upgrades Jinni in the Magic Bottle Upgrades |
|
Items in the Desert of Hadramaveth
| Items found in the Desert of Hadramaveth | |
|---|---|
 Liloupar Gadget Liloupar Gadget |
 Sand Grease Pupa Sand Grease Pupa |
 Ancient Stone Key Ancient Stone Key |
 Fatui Stronghold Key Fatui Stronghold Key |
Creatures in the Desert of Hadramaveth
Enemies in the Desert of Hadramaveth
| Enemy and Boss Guides | ||
|---|---|---|
 Setekh Wenut Setekh Wenut |
 Eremite Floral Ring-Dancer Eremite Floral Ring-Dancer |
 Eremite Scorching Loremaster Eremite Scorching Loremaster |
 Consecrated Flying Serpent Consecrated Flying Serpent |
 Consecrated Scorpion Consecrated Scorpion |
 Consecrated Red Vulture Consecrated Red Vulture |
Wildlife in the Desert of Hadramaveth
| Wildlife in the Desert of Hadramaveth | ||
|---|---|---|
 Flying Serpent Flying Serpent |
All Interactive Map Guides

Author
All Hadramaveth Desert Torch Puzzle Locations
Premium Articles
Rankings
Gaming News
Popular Games

Genshin Impact Walkthrough & Guides Wiki

Honkai: Star Rail Walkthrough & Guides Wiki

Arknights: Endfield Walkthrough & Guides Wiki

Umamusume: Pretty Derby Walkthrough & Guides Wiki

Wuthering Waves Walkthrough & Guides Wiki

Pokemon TCG Pocket (PTCGP) Strategies & Guides Wiki

Abyss Walkthrough & Guides Wiki

Zenless Zone Zero Walkthrough & Guides Wiki

Digimon Story: Time Stranger Walkthrough & Guides Wiki

Clair Obscur: Expedition 33 Walkthrough & Guides Wiki
Recommended Games

Fire Emblem Heroes (FEH) Walkthrough & Guides Wiki

Pokemon Brilliant Diamond and Shining Pearl (BDSP) Walkthrough & Guides Wiki

Diablo 4: Vessel of Hatred Walkthrough & Guides Wiki

Super Smash Bros. Ultimate Walkthrough & Guides Wiki

Yu-Gi-Oh! Master Duel Walkthrough & Guides Wiki

Elden Ring Shadow of the Erdtree Walkthrough & Guides Wiki

Monster Hunter World Walkthrough & Guides Wiki

The Legend of Zelda: Tears of the Kingdom Walkthrough & Guides Wiki

Persona 3 Reload Walkthrough & Guides Wiki

Cyberpunk 2077: Ultimate Edition Walkthrough & Guides Wiki
All rights reserved
Copyright© 2012-2024 HoYoverse — COGNOSPHERE. All Rights Reserved.
The copyrights of videos of games used in our content and other intellectual property rights belong to the provider of the game.
The contents we provide on this site were created personally by members of the Game8 editorial department.
We refuse the right to reuse or repost content taken without our permission such as data or images to other sites.
 Sandstorms in the Desert
 Atmospheric Vortexes
 Sacred Seals
 Primal Obelisks
 Rune Mechanisms
 Weathered Obelisk
 Wenut Tunnels
 Cascade Pools and Spouts
 Chess Pieces
 Chess Activation Device
 Memories of Eternal Oasis
 Mysterious Stone Slate
 Remarkable Chests
 Treasure Chests
 Safhe Shatranj Puzzle
 Debris of Panjvahe Puzzle
 Passage of the Ghouls Puzzle
 Passage of Ghouls Totems
 Dual-Phase Neverlight Cells
 Weathered Rocks
 Runic Window and Pane
 Hadramaveth Viewpoints
 Gurabad's Ruin
 Enigmatic Pages
 Seelie Locations
 Wadi Al-Majuj Sacred Seals
 Safhe Shatranj Chess Puzzle


![Animal Crossing: New Horizons Review [Switch 2] | Needlessly Crossing Over to a New Generation](https://img.game8.co/4391759/47d0408b0b8a892e453a0b90f54beb8a.png/show)


There is an issue with the #9 puzzle. The picture of the 4th torch is actually of the 2nd. I'm not sure if there is a glitch occurring, but I can't seem to find the 4th one anywhere, and nothing happened after 3 torches were lit.