The Tale-Telling Heart Quest Guide
✉ Send your thoughts in our Genshin 6.4 Patch Survey!
★ Exclusive: Dive back in time with the Meta History
◆ Hot: Version 6.4, 6.4 Codes, Linnea, Version 6.5
◆ Builds: Varka, Flins, Skirk, Escoffier
◆ Events: Travelers' Tales, Sightseeing With Friends
◆ Endgame: Spiral Abyss (March 2026)
The Tale-Telling Heart is a World Quest introduced in Genshin Impact Version Luna 1. See how to unlock this quest, its walkthrough, how to do solve both of Sergeant Octopus's trials, how to wake up Colonel Iron Whale, how to return to the surface after going underground, and all the rewards of this quest here in this guide!
List of Contents
The Tale-Telling Heart Quest Location
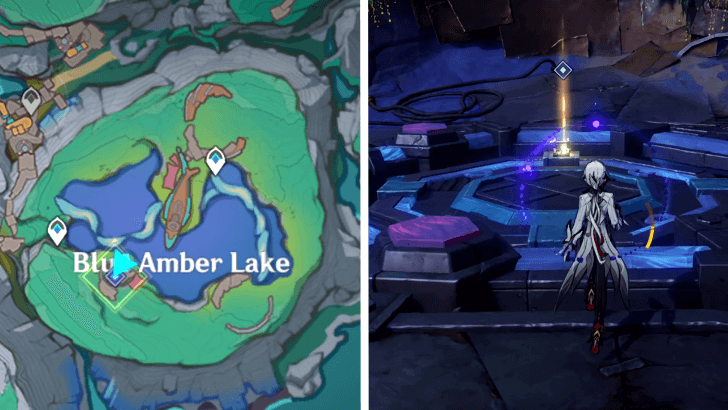
Go to Blue Amber Lake
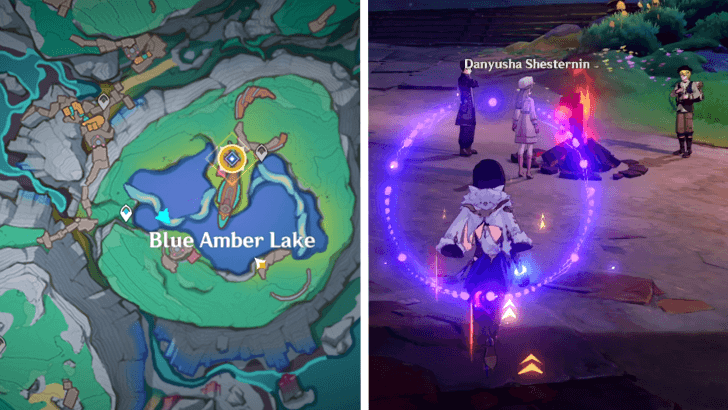
The Tale-Telling Heart is located at Blue Amber Lake, in the nation of Nod-Krai. Players can head north of Nasha Town, and is found in the middle of Lempo Isle past the Barrowmoss Barrens.
How to Unlock The Tale-Telling Heart
Available Upon Arriving in Nod-Krai
| Quest Unlock Requirements | |
|---|---|
 |
Aha! Looks like The Tale-Telling Heart is not locked behind any quest! |
Players do not need to progress through Nod-Krai's Archon Quest first in order to do The Tale-Telling Heart. It can be done as soon as players arrive at its location in Blue Amber Lake.
The Tale-Telling Heart Walkthrough
Check near the campfire
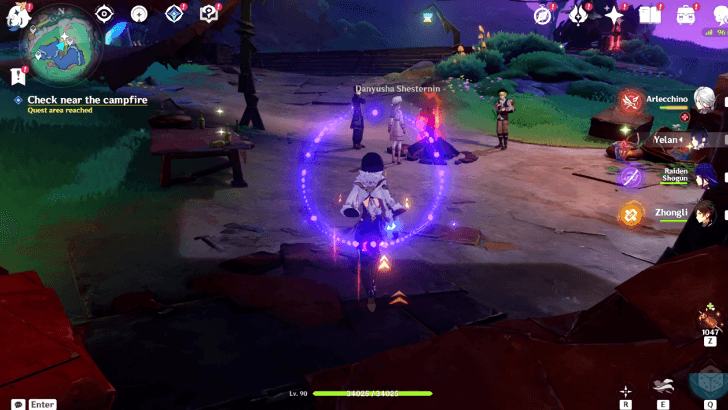
To trigger the World Quest, make your way to Blue Amber Lake, and find a bonfire in between three people. They should be near the whale-like structure besides the lake.
Dialogue triggers when near Blue Amber Lake
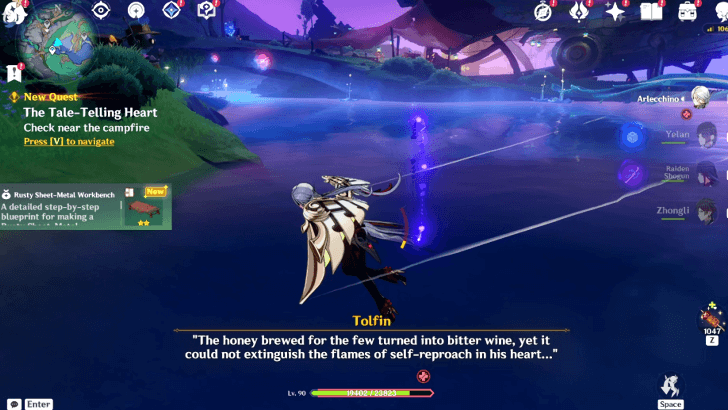
When you arrive in Blue Amber Lake for the first time, one of the aforementioned three NPCs named Tolfin will have his dialogue appear on-screen. This signals you are close to where you can start this World Quest.
Complete Sergeant Octopus's Trials
The three people, namely Tolfin, Zhorik Shesternin and Danyusha Shesternin, were talking about a treasure in their current location called the Proof of the Cognoscenti, made by Papa Wrench.
To find this treasure, first one must collect 12 Stellafruit, deliver them to Sergeant Octopus, and pass the trials to awaken Colonel Iron Whale.
How to Pass Sergeant Octopus Trial 1
| 1 | 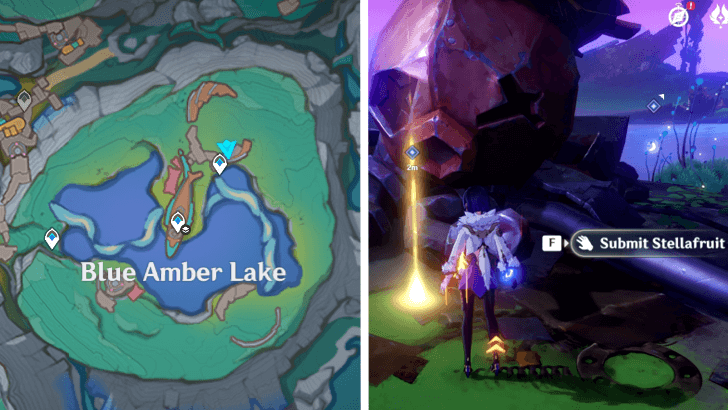 The first trial of Sergeant Octopus is located near the quest's starting location, just nearby the Teleport Waypoint. |
|---|---|
| 2 | 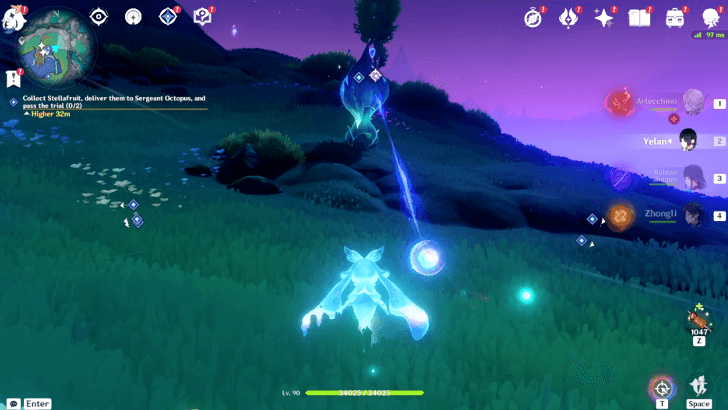 Once in the location, you must give Sergeant Octopus 12 Stellafruits, which you can get from the nearby Rippleweeds around Blue Amber Lake. There are some that can be collected as is, but most of them can only be harvested while transformed as a Kuuhenki. After spotting a Rippleweed, open them as a Kuuvahki, and collect the Stellafruits inside. There are two trials to complete, so you need a total of 24 Stellafruits to complete this World Quest. |
| 3 | 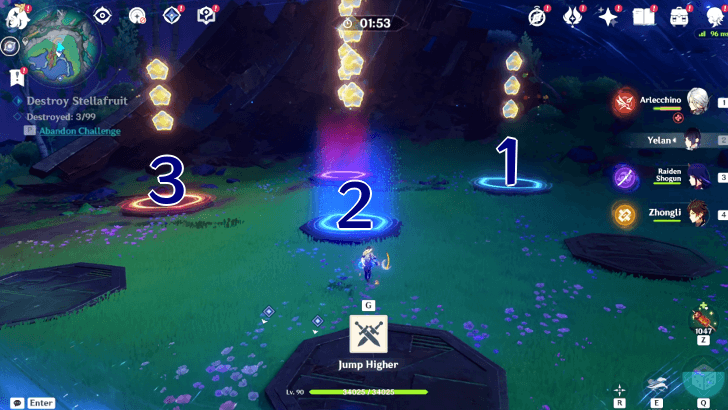 There are three kinds of platforms players must be aware of: 1. Normal blue platform: which empowers the Traveler a boost in their jump. 2. Brighter blue platform: which gives a stronger boost in jumping. 3. Red platform: which significantly reduces the Traveler's jumping power. |
| 4 | 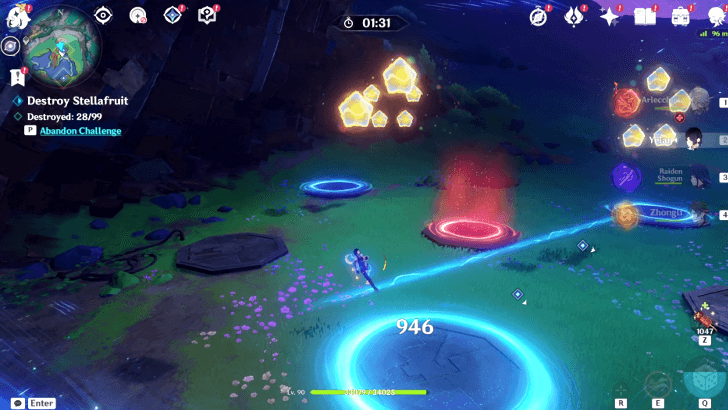 Midway through the trial, waves of electricity will pass through the trial grounds. Colliding with them will deal damage to the Traveler, and will knock them back. This can lose you time in setting up your next jump. |
| 5 |  The final wave of the first trial will change all platforms into the brighter blue ones, making all jumps extra strong. Use this to your advantage and collect the Stellafruits that will spawn in the middle of the trial grounds. |
How to Pass Sergeant Octopus Trial 2
| 1 | 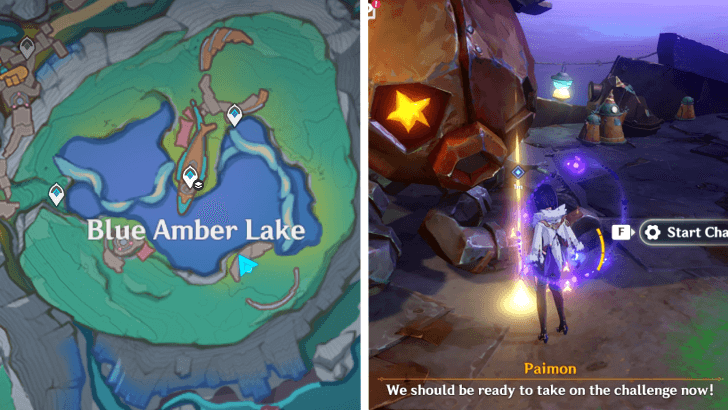 The second Sergeant Octopus is found south of the first one, across the lake. This is where you will deliver the Stellafruit to open the second Trial. The second Sergeant Octopus is found south of the first one, across the lake. This is where you will deliver the Stellafruit to open the second Trial. |
|---|---|
| 2 |  Much like the first trial, you need 12 Stellafruits to partake in this tiral. If you had collected all 24 before doing the first trial, you can jump straight into this one after completion. |
| 3 | 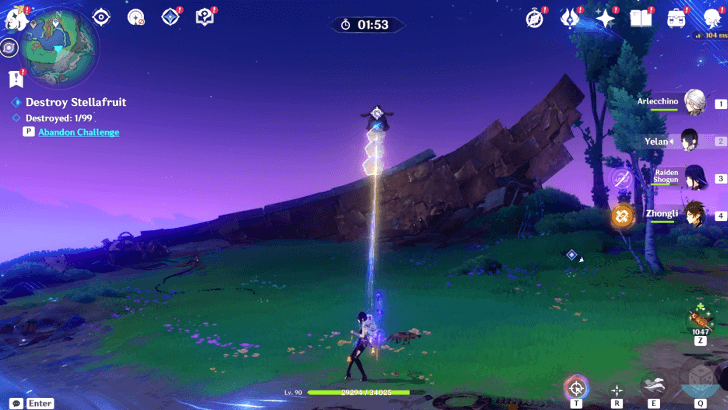 The traveler must destroy 99 of them to clear the trial. They must only use the Unipolar Crystronite projectile for this trial. |
| 4 | 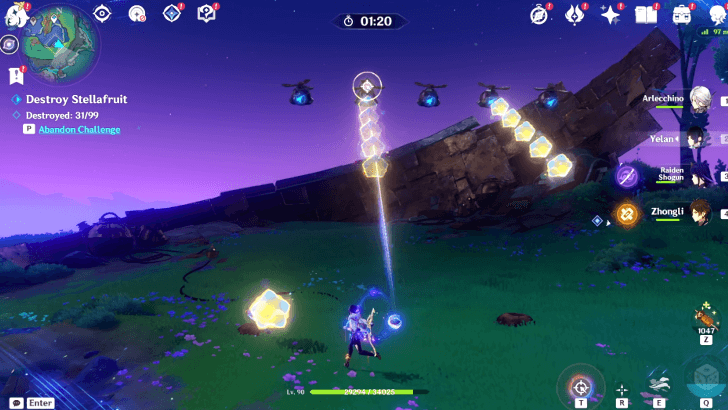 Make sure to aim well in throwing the projectile. This is especially crucial for moving Stellafruit that line up perfectly. |
| 5 | 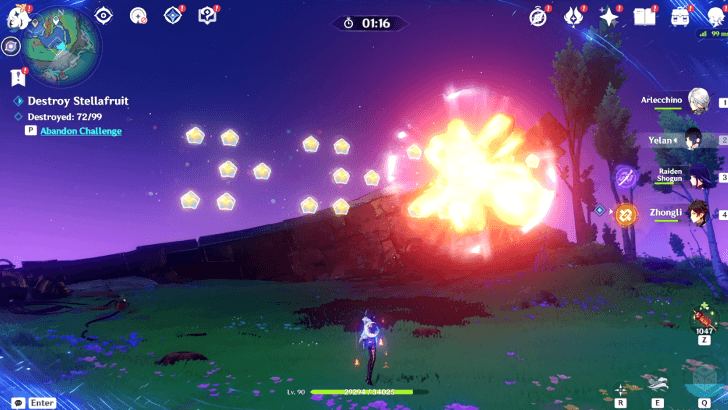 The target your projectile locks onto explodes on contact. This is especially useful for sections of the Trial where the Stellafruit move from left to right, and sometimes vice versa. |
Return to Colonel Iron Whale
After completing the two trials, head back to the whale-shaped structure, now known as Colonel Iron Whale. Then, make your way to the top of the structure where Zhorik and Tolfin are waiting for you. They mention a lift for you to use to get underground and continue the treasure search, but there is no lever.
Find the missing lift parts

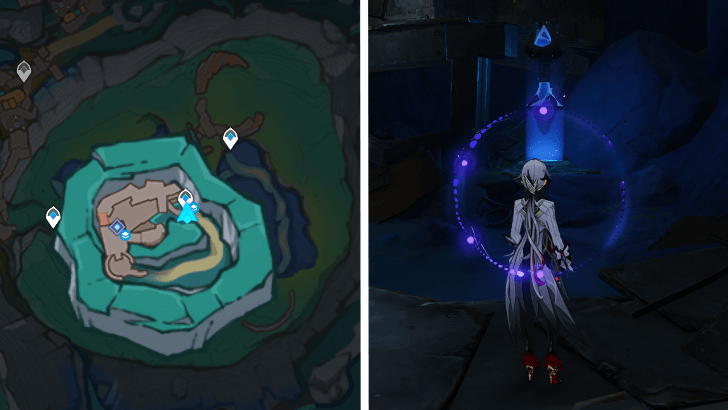
To find the lever for the lift, go southwest of Blue Amber Lake, just south of the western Teleport Waypoint. There should be an Exquiste Chest nearby the marked location, where Treasure Raiders will spawn to protect their keep.
Defeat them all and open the Exquisite Chest.
Activate the lift
After defeating the Treasure Raiders, head back to the lift to repair it with its lever, then activate it to go underground.
Follow Huginn and look for clues
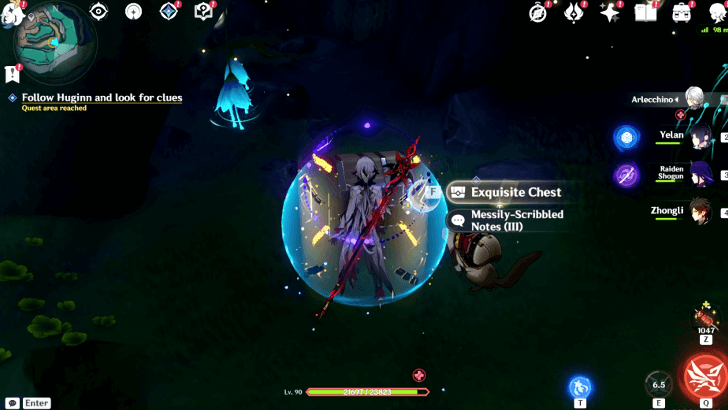
Once undergound, follow Huginn under Tolfin's orders to go deeper inside. The pet will lead you to a small Hilichurl encampment you must defeat to get another Exquisite Chest and another set of notes.
Continue following Huginn
| # | Steps in Following Huginn |
|---|---|
| 2 | 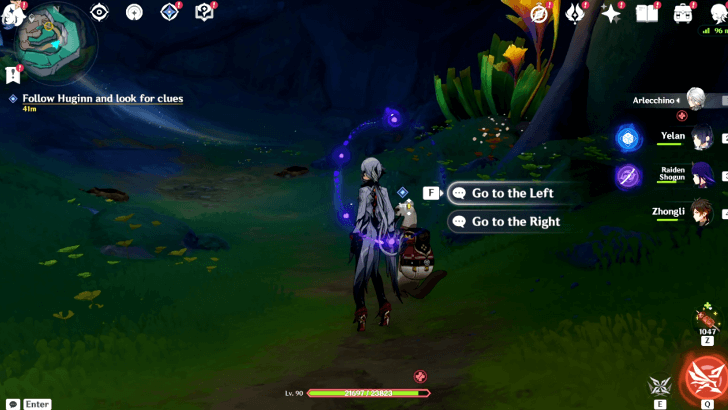 After opening the Exquisite Chest and the notes, a Sniffer Mole will stop you to look for it, spawning two locations. If you choose go left, Huginn will check the left location, but no dice. This will leave the right area for you to interact with and find the mole. |
| 3 | 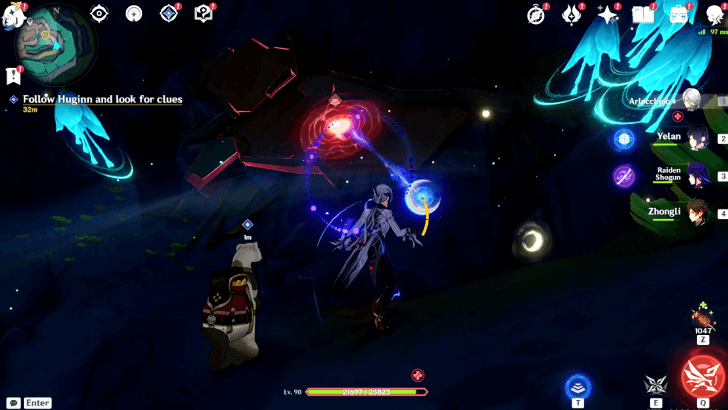 After finding the Sniffer Mole, go near the glowing wall, where some plants will get you to an empowered state. Use your Unipolar power to break the wall, and continue deeper in to the underground/. |
Stop the out-of-control machine
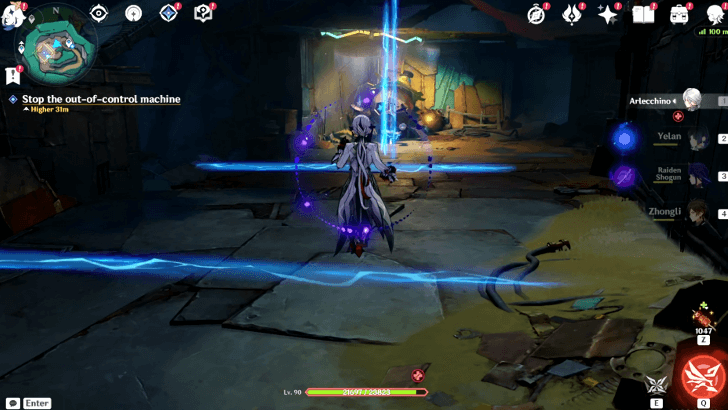
The next area features a broken Sergeant Octopus that is sending waves of electricity outward. Dodge every wave you can to avoid damage, and turn off the machine by approaching it safely.
Teleport Waypoint Automatically Unlocked
Upon reaching this area, the nearby Teleport Waypoint is automatically unlocked. This Waypoint does not show up in the map until after its reveal during this quest.
Follow Huginn and find a way to return to the surface
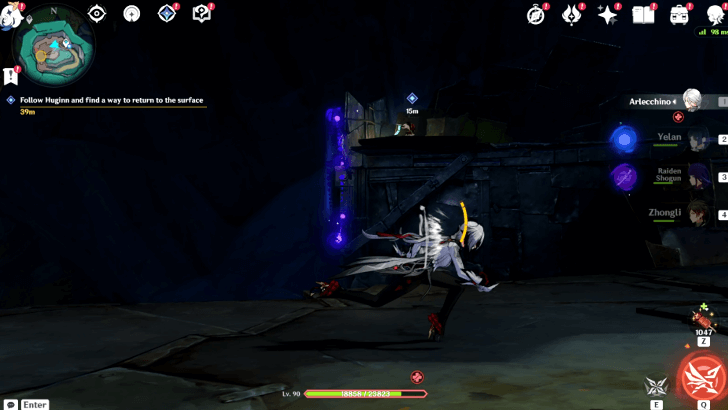
The road back becomes blocked, so you have to follow Huginn in finding a way out of the underground area. Follow him at the platform just beside where the broken Sergeant Octopus you just shut down is.
How to return to the surface
| # | Steps to return to the surface |
|---|---|
| 1 | 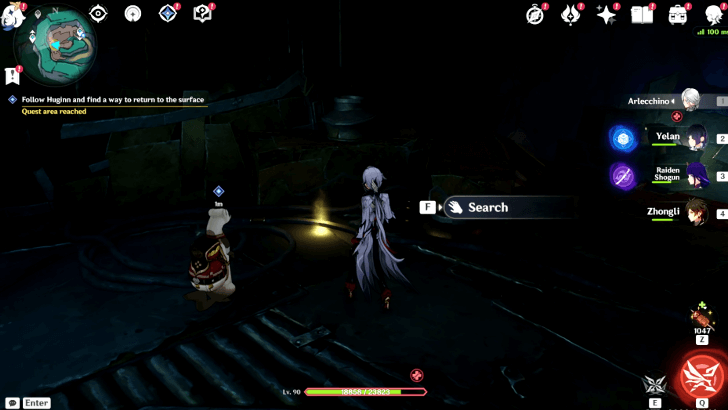 When he stops at a certain area, interact with the found treasure which is a journal page called Messily-Scribbled Notes (II). Search again after a quick cutscene to unearth an Amazing 'Bot. |
| 2 | 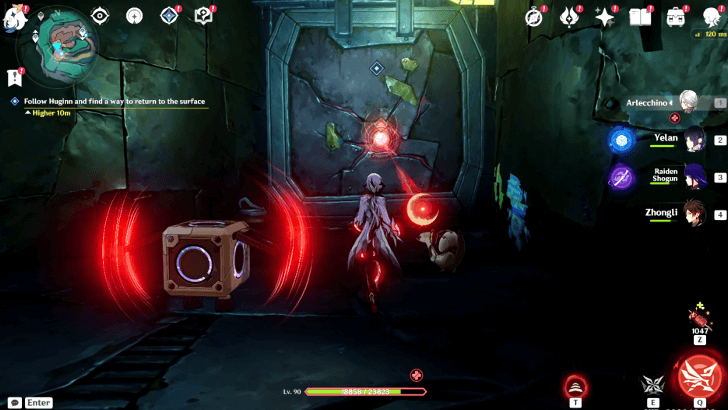 With the Amazing 'Bot functioning, it can help you get into an empowered state. Use the Unipolar power to destroy the wall.. |
| 3 | 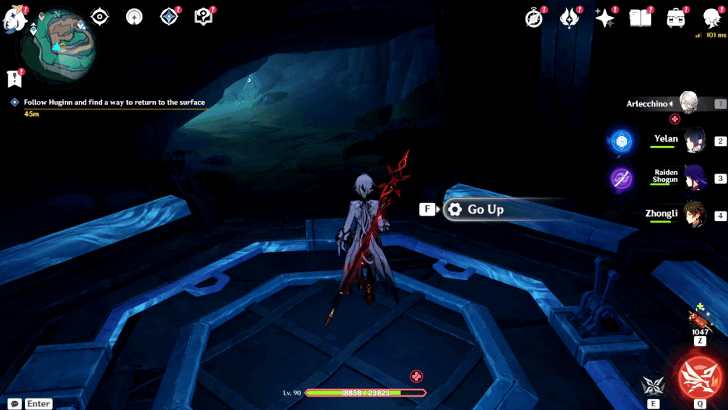 Go past the destroyed wall and hop down to the platform It is the lift you used to go down the area. Activate it to get back up. |
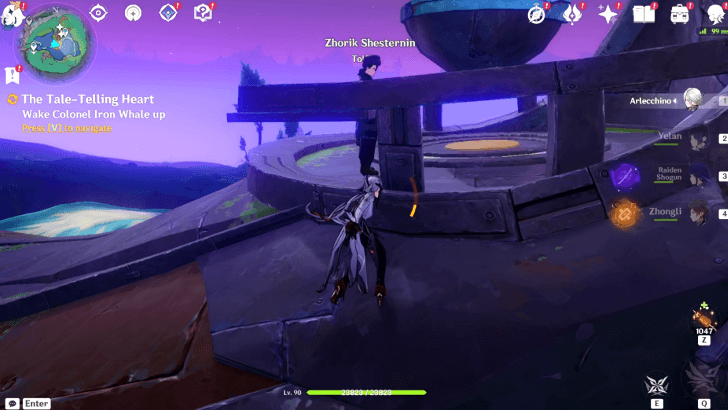
Wake Colonel Iron Whale Up

Now back up on the surface, return to the top of Colonel Iron Whale and wake him up. Doing so will unlock the Aurora lights above the lake, which are actually Moonlanes.
Ride the “Aurora” and reach the destination
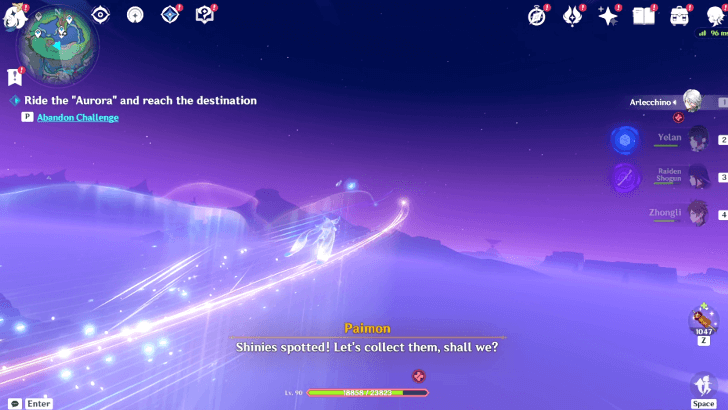
Transform into a kuuhenki and ride along the “Aurora”. Make sure to switch lanes when one is coming up to a dead end. Reach the destination, and the World Quest is complete!
The Tale-Telling Heart Rewards
Total Quest Rewards
| Total Quest Rewards |
 Primogem x50 |
 Mora x34000 |
|---|---|---|
 Hero's Wit x5 |
||

Special Rewards
| Quest Rewards | |
|---|---|
 Stratagema-Cognoscenti's Mask Stratagema-Cognoscenti's Mask |
 Photo with Colonel Iron Whale Photo with Colonel Iron Whale |
Throughout the World Quest, the Quest Items Stratagema-Cognoscenti's Mask, which is one of the Proof of Cognoscenti, and Photo with Colonel Iron Whale will be added to the player's inventory as special rewards.
Additonally, the Proof of Cognoscenti are Reed Miller's treasures, who is the founder of the treasure hoarders.
How to Get the Proof of Cognoscenti
Genshin Impact Related Guides

Other East of the Moon, West of the Sun Quest Guides
| East of the Moon, West of the Sun World Quest Guides | ||
|---|---|---|
| The Tale-Telling Heart | The Shoemaker's Children Go Barefoot | Whisper Beneath the Waves |
| Return to Sender | The Raven's Legacy | |
Comment
me and many other people are unable to obtain the lever due to a bug, is there a way to fix this?
Author

The Tale-Telling Heart Quest Guide


Rankings
- We could not find the message board you were looking for.
Gaming News

![Monster Hunter Stories 3 Review [First Impressions] | Simply Rejuvenating](https://img.game8.co/4438641/2a31b7702bd70e78ec8efd24661dacda.jpeg/show)
![The Liar Princess and the Blind Prince Review [PC] | Lovely to Look at but Tedious to Play](https://img.game8.co/4442586/8d95f5faf05780f1765ce7e0938bd825.jpeg/thumb)
![Marathon Cryo Archive Map Teased as [REDACTED] on Selection Screen](https://img.game8.co/4442236/6357203e58172f6de57f1991e7c39b22.png/thumb)

Popular Games

Genshin Impact Walkthrough & Guides Wiki
Umamusume: Pretty Derby Walkthrough & Guides Wiki
Pokemon Pokopia Walkthrough & Guides Wiki
Honkai: Star Rail Walkthrough & Guides Wiki
Monster Hunter Stories 3: Twisted Reflection Walkthrough & Guides Wiki
Arknights: Endfield Walkthrough & Guides Wiki
Wuthering Waves Walkthrough & Guides Wiki
Zenless Zone Zero Walkthrough & Guides Wiki
Pokemon TCG Pocket (PTCGP) Strategies & Guides Wiki
Monster Hunter Wilds Walkthrough & Guides Wiki


Recommended Games
Diablo 4: Vessel of Hatred Walkthrough & Guides Wiki
Cyberpunk 2077: Ultimate Edition Walkthrough & Guides Wiki
Fire Emblem Heroes (FEH) Walkthrough & Guides Wiki
Yu-Gi-Oh! Master Duel Walkthrough & Guides Wiki
Super Smash Bros. Ultimate Walkthrough & Guides Wiki
Pokemon Brilliant Diamond and Shining Pearl (BDSP) Walkthrough & Guides Wiki
Elden Ring Shadow of the Erdtree Walkthrough & Guides Wiki
Monster Hunter World Walkthrough & Guides Wiki
The Legend of Zelda: Tears of the Kingdom Walkthrough & Guides Wiki
Persona 3 Reload Walkthrough & Guides Wiki


All rights reserved
Copyright© 2012-2024 HoYoverse — COGNOSPHERE. All Rights Reserved.
The copyrights of videos of games used in our content and other intellectual property rights belong to the provider of the game.
The contents we provide on this site were created personally by members of the Game8 editorial department.
We refuse the right to reuse or repost content taken without our permission such as data or images to other sites.
The lever doesn't show up after defeating the treasure hoarders. I hope this gets fixed because I can't complete this quest.