Aqueous Tidemarks Quest Guide
✉ Send your thoughts in our Genshin 6.4 Patch Survey!
★ Exclusive: Dive back in time with the Meta History
◆ Hot: Version 6.4, Luna 5 Codes
◆ Builds: Varka, Flins, Skirk, Escoffier
◆ Events: Travelers' Tales, He Who Caught the Wind
◆ Future: Linnea, Version 6.5 Luna VI

Aqueous Tidemarks is a World Quest introduced in Genshin Impact 4.0. See how to unlock this quest, its walkthrough, and all the rewards of this quest here in this guide!
List of Contents
How to Unlock Aqueous Tidemarks
Complete the Prerequisites
| Quest Unlock Requirements | |
|---|---|
 |
|
 |
Aha! Looks like Aqueous Tidemarks is not locked behind any quest! |
Go to the Court of Fontaine
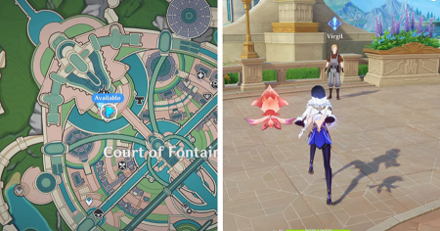
Aqueous Tidemarks is located at Court of Fontaine Region, in the nation of Fontaine. You can find Virgil, who will give you the quest, right in front of the area's Statue of the Seven!
How to Get to Fontaine and Map Guide
Aqueous Tidemarks Walkthrough
Search for and Collect Clues
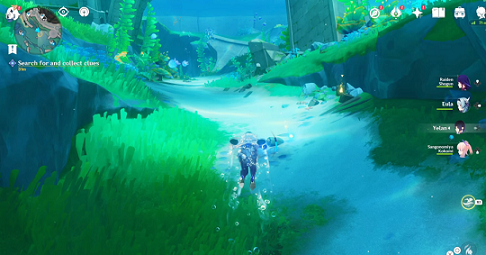
You agreed to help Virgil investigate the headquarters of Lliacruces Forum, now a drowned ruin. After preparing his diving gear, you will be teleported to a shore south of the Court of Fontaine.
Get in the water and dive southward while investigating the marked spots on the map. There are a total of four clues to collect along the way.
Explore the Former Site of the Liliacruces Forum
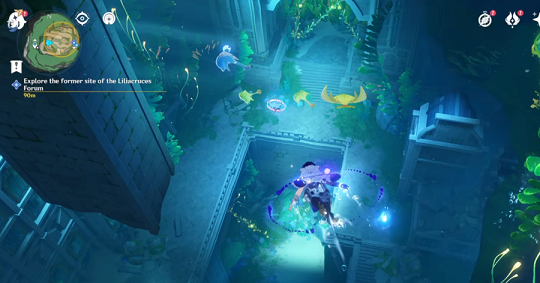
A few more meters past the fourth clue is the entrance to the Insitute of Natural Philosophy. At the center of this room is a chest guarded by three Hunter's Rays (the green ones).
Use your Transoceanic Sourcewater on the Xenochromatic Hunter's Ray (the blue one with a mark) to gain their water blade attack and defeat the green Hunter's Rays.
This will unlock the chest where the Ancient Key is found. It's a surprise tool that will help us later!
| Note: If you've been in this area and opened the chest before starting Aqueous Tidemarks, you can find the Ancient Key inside one of the other chests in this room. |
Proceed Deeper
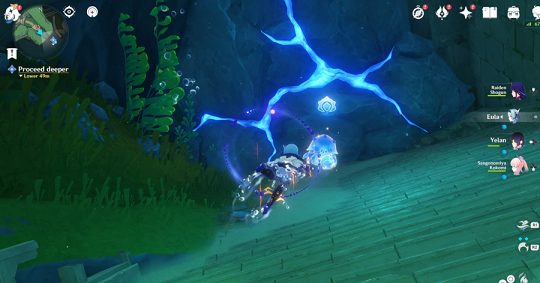
Swim east and cut the nodes on the seagrasses to clear a path forward. You'll find a Xenochromatic Armored Crab at the end of the tunnel that you can absorb to gain shockwave attacks!
Shatter the rocks blocking the tunnel using your new ability. You'll find another roadblock ahead but with the Ancient Key from earlier, the next objective is just a few clicks away!
Search for and Collect Clues
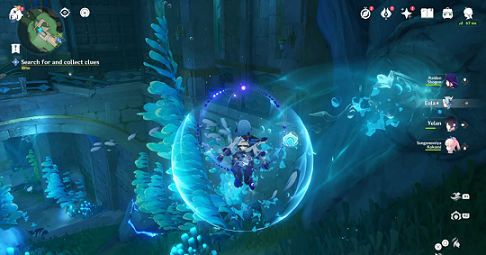
Looks like you're almost there! Keep following the linear path until you reach the objective marker.
Use the Armored Crab's abilities to resist the high-pressure water vents, as well as defend yourself from the pesky Bullet Barnacles!
Leave the Marker and Talk to Virgil
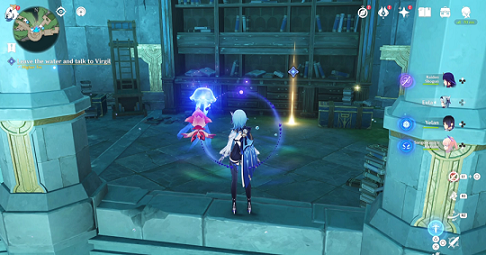
After examining the shut door, ascend to the upper level and talk to Virgil.
Find a Way to Open a Path Forward
Circle around the room (or just get to the other end of the platform by swimming acrosss) to find a mechanism locked by Pneumousia Relays. The relays should all be in a Balanced state to remove the seal.
How to Solve the Pneumousia Relays Puzzle
To put it simply, the light in the relays should be colored green. You can do this by hitting the relay in Ousia state (purple) with a Pneuma (yellow) energy block. This also works the other way around.
| Opening the Path Forward | |
|---|---|
| 1 | 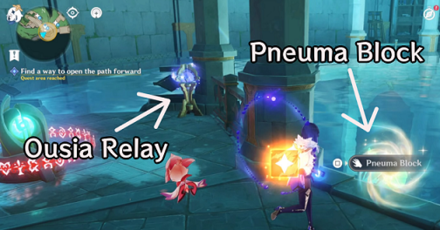 Pick up the Pneuma energy block near the edge and hit the Ousia relay. |
| 2 | 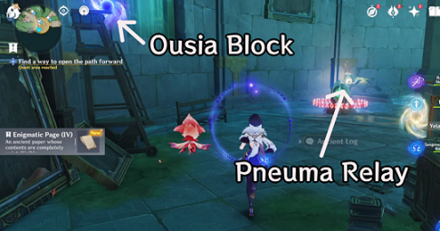 Pick up the Ousia energy block at the top of the steps and hit the Pneuma relay. |
Proceed Deeper
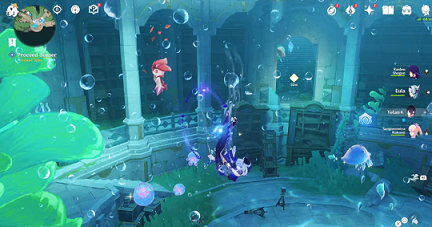
Dive back down into the water and go through the newly opened door on the lower floor. This corridor will lead you back to the floor above, but you need to jump back down through a hole at the end.
You don't have to descend too deep as your destination is just about the same level as where you jumped from. Don't forget to follow the objective marker in case you get lost!
Defeat the Clockwork Meka
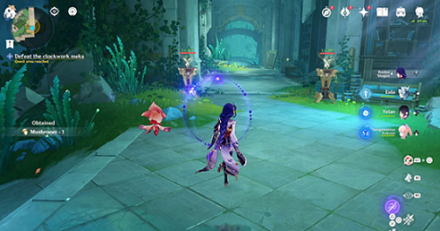
Defeat the two Clockwork Mekas to proceed. They are stationary but can attack from a distance like turrets. Should be a piece of cake for you!
Proceed Deeper
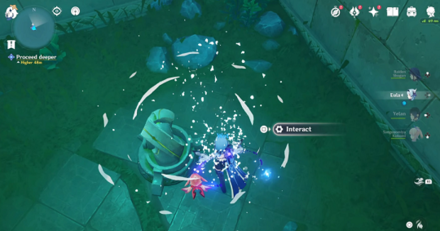
Hmm... this Virgil guy is REALLY getting kinda suspicious. Oh well, we've already made it this far. Let's continue finding this treasure he's talking about!
Further down the path, you'll run into a Seelie. Following it will lead you to your destination and the next objective.
Defeat the Ruin Guard and Find a Way to Open the Door
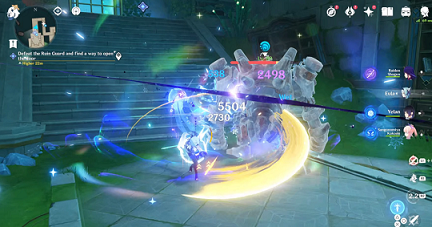
There will be a Ruin Guard on standby at the other end of the hall. Approach it so it activates then defeat it so we can move on.
The other half of this objective is a little easier than the first. Simply go up the stairs and interact with the mechanism to open the gate.
Find the Secret Treasure!
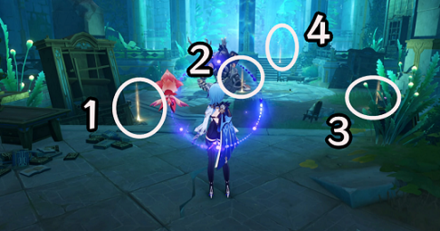
Here we go! Examine the four marked spots in the room and see if you can find the treasure: (1) Kamera with some books, (2) buried machine, (3) Ruin Grader, (4) glass wall.
After checking and finding nothing, a cutscene will start. Hope you're ready for a fight!
Fight and Survive
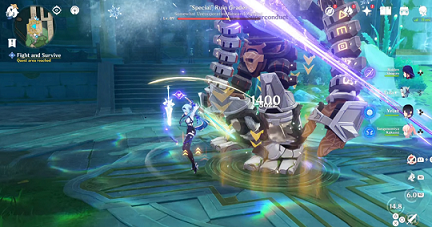
This "Special" Ruin Grader moves and fights like any other. What makes it different is that it can repair itself back to its original state each time it runs out of HP.
Deplete its health bar twice and Paimon will point out that you can make use of the glass wall to defeat it. Hurry back to the glass wall and break it with your attacks to proceed.
Follow the Current...
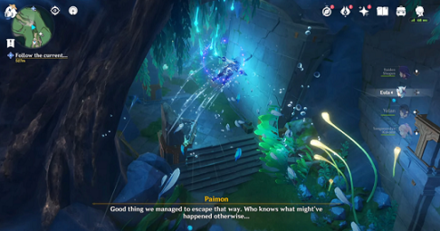
Go with the flow as you get flushed out of the ruins to complete the quest. A Luxurious Chest should be waiting for you at the end, next to a teleport waypoint. Sweet!
Aqueous Tidemarks Rewards
Total Quest Rewards
| Total Quest Rewards |
 Primogem x40 |
 Mora x30000 |
|---|---|---|
 Hero's Wit x3 |
 Adventure EXP x350 |
|
Genshin Impact Related Guides

Other Fontaine Quest Guides
Comment
I think i accidentally broke this quest by defeating the stingrays with my m1...
Author
Aqueous Tidemarks Quest Guide
improvement survey
03/2026
improving Game8's site?

Your answers will help us to improve our website.
Note: Please be sure not to enter any kind of personal information into your response.

We hope you continue to make use of Game8.
Rankings
Gaming News
Popular Games

Genshin Impact Walkthrough & Guides Wiki

Honkai: Star Rail Walkthrough & Guides Wiki

Umamusume: Pretty Derby Walkthrough & Guides Wiki

Pokemon Pokopia Walkthrough & Guides Wiki

Resident Evil Requiem (RE9) Walkthrough & Guides Wiki

Monster Hunter Wilds Walkthrough & Guides Wiki

Wuthering Waves Walkthrough & Guides Wiki

Arknights: Endfield Walkthrough & Guides Wiki

Pokemon FireRed and LeafGreen (FRLG) Walkthrough & Guides Wiki

Pokemon TCG Pocket (PTCGP) Strategies & Guides Wiki
Recommended Games

Diablo 4: Vessel of Hatred Walkthrough & Guides Wiki

Fire Emblem Heroes (FEH) Walkthrough & Guides Wiki

Yu-Gi-Oh! Master Duel Walkthrough & Guides Wiki

Super Smash Bros. Ultimate Walkthrough & Guides Wiki

Pokemon Brilliant Diamond and Shining Pearl (BDSP) Walkthrough & Guides Wiki

Elden Ring Shadow of the Erdtree Walkthrough & Guides Wiki

Monster Hunter World Walkthrough & Guides Wiki

The Legend of Zelda: Tears of the Kingdom Walkthrough & Guides Wiki

Persona 3 Reload Walkthrough & Guides Wiki

Cyberpunk 2077: Ultimate Edition Walkthrough & Guides Wiki
All rights reserved
Copyright© 2012-2024 HoYoverse — COGNOSPHERE. All Rights Reserved.
The copyrights of videos of games used in our content and other intellectual property rights belong to the provider of the game.
The contents we provide on this site were created personally by members of the Game8 editorial department.
We refuse the right to reuse or repost content taken without our permission such as data or images to other sites.


![Everwind Review [Early Access] | The Shaky First Step to A Very Long Journey](https://img.game8.co/4440226/ab079b1153298a042633dd1ef51e878e.png/thumb)

![Monster Hunter Stories 3 Review [First Impressions] | Simply Rejuvenating](https://img.game8.co/4438641/2a31b7702bd70e78ec8efd24661dacda.jpeg/thumb)


All good now! Turns out i just needed to rejoin