When War Songs Rise Quest Guide
★ Exclusive: Dive back in time with the Meta History
◆ Hot: Version 6.4, 6.4 Codes, Version 6.5 Livestream
◆ Builds: Varka, Flins, Skirk, Escoffier
◆ Events: Operation Stronghold Defense
◆ Upcoming: Version 6.5, Linnea
When War Songs Rise is the third quest under the Nightingale's Song quest chain in Genshin Impact Luna IV. See Focal Point of Ancient Array guides, how to unlock the quest, its walkthrough, and all the rewards in this guide!
List of Contents
How to Unlock When War Songs Rise
Complete Nightingale's Song Chapter 1

To unlock When War Songs Rise, you must have completed the previous subquests: Wind-Stirred Ripples and Tower of Inversion! These subquests fall under Chapter 1 of the Nightingale's Song quest chain and can be completed in any order.
Progress through The Moonlit Watcher
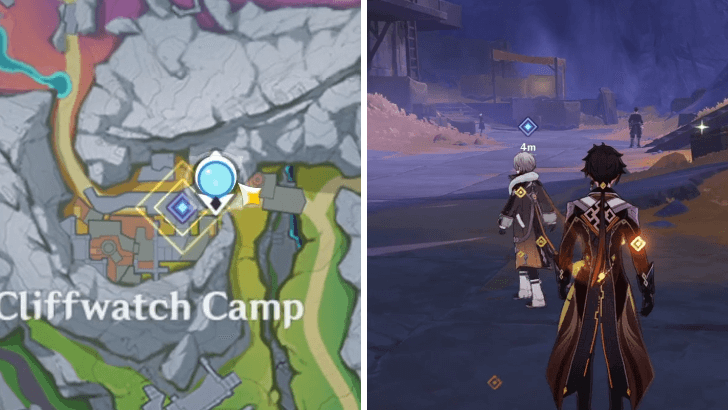
To start When War Songs Rise, you'll need to meet Illuga at Cliffwatch Camp. However, he'll be occupied first in The Moonlit Watcher Meeting Point quest. This can be found next to the Ashveil Peak Statue of the New Moon.
You just need to go through the introductions and strategy meeting of Illuga and their team to officially unlock When War Songs Rise. The rest of the Meeting Point quest can be completed at another time.
When War Songs Rise Walkthrough
Gather Your Strength
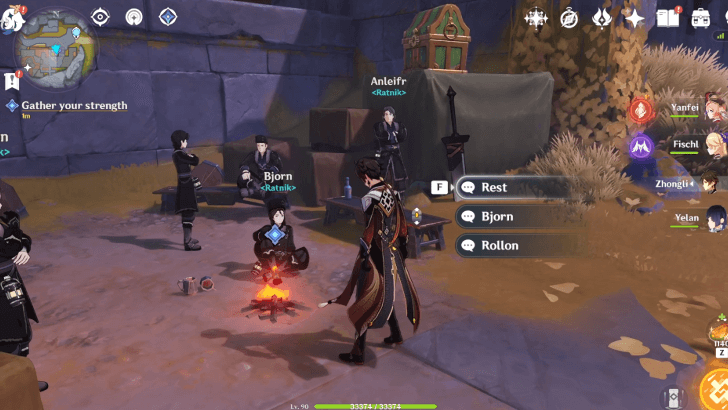
Before the operation begins, rest at the campfire just a few steps southwest of the Ashveil Peak Statue of the New Moon. After a cutscene, you'll be brought to the outskirts of the Cliffwatch Camp.
Go to the Clifftop Camp
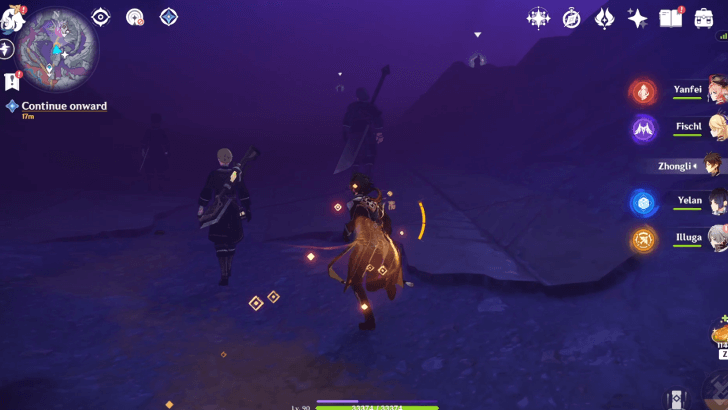
Keep heading north until you reach an area that's covered in fog. Along the way, you'll need to defeat several groups of monsters to continue onwards. Once you've reached your destination, another cutscene will play.
Defeat the Monsters

You'll need to fight the Scourge of Endless Decay and other Wild Hunt monsters. Once you get the Scourge of Endless Decay's health down by a significant amount, the fight will automatically end and the monsters will take their leave.
Rebuild the Barrier
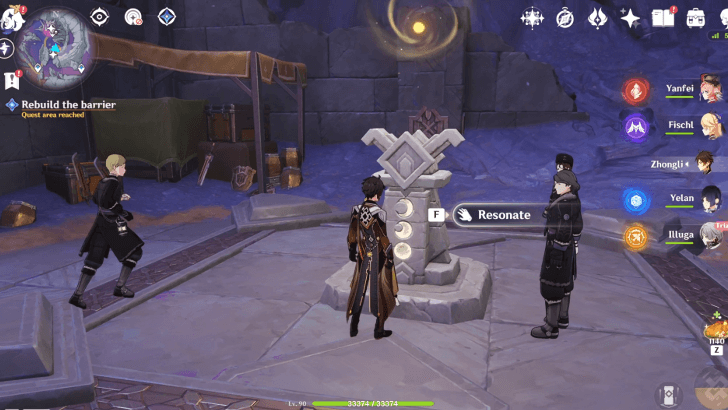
Follow the quest marker towards the southeast and go up the stairs to resonate with the sealing array and rebuild the barrier.
Activate Three Verdant Crests
| All Verdant Crest Locations | ||
|---|---|---|
 |
||
| Jump to a Section! | ||
| Focal Point (I) | Focal Point (II) | Focal Point (III) |
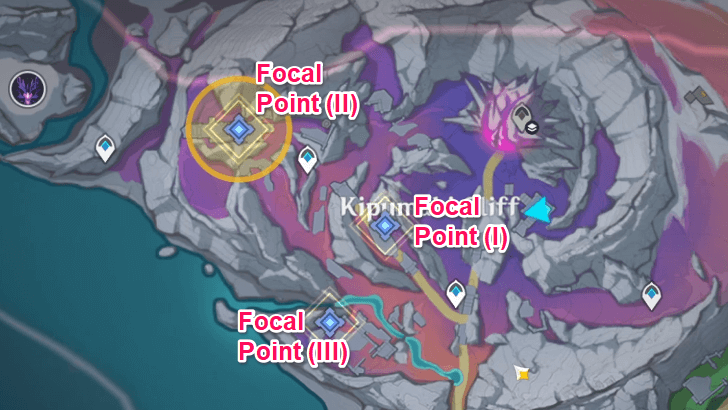
To restore the power of the sealing array, you'll need to activate all the Verdant Crests. The first three Verdant Crests in When War Songs Rise can be activated by completing the Focal Point of Ancient Array mini-quests, which can be done in any order.
Focal Point of Ancient Array (I) Guide
| Focal Point of Ancient Array (I) Guide | |
|---|---|
| 1 | 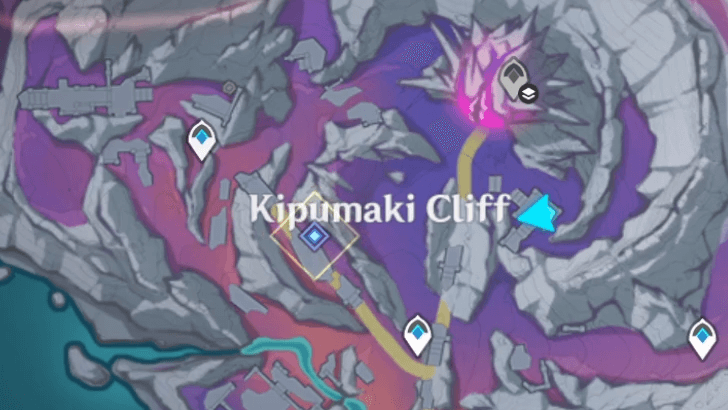 The Verdant Crest of Focal Point of Ancient Array (I) is located around the center of the battlefield. This is along the path between the southern and western waypoints in Kipumaki Cliff. |
| 2 | 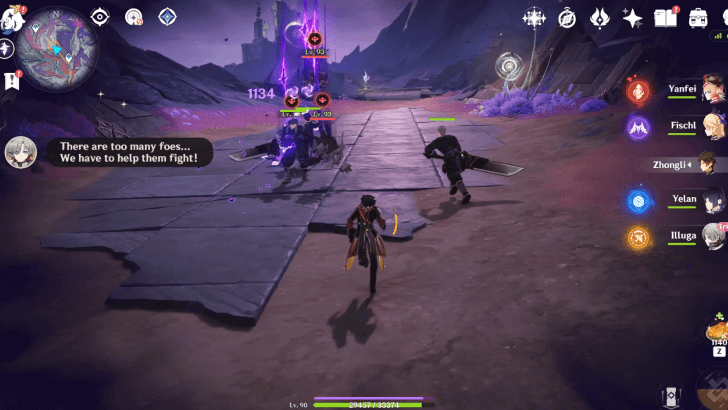 Help the others defeat the groups of monsters to clear out the area. |
| 3 | 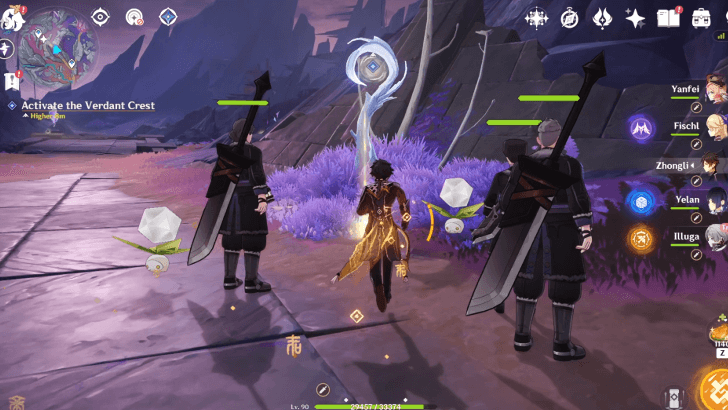 Once the area is safe again, you can activate the Verdant Crest. |
▲ Back to All Crest Locations▲
Focal Point of Ancient Array (II) Guide
| Focal Point of Ancient Array (II) Guide | |
|---|---|
| 1 | 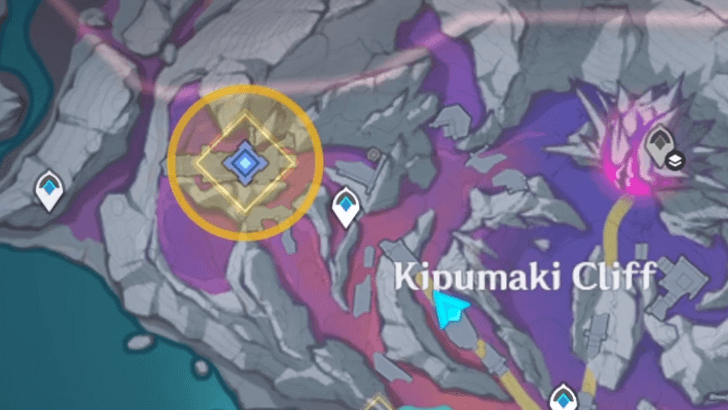 The Verdant Crest of Focal Point of Ancient Array (II) is located around the western area of the battlefield. Just head northwest from the western waypoint in Kipumaki Cliff to reach it. |
| 2 | 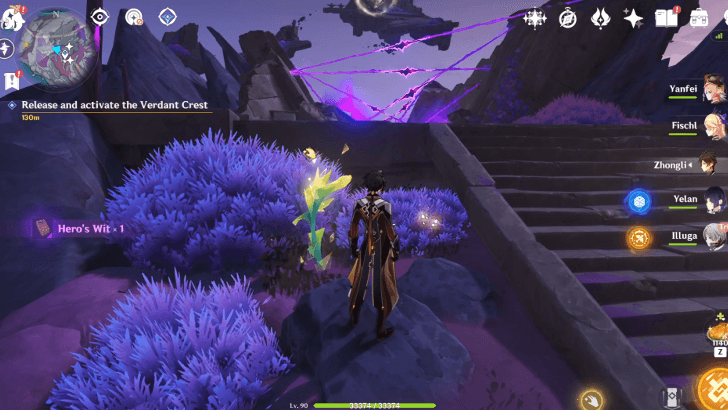 Once you arrive at the destination, the Evil Eye will shoot at the Verdant Crest and block the way with Abyssal Riftlines. Absorb the fruit of the Super Sharp Spirebloom by the stairs to get its abilities. |
| 3 | 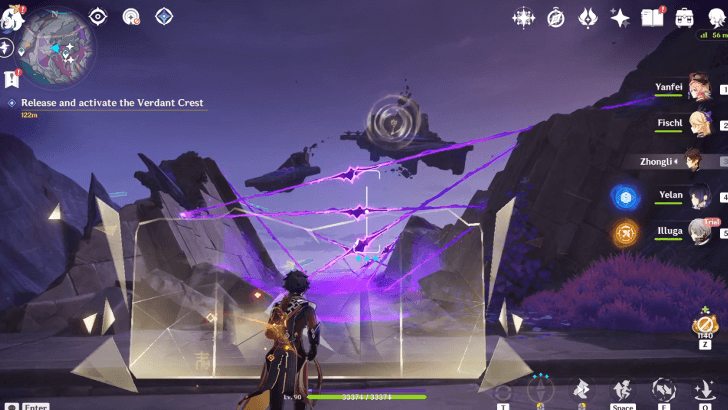 Shoot kuuvakhi lightblades at the Abyssal Riftlines to clear the way and head up to the Verdant Crest. Try to line up as many Riftlines as you can and rotate the lightblade accordingly to hit more of them in one go. |
| 4 | 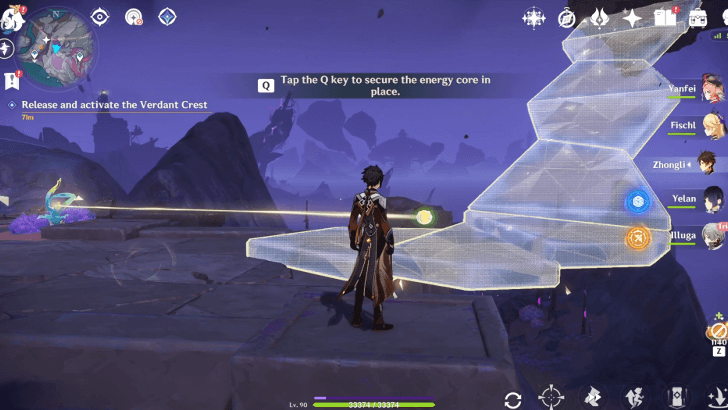 Pick up the energy core of the Intricate Bloom and stand on the corner next to the broken edge of the pathway ahead. Once you see the ramp form properly, you can secure the core into place. |
| 5 | 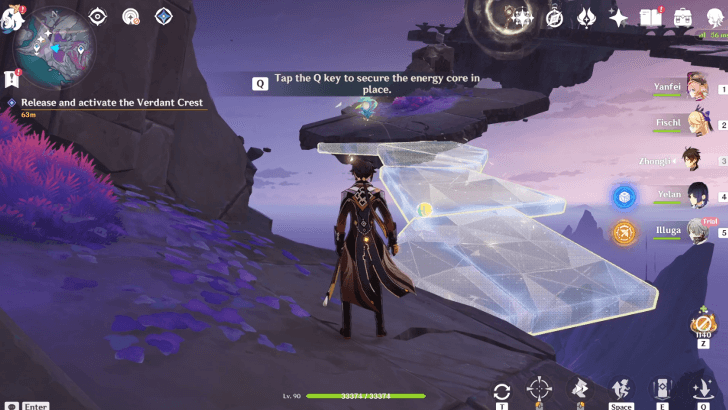 Climb up the ramp and pan the camera to your right once you're on the next platform. Another Intricate Bloom will be up ahead. Once you absorb its core, the next bridge should automatically form without needing adjustments. |
| 6 | 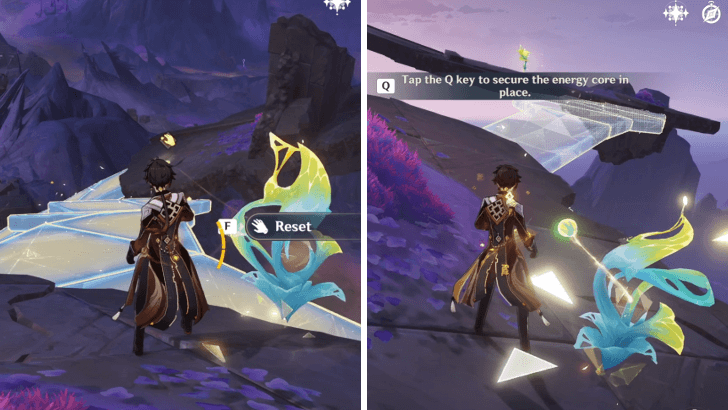 Cross over and reset the Intricate Bloom that was used to form the previous bridge. You can put the core next to the Intricate Bloom to form the bridge leading to the next platform. |
| 7 | The next platform will have another Spirebloom. Absorb its fruit again and use its abilities to hold up a shield against the Abyssal energy shot by the Evil Eyes. Once the shield flashes, you can release your hold to unleash a counterattack. Repeat this until all Evil Eyes are purified. |
| 8 | 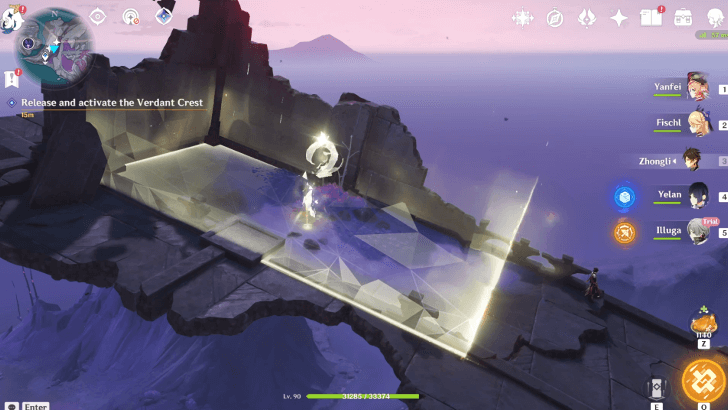 Once the area is clear, you can release the Verdant Crest. Keep moving backwards to bring the crest away from the wall. After moving back enough, it will automatically slot into place and allow you to activate the crest. |
▲ Back to All Crest Locations▲
Focal Point of Ancient Array (III) Guide
| Focal Point of Ancient Array (III) Guide | |
|---|---|
| 1 | 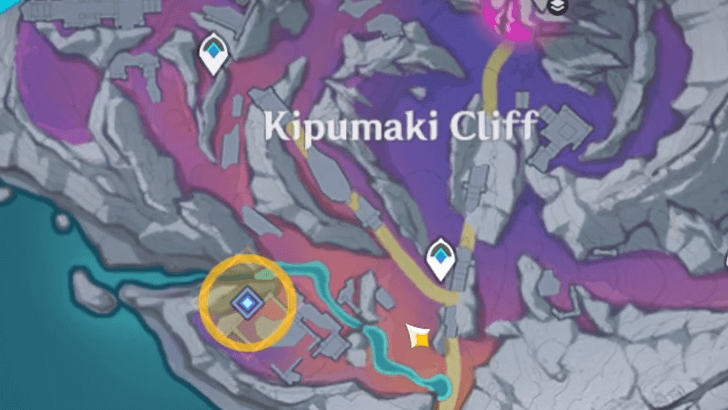 The Verdant Crest of Focal Point of Ancient Array (III) is located around the southern area of the battlefield. Just head west from the southern waypoint in Kipumaki Cliff to reach it. |
| 2 | 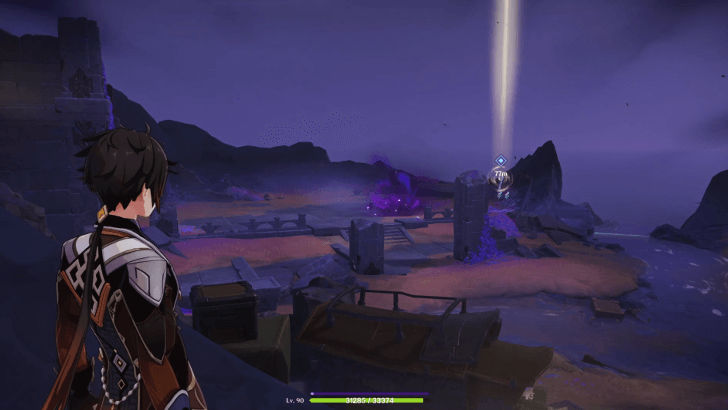 Get closer to the area with the third Verdant Crest. A cutscene should automatically play out. |
| 3 | You'll need to fight the Scourge of Endless Decay again, but the camera will be shifted to a top-down view. While dodging attacks, pick up the Energy Orbs that spawn on the field and unleash lightblades at the Scourge to deal damage to it. |
| 4 | The Scourge will replenish its health after you bring it down once. Eventually, Illuga will offer additional help, which allows you to unleash multiple lightblades in quick succession and get automatic healing. You can stop dodging and just keep attacking the Scourge until its HP goes all the way down. |
| 5 | 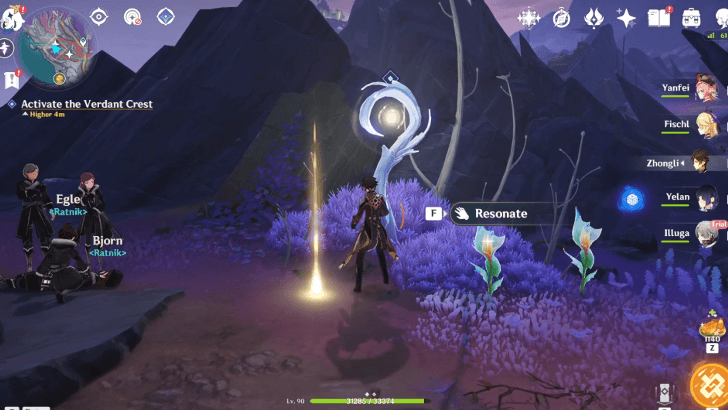 After the next cutscene, you can activate the third Verdant Crest nearby. |
▲ Back to All Crest Locations▲
Activate the Last Verdant Crest
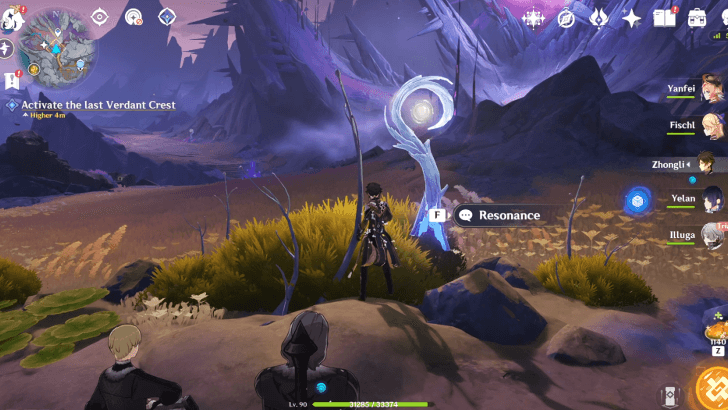
Follow the quest marker and activate the last Verdant Crest, which is located a few steps south of the southern waypoint in Kipumaki Cliff.
Defeat the Evil Eye
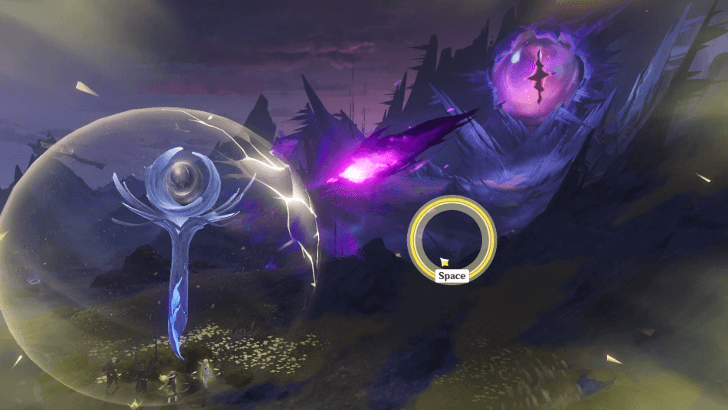
After activating the last Verdant Crest, the giant Evil Eye in the distance will shoot at it. You'll need to counterattack by pressing the designated button once the large yellow circle lines up with the smaller ring.
Press On to the Battlefield
With the Evil Eye defeated, a hole leading underground has opened up. You'll need to head down and face the monster on the final battlefield.
How to Press On to the Battlefield
| How to Press On to the Battlefield | |
|---|---|
| 1 | 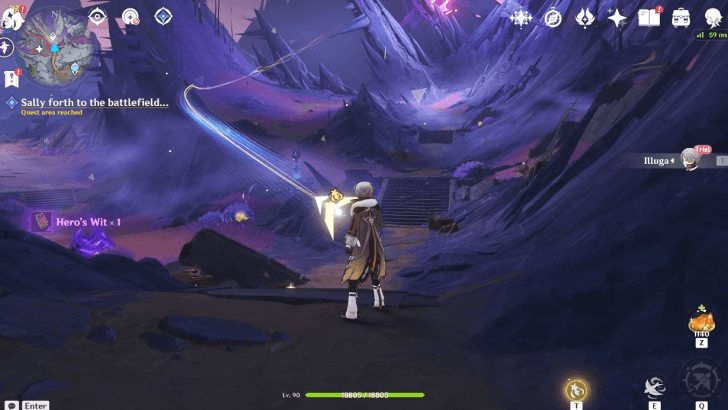 After the cutscene, ride the Moonlane in front of you to start making your way underground. |
| 2 | 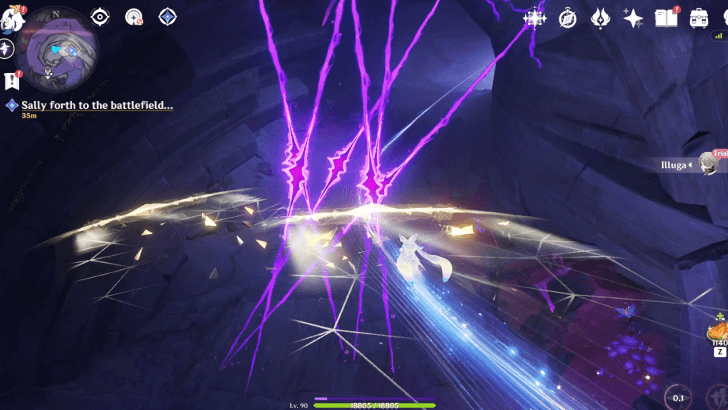 On the way down, Abyssal Rifts will block the way. Shoot lightblades whenever they appear to get rid of them. |
| 3 | 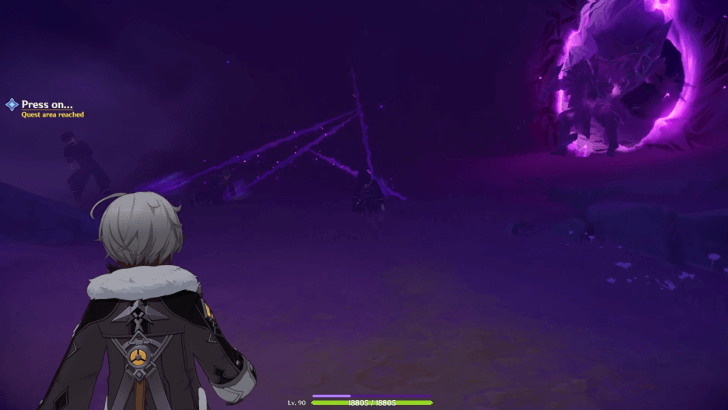 Once you're underground, various illusions of Illuga's past will appear along the path. Keep moving forward as the memories play out. Whenever pink clouds fly towards you, press the Attack button to get rid of them. |
| 4 | 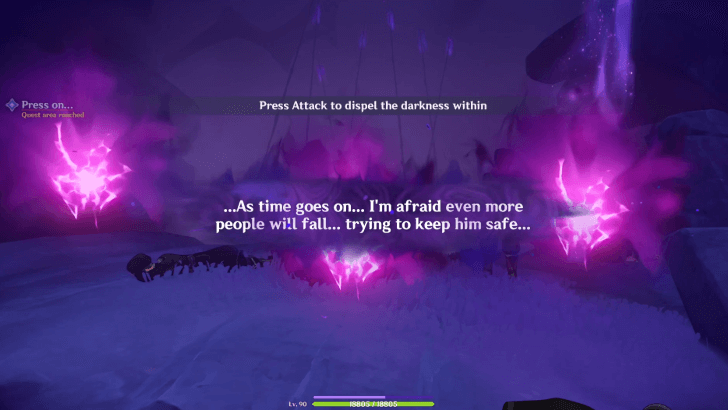 More pink clouds will appear after seeing the memory of Nikita. After a brief period of fighting them off, they'll automatically be cleared out as Illuga musters their courage. |
| 5 | 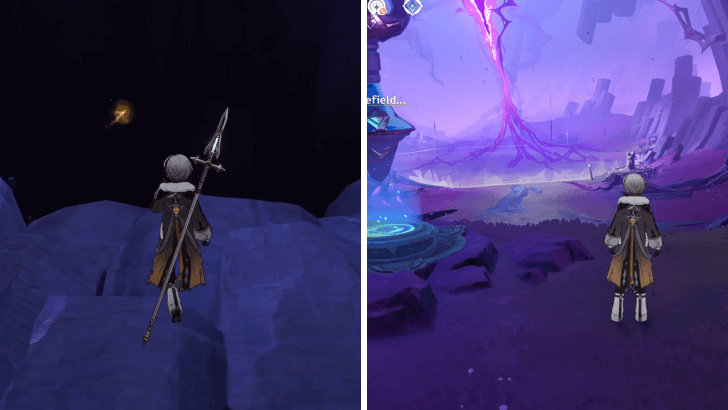 Jump down the hole at the end of the path to go deeper underground. The battlefield will be up ahead, just past the teleport waypoint. |
Defeat the Monsters
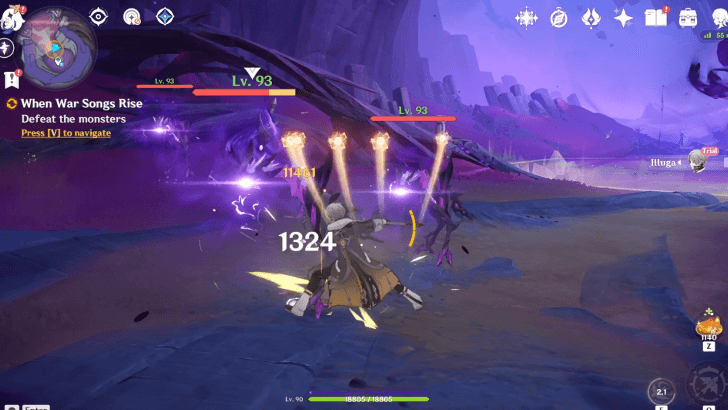
You'll need to use Illuga to fight off the monsters. The fight is scripted to end after some time, so just keep attacking the monsters as much as you can.
Repair the Seal
While the others are fighting off the monsters, you'll need to retrieve the scattered Sealing Blades and return them to the correct Scabbards. To do this, you must match the pattern of the blade's hilt, with the pattern on the Scabbard.
How to Repair the Seal
| How to Repair the Seal | |
|---|---|
| 1 | 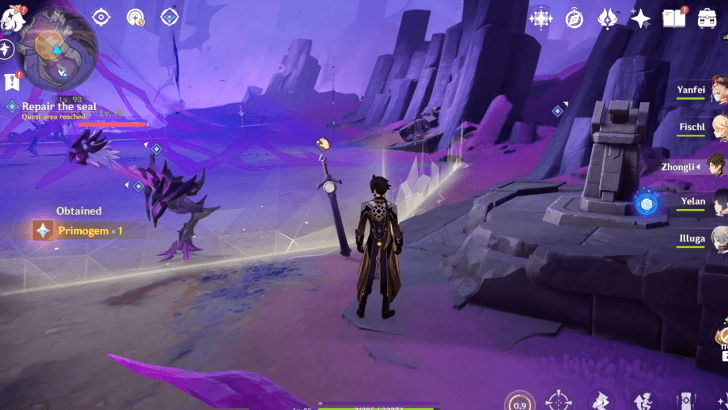 At the southeast area of the battlefield, the blade with a full moon on its hilt can be slotted into the scabbard right next to it. |
| 2 | 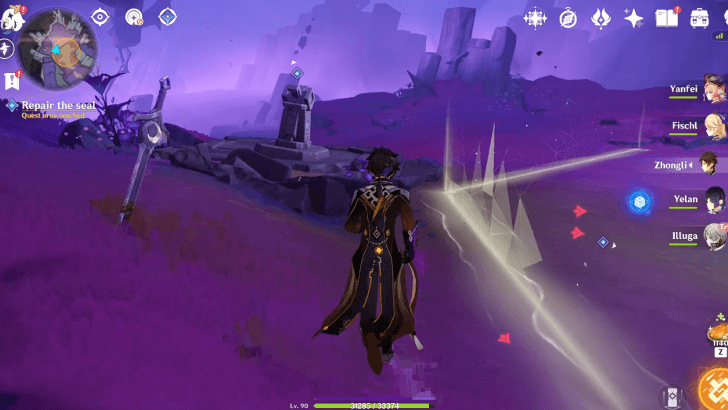 At the northwest area of the battlefield, the blade with the thinner crescent moon matches the scabbard behind it. |
| 3 | 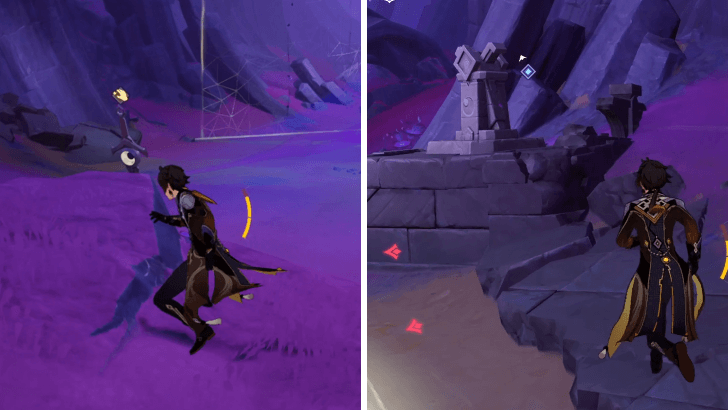 The last blade can be found at the north side of the battlefield. This can be slotted into the final scabbard at the southwest side. |
Defeat the Scourge of Endless Decay
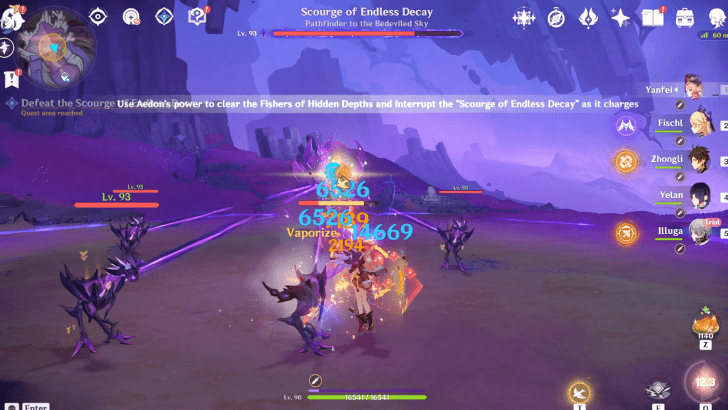
With the seal repaired, it's time for the final battle against the Scourge of Endless Decay. The boss will continuously spawn Fishers of the Hidden Depths, but you can instantly get rid of them by using Aedon's power on them.
Wiping out the summons whenever they appear will interrupt the Scourge. This gives you a brief window to unleash your attacks and do damage. You can just repeat the process of taking down summons and attacking the Scourge until the fight is over.
When War Songs Rise Information
Sub-Quest of Nightingale's Song
When War Songs Rise is a subquest of the quest, Nightingale's Song, which can be started by finding either Wind-Stirred Ripples or Tower of Inversion in Nod-Krai.
When War Songs Rise is the third part of the Nightingale's Song world quest chain.
Nightingale's Song World Quest Guide
When War Songs Rise Rewards
Total Quest Rewards
| Total Quest Rewards |
 Primogem x50 |
 Mora x54,500 |
|---|---|---|
 Hero's Wit x5 |
||

Genshin Impact Related Guides

Other Nightingale's Song Quest Guides
| Nightingale's Song World Quest Guides | ||
|---|---|---|
| Nightingale's Song | Wind-Stirred Ripples | Tower of Inversion |
| When War Songs Rise | The Last Night, the First Light | |
Comment
Author

When War Songs Rise Quest Guide


Rankings
Gaming News

![Death Stranding 2: On The Beach [PC] Review | A Port That Delivers](https://img.game8.co/4447392/15310a0c9aa1b6843bb713b2ea216930.jpeg/show)


Popular Games

Genshin Impact Walkthrough & Guides Wiki
Umamusume: Pretty Derby Walkthrough & Guides Wiki
Crimson Desert Walkthrough & Guides Wiki
Monster Hunter Stories 3: Twisted Reflection Walkthrough & Guides Wiki
Honkai: Star Rail Walkthrough & Guides Wiki
Pokemon Pokopia Walkthrough & Guides Wiki
The Seven Deadly Sins: Origin Walkthrough & Guides Wiki
Wuthering Waves Walkthrough & Guides Wiki
Zenless Zone Zero Walkthrough & Guides Wiki
Arknights: Endfield Walkthrough & Guides Wiki


Recommended Games
Fire Emblem Heroes (FEH) Walkthrough & Guides Wiki
Diablo 4: Vessel of Hatred Walkthrough & Guides Wiki
Cyberpunk 2077: Ultimate Edition Walkthrough & Guides Wiki
Yu-Gi-Oh! Master Duel Walkthrough & Guides Wiki
Super Smash Bros. Ultimate Walkthrough & Guides Wiki
Pokemon Brilliant Diamond and Shining Pearl (BDSP) Walkthrough & Guides Wiki
Elden Ring Shadow of the Erdtree Walkthrough & Guides Wiki
Monster Hunter World Walkthrough & Guides Wiki
The Legend of Zelda: Tears of the Kingdom Walkthrough & Guides Wiki
Persona 3 Reload Walkthrough & Guides Wiki


All rights reserved
Copyright© 2012-2024 HoYoverse — COGNOSPHERE. All Rights Reserved.
The copyrights of videos of games used in our content and other intellectual property rights belong to the provider of the game.
The contents we provide on this site were created personally by members of the Game8 editorial department.
We refuse the right to reuse or repost content taken without our permission such as data or images to other sites.