This survey will take about 1 minute.
Your answers will help us to improve our website.
Genshin Impact
A Blade From Above Day 2 Guide
✉ Send your thoughts in our Genshin 6.4 Patch Survey!
★ Exclusive: Dive back in time with the Meta History
◆ Hot: Version 6.4, Luna 5 Codes
◆ Builds: Varka, Flins, Skirk, Escoffier
◆ Events: Travelers' Tales, He Who Caught the Wind
A Blade From Above is Day 2 of Triumphant Frenzy in Genshin Impact 4.4. Learn how to complete the Pro difficulty challenge, recommended teams, and all the rewards here!
| Triumphant Frenzy Stage Guides | ||||
|---|---|---|---|---|
 Stage 1 Stage 1 |
 Stage 2 Stage 2 |
 Stage 3 Stage 3 |
 Stage 4 Stage 4 |
 Stage 5 Stage 5 |
List of Contents
How to Beat A Blade From Above
Round 1
Round 1 Team Comp
| Suggested Team Comp | |||
|---|---|---|---|
|
|
|
|
|
For the first selection, players are given a chance to either pick a possible Hyperbloom team with Alhaitham or a Vaporize Team, with Diluc.
Both teams can clear out the first round. However, we recommend going for the Vaporize team, as this gives you both Xianyun and Bennett as options for later rounds.
Round 1 Enemies and Strategy
|
|
|
|
|
|
|
|
|
The enemies listed above will spawn by the order they are listed in, players will face the 2 Eremite-Daythunder and a Eremite-Desert Clearwater in the first wave then followed by the Mitachurls.
The main priority to do to clear this round is to set up for Diluc's field time every wave to ensure maximum damage. Make sure to properly rotate through the team and use their respective Elemental Bursts properly.
Round 2
Round 2 Team Comp
| Trial Character to Select | |
|---|---|
|
|
|
| Suggested Team Comp | |||
|---|---|---|---|
|
|
|
|
|
For the second round, you will be given two options for a Cryo Main DPS, which would be Ayaka or Wriothesley. Both are decent picks, so choose which one you are more comfortable playing with.
Diona is also recommended pick here for both shielding and healing, as well as utilizing Cryo reasonance for extra CRIT Rate.
Round 2 Enemies and Strategy
|
|
|
|
|
|
|
|
For the second round you will be facing enemies that can easily be Frozen. With this, prioritize dealing immense Cryo Damage the moment they spawn in.
Ayaka's Elemental Burst works wonders here, as each set of enemies will spawn near each other. Especially when dealing with the Hydro Mimics.
Worth mentioning is Xianyun in this team comp, as you will mainly use her Elemental Skill to cause Swirl and utilize that extra True DMG from her own plunging attacks.
Round 3
Round 3 Team Comp
| Trial Character to Select | |
|---|---|
|
|
|
| Suggested Team Comp | |||
|---|---|---|---|
|
|
|
|
|
Keeping up with the theme of Plunge attacks, we recommend choosing Gaming and Kazuha. These two are great picks for this round as to capitalize on dealing great amounts of Pyro DMG.
Round 3 Enemies and Strategy
|
|
|
|
|
|
As mentioned earlier, Having Pyro in the team can clear these enemies out faster due to having a counter to all Elemental Shields present in this round.
We recommend seting up Bennett's burst first, for Kazuha to swirl. With this, Gaming can greatly benefit from these as to further boost his DMG. Diona can also shield party members just in case.
Round 4
Round 4 Team Comp
| Trial Character to Select | |
|---|---|
|
|
|
| Suggested Team Comp | |||
|---|---|---|---|
|
|
|
|
|
For this round, you will be facing a lot of enemies, with various Elemental Auras. Anemo Teams works really well here, despite its limitations to Elemental Reactions.
Gaming can be replaced here, but you can still use him as a shieldbreaker against the Cryo Abyss Mage and Cryo Slime, or as a backup Main DPS with Kazuha.
Round 4 Enemies and Strategy
|
|
|
|
|
|
|
|
|
|
|
For the last round, there will only be two types of enemies that will spawn. It is important to note that All slimes will spawn spread out, while all Abyss Mages will spawn in tight groups.
This is a clear sign for players to utiilze Kazuha's grouping ability, as one instance of his Elemental skill can greatly deal damage to multiple enemies due to the abundance of Elemental auras to swirl.
Triumphant Frenzy Day 2 Challenge Details
Roiling Resolve Buff
| Roiling Resolve Buff | When the current active character's Plunging Attack hits an opponent, a shockwave will be unleashed at the opponent's postion, dealing a certain amount of/a greater amount of True DMG. This can be triggered once every 5s. |
|---|
If the characters in the party have less than 4 total Resolve, they will not be able to obtain buffs.
A Blade From Above Character Builds
| Character | Trial Weapons and Artifacts |
|---|---|
|
|
|
|
|
|
|
|
|
|
|
|
|
|
|
|
|
|
|
|
|
|
|
|
|
|
|
|
|
|
|
|
|
|
|
|
|
|
|
|
|
Triumphant Frenzy Day 2 Rewards
A Blade From Above Total Rewards
| Objectives | Rewards |
|---|---|
| Complete Normal Difficulty. |
|
| Complete Advanced Difficulty |
|
| Complete Pro Difficulty |
|
A Blade From Above Information
Part of Triumphant Frenzy Event
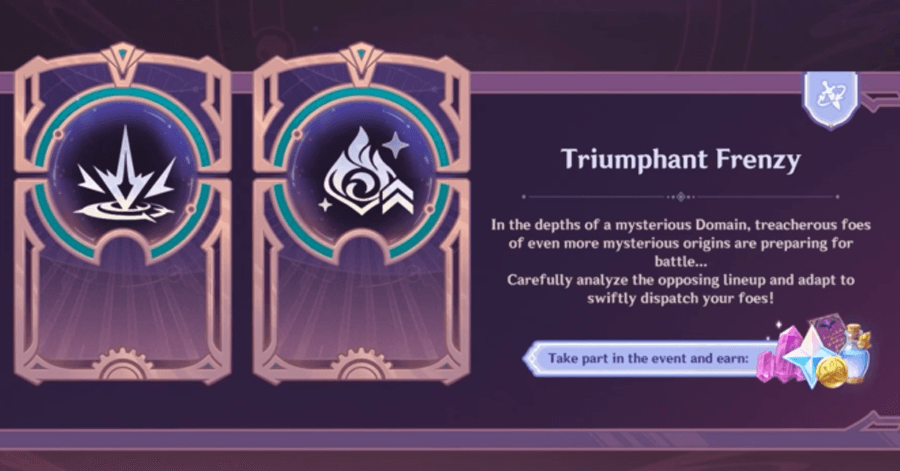
A Blade From Above is the second challenge in the Triumphant Frenzy Event. For this challenge, plunge through hordes of enemies to secure speedy clear times!
Genshin Impact Related Guides

| Triumphant Frenzy Stage Guides | |
|---|---|
| 1 - Rhythmic Quickstep |
2 - A Blade From Above |
| 3 - Blazing Like A Flaming Flower |
4 - Law of Concentrated White Light |
| 5 - The Shimmering Tree-Shadows |
|
All Genshin Impact Events

Comment
Author

A Blade From Above Day 2 Guide
Please participate in our site
improvement survey
03/2026
improvement survey
03/2026
Would you assist in
improving Game8's site?
improving Game8's site?

×
We are listening to our users' valuable opinions and discussing how to act on them.
The information collected through this survey will be used for the purpose of improving our services. In addition, the information will only be disclosed a part of a statistic in a format that will not allow identification of personal information.
Begin Survey
Not Now
×
Please rate each item regarding Game8.co's Advertisements.
Amount of Ads
Very Dissatisfied
Somewhat Dissatisfied
Fine
Somewhat Satisfied
Highly Satisfied
Placement of Ads
Timing of Ad Display
Ad Loading Speed
Safeness of Ads
Content of Ads
×
Please rate each item regarding Game8.co's Quality of Articles.
Amount of information
Very Dissatisfied
Somewhat Dissatisfied
Fine
Somewhat Satisfied
Highly Satisfied
Frequency of updates
Speed of new information
Accuracy of articles
Understandibility of articles
Readability of sentences
×
Please rate each item regarding Game8.co's Usability of the Site.
Ease of finding information
Very Dissatisfied
Somewhat Dissatisfied
Fine
Somewhat Satisfied
Highly Satisfied
Loading Speed
Use of Color
Font Size
Visibility of Images
Easy to Understand Layout
×
Please rate each item regarding Game8.co's Message Boards, Comments.
Ease of Writing
Very Dissatisfied
Somewhat Dissatisfied
Fine
Somewhat Satisfied
Highly Satisfied
Readability
Ease in Finding Information
Comment Quality
Comment Quantity
Admin Response
×
Please rate each item regarding Game8.co's Site's new design.
Please rate our site's new design
Very Dissatisfied
Somewhat Dissatisfied
Fine
Somewhat Satisfied
Highly Satisfied
Do you think that the website's design change makes the site easier to use?
Has the new design made it easier for you to find information on the site?
Has the new design improved the overall visual appeal of the site?
How would you rate your overall satisfaction with the new design of the site?
×
How likely are you to recommend Game8 to someone you know?
Very Unlikely
0
1
2
3
4
5
6
7
8
9
10
Very Likely
If you have other opinions regarding potential improvement to the website, please share them with us. We would appreciate your honest opinion.
Note: This is a free response section, so you can proceed without entering anything.
Note: Please be sure not to enter any kind of personal information into your response.
Note: Please be sure not to enter any kind of personal information into your response.
×
Thank You
×
Thank you for participating in our survey! Your answers will help us to improve the quality of our website and services.
We hope you continue to make use of Game8.
We hope you continue to make use of Game8.
Close


Rankings
Gaming News


![Slay the Spire 2 Review [Early Access] | Still the Deckbuilder to Beat](https://img.game8.co/4433115/44e19e1fb0b4755466b9e516ec7ffb1e.png/thumb)

Popular Games

Genshin Impact Walkthrough & Guides Wiki
Resident Evil Requiem (RE9) Walkthrough & Guides Wiki
Honkai: Star Rail Walkthrough & Guides Wiki
Monster Hunter Wilds Walkthrough & Guides Wiki
Umamusume: Pretty Derby Walkthrough & Guides Wiki
Pokemon TCG Pocket (PTCGP) Strategies & Guides Wiki
Arknights: Endfield Walkthrough & Guides Wiki
Wuthering Waves Walkthrough & Guides Wiki
Zenless Zone Zero Walkthrough & Guides Wiki
Digimon Story: Time Stranger Walkthrough & Guides Wiki


Recommended Games
Fire Emblem Heroes (FEH) Walkthrough & Guides Wiki
Yu-Gi-Oh! Master Duel Walkthrough & Guides Wiki
Super Smash Bros. Ultimate Walkthrough & Guides Wiki
Diablo 4: Vessel of Hatred Walkthrough & Guides Wiki
Pokemon Brilliant Diamond and Shining Pearl (BDSP) Walkthrough & Guides Wiki
Elden Ring Shadow of the Erdtree Walkthrough & Guides Wiki
Monster Hunter World Walkthrough & Guides Wiki
The Legend of Zelda: Tears of the Kingdom Walkthrough & Guides Wiki
Persona 3 Reload Walkthrough & Guides Wiki
Cyberpunk 2077: Ultimate Edition Walkthrough & Guides Wiki


All rights reserved
Copyright© 2012-2024 HoYoverse — COGNOSPHERE. All Rights Reserved.
The copyrights of videos of games used in our content and other intellectual property rights belong to the provider of the game.
The contents we provide on this site were created personally by members of the Game8 editorial department.
We refuse the right to reuse or repost content taken without our permission such as data or images to other sites.