This survey will take about 1 minute.
Your answers will help us to improve our website.
Genshin Impact
Observation: Soaring Will Day 3 Guide
✉ Send your thoughts in our Genshin 6.4 Patch Survey!
★ Exclusive: Dive back in time with the Meta History
◆ Hot: Version 6.4, Luna 5 Codes
◆ Builds: Varka, Flins, Skirk, Escoffier
◆ Events: Travelers' Tales, He Who Caught the Wind
◆ Future: Linnea, Version 6.5 Luna VI
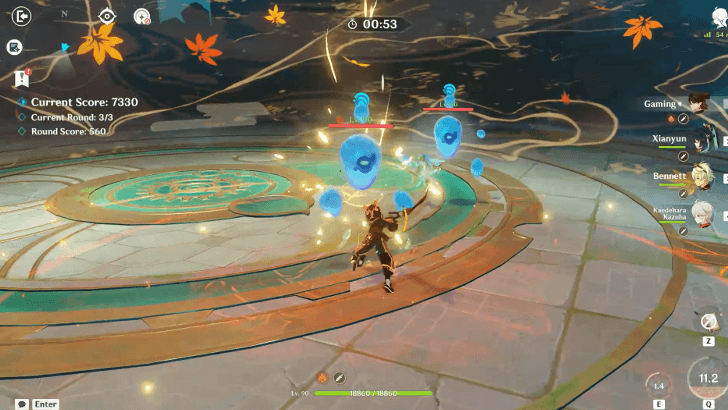
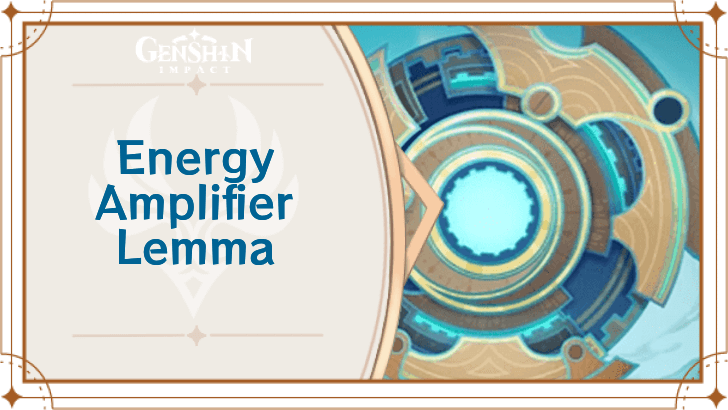
Observation: Soaring Will is the 3rd stage of the Energy Amplifier Lemma event in Genshin Impact 4.8. See how to get 5000 points in Stage 3, along with the best strategies, teams, and amplifiers here!
| Energy Amplifier Lemma Stage Guides | ||
|---|---|---|
List of Contents
How to Beat Observation: Soaring Will Stage 3
Best Teams for Stage 3
| First Round | |||
|---|---|---|---|
|
|
|
|
|
|
|
|
|
|
| Second Round | |||
|
|
|
|
|
|
|
|
|
|
|
|
|
|
|
| Third Round | |||
|
|
|
|
|
|
|
|
|
|
|
|
|
|
|
We recommend Pyro-focused characters specifically on the 1st and 3rd rounds as there will be multiple Cryo-shielded and Hydro-affected enemies, and Pneuma characters on the second round.
If you don't have such characters, any non-Cryo teams that focus on Normal, Charged, or Plunging attacks are also recommended. Second round could have any teams as long as they're focused on the aforementioned attack types.
Best Effectors for Stage 3
| First Round |
|---|
| Second Round |
| |
| Third Round |
Round 1 Effector
Shielders are efficient for Round 1 especially with the Cryo Fatui Mages and Frostarm Lawachurl, and Fatui enemies in mind. Fortunately, Zhongli is a trial character in this stage so he can provide you with a semi-permanent boost with this effector to someone like Arlecchino!
Round 2 Effector
Second round can have any boosts depending on your team comp considering none of the enemies have glaring weaknesses like Round 1 or 3, but make use of the Ley Line Disorder by boosting Normal/Charged/Plunging attack playstyles that mainly focuses on single-target, as this round has many Elite enemies.
Round 3 Effector
As the third round have innate elements on most of the enemies, Elemental Mastery becomes a bigger boon than normal ATK, especially since most of the recommended Pyro characters here becomes better with Melt or Vaporize.
Obtain a High Score of 5000
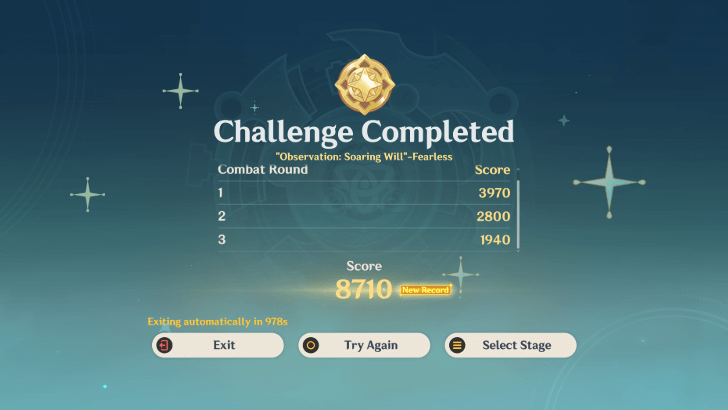
Like before, make sure that your three teams are unique and have no repeating members to take advantage of the maximum amount of Motive Force for buffs.
Use Pyro and Keep your Shield Up on the First Round
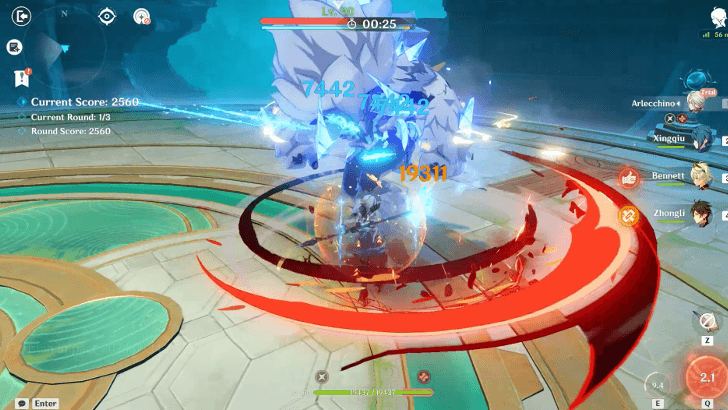
Plenty of Cryo Abyss Mages and solitary Frostarm Lawachurls can catch you by surprise, so unless you want to save the trial Arlecchino or Zhongli, these characters are the best to either remove the Cryo shields or mitigate the damage completely.
Any other Pyro characters can thrive here so long as they excel on both AoE and single-target (like Yanfei or Diluc).
Use Strong Single-Target DMG on the Second Round
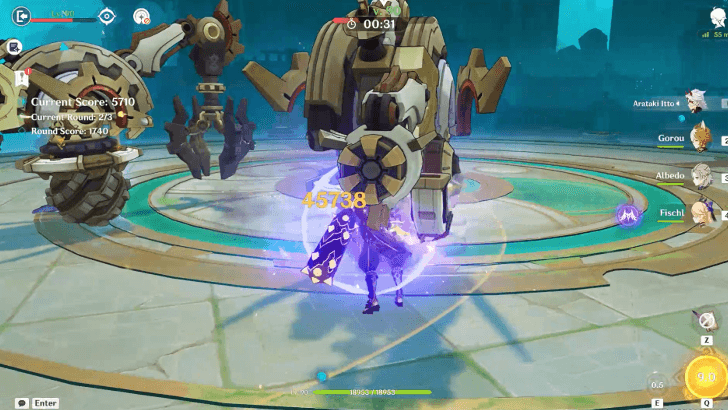
The second round features many Elite Clockwork Meka enemies especially the big Mekas that cannot be staggered or grouped up. It is recommended to bring your best single-target focused comps like Yoimiya to defeat them one by one.
If you cannot hit them all at once, focus on defeating one of them before moving to the other.
Take Advantage of the Innate Elements on the Third Round
Several Cryo-shielded Abyss Mages and Sea Hares make appearance in the first few waves, which is easily removable by bringing a Pyro character to defeat them faster.
Hydro-affected Tainted Hydro Phantasms spawn afterwards. If you have the Elemental Mastery buff, a Pyro character can constantly Vaporize them with high damage as they are permanently affected by Hydro, so take advantage of this fact!
Observation: Soaring Will Stage 3 Event Information
Trial Characters
| Observation: Soaring Will Trial Characters | ||
|---|---|---|
|
|
|
|
For Stage 3, you will be provided the trial characters Arlecchino, Zhongli, and Gaming.
However, if you personally own these units, feel free to use them over the trial ones as yours may be better built and equipped for the challenge!
Disorder and Effectors
Ley Line Disorder
| Ley Line Disorder | ||
|---|---|---|
| When a character's Normal Attacks hit opponents, the DMG dealt by this character's Normal Attacks is increased by 10% for 4s. Can be triggered up to once every 0.2s, max 3 times; When characters' Charged or Plunging Attacks hit an opponent, unleash a shockwave that deals True DMG at the location hit. Can be triggered up to once every 2.5s. |
Effectors
| Primary Effectors |
|---|
| Secondary Effectors |
| Resonant Effectors |
Stage 3 List of Enemies
First Round Enemies
| First Round Enemies |
|---|
Second Round Enemies
| Second Round Enemies |
|---|
Third Round Enemies
| Third Round Enemies |
|---|
Part of Energy Amplifier Lemma Event

Observation: Soaring Will is Stage 3 of the Energy Amplifier: Lemma event, where players must form teams of three to partake in rounds of combat to obtain rewards such as Primogems, EXP Materials, and Weapon Ascension Materials!
Energy Amplifier: Lemma serves as a continuation of the Energy Amplifier event that debutted back in Version 1.5!
Energy Amplifier Lemma 4.8 Rerun Event Guide
Observation: Soaring Will Stage 3 Rewards
Total Observation: Soaring Will Rewards
| Objective | Rewards |
|---|---|
| Obtain a stage score of 500 |
|
| Obtain a stage score of 2000 |
|
| Obtain a stage score of 5000 |
|
Genshin Impact Related Guides

All Energy Amplifier Events
| All Energy Amplifier Events | ||
|---|---|---|
 Initiation (1.5) Initiation (1.5) |
 Fruition (2.3) Fruition (2.3) |
 Lemma (4.8) Lemma (4.8) |
Energy Amplifier: Lemma Stage Guides
| Energy Amplifier Lemma Stages | ||
|---|---|---|
 1 - Interference: Overgrowth 1 - Interference: Overgrowth |
2 - Validation: Torrential Tide |
3 - Observation: Soaring Will |
| 4 - Collection: High-Energy Elements |
5 - Extension: Polyphasic Excitation |
6 - Exceedance: Resonance Amplification |
Other Energy Amplifier Guides
2.3 Fruition Stage Guides
| Energy Amplifier Fruition Stages | |
|---|---|
| Act 1 Places of Interest: West of Wangshu Inn |
Deceitful Domain: Sea of Wandering Souls |
| Act 2 Places of Interest: Tianqiu Valley |
Deceitful Domain 2: Where Bloodhounds Gather |
| Act 3 Places of Interest: Yaoguang Shoal |
Deceitful Domain 3 Whirling Judgement |
1.5 Initiation Stage Guides
| All Twisted Realm Domain Guides | |
|---|---|
 Domain of Deceit Domain of Deceit |
Domain of Furious Thunder |
| Domain of Chaos |
Domain of Heresy |
Energy Amplifier Quest Guides
 Energy Amplifier Initiation Quest Guide |
All Genshin Impact Events

Comment
1  Anonymous over 1 year
Recommending the same five star on all three possible teams for round three is crazy 💀 not everyone has Xianyun tf are we supposed to do then? ARE WE JUST FUCKED? These guides are poorly made!
Author

Observation: Soaring Will Day 3 Guide
Please participate in our site
improvement survey
03/2026
improvement survey
03/2026
Would you assist in
improving Game8's site?
improving Game8's site?

×
We are listening to our users' valuable opinions and discussing how to act on them.
The information collected through this survey will be used for the purpose of improving our services. In addition, the information will only be disclosed a part of a statistic in a format that will not allow identification of personal information.
Begin Survey
Not Now
×
Please rate each item regarding Game8.co's Advertisements.
Amount of Ads
Very Dissatisfied
Somewhat Dissatisfied
Fine
Somewhat Satisfied
Highly Satisfied
Placement of Ads
Timing of Ad Display
Ad Loading Speed
Safeness of Ads
Content of Ads
×
Please rate each item regarding Game8.co's Quality of Articles.
Amount of information
Very Dissatisfied
Somewhat Dissatisfied
Fine
Somewhat Satisfied
Highly Satisfied
Frequency of updates
Speed of new information
Accuracy of articles
Understandibility of articles
Readability of sentences
×
Please rate each item regarding Game8.co's Usability of the Site.
Ease of finding information
Very Dissatisfied
Somewhat Dissatisfied
Fine
Somewhat Satisfied
Highly Satisfied
Loading Speed
Use of Color
Font Size
Visibility of Images
Easy to Understand Layout
×
Please rate each item regarding Game8.co's Message Boards, Comments.
Ease of Writing
Very Dissatisfied
Somewhat Dissatisfied
Fine
Somewhat Satisfied
Highly Satisfied
Readability
Ease in Finding Information
Comment Quality
Comment Quantity
Admin Response
×
Please rate each item regarding Game8.co's Site's new design.
Please rate our site's new design
Very Dissatisfied
Somewhat Dissatisfied
Fine
Somewhat Satisfied
Highly Satisfied
Do you think that the website's design change makes the site easier to use?
Has the new design made it easier for you to find information on the site?
Has the new design improved the overall visual appeal of the site?
How would you rate your overall satisfaction with the new design of the site?
×
How likely are you to recommend Game8 to someone you know?
Very Unlikely
0
1
2
3
4
5
6
7
8
9
10
Very Likely
If you have other opinions regarding potential improvement to the website, please share them with us. We would appreciate your honest opinion.
Note: This is a free response section, so you can proceed without entering anything.
Note: Please be sure not to enter any kind of personal information into your response.
Note: Please be sure not to enter any kind of personal information into your response.
×
Thank You
×
Thank you for participating in our survey! Your answers will help us to improve the quality of our website and services.
We hope you continue to make use of Game8.
We hope you continue to make use of Game8.
Close


Rankings
- We could not find the message board you were looking for.
Gaming News


![Monster Hunter Stories 3 Review [First Impressions] | Simply Rejuvenating](https://img.game8.co/4438641/2a31b7702bd70e78ec8efd24661dacda.jpeg/thumb)
Popular Games

Genshin Impact Walkthrough & Guides Wiki
Honkai: Star Rail Walkthrough & Guides Wiki
Umamusume: Pretty Derby Walkthrough & Guides Wiki
Pokemon Pokopia Walkthrough & Guides Wiki
Resident Evil Requiem (RE9) Walkthrough & Guides Wiki
Monster Hunter Wilds Walkthrough & Guides Wiki
Wuthering Waves Walkthrough & Guides Wiki
Arknights: Endfield Walkthrough & Guides Wiki
Pokemon FireRed and LeafGreen (FRLG) Walkthrough & Guides Wiki
Pokemon TCG Pocket (PTCGP) Strategies & Guides Wiki


Recommended Games
Diablo 4: Vessel of Hatred Walkthrough & Guides Wiki
Cyberpunk 2077: Ultimate Edition Walkthrough & Guides Wiki
Fire Emblem Heroes (FEH) Walkthrough & Guides Wiki
Yu-Gi-Oh! Master Duel Walkthrough & Guides Wiki
Super Smash Bros. Ultimate Walkthrough & Guides Wiki
Pokemon Brilliant Diamond and Shining Pearl (BDSP) Walkthrough & Guides Wiki
Elden Ring Shadow of the Erdtree Walkthrough & Guides Wiki
Monster Hunter World Walkthrough & Guides Wiki
The Legend of Zelda: Tears of the Kingdom Walkthrough & Guides Wiki
Persona 3 Reload Walkthrough & Guides Wiki


All rights reserved
Copyright© 2012-2024 HoYoverse — COGNOSPHERE. All Rights Reserved.
The copyrights of videos of games used in our content and other intellectual property rights belong to the provider of the game.
The contents we provide on this site were created personally by members of the Game8 editorial department.
We refuse the right to reuse or repost content taken without our permission such as data or images to other sites.
they did it for furina too 💀