Narration Footnotes Quest Guide
✉ Send your thoughts in our Genshin 6.4 Patch Survey!
★ Exclusive: Dive back in time with the Meta History
◆ Hot: Version 6.4, Luna 5 Codes
◆ Builds: Varka, Flins, Skirk, Escoffier
◆ Events: Travelers' Tales, He Who Caught the Wind
◆ Future: Linnea, Version 6.5 Luna VI

Narration Footnotes is a World Quest introduced in Simulanka for Genshin Impact 4.8. See how to unlock this quest, how to complete the Oracle Pillar's picture, how to copy the Shape of Empathy pattern, its walkthrough, and all the rewards of this quest here in this guide!
List of Contents
Narration Footnotes Quest Location
Go to the Maritime Express Platform

Narration Footnotes is located at the Maritime Express Platform in Constellation Metropole. You can accept the quest from Kirara as soon as you disembark the train from the Forest of Blessings Station Platform!
Simulanka Interactive Map Guide
How to Unlock Narration Footnotes
Progress They Once Walked the Starry Sky
| Quest Unlock Requirements | |
|---|---|
 |
|

|
They Once Walked the Starry Sky |
You can unlock Narration Footnotes quest right after getting off the Maritime Express Train. You can access both the Forest of Blessings Station Platform, and the destination platform in Constellation Metropole in one of the objectives of They Once Walked the Starry Sky quest!
After which, you have the option of progressing through the event quest first, or you can bench it temporarily to complete Narration Footnotes!
They Once Walked the Starry Sky Quest Guide
Narration Footnotes Walkthrough
Follow Kirara to the village ahead
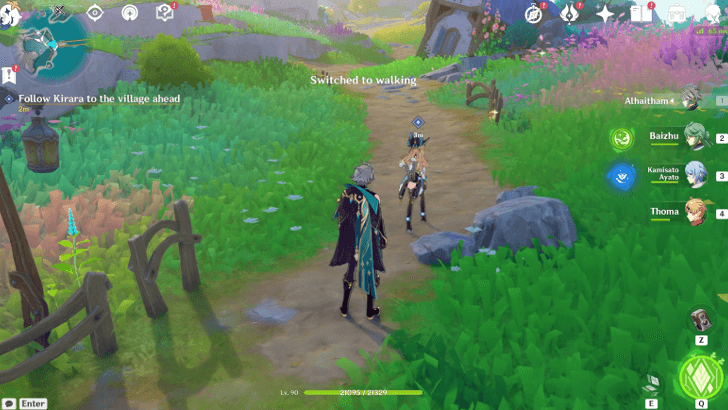
From Kirara's location nearby the Maritime Express Platform, walk towards the village alongside her. Wait until the prompt on her appears to make her walk beside you, otherwise the quest won't progress!
Finish listening to the narration
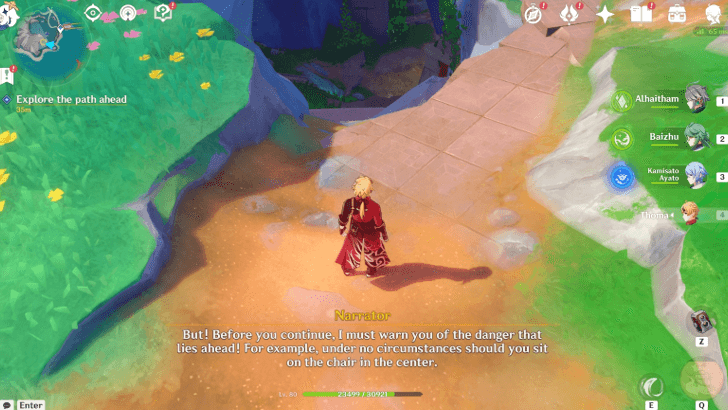
As you walk far ahead, a voice suddenly speaks out of nowhere. After you finish listening to the narration, explore the path on the left-hand side with Kirara. Then, make a sharp turn to your right just past the stairs.
Pull out the great clockwork key
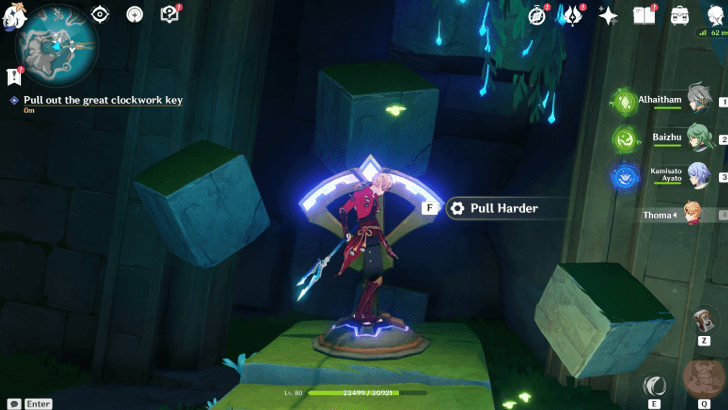
Once you arrive in a cavern with three seats and a raised stone in the middle, three different voices will narrate a story that depicts your supposed arrival.
As you listen to them, read the Witness Pact sitting atop the concrete slab, which tells about the Marquis of Carabas, and the pact between the elders of the three tribes. Then, pull out the great clockwork key from its key fob on the platform behind the chair. You must attack it after your first attempt to successfully remove it!
Speak with the three within the Abode-to-Be
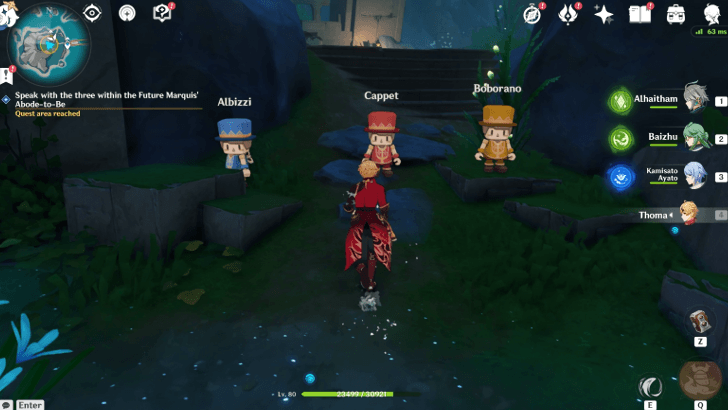
After obtaining the clockwork key, speak with the three within the Future Marquis' Abode-to-Be, who name themselves Cappet, Boborano, and Albizzi. These three supervisors are representatives of their own respective clans; possibly the same tribes mentioned on the Witness Pact.
Go to the sacred site of the Cappet clan

Once you've listened to the three Toy Supervisors, and the brief history of their clans, go to the sacred site of the Cappet Clan, located nearby the village that you and Kirara explored earlier. Although, there's no need to manually locate the site as you will be automatically teleported to the location!
Defeat the opponents standing before you

After hearing out Cappet and the two other supervisors, defeat the opponents standing before you. Then, talk to Cappet about what you should do next.
Complete the Oracle Pillar's Picture of Clan of Valor
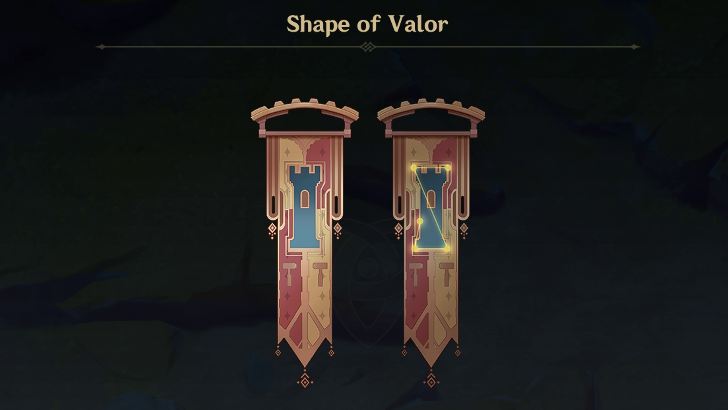
To complete the Oracle Pillar's Picture of Cappet's Clan, copy the pattern from his Family Crest, the Shape of Valor. You can do this by first attacking the Clockwork Key constantly, until the pillars have fully erected, then heading to the pillar with the marker atop it to start copying the pattern!
How to Copy the Shape of Valor
| Cappet's Clan Oracle Pillar Puzzle | |
|---|---|
| 1 | Once the pillars have been fully beckoned from the ground, head to the pillar right beside the Clockwork Key, and summon the Magic Thread from the middle pillar towards it. Do the same to the pillar to its right. |
| 2 | Then, go to the pillar across it, and connect them with the Magic Thread. Do the same thing to the last pillar to its right, to complete the picture! |
Read the true history of the Clan of Valor
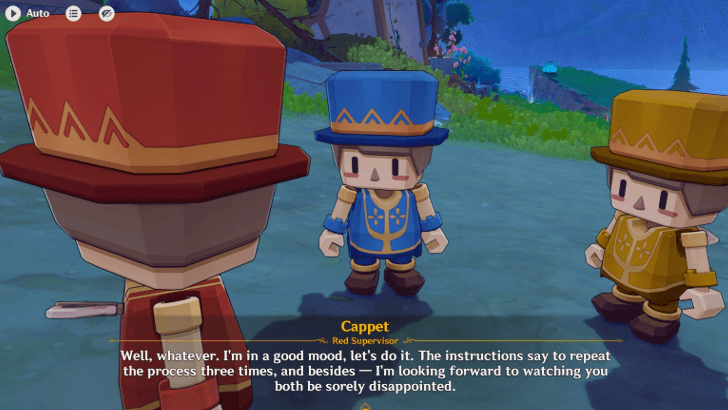
After completing the Clan of Valor's picture, obtain the Goddess's Manuscript (I) which reads the true history of the Clan of Valor, and how they fought the dragon away, relentlessly. Once Cappet is done gloating over his clan's achievements, head to the next site.
Go to the sacred site of the Boborano clan
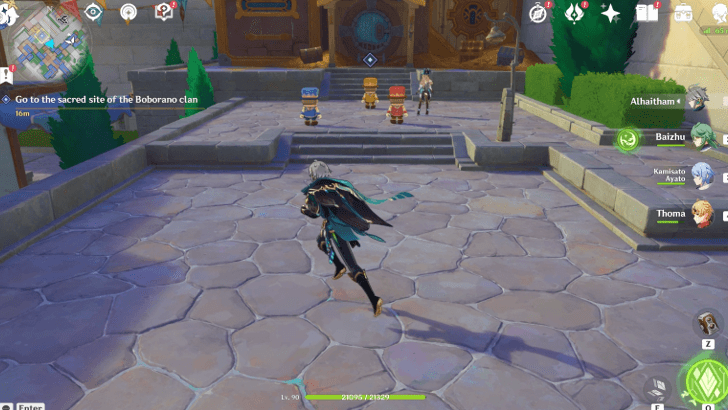
Go to the sacred site of the Boborano Clan on Constellation Metropole. If you have accessed the city during the They Once Walked the Starry Sky , simply use the Teleport Waypoint near the Flying Hatter's Trick, otherwise go to the giant house located right beside the giant stairs.
Complete the Oracle Pillar's Picture of Clan of Wisdom
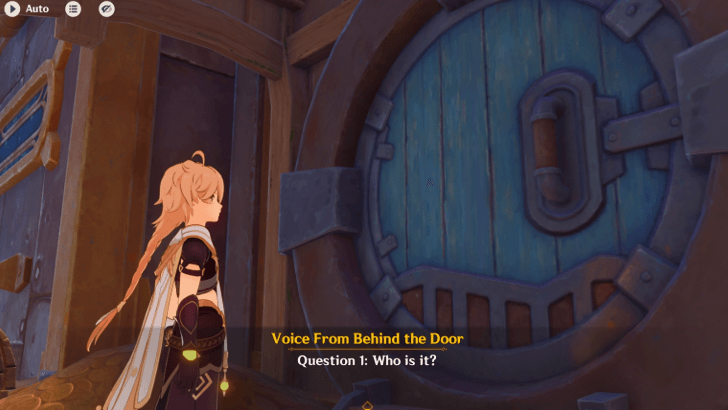
As with Capett's Clan, you have to complete the Oracle Pillar's Picture to access the truth of Boborano's ancestors. Although, you have to open the door first, and answer the smart interrogation system correctly to do obtain the pedestal, to do so!
All Correct Answers to the Smart Interrogation System
| Question | Answer |
|---|---|
| Who is it? | Traveler-Marquis and his retinue. |
| By which virtue did the ancients defeat the dragon? | Wisdom. |
| Which is more real, the fiction of the outside world, or the truth of this world? | Perhaps...both are equally real. |
How to Copy the Shape of Wisdom
| Boborano's Clan Oracle Pillar Puzzle | |
|---|---|
| 1 | 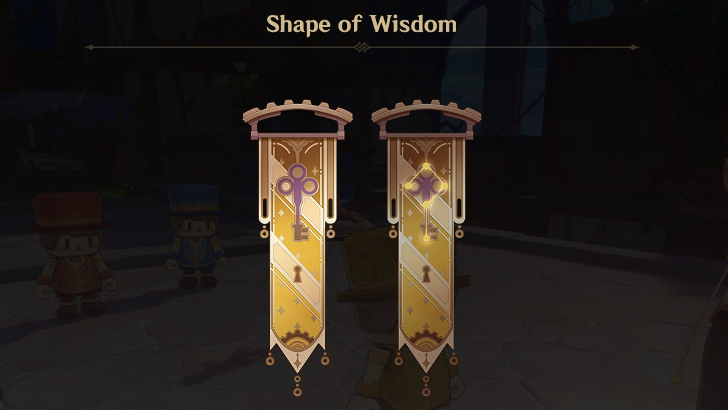 After obtaining the pedestal from the Smart Interrogation System, get the Shape of Wisdom from Boborano. |
| 2 | Then, once the Oracle Pillars have been conjured from the ground, head to the Pillar nearest to Albizzi, and summon the Magic Thread towards it. |
| 3 | Next, walk towards the Oracle Pillar in front of the treasure chests, and connect the Magic Thread to it. Do the same with the pillar right across Boborano. |
| 4 | Lastly, connect the Magic Thread to the Pillar beside the street lamp to complete the Oracle Pillar's Picture! |
Read the true history of the clan of Wisdom
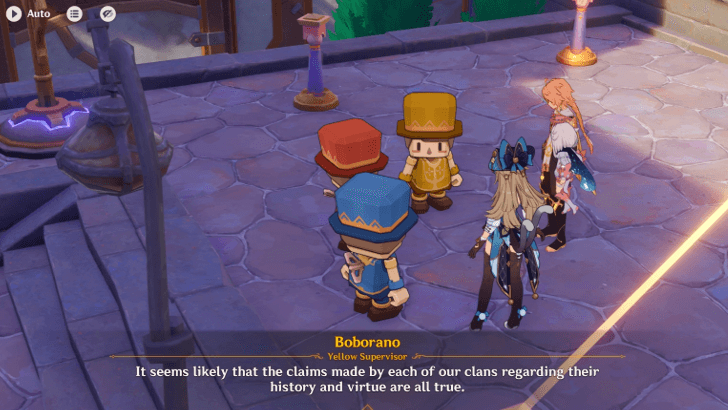
Once Boborano's Clan puzzle has been solved, read the true history of the Clan of Wisdom from the Goddess's Manuscript (II). The text tells of the story of the Wise Antonio, who tricked the drove the dragon away using his riddles, and his wits. At this point, Boborano has come to the conclusion that there are several truths that each clan share, but head to the last site to confirm!
Go to the sacred site of the Albizzi clan
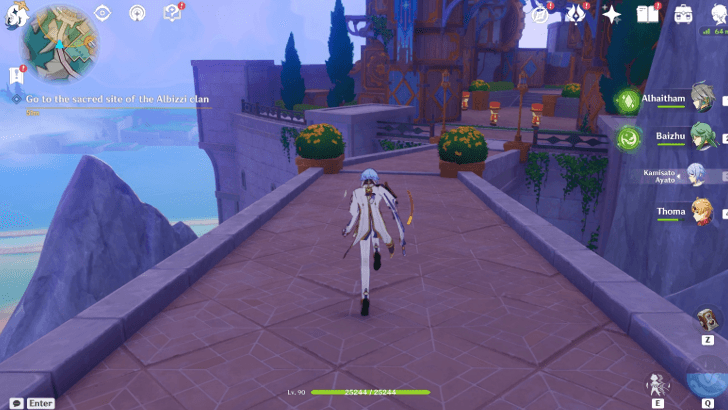
Lastly, go to the sacred site of the Albizzi Clan located within Constellation Metropole. Use the same Teleport Waypoint near Balborono's clan site, but turn to the right instead of jumping down the stairs. Continue walking along the narrow bridge until you see the three Supervisors!
Find the base of the great clockwork key
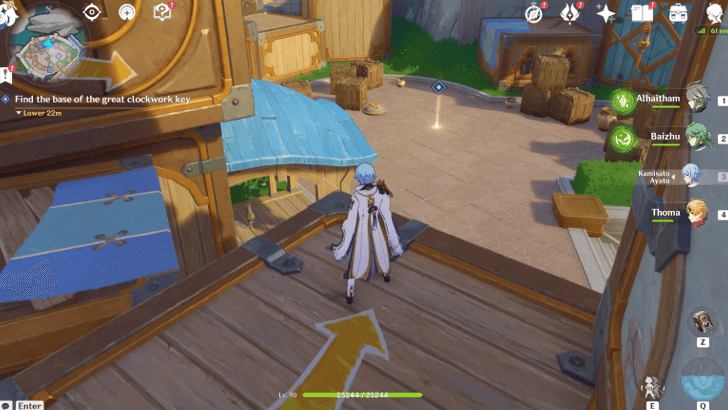
Albizzi warns the whole gang about the gigantified guards marching along the clan site gate, so make your way to the left to safely (and subtly) avoid being spotted. There are arrows marked along the way to guide you, but the trip is short as you just have to circle around the perimeter to find the base of the great clockwork key.
Complete the Oracle Pillar's Picture of Clan of Empathy
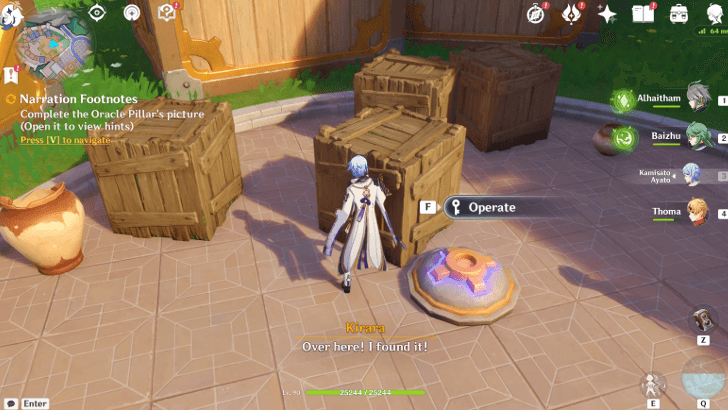
After arriving at the sacred site, talk to Albizzi on how to proceed with the clockwork key puzzle. To complete the Oracle Pillar's Picture of the Albizzi Clan, clear out all the junk first by attacking them. Then, slot the Clockwork Key into to the fob to start the puzzle!
How to Copy the Shape of Empathy
| Albizzi's Clan Oracle Pillar Puzzle | |
|---|---|
| 1 | 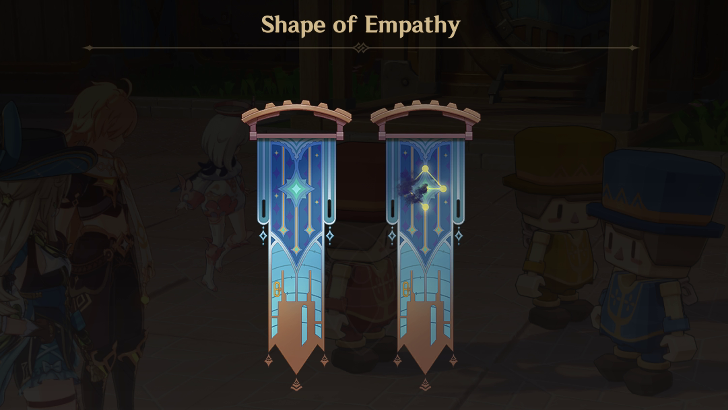 To complete the Oracle Pillar's Picture puzzle, get the Shape of Empathy from Albizzi, then conjure all the pillars from their original positions. |
| 2 | Then, from the first pillar, head to the pillar right across Kirara, and connect the Magic Thread to it. There's a nearby pillar that's positioned slightly off, just ignore it. |
| 3 | Next, is to connect the Magic Thread to the pillar beside Cappet, then onto to the pillar right beside the street lamp. |
| 4 | Lastly, connect the Magic Thread to the pillar in the middle to complete the Oracle Pillar's Picture! |
Read the true history of the clan of Empathy
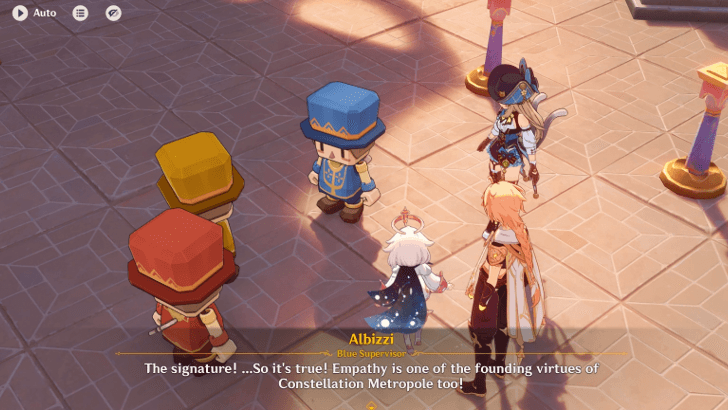
After obtaining the Goddess's Manuscript (III), read the true history of the Clan of Empathy, which depicts the story of Galileo and Alberto, who drove away the Dragon with empathy after chugging a growth potion.
Escape from the clan of Empathy
's sacred site
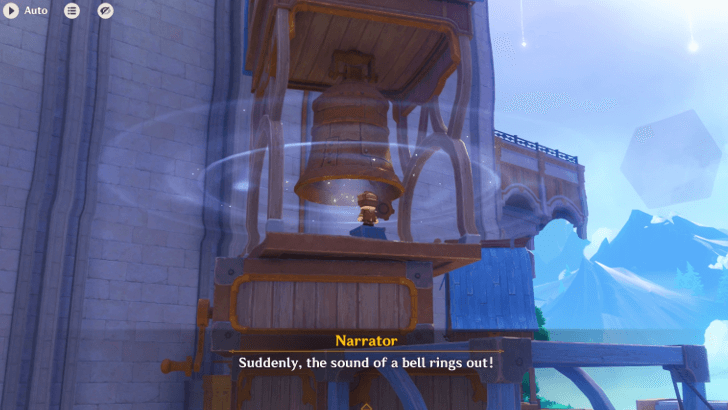
Once the whole crew have read the last manuscript, the siren in Albizzi Clan will pop off, signalling that there are intruders within the site. Escape from the Clan of Empathy's Sacred Site by using the alternate route to your left!
How to Escape the Clan of Empathy
| How to Escape the Guards | |
|---|---|
| 1 | To escape the clan of Empathy, climb on top of the stacks of boxes, until you see the single plank protruding from the edge of the boxes. |
| 2 | Glide down, towards the narrow bridge, which should have a bunch of super glue traps laid down by the Albizzi Clan guards. Walk along the bridge while avoiding the traps as much as you could, as they can slow you down in contact. |
| 3 | Keep going until you see the wooden barricade, and a Magic Thread mechanism to your left. Fly Along the Magic Thread twice, to completely escape the guards! |
Wait until after 08:00 the next day
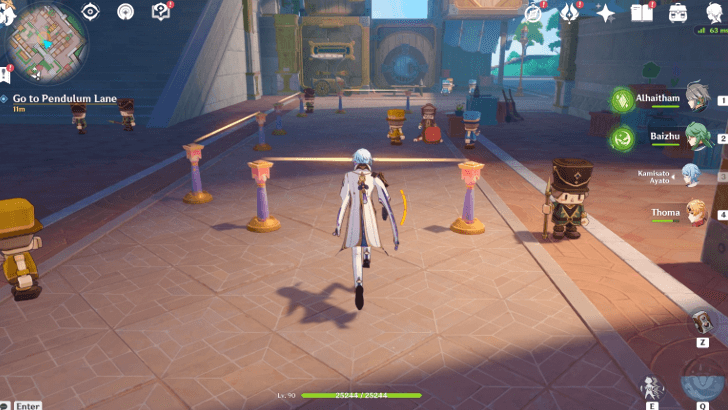
After escaping the guards, talk to everyone about what the three Clan Supervisors are going to do after learning their truths. With the Narrator visibly disappointed with the outcome, wait until after 8:00 the next day, then go to Pendulum Lane, located on the left-hand side of the Waypoint in the middle of Constellation Metropole!
Talk to everyone
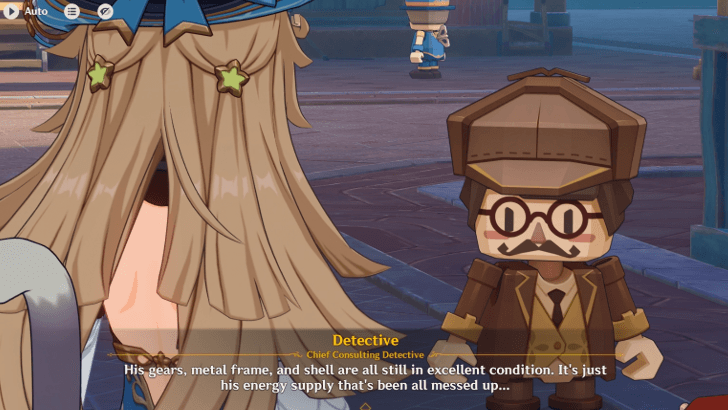
At the Pendulum Lane, you'll see an unconscious Cappet lying on the ground, with Boborano, Albizzi, and a Detective-looking Dude flocking around him. Talk to everyone about what's happening.
Turn the clockwork base and rewind the truth
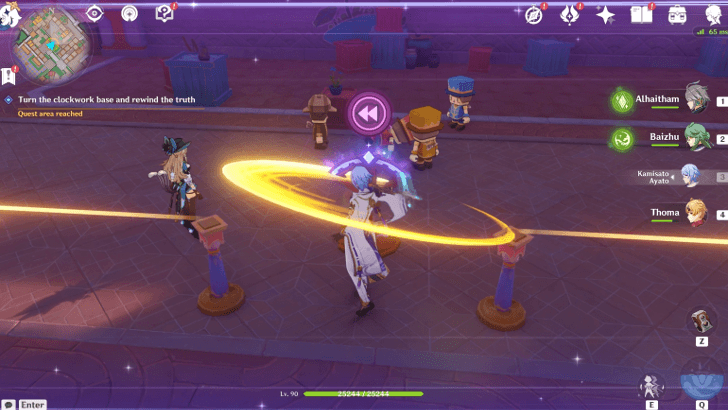
After hearing the Detective-Looking Dude's suggestion to help the , turn the clockwork base, and rewind the truth. You simply have to whack the Clockwork Base once to fully rewind the scene.
Search for suspicious places and clues
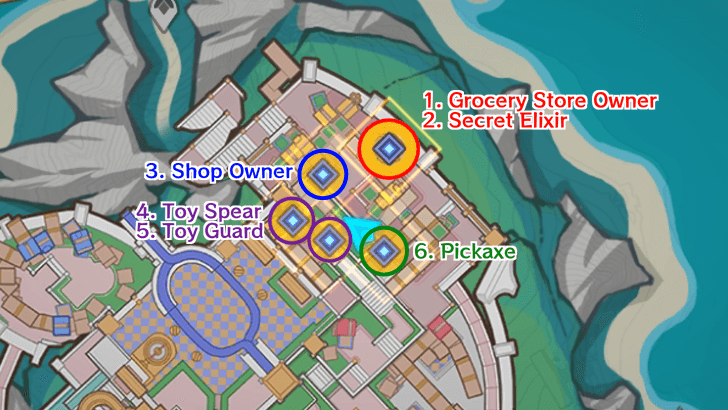
Once done, talk to everyone, and listen to the Detective convince you that it's case-closed. However, search for suspicious places and clues after agreeing with Kirara that something is off.
How to Search for Suspicious Places And Clues
| All Suspicious Places And Clues | |
|---|---|
| 1 | 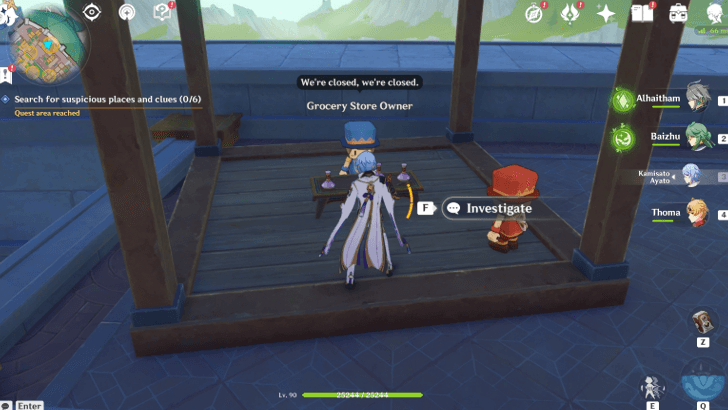 The first suspicious place and clue is located by talking to the Grocery Store Owner. He'll tell you that a bottle of growth serum has been stolen from his stocks. |
| 2 | 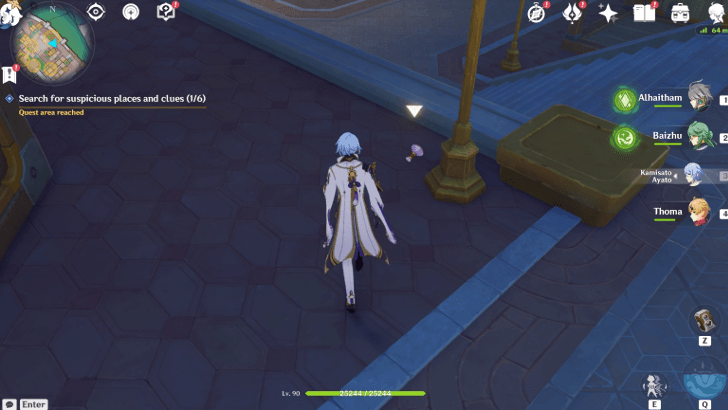 The second suspicious place and clue is lying just few steps away from the Grocery Store. Pick up the Secret Elixir bottle from the ground. |
| 3 | 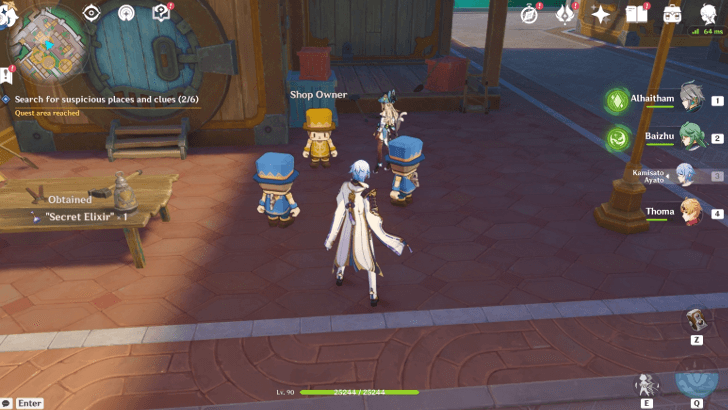 Then, the third suspicious place and clue is located nearby Kirara. Talk to the Shop Owner, and he'll tell you that his pickaxe has one missing. |
| 4 | 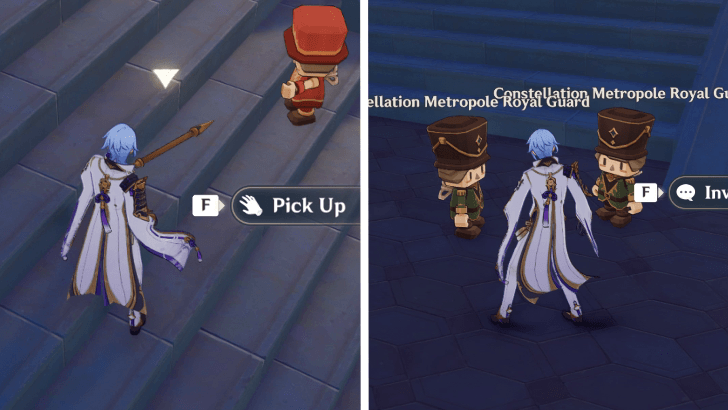 The fourth and fifth suspicious places and clues are located along the stairs behind you. Talk to one of the Toy Guards, who will tell you that his spear is missing, which you can spot on top of the stairs. |
| 5 | 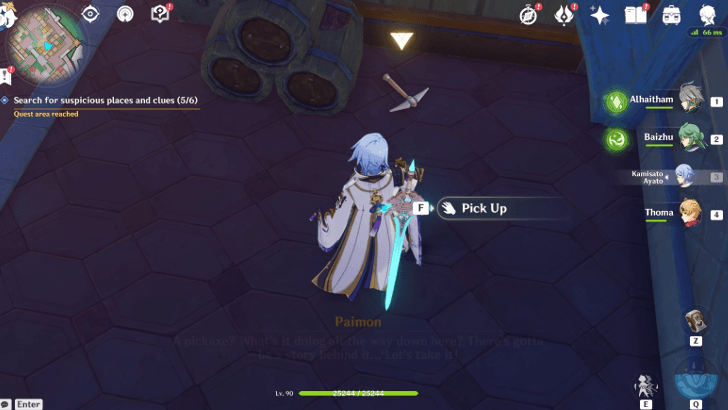 The sixth and last clue is located by a stack of barrels behind a giant crate. |
Deduce the Murder Weapon
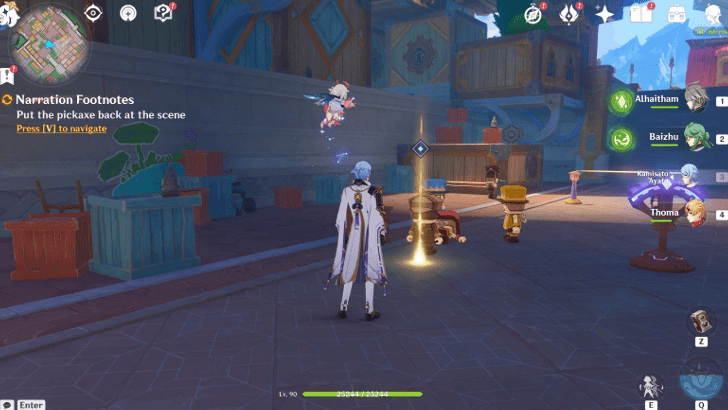
After collecting all six clues, speak with Paimon and Kirara, and deduce the murder weapon. After a brief deliberation, put the pickaxe back at the scene, and turn the clockwork base, and rewind the truth once more. As with the first, whack the base one time to rewind the murder scene.
Pursue the killer detective
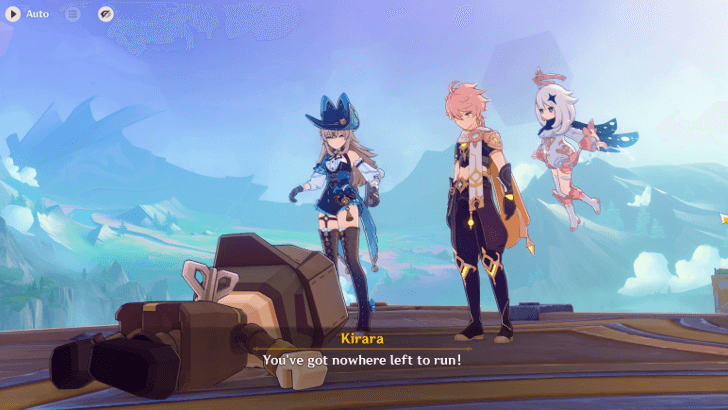
Once the truth has been unraveled, confront the detective. After trying to surround the culprit, the detective still flees from the crime scene. Capture the mastermind, and pursue the killer detective by going through the obstacle course prompt that appears on your screen!
How to Capture the Mastermind
| How to Pursue the Killer Detective | |
|---|---|
| 1 | Climb up the first wall to catch up to the Mastermind on the elevator. |
| 2 | Fly along the Magic Thread to cross to the other side. So long as you interact with the thread, you will be safe from the pendulum. |
| 3 | Climb up the tall wall as the Mastermind is ascending up the elevator. Consider using Kirara's Elemental Skill for this. |
| 4 | Plunge down, move to your left, and follow the path, avoiding the superglue puddles and dispenser on the way. |
| 5 | Climb up the short wall. |
| 6 | Take both of the magic threads to cross each gap safely. Note that with the first gap, so long as you have already interacted with the thread, you will be safe from both pendulums. |
| 7 | Keep running towards the Mastermind. He will spawn platforms behind him and blink towards those platforms 2 times before springing a trap on you. |
| 8 | Navigate the trap any way you see fit. Break the obstacles or climb and use them to get past the superglue. Try your best to save Kirara's Elemental Skill. |
| 9 | Quickly climb up the long wall to reach the Mastermind. The walls will slowly fall down, so we recommend using Kirara's Elemental Skill here. |
Speak to the narrator
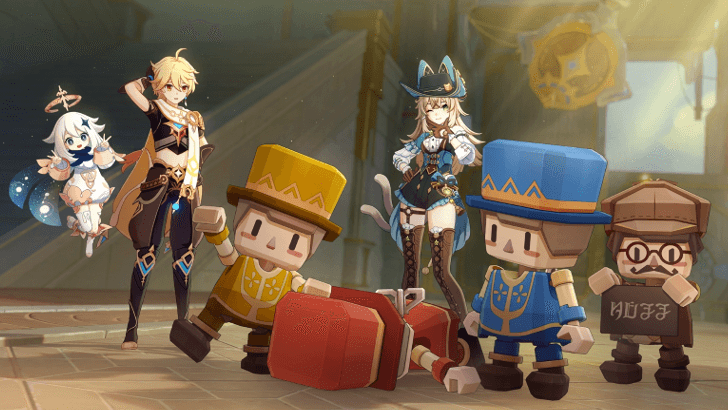
After catching the Detective, he will admit to his crimes right off the bat. Speak to the Narrator (a.k.a the Detective), as to why he's orchestrated everything. Lastly, listen to Footnote, or the echo of the Goddess of Fate to conclude the quest!
Narration Footnotes Rewards
Total Quest Rewards
| Total Quest Rewards |
 Primogem x50 |
 Mora x54500 |
|---|---|---|
 Hero's Wit x5 |
||
Genshin Impact Related Guides

Other Simulanka Quest Guides
Author
Narration Footnotes Quest Guide
improvement survey
03/2026
improving Game8's site?

Your answers will help us to improve our website.
Note: Please be sure not to enter any kind of personal information into your response.

We hope you continue to make use of Game8.
Rankings
Gaming News
Popular Games

Genshin Impact Walkthrough & Guides Wiki

Honkai: Star Rail Walkthrough & Guides Wiki

Umamusume: Pretty Derby Walkthrough & Guides Wiki

Pokemon Pokopia Walkthrough & Guides Wiki

Resident Evil Requiem (RE9) Walkthrough & Guides Wiki

Monster Hunter Wilds Walkthrough & Guides Wiki

Wuthering Waves Walkthrough & Guides Wiki

Arknights: Endfield Walkthrough & Guides Wiki

Pokemon FireRed and LeafGreen (FRLG) Walkthrough & Guides Wiki

Pokemon TCG Pocket (PTCGP) Strategies & Guides Wiki
Recommended Games

Diablo 4: Vessel of Hatred Walkthrough & Guides Wiki

Cyberpunk 2077: Ultimate Edition Walkthrough & Guides Wiki

Fire Emblem Heroes (FEH) Walkthrough & Guides Wiki

Yu-Gi-Oh! Master Duel Walkthrough & Guides Wiki

Super Smash Bros. Ultimate Walkthrough & Guides Wiki

Pokemon Brilliant Diamond and Shining Pearl (BDSP) Walkthrough & Guides Wiki

Elden Ring Shadow of the Erdtree Walkthrough & Guides Wiki

Monster Hunter World Walkthrough & Guides Wiki

The Legend of Zelda: Tears of the Kingdom Walkthrough & Guides Wiki

Persona 3 Reload Walkthrough & Guides Wiki
All rights reserved
Copyright© 2012-2024 HoYoverse — COGNOSPHERE. All Rights Reserved.
The copyrights of videos of games used in our content and other intellectual property rights belong to the provider of the game.
The contents we provide on this site were created personally by members of the Game8 editorial department.
We refuse the right to reuse or repost content taken without our permission such as data or images to other sites.


![Monster Hunter Stories 3 Review [First Impressions] | Simply Rejuvenating](https://img.game8.co/4438641/2a31b7702bd70e78ec8efd24661dacda.jpeg/thumb)


How is this quest worth 50 primo bruh