Contending Tides Event Guide
✉ Send your thoughts in our Genshin 6.4 Patch Survey!
★ Exclusive: Dive back in time with the Meta History
◆ Hot: Version 6.4, Luna 5 Codes
◆ Builds: Varka, Flins, Skirk, Escoffier
◆ Events: Travelers' Tales, He Who Caught the Wind
◆ Future: Linnea, Version 6.5 Luna VI
This is a guide to the Contending Tides, a Windblume Festival event in Genshin Impact. Read on to learn more about the different challenges and rewards available!
List of Contents
Contending Tides Event Info

| Event Start | April 2, 2021 10:00 (Server Time) |
|---|---|
| Event End | April 12, 2021 3:59 (Server Time) |
| Location | Dadaupa Gorge, Mondstadt |
| How to Unlock | Reach AR 20 Complete the Quest: Mountainous Summons (Complete the Quest: Break the Sword Cemetery Seal) |
These challenges will test your combat skills against a wide variety of enemies in the Dadaupa Gorge Arena. Each challenge has certain levels of difficulty, with the toughest challenges offering the best rewards.
Contending Tides Event Location

You can find the Contending Tides Event in the northern part of Dadaupa Gorge.
Changing World Level Has No Effect
Changing your World Level in-game will not affect the difficulty of Contending Tides. This means that you will be facing enemies that match your actual World Level, and the challenges cannot be made easier.
Contending Tides Event Challenges
| Click to Jump to a Section! | ||||||
|---|---|---|---|---|---|---|
| Day 1 | Day 2 | Day 3 | Day 4 | |||
| Day 5 | Day 6 | Day 7 | ||||
Here's more information about what challenges the Contending Tides have to offer.
Day 1: Welcome to Easy Mode
| Objectives | Extreme Difficulty ・Defeat 20 Opponents in 180 seconds. ・Defeat 4 Blazing Axe Mitachurls. ・No characters can die. |
|---|---|
| Arena Effects | There will be an Aura within the arena. Characters within the Aura will obtain the following effects: ・Attack is increased by 100%. ・When attacks hit opponents, a shockwave will be released if your Stamina is above 50%, dealing AoE DMG. A shockwave of this kind can occur once every 3s. |
| Monsters |
This enemies in this challenge are mostly Hilichurls, and there is an Arena effect in the center that buffs your attack.Try to stay within the circle to clear out enemies more efficiently!
Anemo and Geo Characters are recommended
 Group enemies with Anemo Group enemies with Anemo |
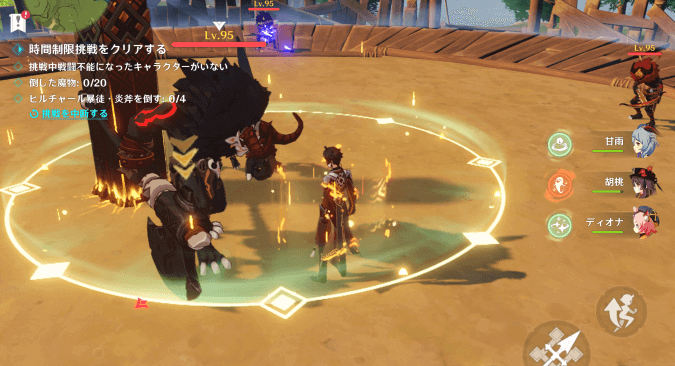 Keep HP above 50% with Shields Keep HP above 50% with Shields |
| Main DPS | |
|---|---|
| Sub-DPS | |
| Support |
Day 2: Don't Sweat It
| Objectives | Extreme Difficulty ・Defeat 30 Opponents in 180 seconds. ・No more than 20s can pass between enemy kills. ・No characters can die. |
|---|---|
| Arena Effects | Electro-Charged damage +150%. If you cause Electro-Charged reactions, an AoE attack is triggered as well. This can happen every 5s. |
| Monsters |
Electro and Pyro Characters are recommended
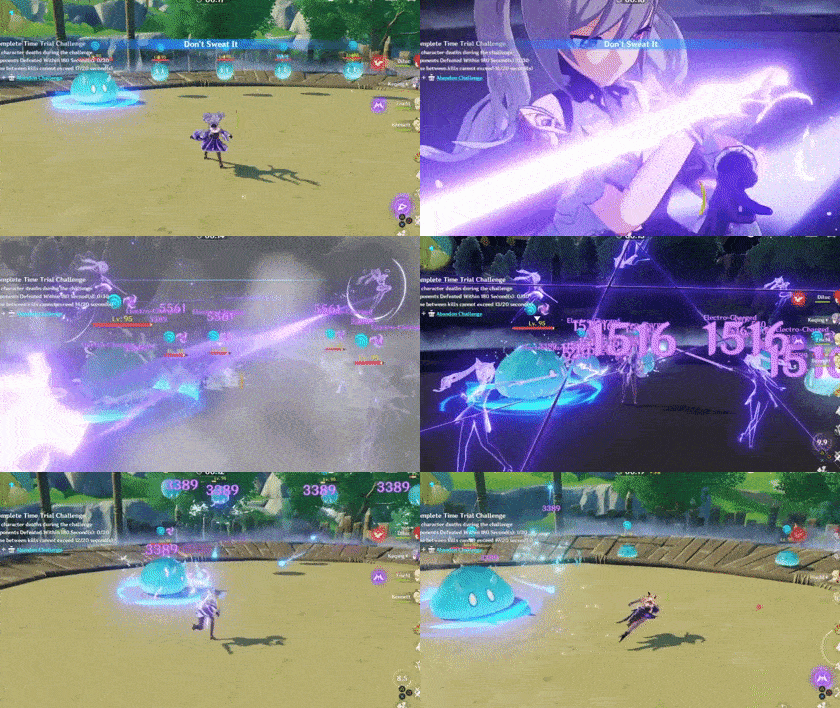 The Electro-Charged bonus allows you to deal more damage in against the Hydro Slimes |
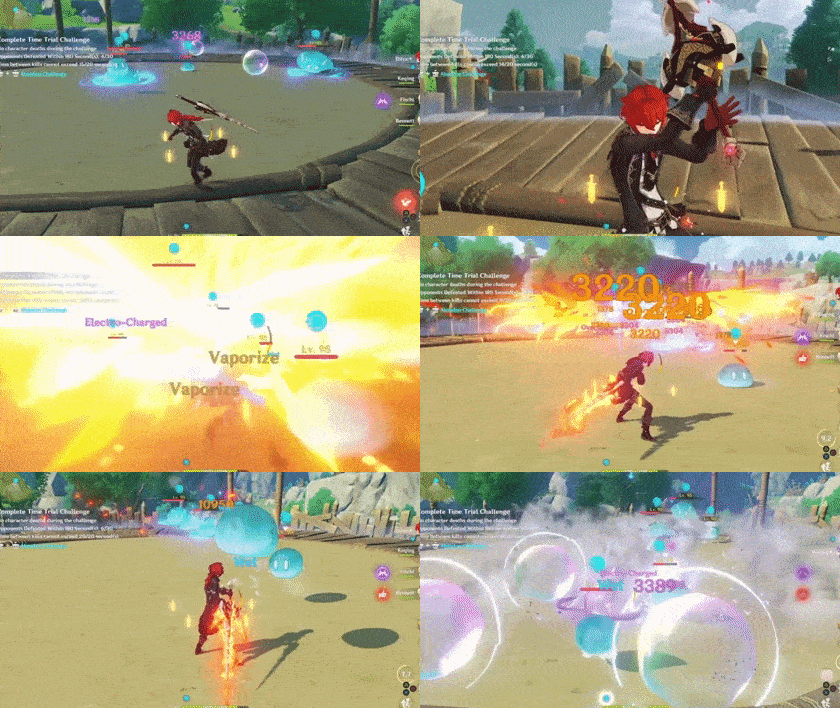 Pyro allows you to deal massive Vaporize damage! |
| Main DPS | |
|---|---|
| Sub-DPS | |
| Support |
Day 3: Art of the Cannonball
| Objectives | Extreme Difficulty ・Defeat 25 Opponents in 190 seconds. ・Defeat 3 Blazing Axe Mitachurls. ・No characters can die. |
|---|---|
| Arena Effects | Plunge attacks deal AoE to all enemies in the arena. After plunge attacks, all Characters in your party get a +50% Plunge Attack DMG bonus, which stacks up to 10 times. |
| Monsters |
DPS and Shield Characters are recommended
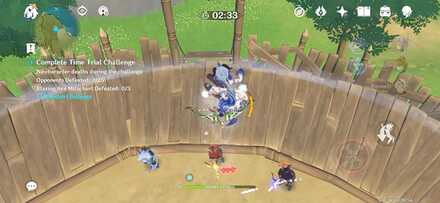 Collect the three Anemograna to summon a Wind Current and do plunging attacks |
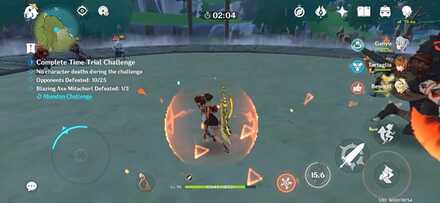 Use shields to defend against long ranged bow attacks |
| Main DPS | |
|---|---|
| Sub-DPS | |
| Support |
Day 4: Battle of an Epoch
| Objectives | Extreme Difficulty ・Defeat 5 Opponents in 135 seconds. ・Do not leave the arena during the challenge. ・No characters can die. |
|---|---|
| Arena Effects | When Normal and Charged Attacks hit a Frozen oppoenent, there is a 50% chance of releasing a shockwave that deals AoE DMG. Can occur once every second. |
| Monsters |
Cryo and Hydro Characters are recommended
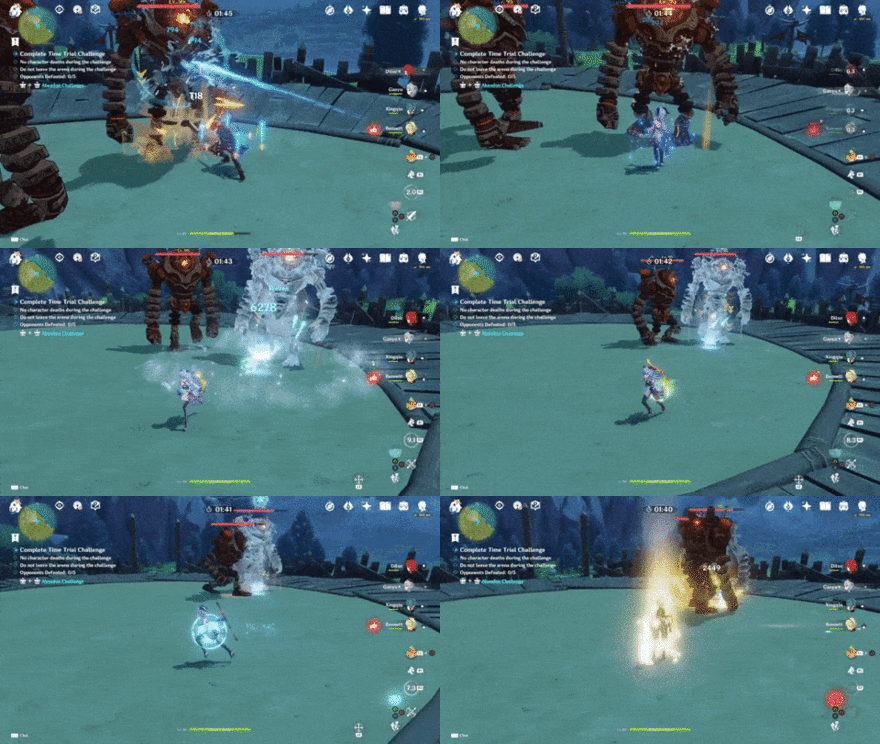 Use Hydro and Cryo Characters to freeze the Ruin Guards |
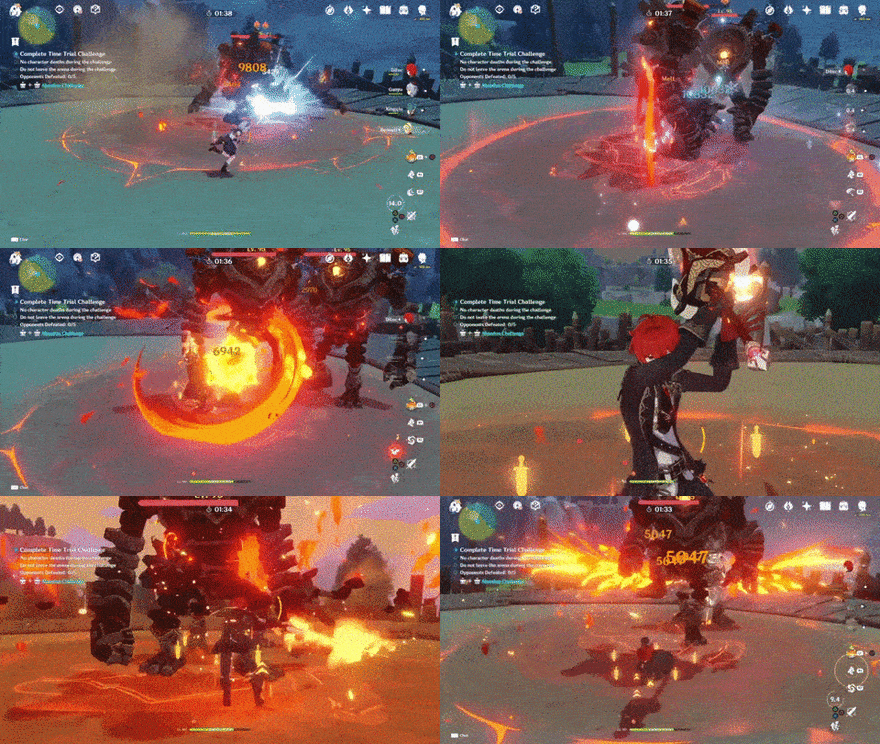 You can also use Pyro Characters to deal Vaporize and Melt reactions |
| Main DPS | |
|---|---|
| Sub-DPS | |
| Support |
Day 5: To The Bitter End
| Objectives | Extreme Difficulty ・Defeat one opponent in 110 seconds. ・Do not leave the arena during the challenge. ・No characters can die. |
|---|---|
| Arena Effects | The following effects will occur according to the current active character's HP: ・When HP is less than 70%, ATK is increased by 50% ・When HP is less than 50%, the character's Normal and Charged Attack SPD is increased by 25% ・When HP is less than 30%, attacks from the character that hit opponents will unleash shockwaves that deal AoE DMG. The aforementioned effects can occur simultaneously |
| Monsters |
Take damage to get stronger attacks
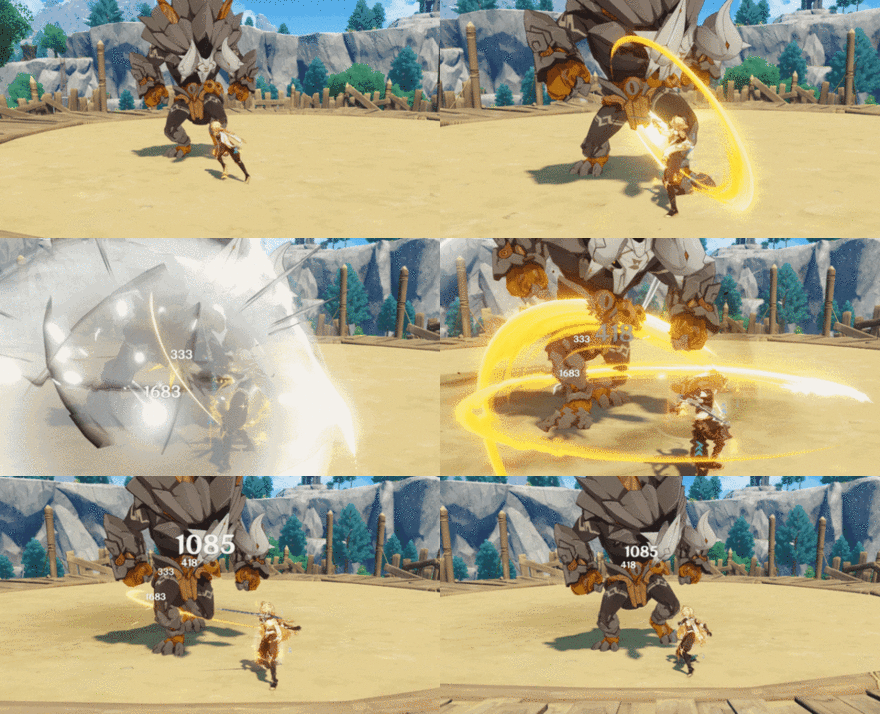 Taking damage during this challenge is necessary to gain different kinds of ATK buffs |
| Main DPS | |
|---|---|
| Sub-DPS | |
| Support |
Day 6: Shock Me, I Dare You!
| Objectives | Extreme Difficulty ・Defeat 30 opponents in 150 seconds ・No character deaths during the challenge |
|---|---|
| Arena Effects | Normal and Charged Attack SPD is increased. Charged Attack Stamina Consumption is decreased. Defeating opponents with Charged Attacks grants a stacking bonus: a Charged Attack DMG increase |
| Monsters |
Keep using your Charged Attacks
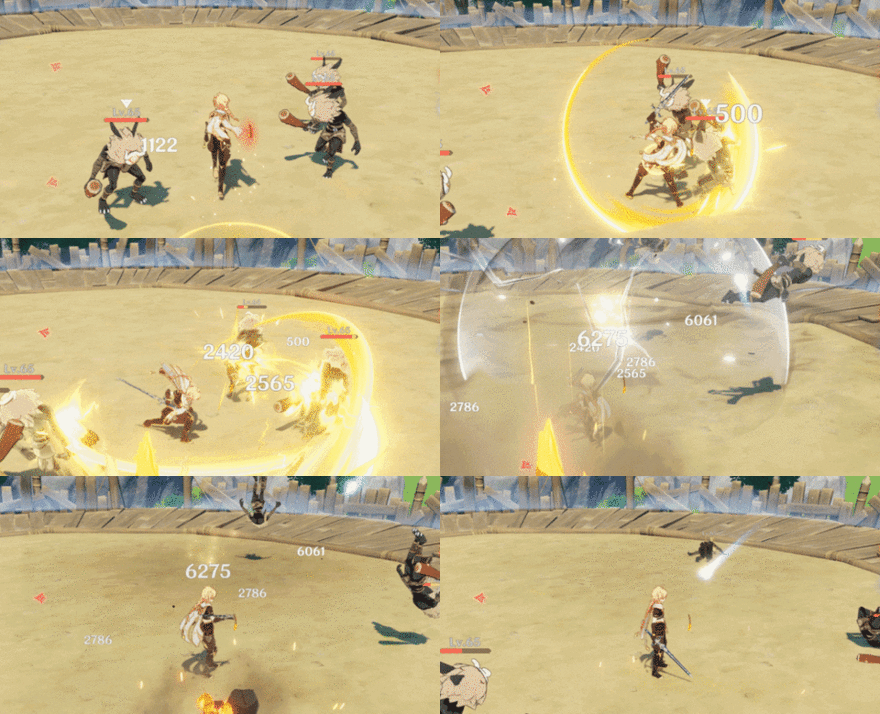 The key to winning this challenge is to keep using your Charged Attacks regularly to deal the most DMG |
| Main DPS | |
|---|---|
| Sub-DPS | |
| Support |
Day 7: Want to Know How I Got These Icicles?
| Objectives | Extreme Difficulty ・Defeat 1 opponent in 90 seconds ・Do not leave the arena during the challenge ・No character deaths during the challenge |
|---|---|
| Arena Effects | There is an Aura in the middle of the arena. If any of your own party members spends over 5s in the Aura, the Aura will be consumed and all your own party members will have their ATK increased by 100% for the next 10s. Their Normal and Charged Attacks will release a shockwave on hit that deals AoE DMG. One shockwave may be unleashed in such a way every 15s. A new Aura will appear 10s after the previous Aura has been consumed and you have aforementioned effects. A maximum of 3 additional Auras will appear during this challenge. |
| Monsters |
Use the Aura to Strengthen your Attack
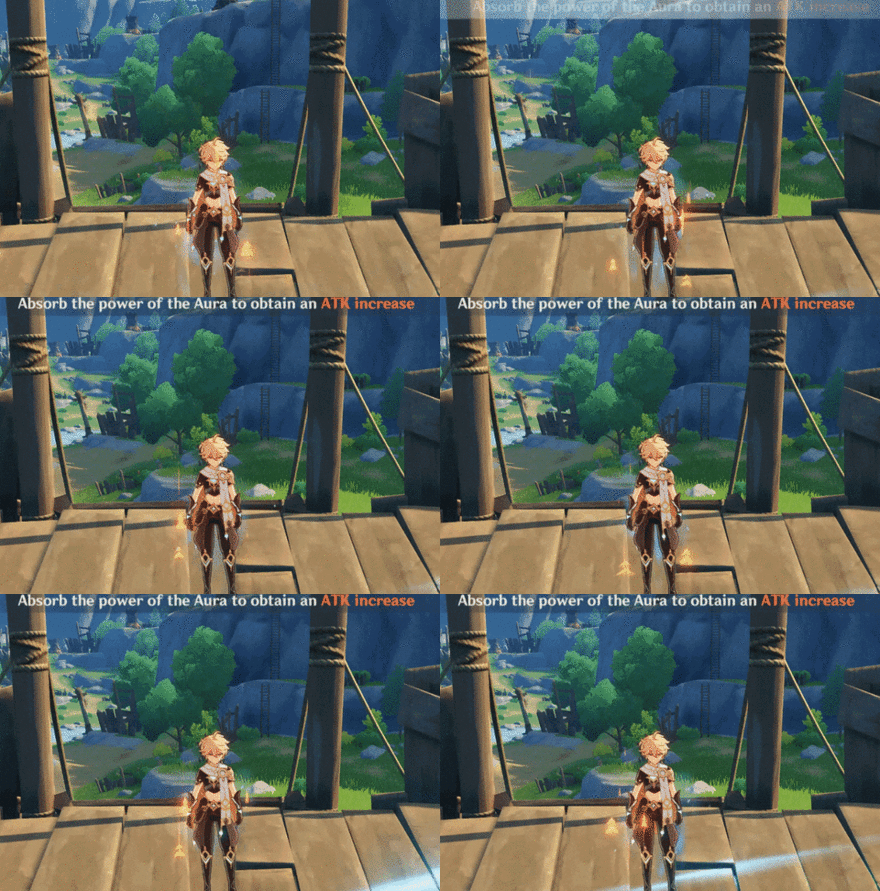 Auras in the arena grant you ATK buffs and AoE DMG. Keep using these to win the fight. |
| Main DPS | |
|---|---|
| Sub-DPS | |
| Support |
Contending Tides Gameplay
New Challenges Daily

Every day you unlock a new challenge, and all challenges have the Normal, Hard, and Extreme difficulties. No matter which option you choose, make sure your characters come prepared to fight!
Get all rewards in one go
You can choose to start with the easier difficulties, but if you clear the challenge on Extreme first, you will also get the Hard and Normal difficulty rewards.
Objectives and Conditions
Completing the challenges is not just about clearing enemies, you also have to fulfill certain conditions to receive all of the rewards. Make sure you clear all objectives!
Timed Challenges
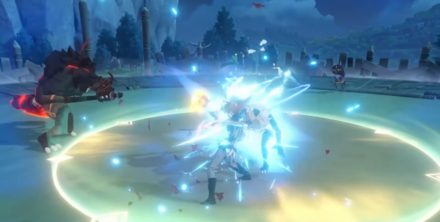
Most of the challenges will have a set time limit, so you only have a certain amount of time to defeat the enemies you need. Similar to Domain challenges or Spiral Abyss, speed is a must!
Special Arena Effects
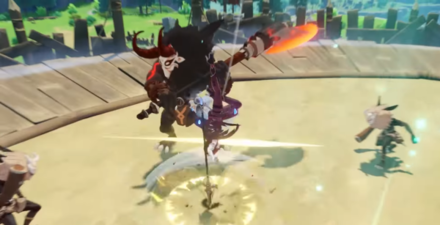
Each of the challenges have special Arena Effects, such as wind currents that will help you perform plunge attacks. Use these effects to your advantage and gain the upper hand!
Contending Tides Event Rewards
Here are the rewards that you can receive by completing each challenge in Contending Tides. Note that clearing a stage on Extreme difficulty will get you all the rewards for the lower difficulties too, so you only need to clear each challenge once!
| Challenge | Rewards | |
|---|---|---|
| Welcome to Easy Mode | Normal | |
| Hard | ||
| Extreme | ||
| Don't Sweat It | Normal | |
| Hard | ||
| Extreme | ||
| Art of the Cannonball | Normal | |
| Hard | ||
| Extreme | ||
| Battle of an Epoch | Normal | |
| Hard | ||
| Extreme | ||
| Shock Me, I Dare You! | Normal | |
| Hard | ||
| Extreme | ||
| Want to Know How I Got These Icicles? | Normal | |
| Hard | ||
| Extreme | ||
Genshin Impact Related Guides

Current Events
| Event Guide | Date and Rewards |
|---|---|
 Homeward, He Who Caught the Wind Homeward, He Who Caught the Wind
|
02/27/2026 - 03/16/2026
|
Upcoming Events
| Event Guide | Date and Rewards |
|---|---|
 Sightseeing With Friends Sightseeing With Friends
|
03/16/2026 - 03/26/2026
|
 Operation Stronghold Defense Operation Stronghold Defense
|
03/23/2026 - 04/02/2026
|
 Overflowing Abundance 6.4 Rerun Overflowing Abundance 6.4 Rerun
|
03/30/2026 - 04/06/2026
Weapon and Talent Up Materials
|
Permanent/Recurring Events
| Event Guide | Date and Rewards |
|---|---|
 To Temper Thyself and Journey Far To Temper Thyself and Journey Far
|
02/23/2026 - 05/18/2026
|
 Stygian Onslaught Stygian Onslaught
|
03/04/2026 - 04/07/2026
|
 Travelers' Tales Travelers' Tales
|
Permanently Available after Version 6.0
|
 Repertoire of Myriad Melodies Repertoire of Myriad Melodies
|
Permanently Available
|
 Test Run Test Run
|
Permanently Available
|
 Hangout Events Hangout Events
|
Permanently Available after Version 1.4
|
 Baptism of Song Baptism of Song
|
Permanently Available
+ Free Barbara
|
 Daily Check-In Daily Check-In
|
2021/03/01 - Permanently Available
|
 Stellar Reunion Returnee Event Stellar Reunion Returnee Event
|
Permanently Available
|
Past Events
Comment
Author
Contending Tides Event Guide
Rankings
Gaming News
Popular Games

Genshin Impact Walkthrough & Guides Wiki

Honkai: Star Rail Walkthrough & Guides Wiki

Umamusume: Pretty Derby Walkthrough & Guides Wiki

Pokemon Pokopia Walkthrough & Guides Wiki

Resident Evil Requiem (RE9) Walkthrough & Guides Wiki

Monster Hunter Wilds Walkthrough & Guides Wiki

Wuthering Waves Walkthrough & Guides Wiki

Arknights: Endfield Walkthrough & Guides Wiki

Pokemon FireRed and LeafGreen (FRLG) Walkthrough & Guides Wiki

Pokemon TCG Pocket (PTCGP) Strategies & Guides Wiki
Recommended Games

Diablo 4: Vessel of Hatred Walkthrough & Guides Wiki

Cyberpunk 2077: Ultimate Edition Walkthrough & Guides Wiki

Fire Emblem Heroes (FEH) Walkthrough & Guides Wiki

Yu-Gi-Oh! Master Duel Walkthrough & Guides Wiki

Super Smash Bros. Ultimate Walkthrough & Guides Wiki

Pokemon Brilliant Diamond and Shining Pearl (BDSP) Walkthrough & Guides Wiki

Elden Ring Shadow of the Erdtree Walkthrough & Guides Wiki

Monster Hunter World Walkthrough & Guides Wiki

The Legend of Zelda: Tears of the Kingdom Walkthrough & Guides Wiki

Persona 3 Reload Walkthrough & Guides Wiki
All rights reserved
Copyright© 2012-2024 HoYoverse — COGNOSPHERE. All Rights Reserved.
The copyrights of videos of games used in our content and other intellectual property rights belong to the provider of the game.
The contents we provide on this site were created personally by members of the Game8 editorial department.
We refuse the right to reuse or repost content taken without our permission such as data or images to other sites.


![Monster Hunter Stories 3 Review [First Impressions] | Simply Rejuvenating](https://img.game8.co/4438641/2a31b7702bd70e78ec8efd24661dacda.jpeg/thumb)


