 under the page's title to be notified of any updates!
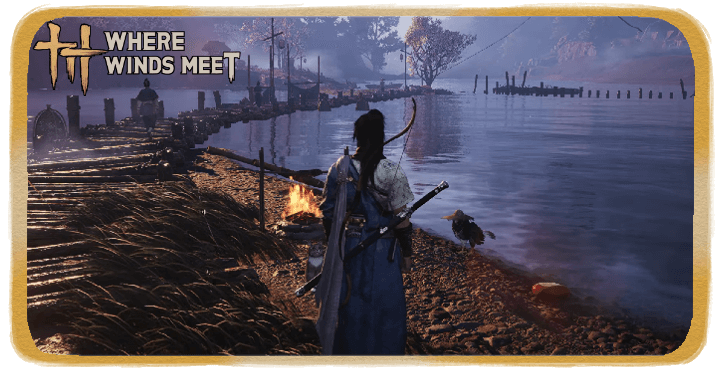 Beginner's Guide and Best Starting Tips
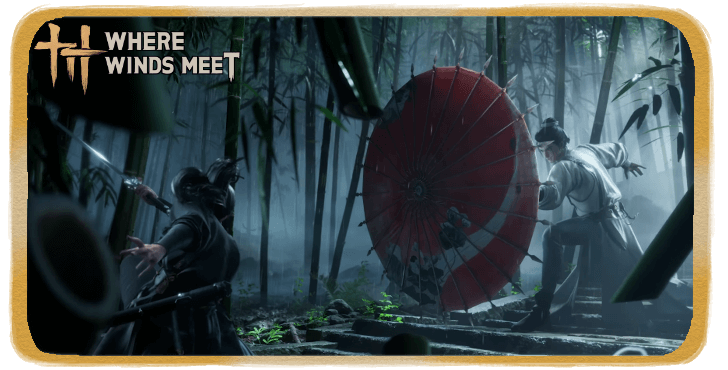 All Redeem Codes
 Difficulty Settings Guide
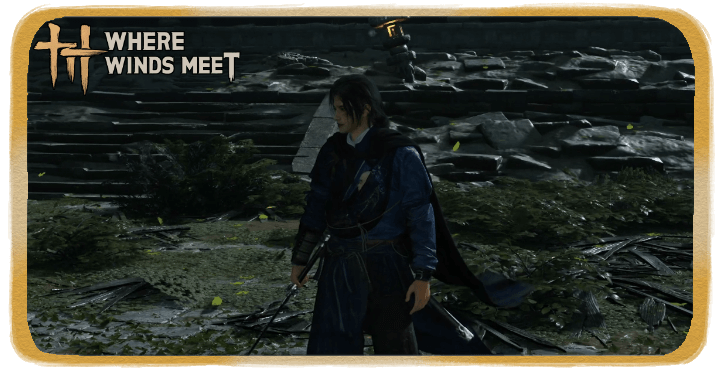 How to Progress Efficiently
 Daily Reset Timer and Cap Unlocks
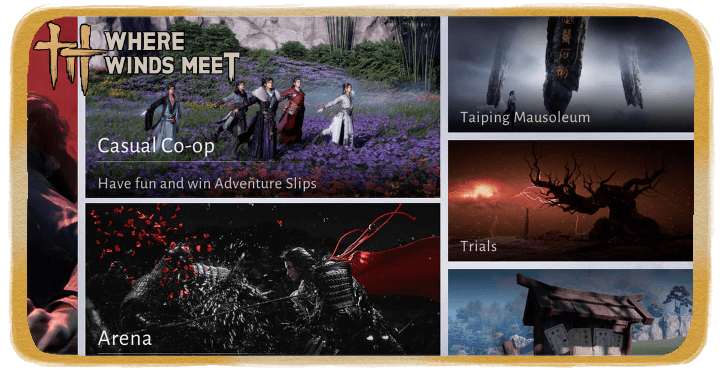 Dailies and Weeklies Guide
 How to Increase World Level
 Story Explained
 How to Play Co-Op and Online Mode
 How to Self-Heal Illness
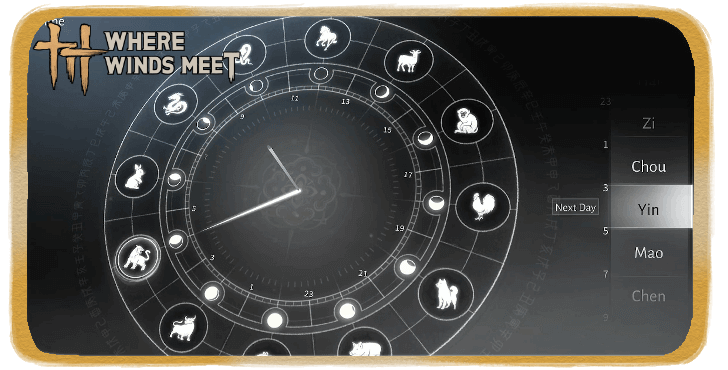 How to Change Time
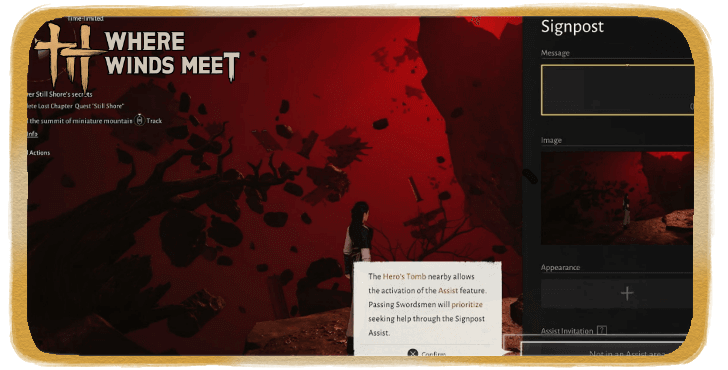 How to Place Signposts
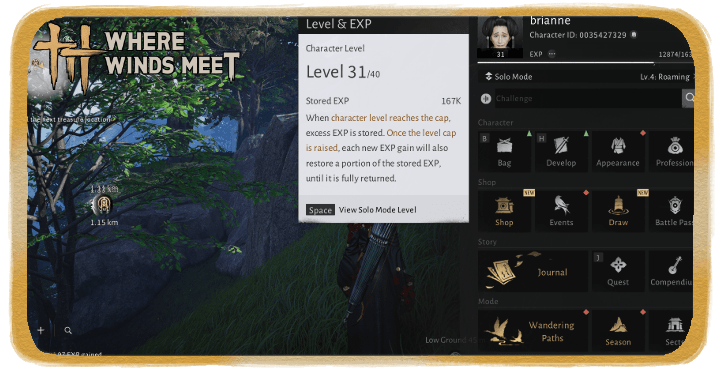 How to Use Stored EXP
 Battle Pass Guide
 How To Use Wind Sense
 List of Achievements
 How To Farm Enlightenment Points
 How to Save Game Data
 How to Upgrade Healing Potions
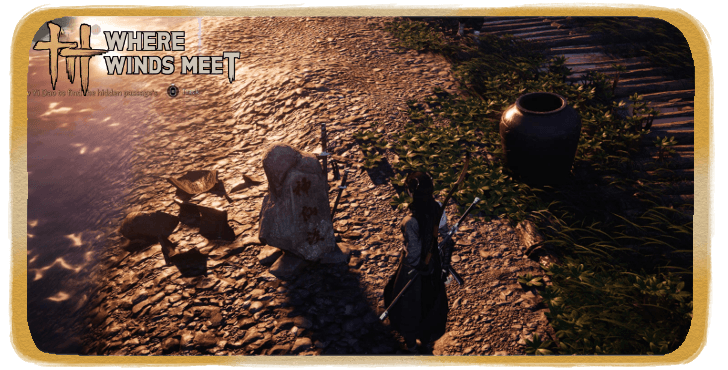 How to Rest
 Best Sect to Join
 Stamina System Explained
 Best Activities to Spend Energy
 Best Side Quests
 How to Level Up Fast
 Skill Theft Guide
 How to Get Commerce Coins
 How to Crouch
 List of Characters
 All Puzzle Solutions
 How To Farm Exploration Points
 How to Get Mount Early
 How to Fly
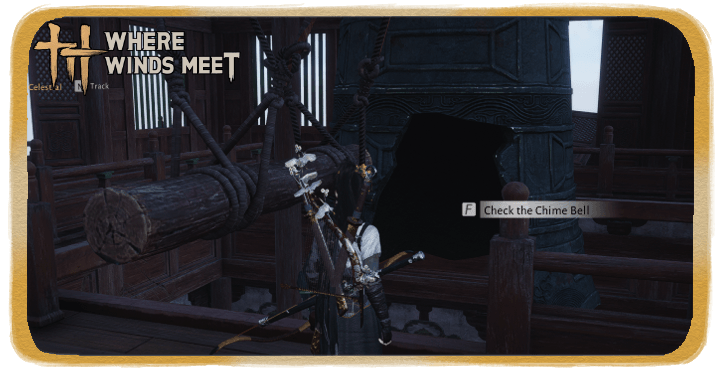 How to Repair Bell of Demoncalm
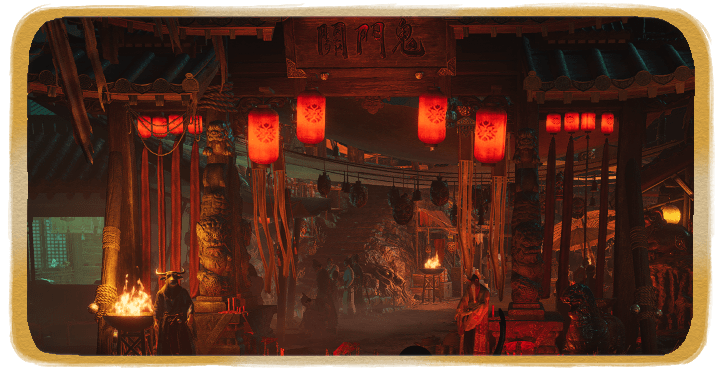 How to Get to Ghostlight Market
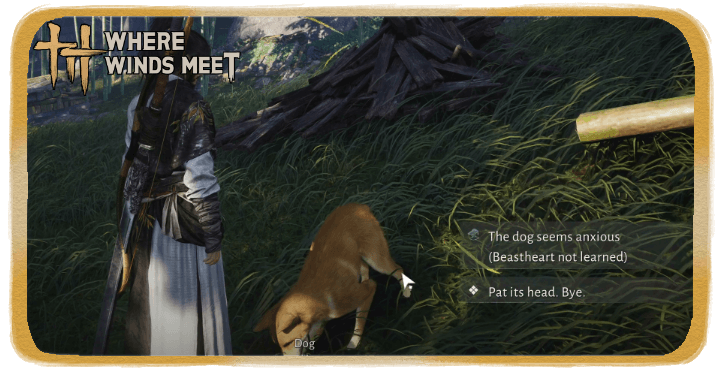 How to Unlock Beastheart
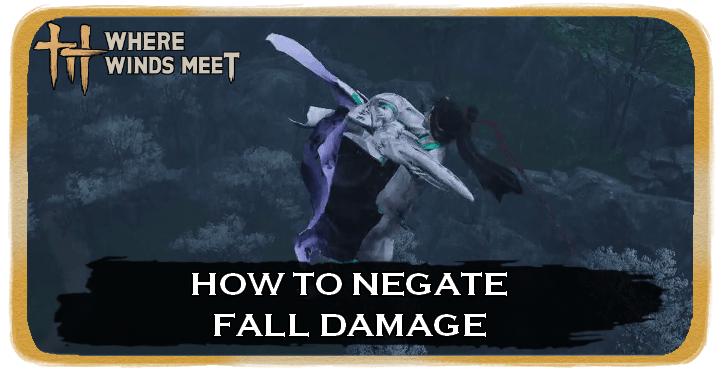 How to Negate Fall Damage
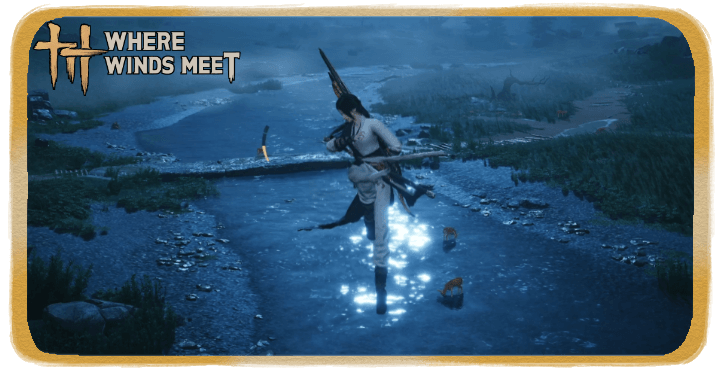 Jumping Explained
 Lock Picking Guide
 How to Unlock Roaring Sands
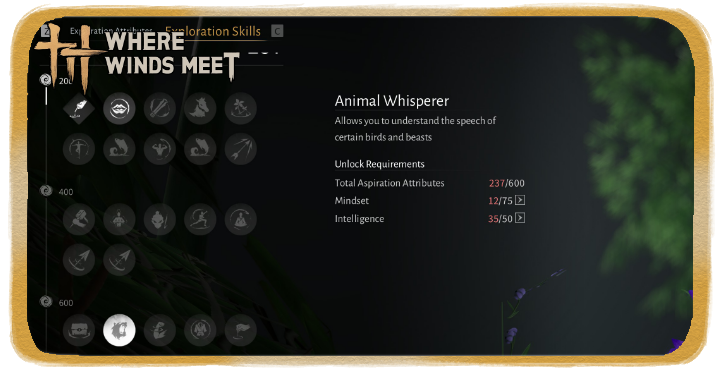 How to Talk to Animals
 How to Play Mahjong
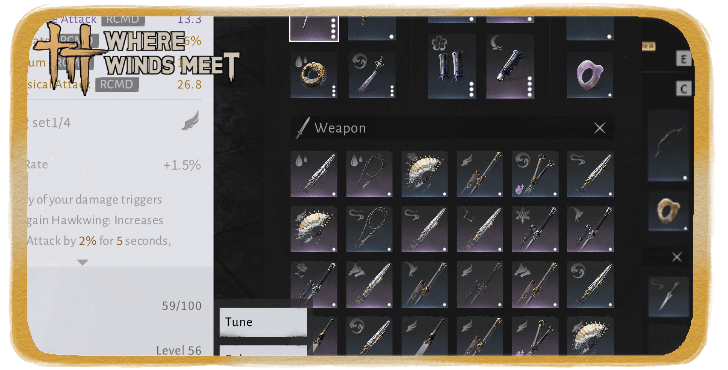 List of All Gear Sets
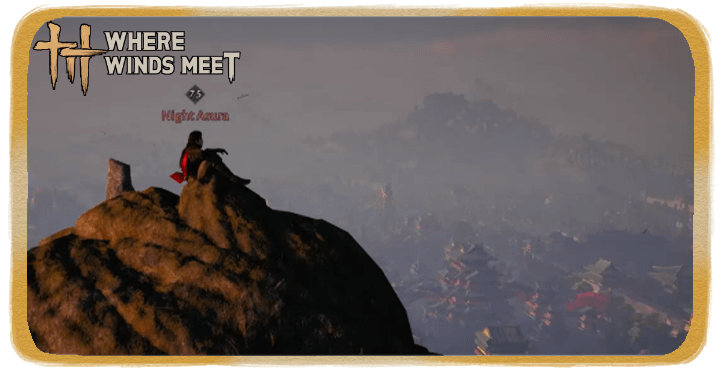 Should You Kill Night Asura?
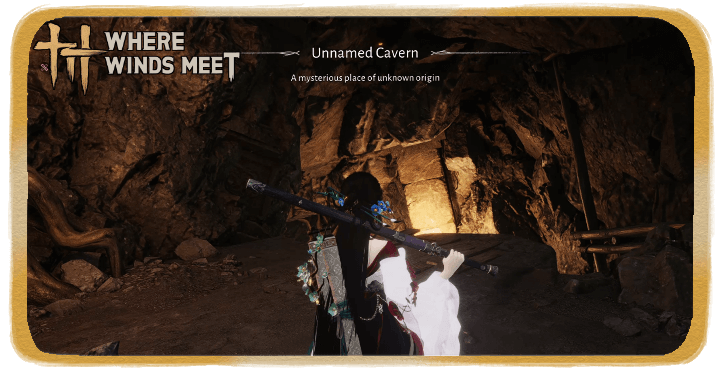 Cascading Water Ruins
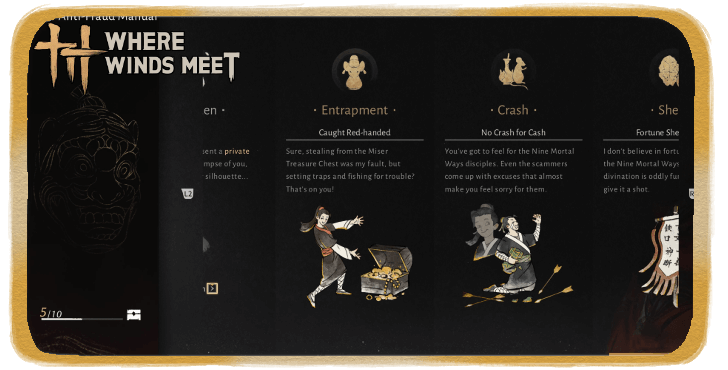 Anti-Fraud Manual Guide
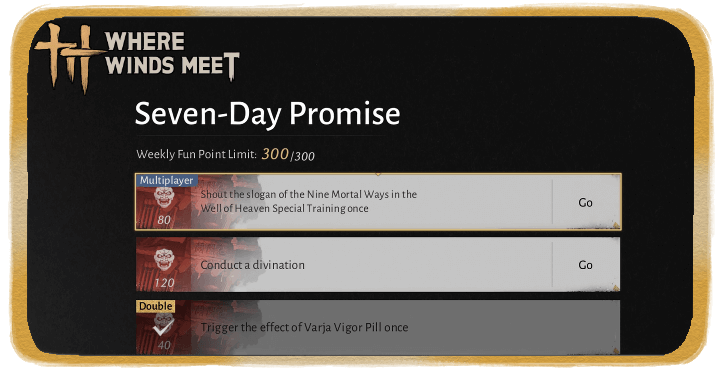 Seven-Day Promise Guide
 Solve the Puzzle on the Wall
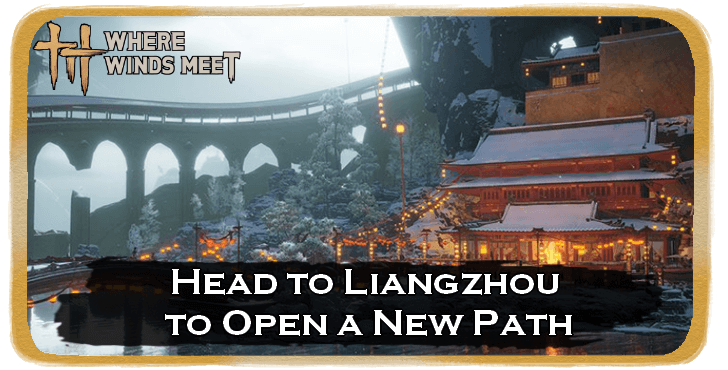 How to Head to Liangzhou
 How to Parry Attacks and Parrying Tips
 PvP Guide
 Advanced Combat Guide
 How to Unlock Mystic Skill Slots
 Stats Explained
 What is Affinity Damage?
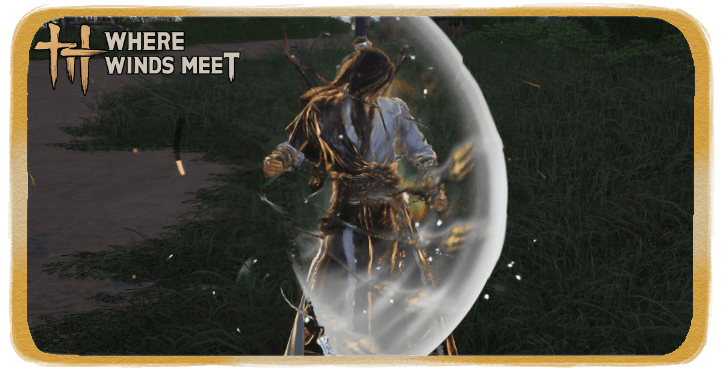 Gear Durability Explained
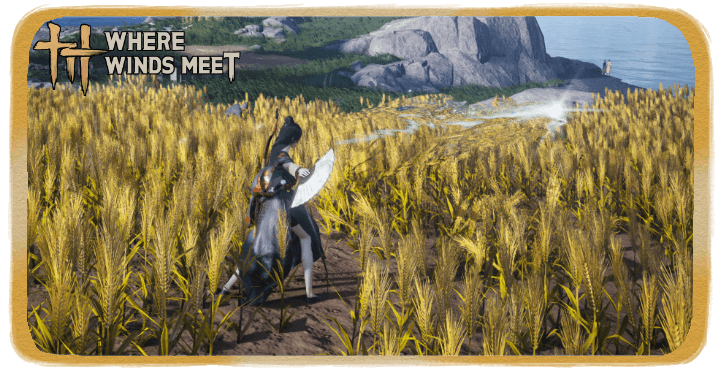 Gear Rarity Explained
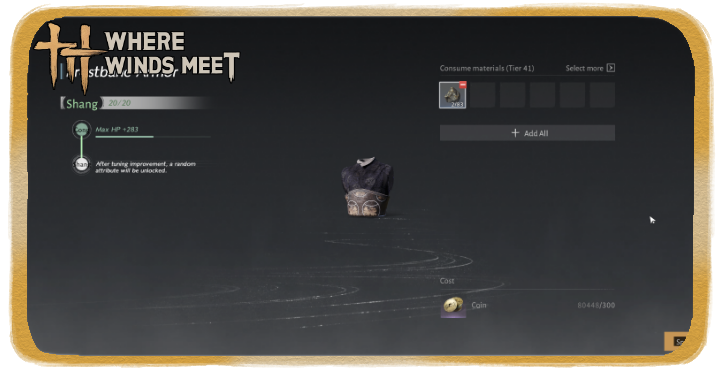 Gear Tuning Guide
 How to Upgrade Weapons
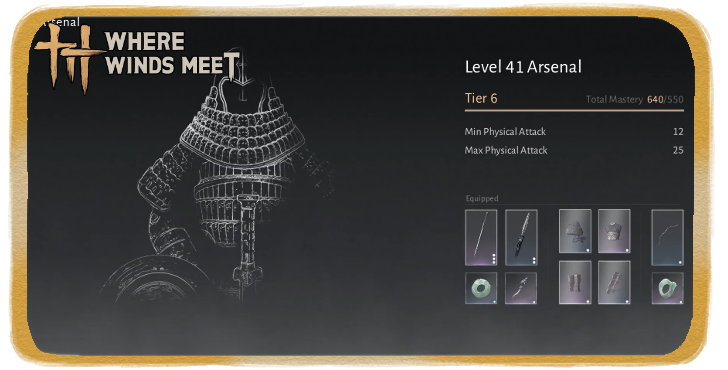 How to Unlock Arsenal
 How to Increase Vitality
 Animation Canceling Guide
 Taiping Mausoleum Guide
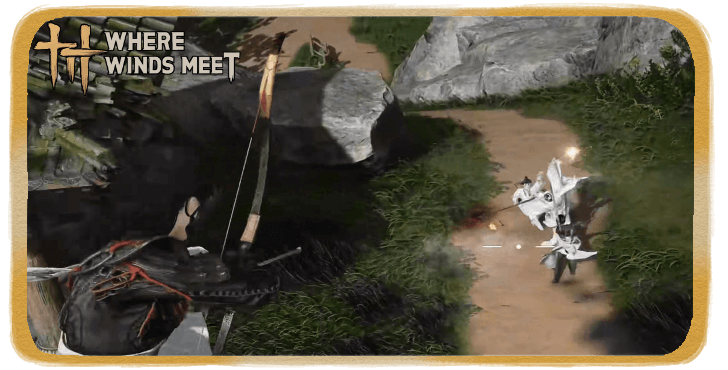 Perception Forest Guide
 How to Increase Perception
 How to Increase Mindset
 How to Increase Coordination
 Character Creation Guide
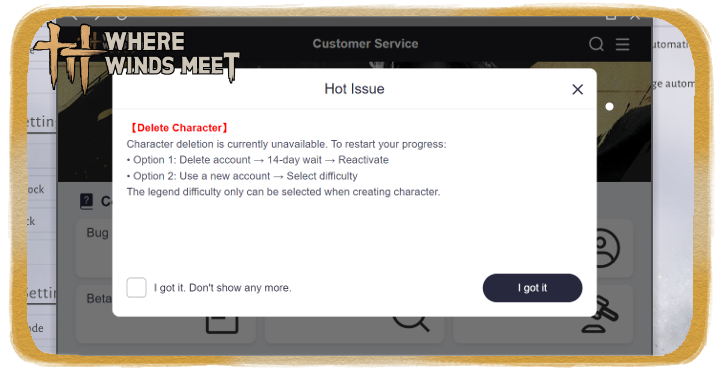 How to Delete Characters
 Best Starting Choices
 Can You Change Gender?
 How to Change Hair Color
 Can You Have Multiple Characters?
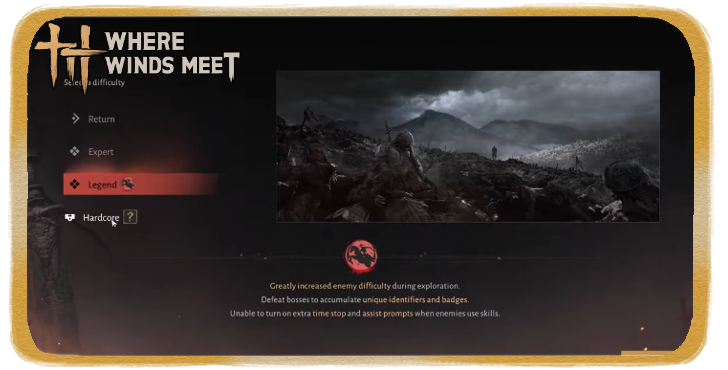 Should You Choose Legends Difficulty?
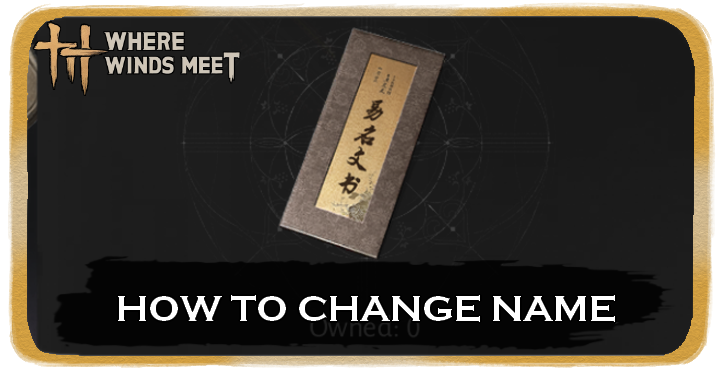 How to Change Name
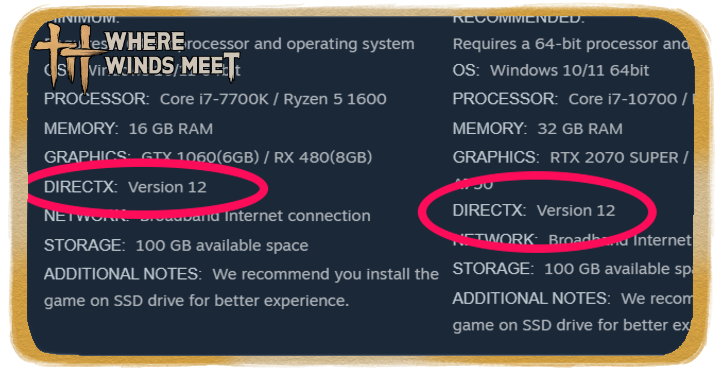 Should You Use DirectX 12?
 How Long is Where Winds Meet?
 What is the Max Level?
 What To Do With Old Gear?
 What are Pardon Parades?
 Death Penalty Explained
 All Missables and Points of No Return
 False Accusation Explained
 Endgame Guide
 How to Top Up
 How to Change Language
 How to Get Unstuck
 Best Settings Guide
 List of All Controls
 How to Hide Bow and Weapons
 How to Skip Cutscenes
 Microtransaction Guide
 Upcoming Weapons and Martial Arts
 Gacha System Explained
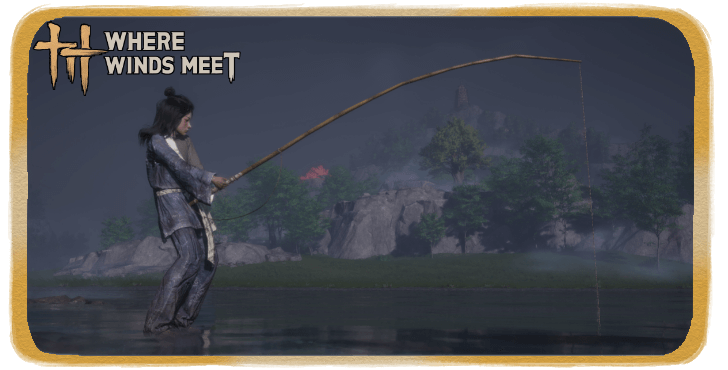 How to Unlock Fishing
 How to Disguise
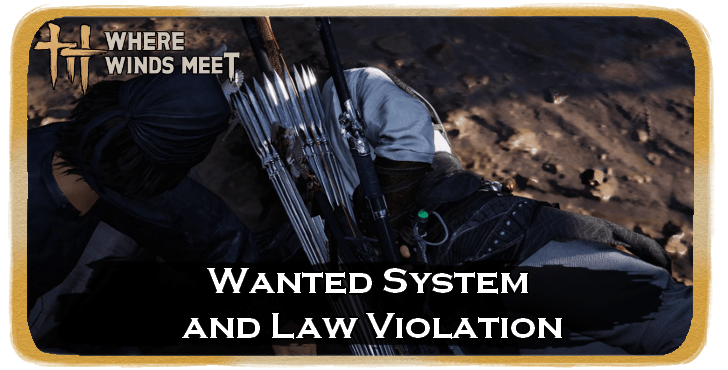 Wanted System and Law Violation
 Guild System Guide
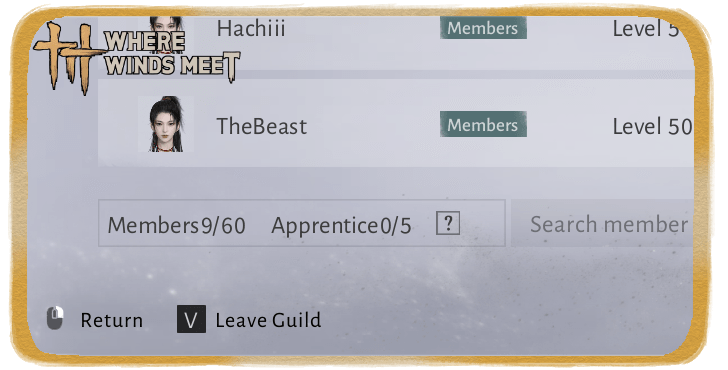 How to Leave Guild
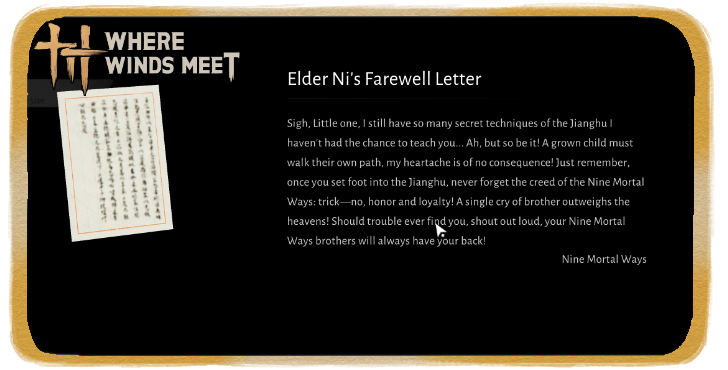 How to Leave Sect
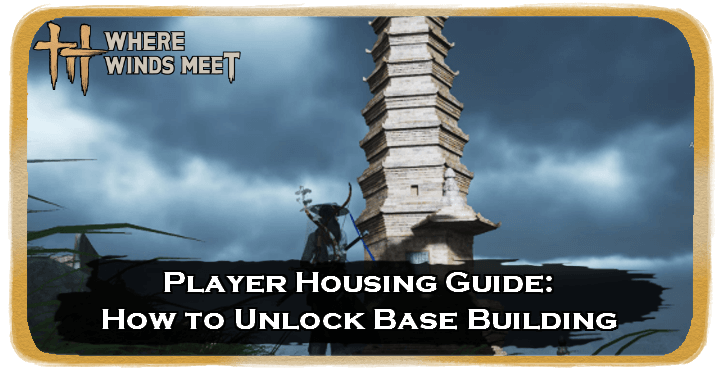 How to Unlock Base Building
 Romance System Explained
 How to Increase Intimacy
 Guild Wars Guide
 Season Challenges Guide
 Eastern Herald Quiz Answers
 Training Dummy Guide
 Spotlight Mode
This survey will take about 1 minute.
Your answers will help us to improve our website.
Where Winds Meet
Cascading Water Ruins Guide and Chest Locations
NEW: Hexi Map | Chapter 3 | Flute Mystic Skill
★ Unfettered and Everspring Build
☆ Liangzhou | Cat Fever | Prismatic Essence
✪ Updated: Best Weapon | Best Builds
☆ WWM Game8 Twitter: New tips daily!
Recruit using our Guild Recruitment Board!
Cascading Water Ruins is a Mysterious Stage released along with the new Nine Mortal Ways Base update. See more details about how to unlock the ruins here!
| All Mistveil Guides | |
|---|---|
| Mist-Shrouded Prison | Tomb Mistveil Prison |
| Mistveil City (Cascading Water Ruins) | |
 Attention! |
We are currently rushing out guides as quickly as possible. More details will be added here soon! |
|---|
List of Contents
Cascading Water Ruins Walkthrough
| Jump to a Section! |
|---|
|
|
Under the Cascading Water Ruins Walkthrough
| 1.1 | 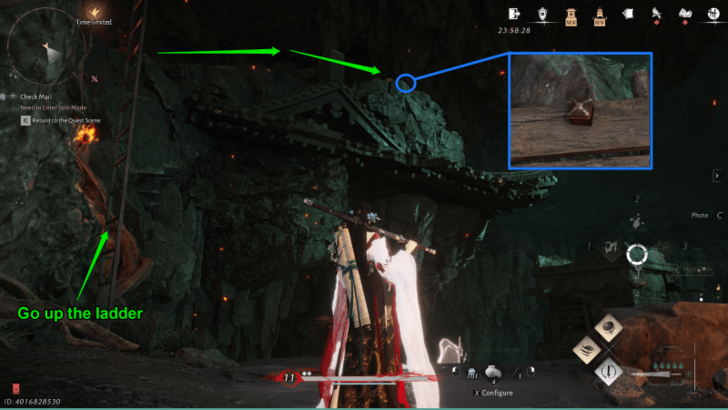 To the left of the Under the Cascading Water Ruins Boundary Stone, take the ladder going up, then follow the path to the right leading to a pile of boxes. Behind the boxes is Chest #1. |
|---|---|
| 1.2 | 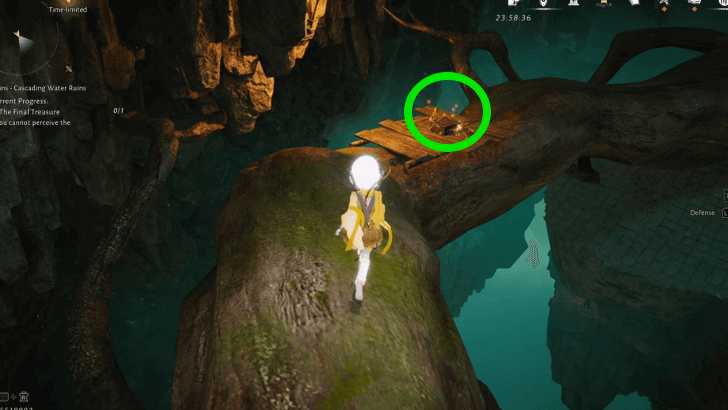 Return to the Boundary Stone, then follow the tree path to the wooden platform to collect Chest #2. Be careful of the shadow enemies launching quick blazing rounds at you. You can eliminate them by going to them directly or by hitting them with an arrow from a distance. |
| 1.2 | 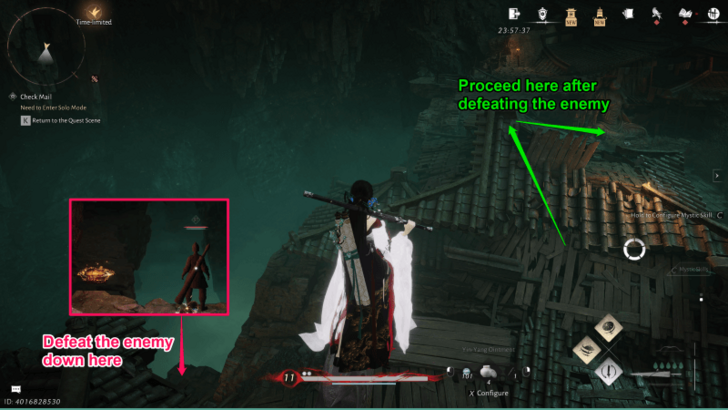 Hop down onto the bricked roof and take the hidden path on the left. Take down the enemy at the end of the path; this will be helpful when collecting a chest later on. After that, make your way back to the broken rooftops and proceed to the run-down residential area. |
| 1.3 |  Take the wooden slope on the right and run past the beheaded Buddha statue. Defeat the City Guards within the vicinity and collect Chest #3 on the ground floor of the large building next to the statue. Be mindful of the enemy waiting to ambush you as you retrieve the chest! |
| 1.4 | 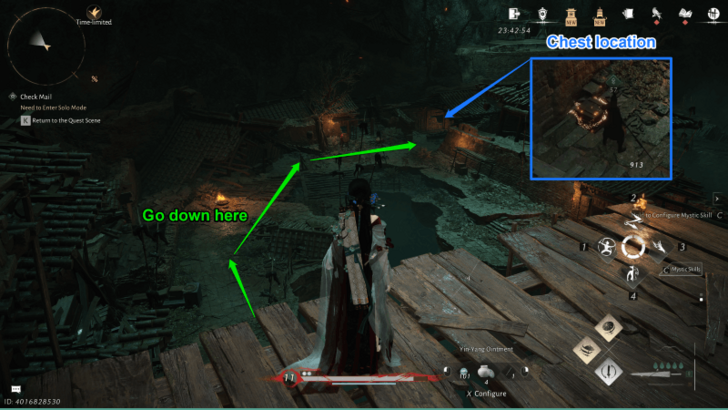 Climb down the ladder at the end of the path. Eliminate the City Guards within the vicinity and keep pushing on to the left side of the area. At the end of it, there will be a broken building leading to a basement. Defeat the City Guard blocking Chest #4. |
| 1.5 | 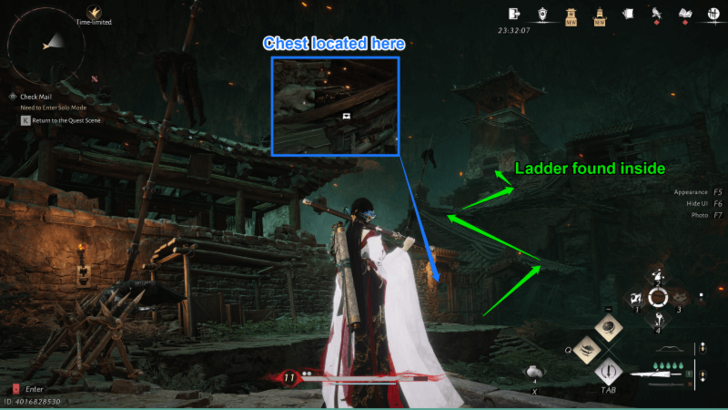 Find the tower at the rightmost side of the area and climb up the roofs to reach the location. Before going to the tower itself, visit the small torn-down house beside it and collect Chest #5. |
| 1.6 | 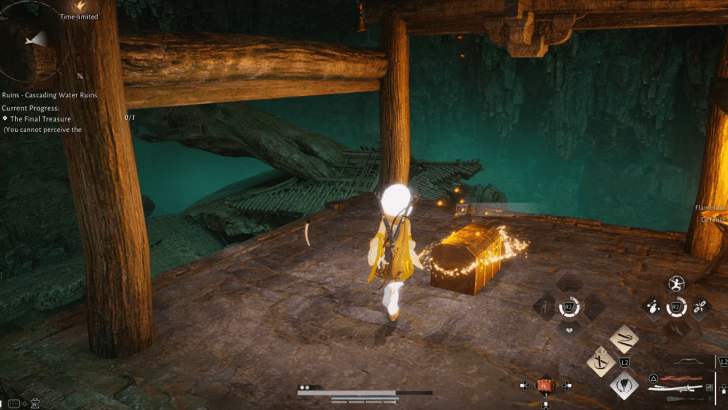 Climb up the ladder in the tower to find Chest #6 at the very top of it. Watch out for the City Guard ambling along the wooden bridges |
| 1.7 | 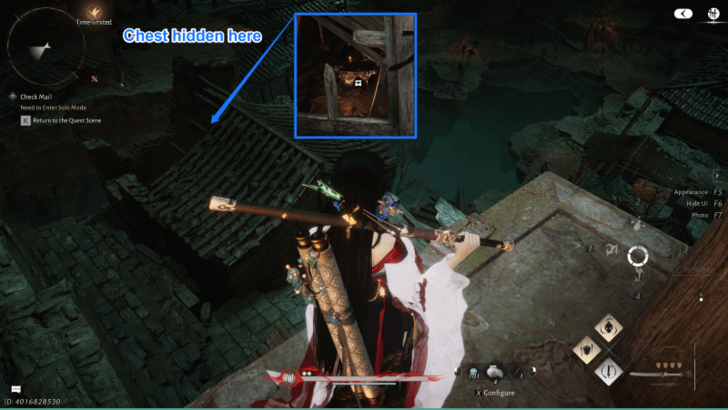 Descend to the left of the tower to get Chest #7 beside the piled-up sacks in a small dilapidated building. Once again, there will be City Guards roaming the area, so be careful. |
| 1.8 | 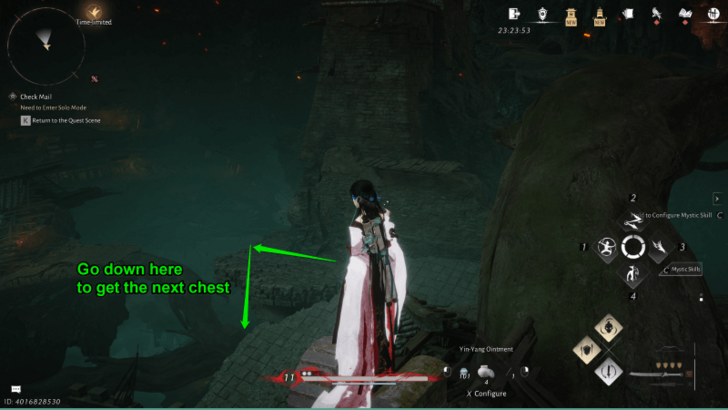 After collecting the seventh chest, backtrack all the way to the tree branch path mentioned earlier. From there, drop down the long branch, then go right to obtain Chest #8 guarded by a City Guard. |
| 1.9 | 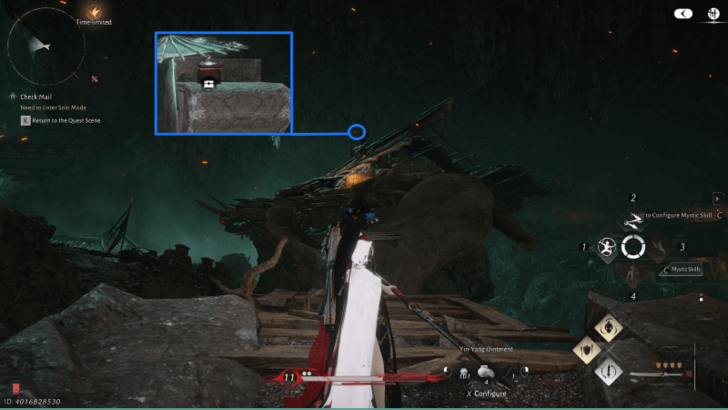 Turn back and collect Chest #9 sitting at the top of the suspended broken building. Be careful, as you will be within shooting distance of the giant ballista. |
| 1.10 | 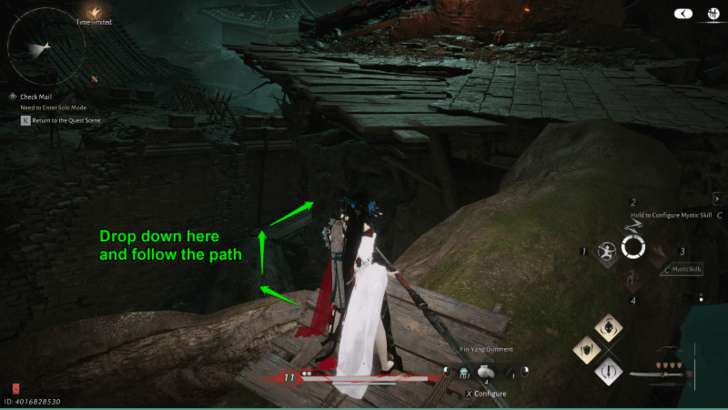 After collecting the ninth chest, drop down further to another tree branch below to gain access to a shortcut that will take you to the end of the broken bridge. |
| 1.11 | 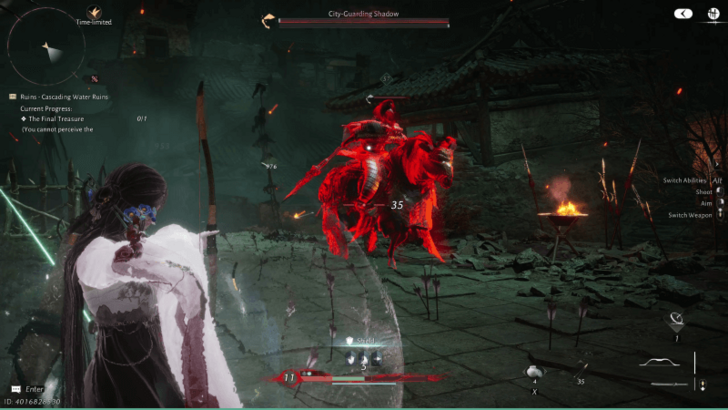 Ignore the chests in the middle of the bridge for the meantime and defeat the City-Guarding Shadow first to disable the giant ballistas. |
| 1.12 | 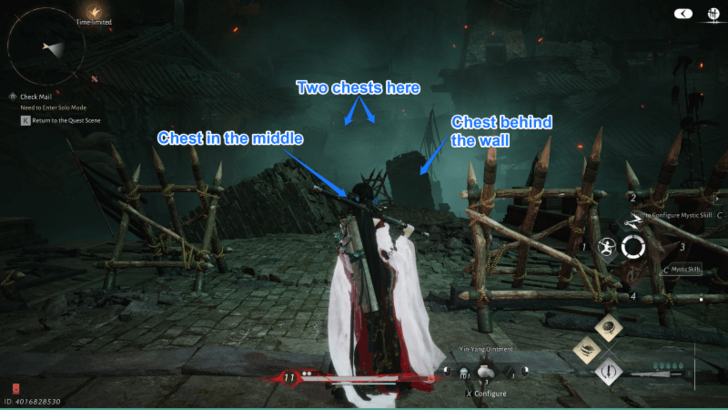 After defeating the City-Guarding Shadow, you may now gather all 4 chests located on the bridge. |
| 1.13 | 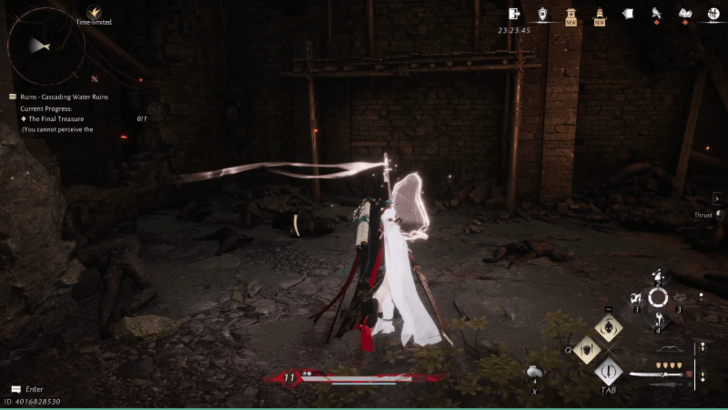 Proceed further into the dungeon by unlocking the A Place of Refuge Boundary Stone. |
A Place of Refuge Walkthrough
| 2.1 | 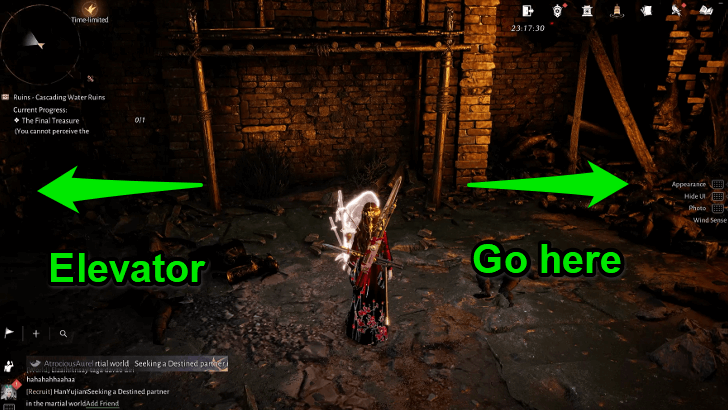 From the newly unlocked Boundary Stone, take the path to the right until you reach the cavern’s exit. |
|---|---|
| 2.2 | 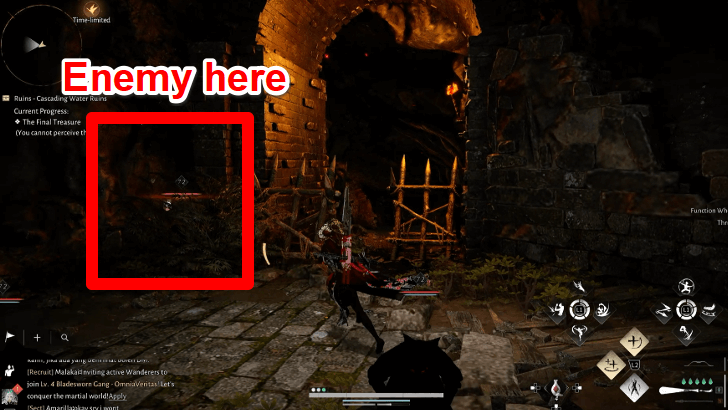 As you pass the wood spikes, an enemy will be hiding in the bushes by the entrance. |
| 2.3 | 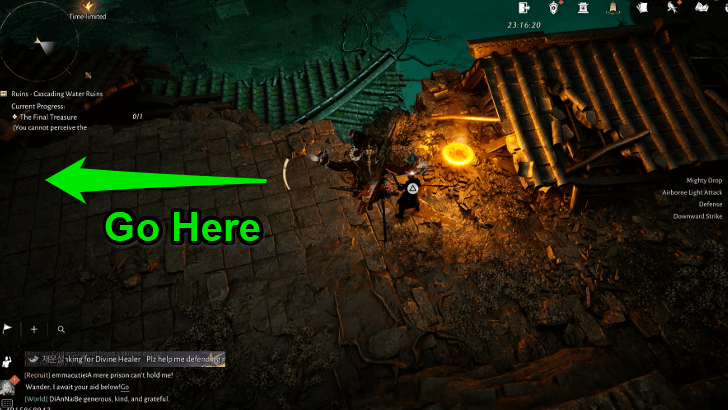 Go down the ledge; you can use Touch of Death to stealth kill the enemy by the fire. Take a left turn towards the large tree and drop down onto the roof. |
| 2.4 |  Drop down into the hole on the roof and grab Chest #14 inside. |
| 2.5 | 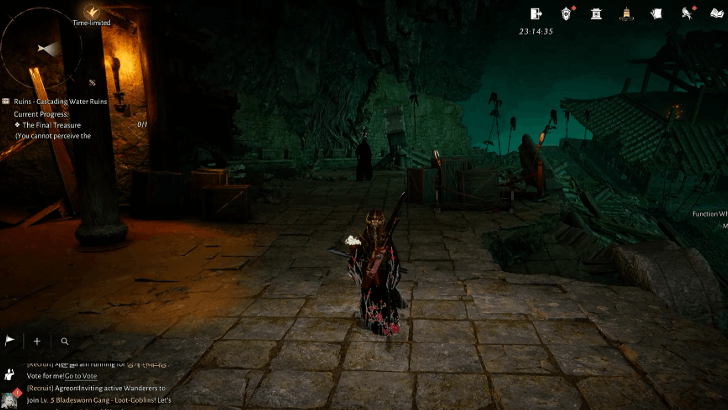 Facing the door, take the path to the left. Climb up the ramp, and you will see a City Guard on the right. |
| 2.6 | 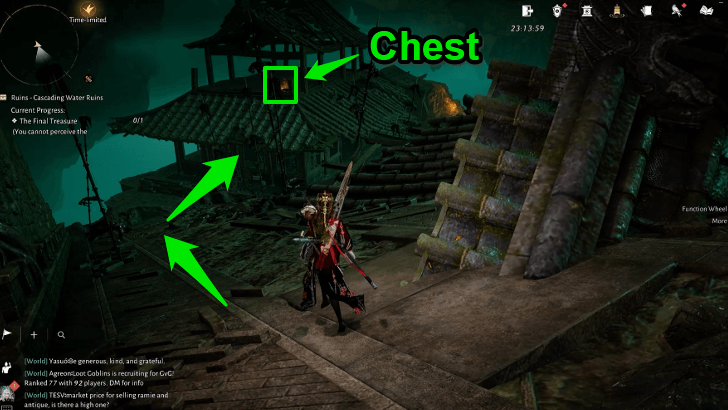 Continue climbing down the broken path once you reach the ruined building, hop up onto the roof, and take Chest #15 there. |
| 2.7 | 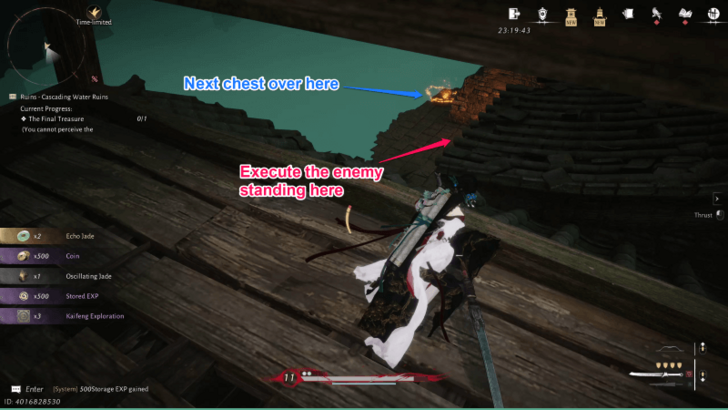 From the fifteenth chest, go to the far side of the roof. Stealth kill the City Guard guarding Chest #16. |
| 2.8 | 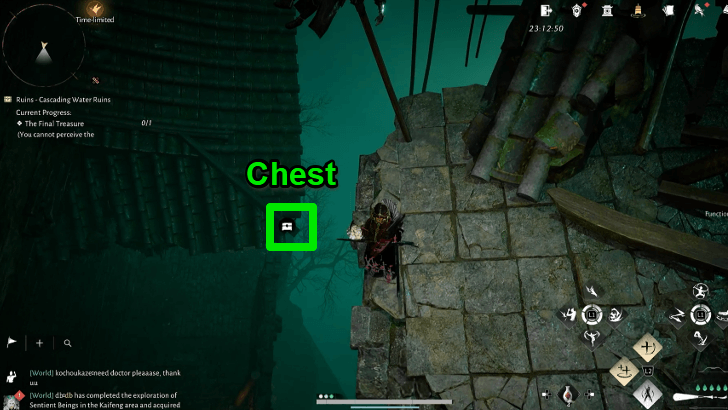 Go to the ledge across the ruined building, then drop onto the roof below to grab Chest #17. |
| 2.9 | 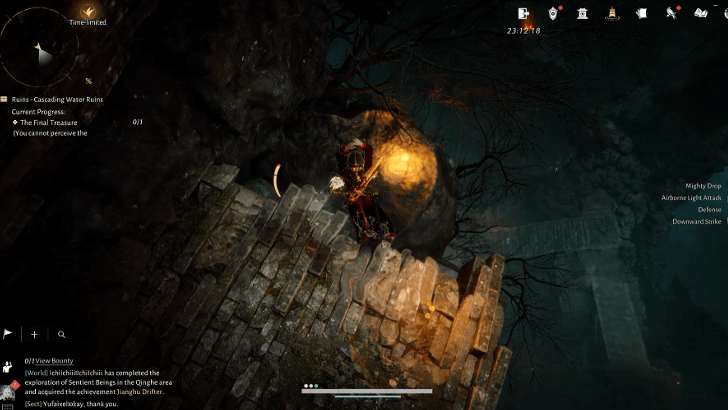 From the roof with the chest, drop down onto the next platform, go to the ledge, and scale down the side of the wall by dropping down onto the outcropping stones and branches. |
| 2.10 | 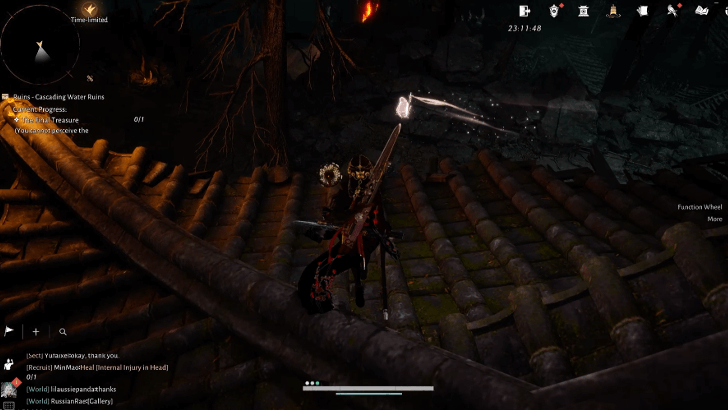 At the base, you will find the third boundary stone of the dungeon. |
The Cascading Waters' Floor Walkthrough
| 3.1 | 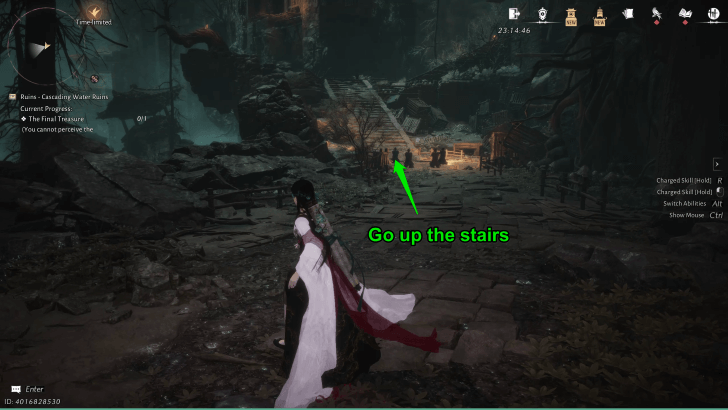 After unlocking the At the Cascading Waters' Floor Boundary Stone, go up the stairs to the right. You can ignore the deadly river for now as you will get an item that will allow you to cross later on. |
|---|---|
| 3.2 |  Upon reaching the top of the stairs, you will encounter a red-glowing enemy. This enemy will continue to resurrect until you destroy the cursed jar tied to it, which you can find located across the bridge to the left. |
| 3.3 | 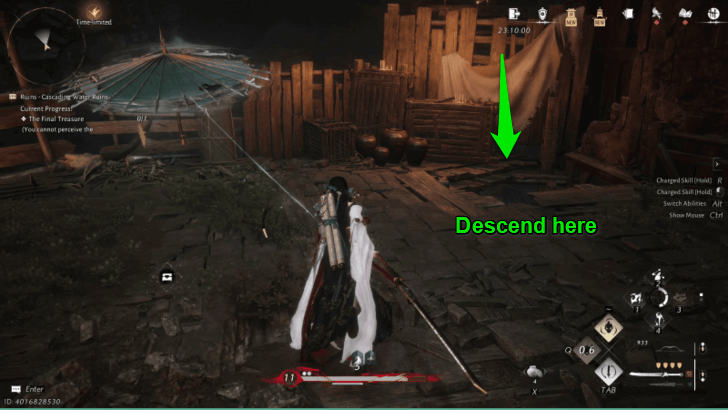 After dealing with the red-glowing enemy, descend through the opening located in the corner of the platform leading to Chest #18. |
| 3.4 | 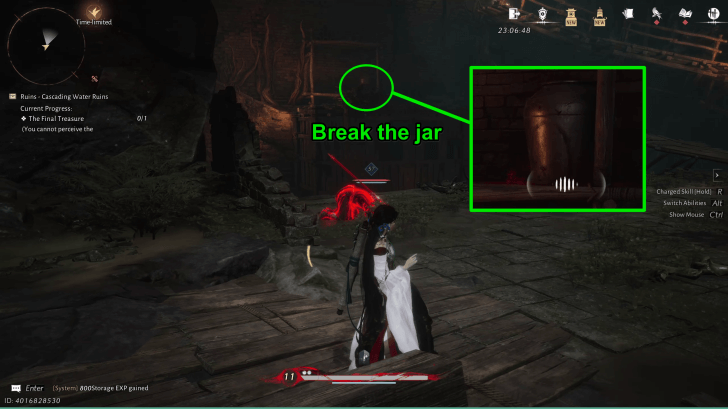 Defeat the group of enemies on the lower floor. There you will encounter another red-glowing enemy, which you can defeat by destroying the cursed jar located on the other side of the area. |
| 3.5 | 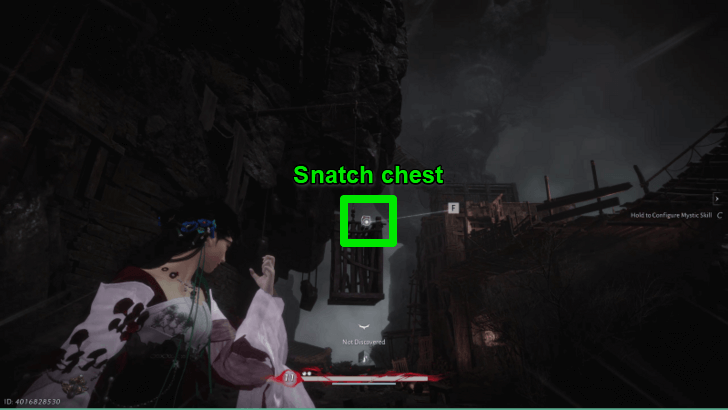 After dealing with the enemies, use the Heavenly Snatch to get Chest #19 sitting at the top of the hanging cage. |
| 3.6 | 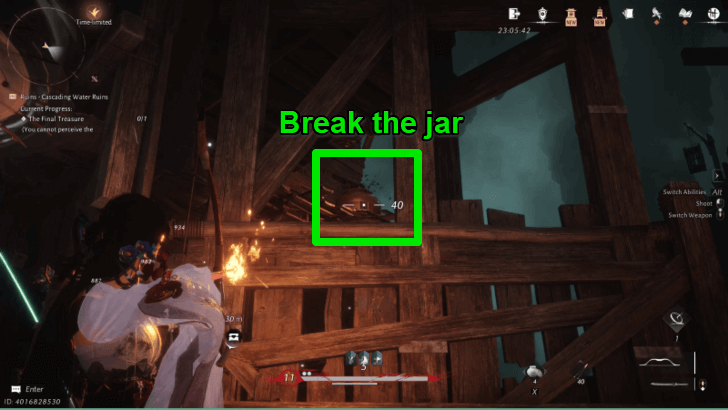 Go up the path and proceed to the left to find a platform you can drop down to. Before going down, destroy the cursed jar on the upper platform to defeat the red-glowing enemy waiting for you. |
| 3.7 | 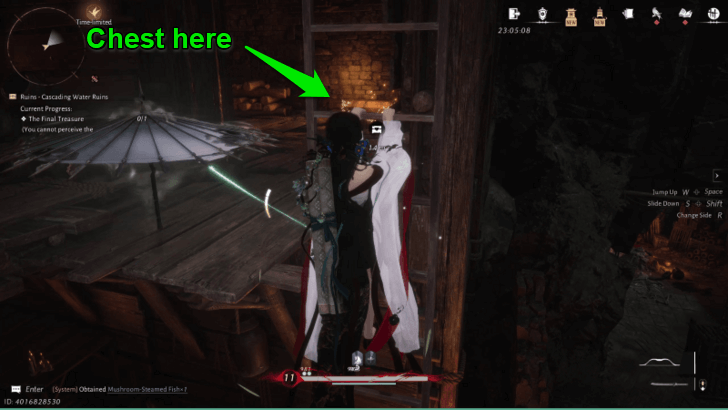 Drop down, then go up the ladder to reach Chest #20. |
| 3.8 | 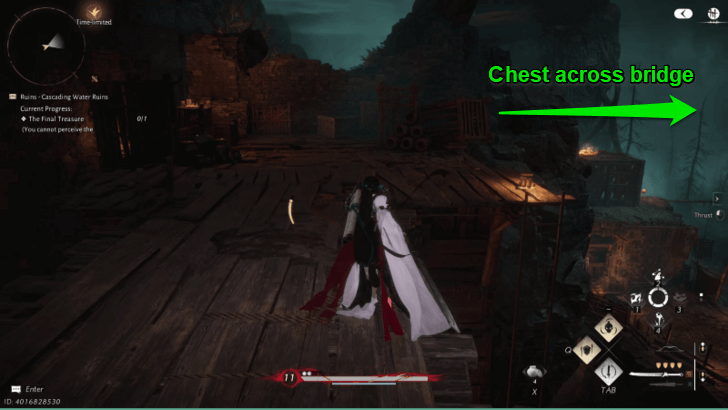 Climb all the way to the top, then proceed to the right to reach the Chest #21 sitting on top of a wooden crate across the bridge. |
| 3.9 | 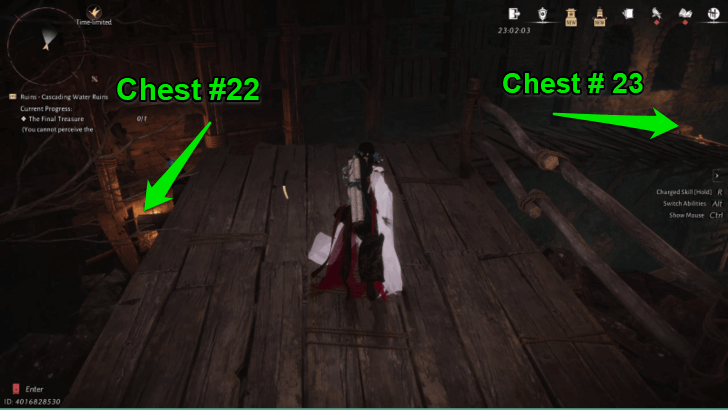 Return to the previous area and then drop down onto the ledge with the spear-wielding enemy. Defeat the enemy, then make your way down the ledge to obtain Chest #22 and Chest #23. |
| 3.10 | 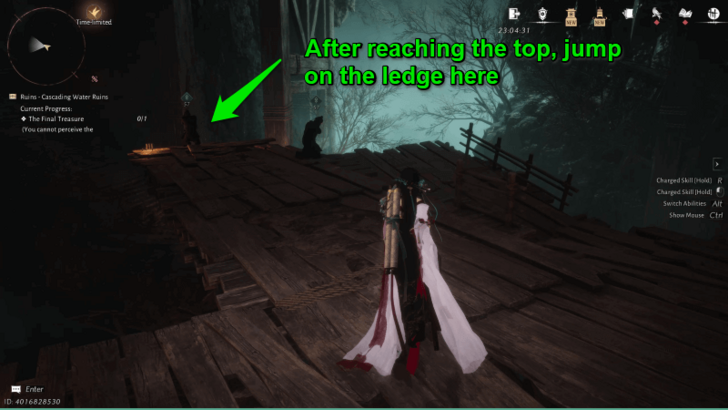 Make your way back up, then drop down the opposite side from where you went earlier. This will take you to the tall wooden tower. |
| 3.11 |  Defeat the enemies along the way, then enter the lighted hallway. Before exiting the hallway, you will see Chest #24 inside a room to your left. Be wary of the enemy waiting to ambush! |
| 3.12 |  After collecting the chest, climb the stairs just outside the room. Defeat the enemy on the upper floor, then climb the next ladder. |
| 3.13 | 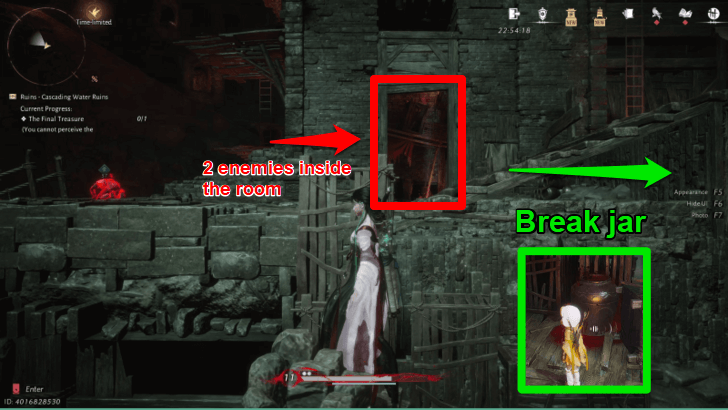 Continue making your way up using the stack of wooden boxes to your right. Destroy the cursed jar to get rid of the red-glowing enemy, then deal with the two shadow enemies in the adjacent room. |
| 3.14 |  Once you have dealt with the enemies, exit the room then climb the ladder. Climb all the way up, then drop down the ledge on your right to get Chest #25. |
| 3.15 | 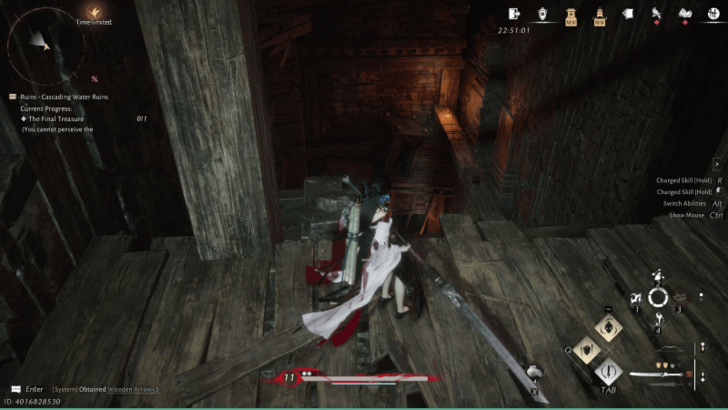 Return to the previous platform and drop down the ledge just beside the ladder to reach Chest #26 resting on a wooden beam. |
| 3.16 | 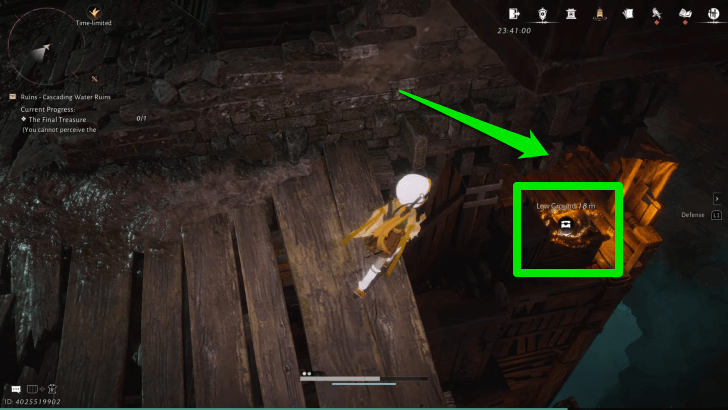 Drop down and make your way up again. This time, proceed to the area behind the wooden boxes. Drop down to the right to reach Chest #27. |
| 3.17 | 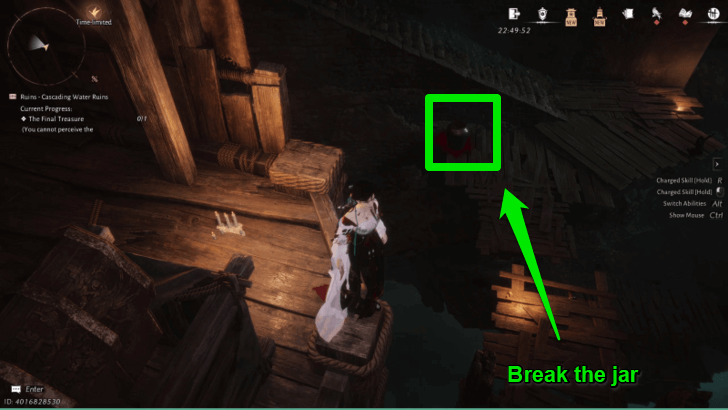 After getting the chest, drop down from the platform behind it and destroy the cursed jar near the flight of stairs. |
| 3.18 |  Go up the stairs then head to the right path to reach an elevator. Use this to unlock a shortcut going back to the second Phantom Boundary Stone. |
| 3.18 |  Use the elevator to head down again. Upon reaching the previous floor, step on the pedestal on the elevator, then quickly hop off to reveal a hidden area underneath where you can get Chest #28. |
| 3.19 |  Drop down from the chest area, then make your way up the stairs again, but this time head toward the left side. There is a red-glowing enemy waiting for you once you drop down. You can destroy its cursed jar near the exit of the cave. |
| 3.20 |  Exit the cave and defeat the enemies waiting on the bridge. Drop down to the ledges on the left again, but this time, head toward the sacrificial altar. |
| 3.21 | 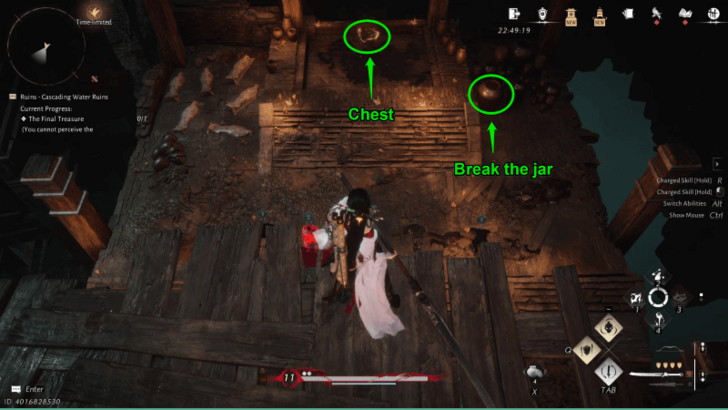 Make your way down and destroy the cursed jar to get rid of the red-glowing enemy praising the altar. Drop down into the altar to get Chest #29. Climb out of the altar, then cross to the bridge beside it. |
| 3.22 | 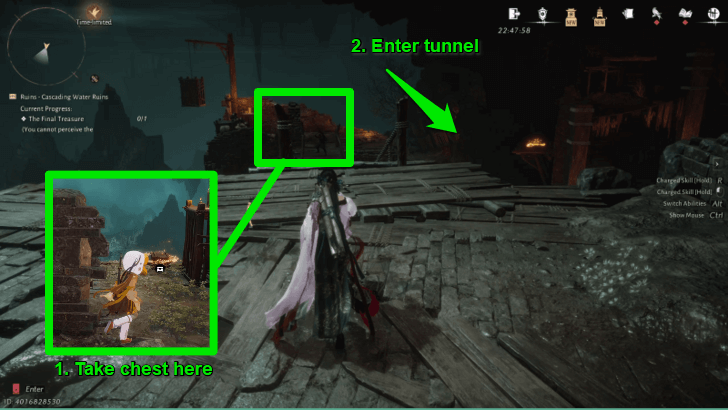 Defeat the enemies across the bridge and open the Chest #30. Go straight ahead until you reach a tunnel going up. Proceed up the tunnel and take down another red-glowing enemy waiting at the top. |
| 3.23 | 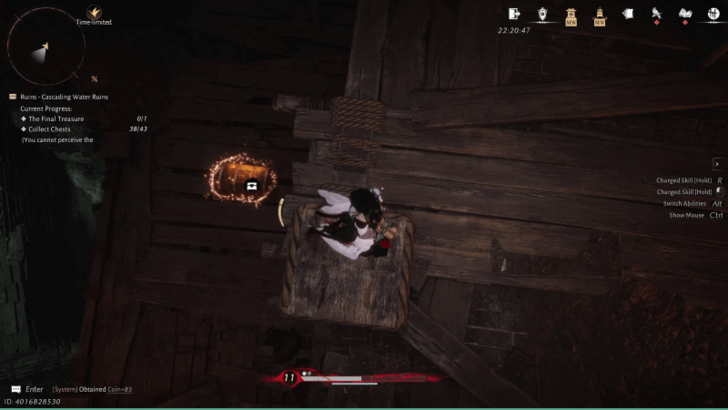 After taking care of the enemies, drop down the ledge on the right to get Chest #31. |
| 3.24 | 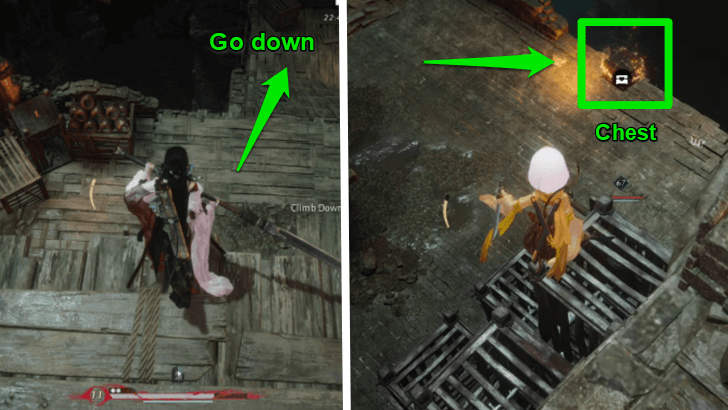 Proceed in the opposite direction of the tunnel to reach a wooden structure where you can obtain Chest #32. |
| 3.25 | 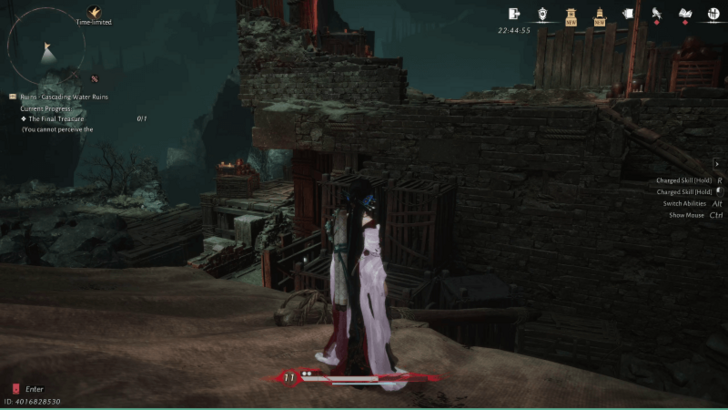 After obtaining the chest, we experienced a bug that prevented us from climbing back up. If you experience this as well, use the wooden boxes beside the stairs to get back up. |
| 3.26 | 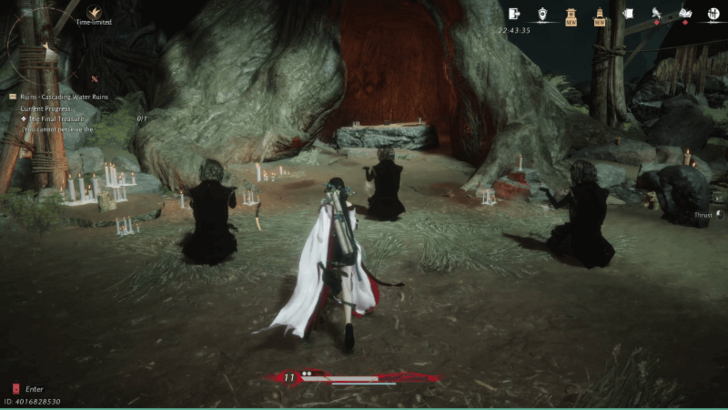 Proceed to the next area where you can find spirits worshipping a huge tree. Inside the tree, you will find a chest containing the Grass Knot, which is a quest item that will allow you to explore the dark swamp without getting cursed. This chest is not counted to the challenge objective, but is required to go through the Poison Swamp. |
Poison Swamp Walkthrough
| 4.1 | 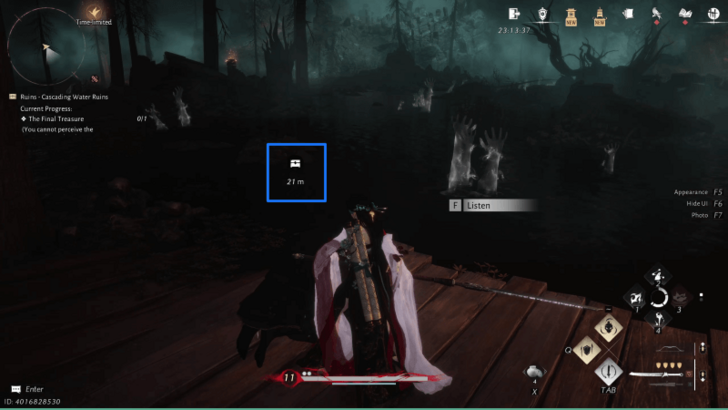 Follow the path down until you reach the beginning of the swamp area, where the third Phantom Boundary Stone is located. Grab Chest #33 on top of a stone nearby. |
|---|---|
| 4.2 |  From the thirty third chest, head to the rightmost part of the swamp. You will pass through a long, narrow path leading you to Chest #34. |
| 4.3 | 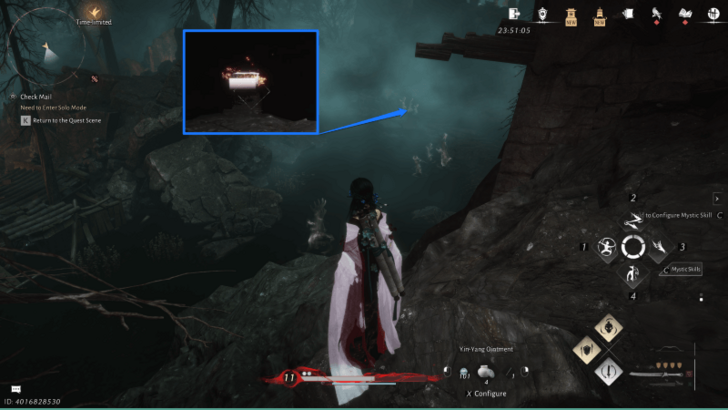 Exit the narrow path, then turn right. You will be able to see Chest #35 in the distance. Be wary of the giant rat roaming around this area! |
| 4.4 | 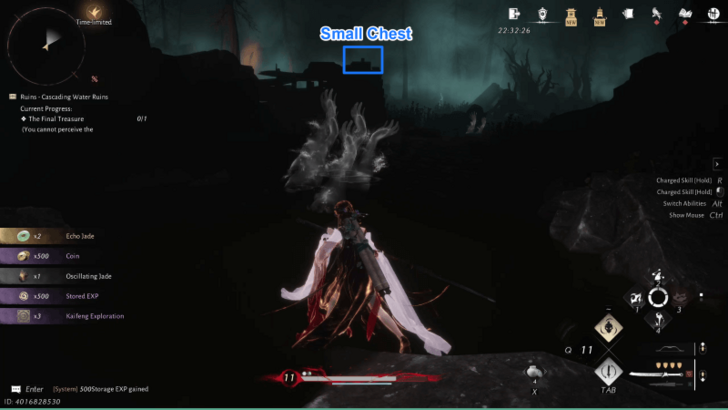 From the thirty fifth chest, turn around and you will see Chest #36 on top of a small pile of debris. |
| 4.5 | 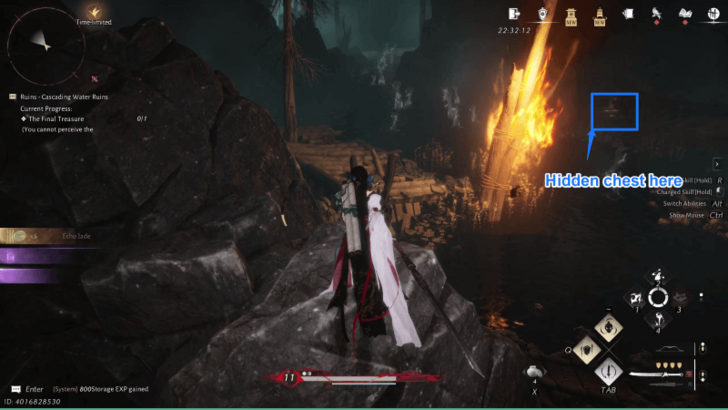 After grabbing the thirty sixth chest, face to the left and you will be able to see Chest #37 hidden underneath some rubble. |
| 4.6 | 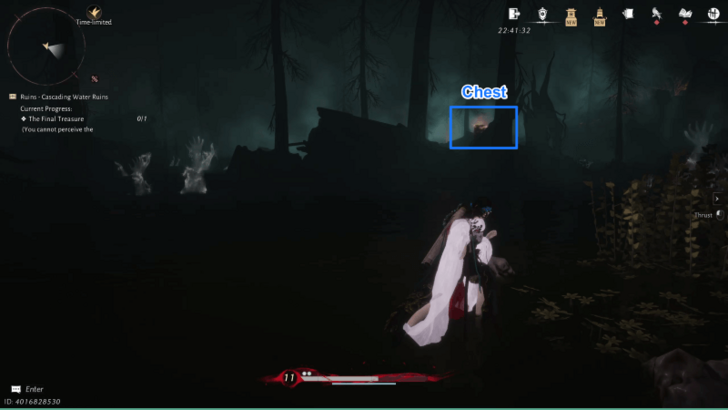 After collecting the thirty seventh chest, return to the starting area and you will be able to see Chest #38 on top of a broken wall. |
| 4.7 | 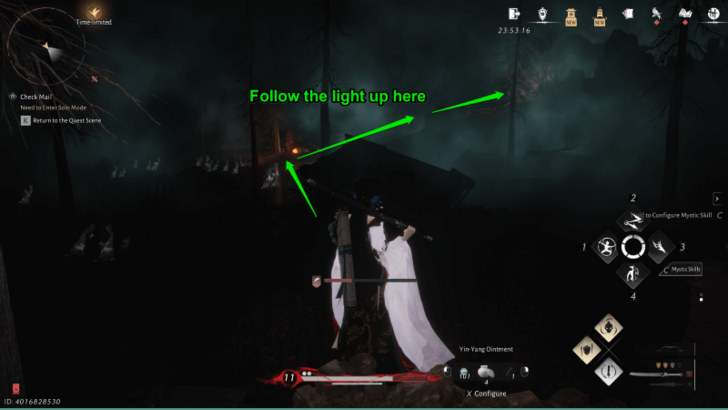 From the broken wall, face to the left and you will see an upwards slope in the distance. Proceed there to reach the graveyard area. |
| 4.8 |  Proceed to the middle of the graveyard to get Chest #39 inside the fallen tombstones arranged in a circle. |
| 4.9 |  Climb further up the path using the large tree branch until you reach the top and grab Chest #40 there. |
| 4.10 | 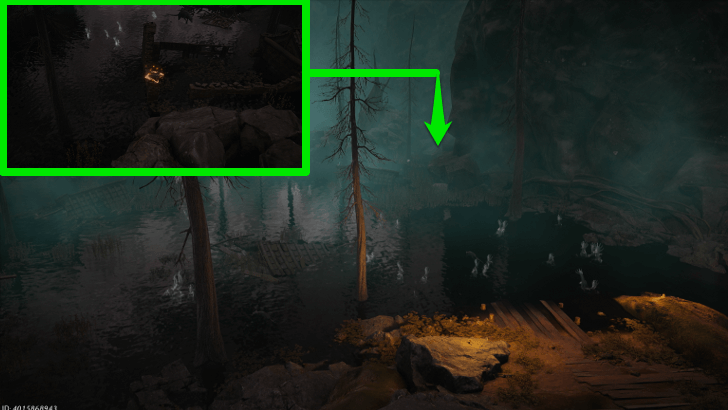 From the graveyard, head toward the swamp area again and hug the right side of the map. Follow along the wall, and you will find Chest #41 on top of another broken wall. |
| 4.11 |  After collecting the forty first chest, go straight ahead into a tunnel-like area to reach Chest #42. This chest will be guarded by two giant rats, so get ready to fight! |
| 4.12 | 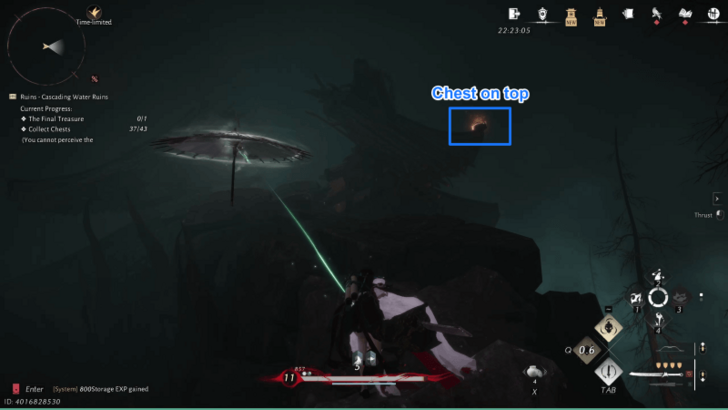 Once you have defeated the rats and acquired the chest, climb onto the tall rock formation just behind it. On the top of the rock, you will be able to get Chest #43. |
Final Chest Location
| 5.1 | 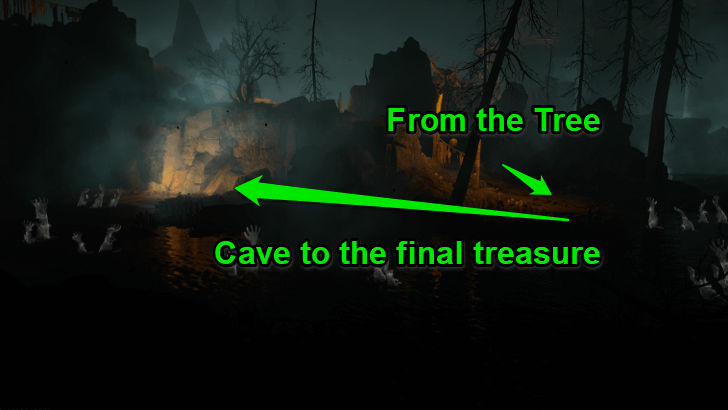 After completing all of the chests, return to the tree where you got the Grass Knot. Here you will see a tunnel that will lead you to the final area. Do not open the large chest at the further end of this area. This is a mimic mimic will spawn 4 large rats. You will get nothing from defeating them. |
|---|---|
| 5.2 | 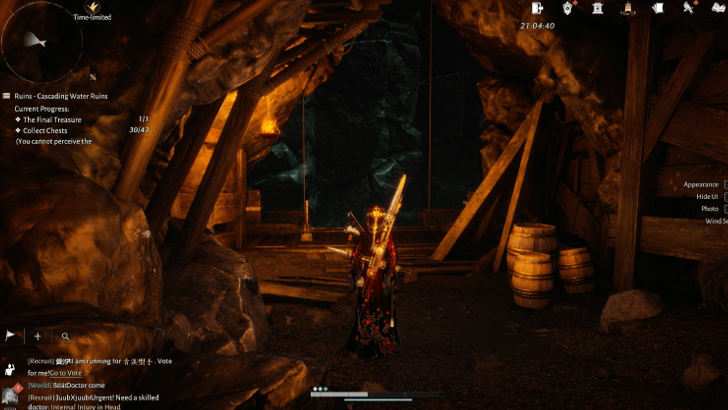 Take the elevator inside the tunnel. |
| 5.3 |  Claim the final treasure on the last area of the dungeon. |
Cascading Water Ruins Rewards
| ・Echo Shade x25000 ・Medicinal tales x2 ・Coin x18000 ・Character EXP x18000 ・Kaifeng Exploration x25 ・Hidden Face x1 |
These are the one-time rewards for completing the Cascading Water Ruins.
Cascading Water Ruins Location
Look for Mistveil City in Nine Mortal Ways Base
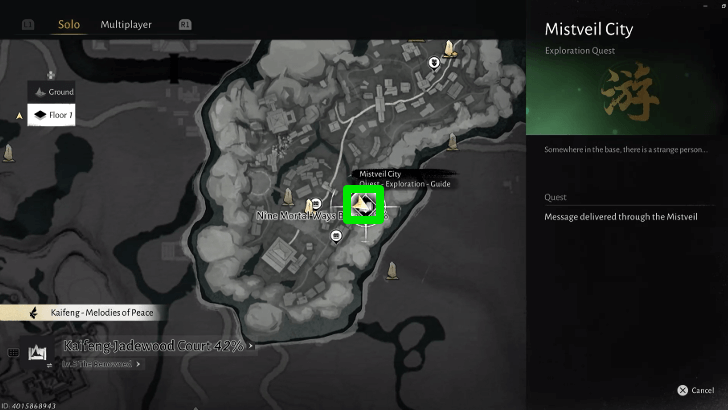
Follow the Exploration Quest, Mistveil City, and take the elevator going underneath the house. There will be another elevator with a duplicate of the Ghost Bride nearby.
Activate this elevator, then hop down quickly. Jump on the hole with a treasure chest in it to reach the secret area, Ruins - Cascading Water Ruins.
Mistveil City Walkthrough and Rewards
Where Winds Meet Related Guides

Meta Guides
 Weapons Martial Arts Tier List Weapons Martial Arts Tier List |
 Best Mystic Arts to Unlock Early Best Mystic Arts to Unlock Early |
 Best Inner Ways Tier List Best Inner Ways Tier List |
 Best Gear Sets Best Gear Sets |
 Best Starting Weapon Best Starting Weapon |
 Best Companions to Summon Best Companions to Summon |
Message Boards
 Character Sharing Board Character Sharing Board |
 Guild Recruitment Board Guild Recruitment Board |
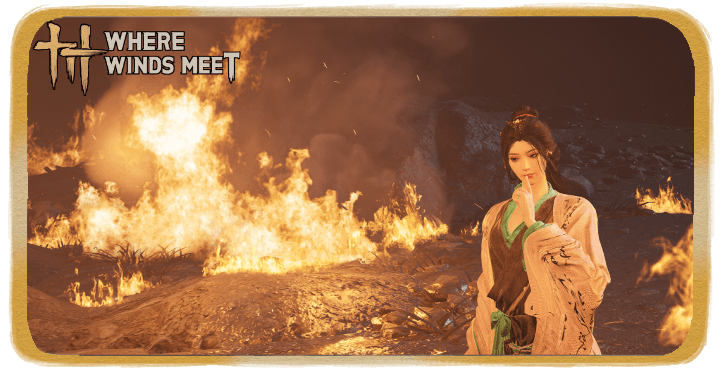 Photo Mode Sharing Board Photo Mode Sharing Board |
Beginner Guides
Exploration Guides
Combat Guides
Character Creation Guides
Common Questions and Technical Guides
Gameplay Features
Comment
6  Somjy about 1 month
Somjy about 1 monthTHANK YOU SO MUCH!!! I opened 37 chests but got bored and just wanted to get the hell out of this place T-T
Author

Cascading Water Ruins Guide and Chest Locations
Please participate in our site
improvement survey
03/2026
improvement survey
03/2026
Would you assist in
improving Game8's site?
improving Game8's site?

×
We are listening to our users' valuable opinions and discussing how to act on them.
The information collected through this survey will be used for the purpose of improving our services. In addition, the information will only be disclosed a part of a statistic in a format that will not allow identification of personal information.
Begin Survey
Not Now
×
Please rate each item regarding Game8.co's Advertisements.
Amount of Ads
Very Dissatisfied
Somewhat Dissatisfied
Fine
Somewhat Satisfied
Highly Satisfied
Placement of Ads
Timing of Ad Display
Ad Loading Speed
Safeness of Ads
Content of Ads
×
Please rate each item regarding Game8.co's Quality of Articles.
Amount of information
Very Dissatisfied
Somewhat Dissatisfied
Fine
Somewhat Satisfied
Highly Satisfied
Frequency of updates
Speed of new information
Accuracy of articles
Understandibility of articles
Readability of sentences
×
Please rate each item regarding Game8.co's Usability of the Site.
Ease of finding information
Very Dissatisfied
Somewhat Dissatisfied
Fine
Somewhat Satisfied
Highly Satisfied
Loading Speed
Use of Color
Font Size
Visibility of Images
Easy to Understand Layout
×
Please rate each item regarding Game8.co's Message Boards, Comments.
Ease of Writing
Very Dissatisfied
Somewhat Dissatisfied
Fine
Somewhat Satisfied
Highly Satisfied
Readability
Ease in Finding Information
Comment Quality
Comment Quantity
Admin Response
×
Please rate each item regarding Game8.co's Site's new design.
Please rate our site's new design
Very Dissatisfied
Somewhat Dissatisfied
Fine
Somewhat Satisfied
Highly Satisfied
Do you think that the website's design change makes the site easier to use?
Has the new design made it easier for you to find information on the site?
Has the new design improved the overall visual appeal of the site?
How would you rate your overall satisfaction with the new design of the site?
×
How likely are you to recommend Game8 to someone you know?
Very Unlikely
0
1
2
3
4
5
6
7
8
9
10
Very Likely
If you have other opinions regarding potential improvement to the website, please share them with us. We would appreciate your honest opinion.
Note: This is a free response section, so you can proceed without entering anything.
Note: Please be sure not to enter any kind of personal information into your response.
Note: Please be sure not to enter any kind of personal information into your response.
×
Thank You
×
Thank you for participating in our survey! Your answers will help us to improve the quality of our website and services.
We hope you continue to make use of Game8.
We hope you continue to make use of Game8.
Close
Rankings
- We could not find the message board you were looking for.
Gaming News


Popular Games

Genshin Impact Walkthrough & Guides Wiki
Honkai: Star Rail Walkthrough & Guides Wiki
Umamusume: Pretty Derby Walkthrough & Guides Wiki
Pokemon Pokopia Walkthrough & Guides Wiki
Resident Evil Requiem (RE9) Walkthrough & Guides Wiki
Monster Hunter Wilds Walkthrough & Guides Wiki
Wuthering Waves Walkthrough & Guides Wiki
Arknights: Endfield Walkthrough & Guides Wiki
Pokemon FireRed and LeafGreen (FRLG) Walkthrough & Guides Wiki
Pokemon TCG Pocket (PTCGP) Strategies & Guides Wiki


Recommended Games
Fire Emblem Heroes (FEH) Walkthrough & Guides Wiki
Diablo 4: Vessel of Hatred Walkthrough & Guides Wiki
Yu-Gi-Oh! Master Duel Walkthrough & Guides Wiki
Super Smash Bros. Ultimate Walkthrough & Guides Wiki
Pokemon Brilliant Diamond and Shining Pearl (BDSP) Walkthrough & Guides Wiki
Elden Ring Shadow of the Erdtree Walkthrough & Guides Wiki
Monster Hunter World Walkthrough & Guides Wiki
The Legend of Zelda: Tears of the Kingdom Walkthrough & Guides Wiki
Persona 3 Reload Walkthrough & Guides Wiki
Cyberpunk 2077: Ultimate Edition Walkthrough & Guides Wiki


All rights reserved
©1997-2025 NetEase, Inc. All Rights Reserved
The copyrights of videos of games used in our content and other intellectual property rights belong to the provider of the game.
The contents we provide on this site were created personally by members of the Game8 editorial department.
We refuse the right to reuse or repost content taken without our permission such as data or images to other sites.
There's a part where I was confused about the path to the swamp from the knotted tree. There was a closer path that led to the tree but ig it's skill issue on my part that I didn't know that the third boundary stone was the stone on a farther previous path