Infernal Twinblades and Rope Dart Build
NEW: Hexi Map | Chapter 3 | Flute Mystic Skill
★ Unfettered and Everspring Build
☆ Liangzhou | Cat Fever | Prismatic Essence
✪ Updated: Best Weapon | Best Builds
☆ WWM Game8 Twitter: New tips daily!
Recruit using our Guild Recruitment Board!
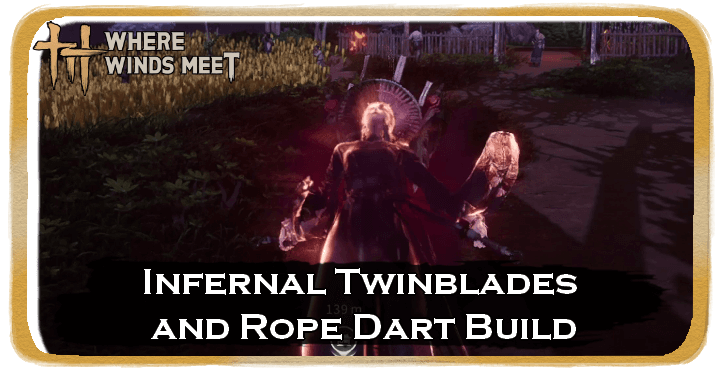
This is a build focusing on the Infernal Twinblades and Mortal Rope Dart Martial Art school in Where Winds Meet. Read on to see a full build guide to these martial arts including its best Inner Ways, Mystic Arts to take, and the best gear set and substats to aim for, updated for Version 1.2.
List of Contents
Infernal Twinblade and Rope Dart Build
Infernal Twinblade and Rope Dart Overview
| Jump Table | |||||
|---|---|---|---|---|---|
| Overview | Martial Arts | Inner Way | |||
| Mystic Arts | Set and Stats | How to Play | |||
| Overview | |
|---|---|
| Martial Arts | |
| Role | DPS |
| Pros and Cons |
|
This is a build for the Mortal Rope Dart and Infernal Twinblade that focuses on maximizing the Infernal Twinblade's DPS through buffs and secondary on-hit effects (Rodent Rampage) that capitalizes on the Twinblades extremely fast attack speed.
| Date | Changes |
|---|---|
| 1-27-2026 | ・Further optimized the build for Version 1.2. ・Removed Ghost Bind from the main loop as it is now suboptimal. ・Added Inner Way for PvP. ・Reworked Mystic Arts and added dedicated PvP options. ・Updated Stat Priority. ・ Updated Set Gear and added PvP option. ・Added PvP rotations. |
Infernal Twinblade and Rope Dart Martial Arts and Weapons
| Jump Table | |||||
|---|---|---|---|---|---|
| Overview | Martial Arts | Inner Way | |||
| Mystic Arts | Set and Stats | How to Play | |||
| Martial Art | |
|---|---|
|
Path: Bamboocut - Wind |
Path: Bamboocut - Wind |
The main weapons you'll use for the build is the Infernal Twinblades and applying the Mortal Rope Dart's Rodent Rampage buff that will let you summon a rat and attack the enemy whenever you land a Light Attack. This synergizes well with each other due to the high attack speed that Infernal Twinblades provides to proc Rodent Rampage multiple times.
How to Unlock All Martial Arts
Best Inner Way
| Jump Table | |||||
|---|---|---|---|---|---|
| Overview | Martial Arts | Inner Way | |||
| Mystic Arts | Set and Stats | How to Play | |||
| Inner Way | Details |
|---|---|
 Echoes of Oblivion Echoes of Oblivion |
Infernal Twinblades' normal Light Attacks apply Sin to enemies, while Light Attacks under Flamelash apply Karma. When attacking targets affected by Sin and Karma with Infernal Twinblades' Light Attacks, ignore their 10% Physical Defense and 10% Bamboocut Resistance respectively. |
 Vendetta Vendetta |
Guided Blade's Vendetta Token last 5 seconds longer and restores 20 Token of Gratitudes. |
 Breaking Point Breaking Point |
Hitting Exhausted enemies with a Critical Hit applies a stack of Disintegration for 3 seconds, stacking up to 3 times. Each stack grants 10 Physical Penetration and increases Critical DMG Bonus by 5%. |
 Morale Chant Morale Chant |
80% chance to gain one stack of Yi River when attacking or healing. Yi River: Increases Physical Damage and healing by 1% for 8 seconds, stacking up to 5 times. The chance to gain Yi River is only calculated once every 2 seconds. |
For our Inner Way, the Bamboocut - Wind path will mostly serve your needs but we recommend swapping out Riptide Reflex with Morale Chant for better damage and healing. Most of the Bamboocut internal art already amplifies your damage and its all about activating the right condition such as exhausting enemies and using crowd control skills which the Rope Dart can easily do.
Alternative Inner Way for PVP
| Inner Way | Details |
|---|---|
 Vital Leech Vital Leech |
Casting an Exhaustion Execution Skill restores HP equal to 8% of the damage dealt. |
For PvP, sweep Breaking Point for Vital Leech as it heals you whenever you hit an exhausted enemy, letting your aggressive Twin Blade + Rope Dart combos convert pressure into sustain and keeping you healthy while maintaining constant offensive tempo. If you can't afford Vital Leech yet, you may substitute it with Fivefold Bleed.
Best Mystic Arts
| Jump Table | |||||
|---|---|---|---|---|---|
| Overview | Martial Arts | Inner Way | |||
| Mystic Arts | Set and Stats | How to Play | |||
| Stat Group | Recommended Substats |
|---|---|
 Cloud Steps Cloud Steps |
Stomp on an enemy's shoulder to deal Physical Damage, other Attribute Damage effective against Cavalry and other units with Unstable Poise. |
 Meridian Touch Meridian Touch |
Chance to immobilize, deal Physical damage, and break Vital Points. Immobilize is ineffective against mighty enemies. Vital Points: These enemies have bound Qi bars. Breaking their Vital Points disables Qi regen, deals extra Physical damage and Qi Damage. |
 Wolflike Frenzy Wolflike Frenzy |
Knock down an enemy, followed with rapid strikes, and finish with an upward swing that disables the target. Effective against Cavalry and other units with Unstable Poise. Unstable Poise: These units have a Stance bar near their HP. Stance-break deals special hit and Physical damage. |
 Honking Havoc Honking Havoc |
Clamp the goose's throat, forcing two honks forward, each dealing damage in a wide area and inflicting Breath-hold for 6s. The goose then breaks free, flailing with kicks that deal damage to a small area ahead, then flaps away from the scene. |
Meridian Touch lets you immoblize enemies, and useful against bosses like Lucky Seventeen and God of Avarice, while Cloud Steps is also very useful against enemies on mounts and bosses like Sleeping Daoist and Ye Wanshan! Wolflike Frenzy is highly recommended because it starts with a knockdown and follows up with a rapid flurry of strikes that deliver strong damage and crowd control, while Honking Havoc slows down time in PvE and gives you more opportunity to do your combos.
Alternative Mystic Arts for PvP
| Stat Group | Recommended Substats |
|---|---|
 Serene Breeze Serene Breeze |
Channel Qi into your body to clear blockages in the veins. Can be used while under attack or control effects. On hit, reduces the target's Endurance recovery by 50% and deals damage for 8s. |
 Guardian Palm Guardian Palm |
Unleash two palm strikes forward, then leap into the air and smite the ground to knock back nearby enemies. At 3-5m height, skill upgrades to Lamp Light with a 12s cooldown: Unleash palm strikes toward the ground and knocking back enemies in the area. |
 Soaring Spin Soaring Spin |
Channel your Qi into a roaring thrust, dealing damage to units along the path. Then suddenly shift stance into a spiraling follow-up strike that catches enemies off-guard. Hitting a target reduces their Healing Received by 60% over 5s. |
Mystic Arts in PvP are not meant to replace your main rotation, but to stabilize fights and protect your tempo when things go wrong. Your priority is always to preserve control, using defensive tools like Serene Breeze to break enemy combos and escape crowd control, then relying on skills such as Guardian Palm and Soaring Spin to reset spacing, buy cooldown time, and safely re-enter combat.
Though they're a great choice for other builds, here we're avoiding Dragon’s Breath and Drunken Poet in PvP, as they require long setup times for this build.
Infernal Twinblade and Rope Dart Set Gear and Stat Priorities
| Jump Table | |||||
|---|---|---|---|---|---|
| Overview | Martial Arts | Inner Way | |||
| Mystic Arts | Set and Stats | How to Play | |||
Set Gear
| Stat Group | Recommended Substats |
|---|---|
 Swallowcall SwallowcallWeapon |
2 Set Effect: +27 Min Physical Attack
4 Set Effect: Light Attacks deal 15% more damage against targets with less than 40% Qi and 5% more damage against Exhausted targets. |
 Calmwaters CalmwatersArmor |
2 Set Effect: +13 Physical Defense
4 Set Effect: A Perfect Dodge of an enemy attack has a 50% chance of restoring 3% of your Max HP and 10 Endurance. |
Swallowcall is easily one of the best gear sets to use as it compliments your multiple hits, specially with its min physical attack damage bonus. It also increases your Light Attack damage and even more against exhausted enemies that you will naturally get anyway.
Additionally, Calmwaters is great for this build because it gives you a chance to restore HP and endurance on a perfect dodge, letting you stay aggressive longer
Alternative Gear for PvP
| Stat Group | Set Effect |
|---|---|
 Hawkwing HawkwingWeapon |
2 Set Effect: +0.1% Affinity Rate
4 Set Effect: When any of your damage triggers Affinity, gain Hawkwing: Increases Physical Attack by 2% for 5 seconds, stacking up to 5 times. |
 Eaglerise EagleriseArmor |
2 Set Effect: +1 Physical Defense
4 Set Effect: Dealing damage over time or healing grants 1 stack of Eaglerise: Reduces damage taken by 1.2% for 10 seconds, stacking up to 5 times. At max stacks, receives an Eagle Guard effect that reduces the next incoming damage within 10 seconds by 90% (halved when the damage comes from a boss). This effect can only trigger once every 30 seconds. |
For PvP, use Hawkwing to maximize light-attack spam, as its stacking Physical Attack buffs scale with frequent hits for consistent damage. Eaglerise provides reliable, always-on defense, keeping you alive without relying on situational conditions, making it a solid balance for chaotic fights.
Stat Priority
| 1st | Affinity Rate |
| 2nd | Momentum |
| 3rd | Physical Attack |
| 4th | Bamboo Cut Attack |
| 5th | Crit Chance |
Prioritize Affinity Rate / Momentum first so Hawkwing stacks quickly and your frequent hits gain maximum value, then stack Physical Attack and Bamboo Cut Attack to scale both base and affinity damage. After that, invest in Crit Chance for consistent burst during stun chains.
How to Play
| Jump Table | |||||
|---|---|---|---|---|---|
| Overview | Martial Arts | Inner Way | |||
| Mystic Arts | Set and Stats | How to Play | |||
| Silkbind - Deluge Playstyle |
|---|
|
|
Recommended Skill Rotation
- Use your Rope Dart's Charged Heavy Attack to gain the Special Skill Enhancement that will boost your Might Rat's damage.
- Use Bladebound Thread to pull enemies towards you and use the follow-up attack to apply Vendetta to enemies, This will allow the Might Rat to deal 50% more damage.
- Cast Rodent Rampage to summon the Might Rat.
- Swap to Infernal Twinblades and build up your Flamelash meter using Addled Mind or Light Attacks.
- Once your Flamelash bar is full, activate Flamelash and focus on dishing out your 5-combo Light Attack to deal the most damage.
- After your Flamelash dissipates, you can swap back to your Rope Dart and repeat the combo.
Avoid Hits Even in Flamelash Mode
Despite the buffs, you'll need to avoid hits instead of tanking it to maximize your damage. You do have lifesteal while in this mode but that doesn't mean that you can take every damage that enemies throw at you.
Avoid using Charged Heavy Attacks Mid-Combo
During your skill rotation, consider avoiding charged heavy attacks as it can make your combo sequence slow. Consider replacing it with the Rope Dart's Blade Bound Thread to pull yourself back into the fray.
Use Calamity's Greed to reduce Addled Mind Cooldown
Calamity's Greed can be used to reduce Addled Mind's cooldown by 3 seconds. After using Calamity's Greed, wait for the blade to return to your hand the re-cast it again for a follow up. Successfully doing this combo will lower Addled Mind's cooldown which can speed up your next combos.
PvP Tips and Tricks
PvP with Twin Blades and Rope Dart revolves around control and momentum rather than raw damage, demanding sharp timing and constant awareness of both cooldowns and positioning. Your strength lies in creating brief windows where you can lock opponents in place, layering pressure through light attacks and repeated stuns while carefully managing stamina and using Mystic Skills to avoid being punished.
Because fights are fast and chaotic, you must stay flexible, disengaging when your rotation breaks, reapplying Rodent Rampage when space opens, and patiently waiting for clean re-engage opportunities rather than forcing unsafe combos.
- Open fights by charging Rope Dart with Charge Heavy only to the 1.5s trigger, proccing Rodent Rampage and swap immediately to Twin Blades. Stay alert as aggressive opponents may try to sneak in early pressure while you're charging.
- Treat Serene Breeze as a defensive clutch only: use it to break enemy combos or CC on you, not as an opener.
- Use Guardian Palm as a rotation reset (not just damage): when your combo breaks, knock them down, ult if needed, then restart
- Use Soaring Spin and Cloud Steps as re-engage/gap-closers after a reset or knockdown. Don’t open with them unless you have a plan.
- Against the Vernal Umbrella users, parry their Spring Away shots until they land, or use Cloud Steps to bring them down.
- Re-apply Rodent Rampage during forced gaps (knockbacks, rolls, after Guardian's Palm), rodents are a huge DPS multiplier but don’t force them mid-melee.
- Fight near walls and corners when possible; walls reduce escape options and make your stun chains easier to finish.
- Use Soaring Spin as a gap closer and apply strong healing-reduction debuff, if your opponent utilizes them.
- Don’t tunnel vision on keeping Rodents Damage up! If staying on blades wins the exchange, stay on blades and reapply rodents after you reset.
- Versus tanks, poke and bait Endurance usage; when they’re exhausted, Vital Leech and your light-attack loop will win the attrition game.
- Don’t chase panic rollers; back off, re-charge Rodents or reset your rotation, and re-engage when their Endurance is low.
- You can lean on your offensive Mystic Skills like Wolflike Frenzy whenever your main combo is unavailable.
- If you really can’t give up Drunken Poet and Dragon’s Breath, make it a habit to press Drunken Poet first, then Execute, and follow up with Dragon’s Breath.
- If you charge the Mortal Rope Dart for 3 seconds, you can recover a small amount of HP, but this should be used only as a last resort when your Mystic Skills and combo cooldowns are unavailable. It’s highly situational and risky to attempt in combat, but in the right moment it can buy you just enough sustain to survive and turn the fight around.
Where Winds Meet Related Guides


Comment
 implosive69 3 months
I think it is in the game, i have one piece, but, i dont see any trail or anything to specialy select it. Which thing do you have to clear?
Author

Infernal Twinblades and Rope Dart Build
Rankings
Gaming News


Popular Games

Genshin Impact Walkthrough & Guides Wiki
Umamusume: Pretty Derby Walkthrough & Guides Wiki
Pokemon Pokopia Walkthrough & Guides Wiki
Honkai: Star Rail Walkthrough & Guides Wiki
Monster Hunter Stories 3: Twisted Reflection Walkthrough & Guides Wiki
Arknights: Endfield Walkthrough & Guides Wiki
Wuthering Waves Walkthrough & Guides Wiki
Zenless Zone Zero Walkthrough & Guides Wiki
Pokemon TCG Pocket (PTCGP) Strategies & Guides Wiki
Monster Hunter Wilds Walkthrough & Guides Wiki


Recommended Games
Diablo 4: Vessel of Hatred Walkthrough & Guides Wiki
Cyberpunk 2077: Ultimate Edition Walkthrough & Guides Wiki
Fire Emblem Heroes (FEH) Walkthrough & Guides Wiki
Yu-Gi-Oh! Master Duel Walkthrough & Guides Wiki
Super Smash Bros. Ultimate Walkthrough & Guides Wiki
Pokemon Brilliant Diamond and Shining Pearl (BDSP) Walkthrough & Guides Wiki
Elden Ring Shadow of the Erdtree Walkthrough & Guides Wiki
Monster Hunter World Walkthrough & Guides Wiki
The Legend of Zelda: Tears of the Kingdom Walkthrough & Guides Wiki
Persona 3 Reload Walkthrough & Guides Wiki


All rights reserved
©1997-2025 NetEase, Inc. All Rights Reserved
The copyrights of videos of games used in our content and other intellectual property rights belong to the provider of the game.
The contents we provide on this site were created personally by members of the Game8 editorial department.
We refuse the right to reuse or repost content taken without our permission such as data or images to other sites.
Hi! The Flawless Defense Set can be purchased in the Seasonal Shop using Jade Fishes. Hope this helps!