Murong Yuan Location and How to Beat
NEW: Hexi Map | Chapter 3 | Flute Mystic Skill
★ Unfettered and Everspring Build
☆ Liangzhou | Cat Fever | Prismatic Essence
✪ Updated: Best Weapon | Best Builds
☆ WWM Game8 Twitter: New tips daily!
Recruit using our Guild Recruitment Board!
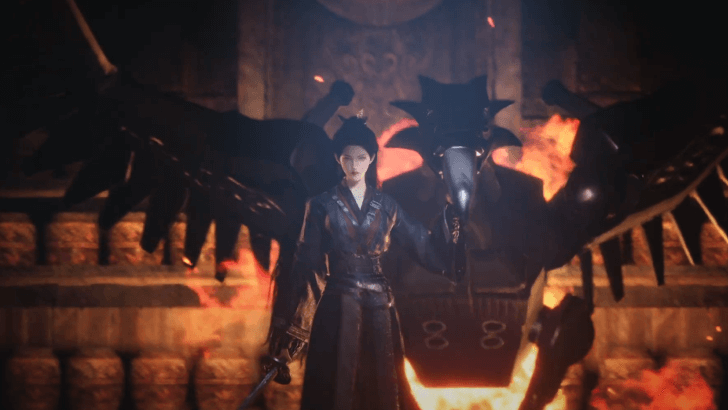
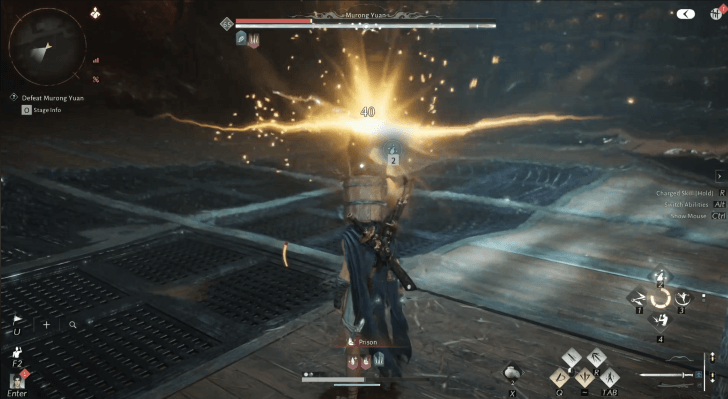
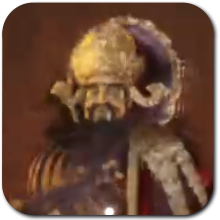
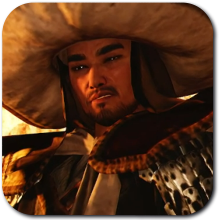
Murong Yuan is a Campaign Boss that you can find at Jadewood Court in Where Winds Meet. Check out how to beat Murong Yuan, their movesets and weaknesses, and the rewards and achievements you can claim here!
List of Contents
Murong Yuan Boss Weakness
Basic Information and Recommmended Arts
 |
||
| Difficulty | Weakness | |
|---|---|---|
| ★★★★★ | TBD | |
| Recommended Arts | ||
| Martial Arts | ・Panacea Fan | |
| Mystic Arts | ・Flaming Meteor ・Loong Head ・Meridian Touch |
|
Murong Yuan Best Companion
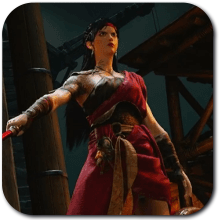
The best companion to bring with you against Murong Yuan is Ruby due to her ability to provide you with a second life. This can stack well with the Evening Snow Inner Way and the Surging Meridian talent in Solo Mode, providing you with up to three extra lives for you survive Murong Yuan's 2nd phase.
Take note that there is a bug on Murong Yuan's 2nd phase where any of your companions will not attack for the duration of the fight, which Ruby can take advantage of since she does not spawn as an actual NPC.
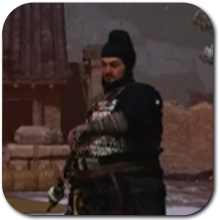
Murong Yuan Location
Found at North Imperial Garden at Jadewood Court
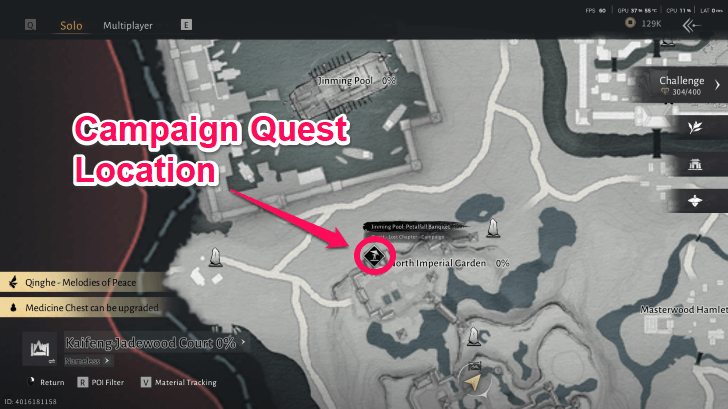
In order to unlock Murong Yuan, you will need to complete the Jinming Pool: Petalfall Banquet campaign quest to progress further.
Once you have finished the quest, you can find Murong Yuan's Campaign version at the Jadewood Court area in the Kaifeng region.
How to Beat Murong Yuan (World Boss)
|
|
Always Remain at a Distance
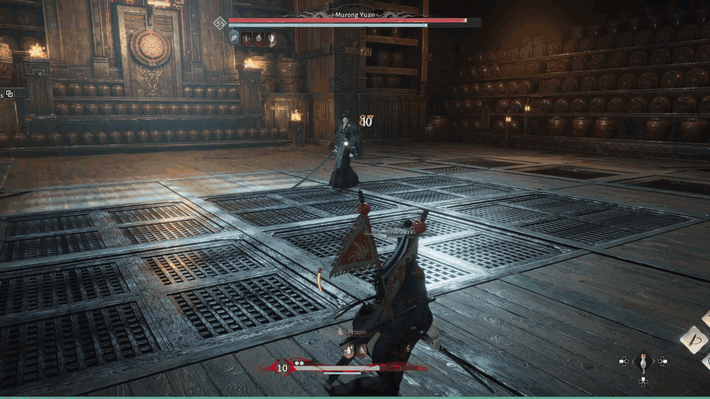
During Murong Yuan's first phase, it is better to adopt a reactive playstyle, and always keep a decent amount of distance between you and Murong Yuan to give yourself enough time to react to her attacks.
Holding your block while moving around is a good option, while remembering to parry often to stagger the boss faster.
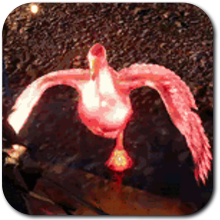
Ignore the Wooden Eagle
During the second phase of the fight, it is better to ignore the Wooden Eagle as much as you can, and focus only on fighting Murong Yuan, since defeating Murong Yuan will end the battle, regardless of whether the Wooden Eagle is still present.
Even during the times when you must focus on the Wooden Eagle only, focus on dodging and blocking instead, to save your cooldowns for when you can attack Murong Yuan.
Use Meridian Touch to Cancel Her Yellow Attack
Whenever Murong Yuan performs a yellow unblockable attack during her first phase, you can use Meridian Touch to cancel it and knock her down for a few seconds. This is useful for giving you openings to perform your most powerful combos as you whittle down her health and Qi bar throughout the fight.
How to Beat Murong Yuan (Hero's Realm)
|
|
Destroy Her Shield Quickly
Murong Yuan will eventually create a shield around her that encompasses her entire health bar to execute an instant party wipe mechanic after 20 seconds. We highly recommend all players to focus on destroying her shield before the 20 seconds are up to prevent your party from losing the run.
Move the Barrels to the Right Side
The Sea of Fire move releases a large fire wave around the entire arena from left to right. Make sure to carry the barrels to the right side to prevent them from exploding due to the large fire wave that the Wooden Bird will execute.
Take note the barrels that are near each other will deal an area-wide explosion when hit by the Wooden Bird's fire projectiles so try to distance each barrel from each other to avoid procing the explosion.
Murong Yuan Movesets
| All Murong Yuan Phases | |
|---|---|
| Phase 1 | Phase 2 |
| Hero's Realm | |
Phase 1 Murong Yuan Attack Pattern
| Moves | Details |
|---|---|
| Rising Sweep | Murong Yuan dashes forward and performs an upward swing mid-dash, and then follows it up with a charged attack. Both the dash and slash can be parried and dodged |
| Piercing Strike | Murong Yuan's blade turns golden, and then performs a dashing downward slash, followed by a golden glow stab. The dash can be parried and dodged, but the Stab can only be dodged and not parried. |
| Gua Parry | Murong Yuan's blade turns golden, and then prepares to block incoming attacks. If she successfully parries an attack, Murong Yuan performs a diagonally rising slash. This move can be dodged and not parried.. |
| Chong | Murong Yuan's blade turns bright white, and then she will perform a lunging stab. This move can be parried and dodged. |
| Wheel Slash | Murong Yuan performs a circular slash, followed by an upward swing mid-dash. This move can be parried and dodged. |
| Eagle Descent | Murong Yuan performs a feint, followed by leaping into the air, and then stabbing her sword downward with a red hue with AoE slashes on impact. The move is followed up by another aerial downward slash that can be perfectly parried to trigger a counterattack, and dodged when timed correctly. The initial downward slam and succeeding AoE Slashes can be parried, but is extremely difficult due to the successive slashes. |
| Sword Cyclone | Murong Yuan throws her sword towards you, and then performs a yellow attack upon retrieving the sword. The sword throw can be parried and dodged, but the yellow slash can only be dodged and not parried. |
| Sword Dance | Murong Yuan kicks her sword into the air, which then falls towards you. She then follows up this move by dashing towards the sword and then performs a series of slashes in a rhythmic pattern. Both parts of the attack can be parried and dodged. |
Phase 2 Murong Yuan and Wooden Eagle Attack Patterns
| Moves | Details |
|---|---|
| Wheel Dance | Murong Yuan dashes forward and performs an upward swing, and then follows it up with two spinning slashes. Both the dash and slashes can be parried and dodged |
| Eagle Strike | Wooden Eagle launches two sets of four burning feathers. The projectiles should be dodged, since your focus must remain on Murong Yuan instead during the second phase of the fight. |
| Crushing Dance | Murong Yuan begins the combo with a stab, followed by a downward slam into a wheel slash. She then finishes off the combo by leaping into the air and then slamming into the ground, dealing massive damage on impact. This move can be dodged and parried. |
| Wing Swoop | The Wooden Eagle readies its wings and performs a forward dash, attempting to attack the player using its wings. This move can be parried and dodged. |
| Eclipse Crash | Murong Yuan's blade glows red, then grabs on to the Wooden Eagle. The Wooden Eagle then launches four projectiles, which Murong Yuan follows up with a downward thrust after eclipsing the Wooden Eagle. This move can be perfectly parried to trigger a counterattack and dodged when timed correctly.. |
| Blazing Sweep | The Wooden Eagle swipes at the player twice using its wings, moving forward with each swipe. This move can be parried and dodged. |
| Sword Cyclone | Murong Yuan throws her sword towards you, and then performs a yellow attack upon retrieving the sword. The sword throw can be parried and dodged, but the yellow slash can only be dodged and not parried. |
| Eagle Descent | Murong Yuan performs a feint, followed by leaping into the air, and then stabbing her sword downward with a red hue with AoE slashes on impact. The move is followed up by another aerial downward slash that can be perfectly parried to trigger a counterattack, and dodged when timed correctly. The initial downward slam and succeeding AoE Slashes can be parried, but is extremely difficult due to the successive slashes. |
Hero's Realm Murong Yuan Attack Pattern
| Moves | Details |
|---|---|
| Coward | Murong Yuan winds up her blade and leaps into the air to thrust her sword into the ground with a red hue and trigger AoE slashes on impact. We recommend moving away and dodging the AoE due to the excessive amount of hits it can deal. |
| Army Breaker | Murong Yuan targets a random player and winds up her blade to suddenly dash at her target to perform a series of slashes. This move can be parried and dodged when timed correctly. |
| Severance | Murong Yuan creates a shield around her and charges her blade on the ground to instantly kill all players on the field. We recommend that all players focus on destroying her shield within the 20-second duration to avoid losing the run. |
| Summon Firebird | Murong Yuan summons her Wooden Bird as it dives to the ground to charge up and deal a huge AoE explosion around itself. We recommend all players to focus on destroying the Firebird to get rid of the AoE explosion easily. |
| Sea of Fire | Murong Yuan's Wooden Bird will fly up and start charging a huge fire wave that builds up from left to right across the entire arena. We recommend all players to carry the barrels to the right side so you can avoid the one-shot explosion mechanic. |
Murong Yuan Boss Rewards
Jinming Pool: Petalfall Banquet Quest Rewards
|
・Echo Jade x55 ・Kaifeng Exploration x105 ・Enlightment Points x100 ・Coin x43000 ・Character EXP x43000 ・Soul Weave: Tome x1 ・Zheng E Snowborne Fan x1 ・Medicinal Tales x1 ・Oscillating Jade x5 |
Hero's Realm Rewards
|
First Clear Reward: ・Inner Way Note: Custom Chest ・Gear Chest x3 ・Attunement Stone: Rhapsody x1 ・Adventure Slip x20 ・Coins x9600 ・Character EXP x19200 |
Murong Yuan Campaign Drops
| Level 1 | ・Tier 16 Swallowcall Set (Uncommon) x2
・Jinming Pool Cosmetic Chest x1 ・Crimson Leaves Chest x1 ・Bamboocut: Wind Tips x2 ・Oscillating Jade x2 ・Zhou Coin x3200 ・Character XP x4000 |
|---|---|
| Level 2 | ・Tier 16 Swallowcall Set (Epic) x2
・Jinming Pool Cosmetic Chest x1 ・Crimson Leaves Chest x1 ・Bamboocut: Wind Tips x2 ・Oscillating Jade x2 ・Zhou Coin x3200 ・Character XP x4400 |
| Level 3 | ・Tier 16 Swallowcall Set (Epic) x2
・Jinming Pool Cosmetic Chest x1 ・Crimson Leaves Chest x1 ・Bamboocut: Wind Tips x2 ・Oscillating Jade x2 ・Zhou Coin x3200 ・Character XP x4800 |
| Level 4 | ・Tier 31 Swallowcall Set (Epic) x2
・Jinming Pool Cosmetic Chest x1 ・Crimson Leaves Chest x1 ・Bamboocut: Wind Tips x2 ・Inner Way Note: Custom Chest x1 ・Oscillating Jade x2 ・Zhou Coin x3200 ・Character XP x5200 |
| Level 5 | ・Tier 41 Swallowcall Set (Epic) x2
・Jinming Pool Cosmetic Chest x1 ・Crimson Leaves Chest x1 ・Bamboocut: Wind Tips x2 ・Inner Way Note: Custom Chest x1 ・Oscillating Jade x2 ・Zhou Coin x3200 ・Character XP x5600 |
| Level 6 | ・Tier 51 Swallowcall Set (Epic) x2
・Jinming Pool Cosmetic Chest x1 ・Crimson Leaves Chest x1 ・Bamboocut: Wind Tips x2 ・Inner Way Note: Custom Chest x1 ・Attunement Stone: Doom x1 ・Oscillating Jade x3 ・Zhou Coin x3200 ・Character XP x6000 |
| Level 7 | ・Tier 56 Swallowcall Set (Epic) x2
・Jinming Pool Cosmetic Chest x1 ・Crimson Leaves Chest x1 ・Bamboocut: Wind Tips x2 ・Inner Way Note: Custom Chest x1 ・Attunement Stone: Rhapsody x1 ・Oscillating Jade x3 ・Zhou Coin x3200 ・Character XP x6400 |
| Level 8 | ・Tier 61 Swallowcall Set (Epic) x2
・Jinming Pool Cosmetic Chest x1 ・Crimson Leaves Chest x1 ・Bamboocut: Wind Tips x2 ・Inner Way Note: Custom Chest x1 ・Attunement Stone: Gold Inlay x1 ・Oscillating Jade x3 ・Zhou Coin x3200 ・Character XP x6800 |
| Level 9 | ・Tier 61 Swallowcall Set (Legendary) x2
・Jinming Pool Cosmetic Chest x1 ・Crimson Leaves Chest x1 ・Bamboocut: Wind Tips x2 ・Inner Way Note: Custom Chest x1 ・Attunement Stone: Gold Inlay x1 ・Oscillating Jade x3 ・Zhou Coin x3200 ・Character XP x7000 |
| Level 10 | ・Tier 71 Swallowcall Set (Legendary) x2
・Gear Echo: Fieryheart x2 ・Jinming Pool Cosmetic Chest x1 ・Crimson Leaves Chest x1 ・Bamboocut: Wind Tips x2 ・Inner Way Note: Custom Chest x1 ・Attunement Stone: Fieryheart x1 ・Oscillating Jade x3 ・Zhou Coin x3200 ・Character XP x7200 |
| Level 11 | ・Tier 71 Swallowcall Set (Legendary) x2
・Gear Echo: Fieryheart x2 ・Jinming Pool Cosmetic Chest x1 ・Crimson Leaves Chest x1 ・Bamboocut: Wind Tips x2 ・Inner Way Note: Custom Chest x1 ・Attunement Stone: Fieryheart x1 ・Oscillating Jade x3 ・Zhou Coin x3200 ・Character XP x7400 |
Where Winds Meet Related Guides

| All Boss Guides | |
|---|---|
| World Bosses | - |
Campaign Bosses
 Heartseeker Heartseeker
|
 Qianye Qianye
|
 Ye Wanshan Ye Wanshan
|
 The Void King The Void King
|
 Lucky Seventeen Lucky Seventeen
|
 Tian Ying Tian Ying
|
 Dao Lord Dao Lord
|
 Zheng the Frostwing Zheng the Frostwing
|
 Murong Yuan Murong Yuan
|
 God of Avarice God of Avarice
|
 River Master River Master
|
World Bosses
 Puppeteer - Sheng Wu Puppeteer - Sheng Wu
|
 Sleeping Daoist Sleeping Daoist
|
Puppeteer - Curtaincall
|
 Earth Fiend Deity Earth Fiend Deity
|
 Snake Doctor Snake Doctor
|
 Yi Dao Yi Dao
|
 Wolf Maiden Wolf Maiden
|
 Twin Lions Twin Lions
|
 Ghost Master Ghost Master
|
 Nameless General Nameless General
|
 Feng Ruzhi Feng Ruzhi
|
Quest-related Bosses
 Dalang Dalang
|
 He Yuezhi He Yuezhi
|
 Shen Yiren Shen Yiren
|
Challenge Bosses
 Elder Gongsun Elder Gongsun
|
 Gongsun Deng Gongsun Deng
|
 Demon Goose Demon Goose
|
Comment
Author

Murong Yuan Location and How to Beat
Rankings
Gaming News

![Marathon Cryo Archive Map Teased as [REDACTED] on Selection Screen](https://img.game8.co/4442236/6357203e58172f6de57f1991e7c39b22.png/show)
![Monster Hunter Stories 3 Review [First Impressions] | Simply Rejuvenating](https://img.game8.co/4438641/2a31b7702bd70e78ec8efd24661dacda.jpeg/thumb)

![The Seven Deadly Sins: Origin [First Impressions] | A Promising Start](https://img.game8.co/4440581/584e0bfb87908f12c4eab6e846eb1afd.png/thumb)
Popular Games

Genshin Impact Walkthrough & Guides Wiki
Umamusume: Pretty Derby Walkthrough & Guides Wiki
Pokemon Pokopia Walkthrough & Guides Wiki
Honkai: Star Rail Walkthrough & Guides Wiki
Monster Hunter Stories 3: Twisted Reflection Walkthrough & Guides Wiki
Arknights: Endfield Walkthrough & Guides Wiki
Wuthering Waves Walkthrough & Guides Wiki
Zenless Zone Zero Walkthrough & Guides Wiki
Pokemon TCG Pocket (PTCGP) Strategies & Guides Wiki
Monster Hunter Wilds Walkthrough & Guides Wiki


Recommended Games
Diablo 4: Vessel of Hatred Walkthrough & Guides Wiki
Cyberpunk 2077: Ultimate Edition Walkthrough & Guides Wiki
Fire Emblem Heroes (FEH) Walkthrough & Guides Wiki
Yu-Gi-Oh! Master Duel Walkthrough & Guides Wiki
Super Smash Bros. Ultimate Walkthrough & Guides Wiki
Pokemon Brilliant Diamond and Shining Pearl (BDSP) Walkthrough & Guides Wiki
Elden Ring Shadow of the Erdtree Walkthrough & Guides Wiki
Monster Hunter World Walkthrough & Guides Wiki
The Legend of Zelda: Tears of the Kingdom Walkthrough & Guides Wiki
Persona 3 Reload Walkthrough & Guides Wiki


All rights reserved
©1997-2025 NetEase, Inc. All Rights Reserved
The copyrights of videos of games used in our content and other intellectual property rights belong to the provider of the game.
The contents we provide on this site were created personally by members of the Game8 editorial department.
We refuse the right to reuse or repost content taken without our permission such as data or images to other sites.