Tian Ying Location and How to Beat
NEW: Hexi Map | Chapter 3 | Flute Mystic Skill
★ Unfettered and Everspring Build
☆ Liangzhou | Cat Fever | Prismatic Essence
✪ Updated: Best Weapon | Best Builds
☆ WWM Game8 Twitter: New tips daily!
Recruit using our Guild Recruitment Board!
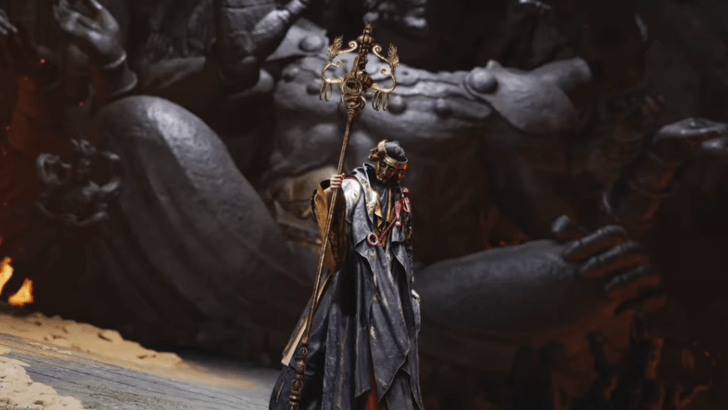
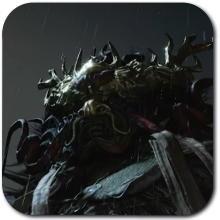
Tian Ying is a Campaign Boss that you can find at Sundara Land in Where Winds Meet. Check out how to beat Tian Ying, their movesets and weaknesses, and the rewards and achievements you can claim here!
List of Contents
Tian Ying Boss Weakness
Basic Information
 |
||
| Difficulty | Weakness | |
|---|---|---|
| ★★★★★ | TBD | |
Tian Ying Best Companion
The best companion to bring with against Tian Ying would be Yuan Jin'gang due to his ability to deal huge Qi damage from a far with his Bow. He can also knock down and stagger Tian Ying at long range to give you openings for burst damage and eventually exhaust him for an Execute attack.
Tian Ying Location
Found During The Promised Light Quest
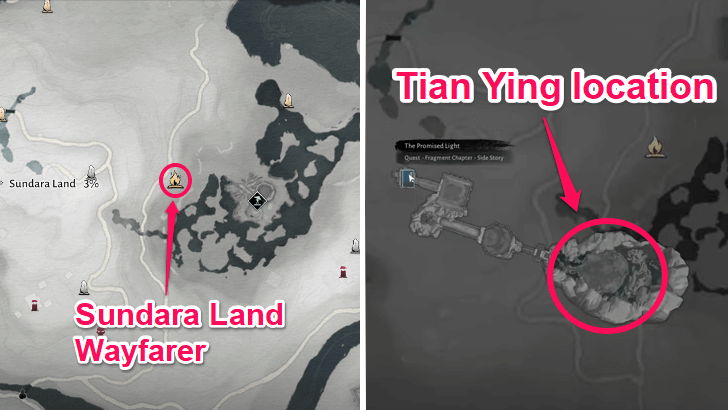
In order to fight Tian Ying, you first have to accumulate 6,000 Qinghe Exploration Points and then take on The Promised Light quest over at the Wayfarer in Sundara Land.
Once you have defeated Tian Ying at the end of the quest, his Campaign version will be automatically unlocked in your map, where you can spend 20 Energy Points to claim more rewards depending on your World Level.
The Promised Light Walkthrough and Rewards
How to Beat Tian Ying
|
|
Use Meridian Touch to Cancel His Shockwave Move
When Tian Ying raises his staff with a gold glow, he will release a shockwave attack that can deal huge damage. We highly recommend using the Meridian Touch mystic art, as this can easily cancel his shockwave attack while he is channeling to knock him down for a few seconds.
Take note that Meridian Touch has a 10-second cooldown, so make sure to keep your distance from Tian Ying when he does the shockwave attack in case your mystic art is still on cooldown.
Stay on the Side During His Statue Attack
During Tian Ying's 2nd phase, he will eventually float in the air and use the Buddha statue behind him to deal a series of wide AoE attacks throughout the arena. Make sure to stay on the side of the arena as this is a blind spot to help avoid all the Buddha statue attacks.
Additionally, you can also perform ranged attacks from a far while you are stationed at the side. Make sure to avoid getting closer to the center as the Buddha statue can still hit you.
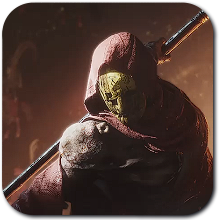
Ignore the Minions and Parry the Original
On the third and last phase, he is capable of summoning 3 clones that will simultaneously attack you, while Tian Ying will hide away and attack you from your blind spot every now and then. We recommend ignoring all 3 clones and focus on parrying Tian Ying whenever he attacks you, as each successful parry will remove a clone in the field.
Tian Ying Moveset
| All Tian Ying Phases | ||
|---|---|---|
| Phase 1 | Phase 2 | Phase 3 |
Phase 1 Tian Ying Moves
| Moves | Details |
|---|---|
| Gold Smash | Tian Ying goes into stance and suddenly smashes the ground with his left hand, causing small tremors from that attack. This move can be parried and dodged. |
| Golden Charge | Tian Ying wields his staff and calls forth his power before plunging his staff onto the ground with a wide range of tremors going across the field. This move can be parried and dodged. |
| Gold Slash | Tian Ying raises his staff and uses it to summon a wave of gold towards his opponent, damaging them from long range. This move can be parried and dodged. |
| Golden Swings | Tian Ying swings his staff and summons a gold meteorite with his hand. Afterwards, he continues to swing his staff twice. This move can be parried and dodged. |
| War Staff Combo | Tian Ying swings his staff violently and spins at the fourth move. This move can be parried and dodged. |
| Golden Dance | Tian Ying wields his staff to spin and smash into the ground, causing gold to splatter around it. Afterwards, he plunges his staff with a small gold tremor around it. This move can be parried and dodged. |
Phase 2 Tian Ying Moves
| Moves | Details |
|---|---|
| Sandstorm | Tian Ying summons his Sand Golem to attack with sand projectile. Afterwards, Tian Ying smashes his opponent with sand from above. This move can be parried and dodged. |
| Assassin Sting | Tian Ying throws a jab followed by a spinning elbow. He jabs again and throws a devastating punch that he telegraphs from his back. This move can be parried and dodged. |
| Divine Punishment | Tian Ying throws multiple punches with his Sand Golem onto the ground and rushes forward to his opponent to attack with an axe kick. This move can be parried and dodged. |
| Enlightenment | Tian Ying hovers into the air and summons a giant Sand Golem behind him. The Sand Golem will then do a sweep with its right hand and finish it with a double hammer fist, causing immense damage in a wide range. Move to a blind spot to avoid getting hit. |
| Tornado Kicks | Tian Ying advances with spinning kicks toward his opponent and suddenly retreats across the field. This move can be parried and dodged. |
| Golden Flurry | Tian Ying spins across the field with his kicks, and after travelling a certain distance, he throws a left uppercut followed by a smashing right. This move can be parried and dodged. |
| Asura Rush | Tian Ying suddenly rushes with a red glow and grabs his opponent with a Sand Golem before smashing them violently into the ground and punching them, causing immense damage. This move can be perfect parried to trigger a counterattack and dodged when timed correctly. |
Phase 3 Tian Ying Moves
| Moves | Details |
|---|---|
| Shadow Dance | Tian Ying jumps away from his opponent before suddenly rushing towards them, attacking from a different direction in quick succession, and finishing the move with a strike from behind. This move can be parried and dodged. |
| Sand Clones | Tian Ying hovers at the center of the field to summon three sand clones for them to form an inverted triangle. The three sand clones will drop down onto the field, and Tian Ying disappears. Ignore the Sand Clones and focus on Tian Ying. |
| Ambush | With the three clones chasing his opponent, Tian Ying will suddenly appear from different directions to strike them from behind. This move can be parried and dodged. |
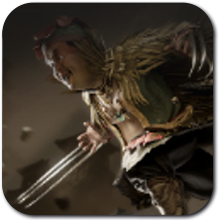
| Assasin's Bladework | Tian Ying rushes forward with his daggers, slicing his opponent in the air before doing a spinning attack with his daggers. This move can be parried and dodged. |
| Sand Rush | Tian Ying rushes quickly to his opponent and does so three times in different directions. This move can be parried and dodged. |
| Shadow Break | Tian Ying walks around the field and suddenly teleports in a different direction, disorienting his opponent. He teleports twice before suddenly striking his opponent down. This move can be parried and dodged. |
| Assasin's Blade Dance | Tian Ying leaps toward his enemies to strike them in a downward motion before following it up with two spinning blade strikes. This move can be parried and dodged. |
| Blade Chain | Tian Ying jumps to strike his opponent, one strike as he rises and one as he descends, and suddenly rushes forward to strike upfront. This move can be parried and dodged. |
Tian Ying Boss Rewards
The Promised Light Quest Rewards
|
・Echo Jade x30 ・Qinghe Exploration x50 ・Character EXP x5000 ・Coin x5000 ・Yaksha Rush x1 ・Medicinal Tales x1 ・Lv. 1 Ebon Iron x4 |
Tian Ying Campaign Rewards
| Level 1 | ・Tier 16 Eaglerise Greaves (Uncommon) x2
・Halo Peak Cosmetic Chest x1 ・Crimson Leaves Chest x1 ・Martial Arts: Custom Tips x2 ・Oscillating Jade x2 ・Zhou Coin x3200 ・Character XP x4000 |
|---|---|
| Level 2 | ・Tier 16 Eaglerise Greaves (Epic) x2
・Halo Peak Cosmetic Chest x1 ・Crimson Leaves Chest x1 ・Martial Arts: Custom Tips x2 ・Oscillating Jade x2 ・Zhou Coin x3200 ・Character XP x4400 |
| Level 3 | ・Tier 16 Eaglerise Greaves (Epic) x2
・Halo Peak Cosmetic Chest x1 ・Crimson Leaves Chest x1 ・Martial Arts: Custom Tips x2 ・Oscillating Jade x2 ・Zhou Coin x3200 ・Character XP x4800 |
| Level 4 | ・Tier 31 Eaglerise Greaves (Epic) x2
・Halo Peak Cosmetic Chest x1 ・Crimson Leaves Chest x1 ・Martial Arts: Custom Tips x2 ・Inner Way Note: Custom Chest x1 ・Oscillating Jade x2 ・Zhou Coin x3200 ・Character XP x5200 |
| Level 5 | ・Tier 41 Eaglerise Greaves (Epic) x2
・Halo Peak Cosmetic Chest x1 ・Crimson Leaves Chest x1 ・Martial Arts: Custom Tips x2 ・Inner Way Note: Custom Chest x1 ・Oscillating Jade x2 ・Zhou Coin x3200 ・Character XP x5600 |
| Level 6 | ・Tier 51 Eaglerise Greaves (Epic) x2
・Halo Peak Cosmetic Chest x1 ・Crimson Leaves Chest x1 ・Martial Arts: Custom Tips x2 ・Inner Way Note: Custom Chest x1 ・Attunement Stone: Doom x1 ・Oscillating Jade x3 ・Zhou Coin x3200 ・Character XP x6000 |
| Level 7 | ・Tier 56 Eaglerise Greaves (Epic) x2
・Halo Peak Cosmetic Chest x1 ・Crimson Leaves Chest x1 ・Martial Arts: Custom Tips x2 ・Inner Way Note: Custom Chest x1 ・Attunement Stone: Rhapsody x1 ・Oscillating Jade x3 ・Zhou Coin x3200 ・Character XP x6400 |
| Level 8 | ・Tier 61 Eaglerise Greaves (Epic) x2
・Halo Peak Cosmetic Chest x1 ・Crimson Leaves Chest x1 ・Martial Arts: Custom Tips x2 ・Inner Way Note: Custom Chest x1 ・Attunement Stone: Gold Inlay x1 ・Oscillating Jade x3 ・Zhou Coin x3200 ・Character XP x6800 |
| Level 9 | ・Tier 61 Eaglerise Greaves (Legendary) x2
・Halo Peak Cosmetic Chest x1 ・Crimson Leaves Chest x1 ・Martial Arts: Custom Tips x2 ・Inner Way Note: Custom Chest x1 ・Attunement Stone: Gold Inlay x1 ・Oscillating Jade x3 ・Zhou Coin x3200 ・Character XP x7000 |
| Level 10 | ・Tier 71 Eaglerise Greaves (Legendary) x2
・Gear Echo: Fieryheart x2 ・Halo Peak Cosmetic Chest x1 ・Crimson Leaves Chest x1 ・Martial Arts: Custom Tips x2 ・Inner Way Note: Custom Chest x1 ・Attunement Stone: Fieryheart x1 ・Oscillating Jade x3 ・Zhou Coin x3200 ・Character XP x7200 |
| Level 11 | ・Tier 71 Eaglerise Greaves (Legendary) x2
・Gear Echo: Fieryheart x2 ・Halo Peak Cosmetic Chest x1 ・Crimson Leaves Chest x1 ・Martial Arts: Custom Tips x2 ・Inner Way Note: Custom Chest x1 ・Attunement Stone: Fieryheart x1 ・Oscillating Jade x3 ・Zhou Coin x3200 ・Character XP x7400 |
Where Winds Meet Related Guides

| All Boss Guides | |
|---|---|
| World Bosses | - |
Campaign Bosses
 Heartseeker Heartseeker
|
 Qianye Qianye
|
 Ye Wanshan Ye Wanshan
|
 The Void King The Void King
|
 Lucky Seventeen Lucky Seventeen
|
 Tian Ying Tian Ying
|
 Dao Lord Dao Lord
|
 Zheng the Frostwing Zheng the Frostwing
|
 Murong Yuan Murong Yuan
|
 God of Avarice God of Avarice
|
 River Master River Master
|
World Bosses
 Puppeteer - Sheng Wu Puppeteer - Sheng Wu
|
 Sleeping Daoist Sleeping Daoist
|
Puppeteer - Curtaincall
|
 Earth Fiend Deity Earth Fiend Deity
|
 Snake Doctor Snake Doctor
|
 Yi Dao Yi Dao
|
 Wolf Maiden Wolf Maiden
|
 Twin Lions Twin Lions
|
 Ghost Master Ghost Master
|
 Nameless General Nameless General
|
 Feng Ruzhi Feng Ruzhi
|
Quest-related Bosses
 Dalang Dalang
|
 He Yuezhi He Yuezhi
|
 Shen Yiren Shen Yiren
|
Challenge Bosses
 Elder Gongsun Elder Gongsun
|
 Gongsun Deng Gongsun Deng
|
 Demon Goose Demon Goose
|
Comment
Author

Tian Ying Location and How to Beat
Rankings
Gaming News

![The Liar Princess and the Blind Prince Review [PC] | Lovely to Look at but Tedious to Play](https://img.game8.co/4442586/8d95f5faf05780f1765ce7e0938bd825.jpeg/show)
![Monster Hunter Stories 3 Review [First Impressions] | Simply Rejuvenating](https://img.game8.co/4438641/2a31b7702bd70e78ec8efd24661dacda.jpeg/thumb)

![The Seven Deadly Sins: Origin [First Impressions] | A Promising Start](https://img.game8.co/4440581/584e0bfb87908f12c4eab6e846eb1afd.png/thumb)
Popular Games

Genshin Impact Walkthrough & Guides Wiki
Umamusume: Pretty Derby Walkthrough & Guides Wiki
Pokemon Pokopia Walkthrough & Guides Wiki
Honkai: Star Rail Walkthrough & Guides Wiki
Monster Hunter Stories 3: Twisted Reflection Walkthrough & Guides Wiki
Arknights: Endfield Walkthrough & Guides Wiki
Wuthering Waves Walkthrough & Guides Wiki
Zenless Zone Zero Walkthrough & Guides Wiki
Pokemon TCG Pocket (PTCGP) Strategies & Guides Wiki
Monster Hunter Wilds Walkthrough & Guides Wiki


Recommended Games
Diablo 4: Vessel of Hatred Walkthrough & Guides Wiki
Cyberpunk 2077: Ultimate Edition Walkthrough & Guides Wiki
Fire Emblem Heroes (FEH) Walkthrough & Guides Wiki
Yu-Gi-Oh! Master Duel Walkthrough & Guides Wiki
Super Smash Bros. Ultimate Walkthrough & Guides Wiki
Pokemon Brilliant Diamond and Shining Pearl (BDSP) Walkthrough & Guides Wiki
Elden Ring Shadow of the Erdtree Walkthrough & Guides Wiki
Monster Hunter World Walkthrough & Guides Wiki
The Legend of Zelda: Tears of the Kingdom Walkthrough & Guides Wiki
Persona 3 Reload Walkthrough & Guides Wiki


All rights reserved
©1997-2025 NetEase, Inc. All Rights Reserved
The copyrights of videos of games used in our content and other intellectual property rights belong to the provider of the game.
The contents we provide on this site were created personally by members of the Game8 editorial department.
We refuse the right to reuse or repost content taken without our permission such as data or images to other sites.