Panacea Fan and Soulshade Umbrella Build
NEW: Hexi Map | Chapter 3 | Flute Mystic Skill
★ Unfettered and Everspring Build
☆ Liangzhou | Cat Fever | Prismatic Essence
✪ Updated: Best Weapon | Best Builds
☆ WWM Game8 Twitter: New tips daily!
Recruit using our Guild Recruitment Board!
This is a build focusing on the Soulshade Umbrella and Panacea Fan Martial Art school in Where Winds Meet. Read on to see a full build guide to these martial arts including its best Inner Ways, Mystic Arts to take, and the best gear set and substats to aim for, updated for Version 1.2.
List of Contents
Soulshade Umbrella and Panacea Fan Build
Soulshade Umbrella and Panacea Fan Overview
| Jump Table | |||||
|---|---|---|---|---|---|
| Overview | Martial Arts | Inner Way | |||
| Mystic Arts | Set and Stats | How to Play | |||
| Overview | |
|---|---|
| Martial Arts | |
| Role | Support Healer |
| Pros and Cons |
|
This build is a healing focused build that aims to balance out its usage of Dewdrop to activate healing abilities and rotating skills and heavy attack to replenish it which creates a cycle of repeated dew regeneration and healing output.
| Date | Changes |
|---|---|
| 1-20-2026 | ・Further optimized the build for Version 1.2. ・Removed Ghost Bind from the main loop as it is now suboptimal. ・Updated Inner Way for both PvE and PvP. ・Reworked Mystic Arts and added dedicated PvP options. ・Updated Stat Priority. ・ Updated Set Gear and added PvP option. ・Updated recommended PvE rotations and added PvP rotations. |
Soulshade Umbrella and Panacea Fan Martial Arts and Weapons
| Jump Table | |||||
|---|---|---|---|---|---|
| Overview | Martial Arts | Inner Way | |||
| Mystic Arts | Set and Stats | How to Play | |||
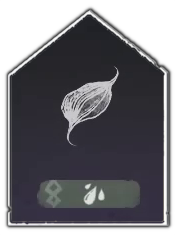
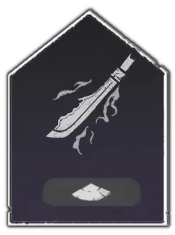
| Martial Art | |
|---|---|
|
Path: Silkbind - Deluge |
Path: Silkbind - Deluge |
The main Martial Arts used in this build are the Soulshade Umbrella and the Panacea Fan. Both specialize in sustained healing, with Panacea Fan providing strong AoE support through Cloudburst Healing and reliable single-target recovery through Morning Drizzle for allies in critical condition.
While maintaining your team’s HP, continuously charge Dew by spamming Panacea Fan’s heavy attacks from a safe distance. These attacks automatically target the lowest-HP ally, allowing you to heal efficiently without manual targeting and ensuring your healing resource never runs dry.
Best Inner Way
| Jump Table | |||||
|---|---|---|---|---|---|
| Overview | Martial Arts | Inner Way | |||
| Mystic Arts | Set and Stats | How to Play | |||
| Inner Way | Details |
|---|---|
 Royal Remedy Royal Remedy |
The Mingchuan Medical Codex Martial Skill Sitting Watch Clouds Rise created Water Clone's healing effect is increased by 10%. If you are within the area of the healing over time effect, you also additionally restore 3 Dew points and 2 Essence points each time. |
 Restoring Blossom Restoring Blossom |
Dealing Critical healing applies one stack of Nurturing for 3 seconds, increasing healing received by 2%, stacking up to 3 times. |
 Morale Chant Morale Chant |
100% chance to gain one stack of Yi River when attacking or healing: Increases Physical Penetration by 2 and damage and healing by 1% for 12 seconds, stacking up to 5 times. The chance to gain Yi River is only calculated once every 2 seconds. |
 Mending Loom Mending Loom |
Casting Soulshade Umrella's Special Skill, Echoing Grow restores 5 Dew and additionally heals 10% of your Max HP for every 100 Dew consumed. |
For the Inner Way, use the three existing Silkbind Deluge (Royal Remedy, Restoring Blossom, Mending Loom) and replace Esoteric Revival with Morale Chant. This setup significantly increases your healing output while also providing valuable damage bonuses for both multiplayer support and solo play.
Esoteric Revival is not recommended because its effect only triggers when an ally is in a dying state. If your teammates are frequently reaching that point, it usually means your healing uptime or positioning has already failed. Morale Chant, on the other hand, provides consistent value throughout the fight, making it far more reliable and efficient for this build.
Alternative Inner Way for PVP
| Inner Way | Details |
|---|---|
 Fury Harvest Fury Harvest |
Vitality is required to cast Mystic Skills. Certain recovery actions have a 50% chance to grant 1 bonus Vitality. No bonus Vitality is rewarded when you gain Vitality by attacking, taking a hit, or successfully deflecting an attack. |
 Divine Roulette Divine Roulette |
Upon a successful deflection, gain one of the following effects (see below). The effect lasts 10 seconds and can only trigger once every 30 seconds. It applies to Martial Arts Skills, Perception Skills, Special Skills, Charged Skills, and Varied Combos. |
 Vital Leech Vital Leech |
Casting Exhaustion Execution Skill restores HP equal to 8% of the damage dealt. |
Since healing is heavily nerfed in PvP, these Inner Ways focus on resource control, counterplay, and self-sustain instead of raw healing: Fury Harvest gives extra Vitality so you can cast Mystic Arts more often in long fights, Divine Roulette rewards good deflections with strong buffs to your next skill for clutch trades, and Vital Leech adds lifesteal through executions to recover HP when direct healing isn’t enough .
Best Mystic Arts
| Jump Table | |||||
|---|---|---|---|---|---|
| Overview | Martial Arts | Inner Way | |||
| Mystic Arts | Set and Stats | How to Play | |||
Recommended Mystic Arts
| Stat Group | Recommended Substats |
|---|---|
 Drunken Poet Drunken Poet |
Drink deeply to enter the Intoxicated state, imitating the drunken grace of the Poet Immortal. Cast repeatedly for up to 5 strikes, each consuming 6 Vitality. Intoxicated: Lasts 30s. Dragon's Breath and Drunken Poet can be used without drinking. |
 Dragon's Breath Dragon's Breath |
Drink to enter Intoxicated. Breath fire with Qi, dealing damage over 2 hits plus Ignition. Gain 15% Damage Reduction and Fortitude. Intoxicated: Lasts 30s. Dragon's Breath and Drunken Poet can be used without drinking. Ignition: Target takes damage every 0.5s for 8s. |
 Cloud Steps Cloud Steps |
Stomp on an enemy's shoulder to deal Physical Damage, other Attribute Damage effective against Cavalry and other units with Unstable Poise. |
 Meridian Touch Meridian Touch |
Chance to immobilize, deal Physical damage, and break Vital Points. Immobilize is ineffective against mighty enemies. Vital Points: These enemies have bound Qi bars. Breaking their Vital Points disables Qi regen, deals extra Physical damage and Qi Damage. |
Dragon's Breath applies burn, and Drunken Poet turns that burn into explosive bonus damage, which makes the combo hit far above its cost. Once you’re intoxicated, you can loop both skills cheaply and keep constant pressure without breaking your rotation. Meanwhile, Meridian Touch lets you immoblize enemies, and useful against bosses like Lucky Seventeen and God of Avarice, while Cloud Steps is also very useful against enemies on mounts and bosses like Sleeping Daoist and Ye Wanshan!
Alternative Mystic Arts for PvP
| Stat Group | Recommended Substats |
|---|---|
 Wolflike Frenzy Wolflike Frenzy |
Knock down an enemy, followed with rapid strikes, and finish with an upward swing that disables the target. Effective against Cavalry and other units with Unstable Poise. Unstable Poise: These units have a Stance bar near their HP. Stance-break deals special hit and Physical damage. |
 Serene Breeze Serene Breeze |
Channel Qi into your body to clear blockages in the veins. Can be used while under attack or control effects. On hit, reduces the target's Endurance recovery by 50% and deals damage for 8s. |
 Free Morph Free Morph |
Vault into the air and unleash a storm of kicks. The first blow launches the target upward, followed by relentless mid air strikes to keep them aloft. Finally finish with a slam that deals damage on impact. |
 Leaping Toad Leaping Toad |
Flip back to knock back and damage enemies, then lunge to apply Toad Venom. The third cast becomes Golden Toad Crash, a knockdown AoE slam. Toad Venom: Explodes after 5 seconds or on death. Can be Detonated by Lion's Roar. |
Aside from the Mystic Skills above, these options are excellent for PvP since Mystic Arts will be your main source of damage. Serene Breeze is an absolute must-have in PvP, letting you break out of combos and crowd control so you can reset, reposition, and stay alive.
Soulshade Umbrella and Panacea Fan Set Gear and Stat Priorities
| Jump Table | |||||
|---|---|---|---|---|---|
| Overview | Martial Arts | Inner Way | |||
| Mystic Arts | Set and Stats | How to Play | |||
Set Gear
| Stat Group | Set Effect |
|---|---|
 Ivorybloom IvorybloomWeapon |
2 Set Effect: +5.4% Critical Rate
4 Set Effect: At Max HP, there is a bonus 5% chance to deal Critical healing and damage, and increases the effects of Critical healing and damage by 15. |
 Eaglerise EagleriseArmor |
2 Set Effect: +24 Physical Defense
4 Set Effect: Dealing damage over time or healing grants 1 stack of Eaglerise: Reduces damage taken by 1.2% for 10 seconds, stacking up to 5 times. At max stacks, receives an Eagle Guard effect that reduces the next incoming damage within 10 seconds by 90% (halved when the damage comes from a boss). This effect can only trigger once every 30 seconds. |
Ivorybloom is the core of this healing set, adding crit rate and, at max HP, granting a bonus 5% chance to crit while boosting critical healing and damage by 15%. Since healers naturally stay near full health, this bonus is almost always active, making every heal hit harder, strengthening overflow shields, and turning crit healing into your main source of power.
Eagle Rise keeps you alive long enough to use it. Constant healing builds stacks that reduce damage taken, and at full stacks you gain Eagle Guard, cutting the next hit by 90% on a short cooldown. This prevents one-shots, protects you under focus, and helps you stay at max HP so Ivory Bloom’s bonuses never fall off.
Alternative Gear for PvP
| Stat Group | Set Effect |
|---|---|
 Rainwhisper RainwhisperWeapon |
2 Set Effect: +4.8 Precision Rate
4 Set Effect: Increases all Critical DMG and healing by 10%, and further increases them by 15% when you have an HP shield. |
|
Eaglerise Armor |
2 Set Effect: +24 Physical Defense
4 Set Effect: Dealing damage over time or healing grants 1 stack of Eaglerise: Reduces damage taken by 1.2% for 10 seconds, stacking up to 5 times. At max stacks, receives an Eagle Guard effect that reduces the next incoming damage within 10 seconds by 90% (halved when the damage comes from a boss). This effect can only trigger once every 30 seconds. |
For PvP, consider switching to Rain Whisper because you often won’t be sitting at full HP while under focus, which weakens Ivorybloom’s max-HP condition. Rain Whisper instead gives flat Max HP from the 2-set and a permanent 10% boost to all critical damage and healing, making your output more stable in chaotic fights.
Stat Priority
| 1st | Min-Max Silkbind Attack |
| 2nd | Min-Max Physical Attack |
| 3rd | Agility and Critical Rate |
| 4th | HP |
| 5th | Defense |
For stat priority, you'd want to get Min-Max Silkbind Attack first, then Min-Max Physical Attack. After those, stack Agility and Critical Rate so your crit heals land more often. If you aren't lucky with those, you lean into Max HP or Defense to stay alive.
Stats and Attributes Explained
How to Play
| Jump Table | |||||
|---|---|---|---|---|---|
| Overview | Martial Arts | Inner Way | |||
| Mystic Arts | Set and Stats | How to Play | |||
| Soulshade Umbrella and Panacea Fan Playstyle |
|---|
|
|
Recommended Skill Rotation
- Use Soulshade Umbrella's Floating Grace for damage buffs
- Activate Echoes of a Thousand Plants special skill for the passive healing, then Switch Weapons.
- Cast Panacea Fan's Cloudburst Healing to gain more Dew and sustain your health.
- Spam the Panacea Fan's heavy attacks to rapidly regain Dew and heal your companions.
- Use Light Dust After Morning Rain when you have Dew to spare for bigger heals.
- Use the Umbrella’s charged heavy to extend a downed enemy for team burst, but only when your Echoes of a Thousand Plants is almost off cooldown. Otherwise, prioritize sustain and time heals with the stagger bar.
- Once the Umbrella's effect ends, rinse and repeat your rotation.
Use Panacea Fan's Light Dust for Emergency Heals
Light Dust After Morning Rain costs 50 Dew and applies a big amount of heals to yourself and the lowest HP party member over 6 seconds. This lets you ensure that you or an ally that's in trouble can survive the fight.
Take note to not use it twice in quick succession as the effects overwrite each other instead of stacking. If an ally receives fatal damage, use Light Dust After Morning Rain as a resurrection skill to return them back to the playing field. However, it has a long cooldown so avoid using it immediately and try to use it on a crucial team member such as a tanker to keep the party alive.
After reviving an ally, you gain Abundant Dew which amplifies your Dew regeneration and lets you replenish the Dew spent on the resurrection.
Use Cloudburst Healing to Regain Dew and Heal Allies on a Target Zone
Cloudburst Healing lets you immediately gain 20 Dew after using it. Use it on an area where a wounded ally or summon it on your own position to restore teammates on the said area. This is best used after Resurrection to restore some Dew after exhausting your Dew from the resurrection ability.
You can also use this ability while you have maximum Dew to summon a rotating water clone of yourself that you can re-activate to trigger a burst of heal in that target zone.
Soulshade Umbrella Is a Constant Source of Heal
The Soulshade Umbrella lets you throw the Umbrella in the air and it will continuously heal you or an ally with lower HP than you. It also lets you generate Dew over time which lets you use more Dew for your other skills. Keep this ability up constantly to ensure your HP always stay high.
Use Umbrella's Charged Heavy Attack to Extend Stun Duration
Once an enemy is downed, use the Soulshade Umbrella's charged attack to prolong the down status. While this may not deal that much damage and not the best option to do during single player, you'll want to use this on multiplayer mode to extend the damage window your allies can use to use their own attacks against the enemy.
PvP Tips and Tricks
Healing is greatly nerfed in PvP, so playing a healer in PvP demands patience and discipline, forcing you to act methodically while constantly predicting your opponent’s next move. You also have to rely on your Mystic Arts to contribute damage, using them carefully to pressure enemies while preserving your resources and positioning to stay alive.
- Open each fight by casting Echoes of a Thousand Plants from your Soulshade Umbrella to secure early self-sustain.
- Use Serene Breeze whenever you’re caught in an enemy’s combo to break free and regain control, or break any crowd control on you.
- Even with healing nerfed, don't be afraid to give up some HP and take a trade; as a healer, you can recover it over time, and smart trades often swing the fight in your favor. Healers often win a battle of attrition, so manage your Vitality carefully and use offensive Mystic Arts to steadily wear your opponent down.
- Against the Vernal Umbrella users, parry their Spring Away shots until they land, or use Cloud Steps to bring them down. Be aggressive, but take care when your Serene Breeze is on coolwdown.
- Against the Strategic Sword, stay mobile and play patiently, it's a hit-and-run weapon, so wait out their key moves, bait their attacks, then punish when they’re locked in animations or after major skills. Focus on dodging over parrying, and use your bow or ranged pressure to force mistakes before committing.
- Against tanks, rely mainly on your Mystic Skills and look for safe windows to land them, especially Dragon’s Breath. If they play slowly and defensively, you can outpace them over time by constantly poking with ranged damage, particularly charged bow shots, until an opening appears.
- Against highly aggressive players, create distance and slowly chip away at their health with your bow instead of trading head-on. Though you are only limited to 20 arrows as of Version 1.2.
- Use Cloud Steps to close gaps quickly and secure free damage on your target.
- Use Soaring Spin as a gap closer and apply strong healing-reduction debuff, if your opponent utilizes them.
- It's a good opportunity to use Dragon’s Breath and Drunken Poet right after an execution, and consider animation-canceling Dragon’s Breath when necessary.
Where Winds Meet Related Guides


Comment
 Sunny 4 months
Everything was fine until i saw the gear you suggested, your suggestion like this loses the crit heal and final tune
Author

Panacea Fan and Soulshade Umbrella Build
Rankings
Gaming News

![Monster Hunter Stories 3 Review [First Impressions] | Simply Rejuvenating](https://img.game8.co/4438641/2a31b7702bd70e78ec8efd24661dacda.jpeg/show)
![The Seven Deadly Sins: Origin [First Impressions] | A Promising Start](https://img.game8.co/4440581/584e0bfb87908f12c4eab6e846eb1afd.png/thumb)
![The Liar Princess and the Blind Prince Review [PC] | Lovely to Look at but Tedious to Play](https://img.game8.co/4442586/8d95f5faf05780f1765ce7e0938bd825.jpeg/thumb)
![Marathon Cryo Archive Map Teased as [REDACTED] on Selection Screen](https://img.game8.co/4442236/6357203e58172f6de57f1991e7c39b22.png/thumb)
Popular Games

Genshin Impact Walkthrough & Guides Wiki
Umamusume: Pretty Derby Walkthrough & Guides Wiki
Pokemon Pokopia Walkthrough & Guides Wiki
Honkai: Star Rail Walkthrough & Guides Wiki
Monster Hunter Stories 3: Twisted Reflection Walkthrough & Guides Wiki
Arknights: Endfield Walkthrough & Guides Wiki
Wuthering Waves Walkthrough & Guides Wiki
Zenless Zone Zero Walkthrough & Guides Wiki
Pokemon TCG Pocket (PTCGP) Strategies & Guides Wiki
Monster Hunter Wilds Walkthrough & Guides Wiki


Recommended Games
Diablo 4: Vessel of Hatred Walkthrough & Guides Wiki
Cyberpunk 2077: Ultimate Edition Walkthrough & Guides Wiki
Fire Emblem Heroes (FEH) Walkthrough & Guides Wiki
Yu-Gi-Oh! Master Duel Walkthrough & Guides Wiki
Super Smash Bros. Ultimate Walkthrough & Guides Wiki
Pokemon Brilliant Diamond and Shining Pearl (BDSP) Walkthrough & Guides Wiki
Elden Ring Shadow of the Erdtree Walkthrough & Guides Wiki
Monster Hunter World Walkthrough & Guides Wiki
The Legend of Zelda: Tears of the Kingdom Walkthrough & Guides Wiki
Persona 3 Reload Walkthrough & Guides Wiki


All rights reserved
©1997-2025 NetEase, Inc. All Rights Reserved
The copyrights of videos of games used in our content and other intellectual property rights belong to the provider of the game.
The contents we provide on this site were created personally by members of the Game8 editorial department.
We refuse the right to reuse or repost content taken without our permission such as data or images to other sites.
I would personally only change the Rainwhisper set for the Ivorybloom set for more crit rate, crit damage and crit healing. A lot of the Silkbind delude inner ways breakthrough also give crit rate, so it would be a waste not to invest into crit