 Bodhi Sea
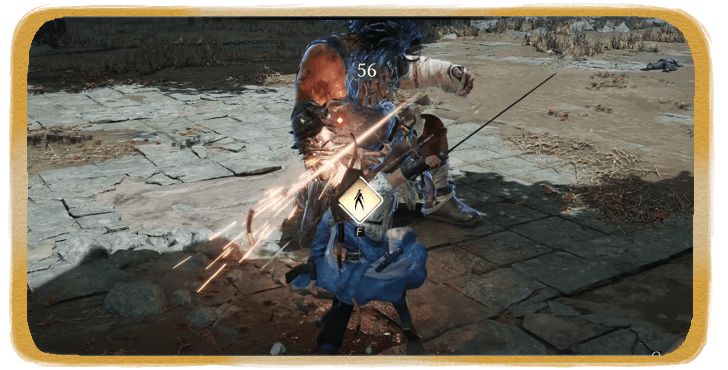 Palace of Annals
 Gleaming Abyss
 Still Shore
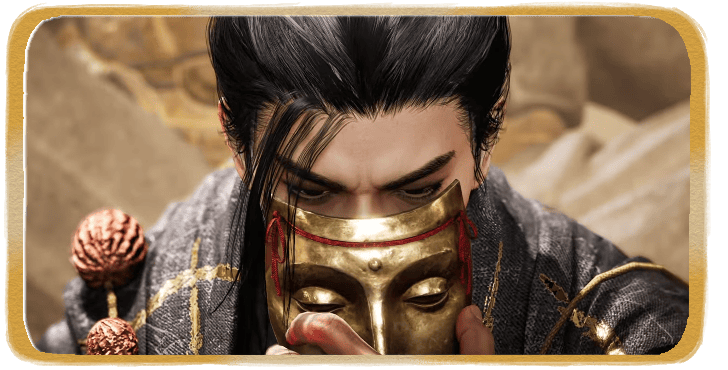 Halo Peak
 Blissful Retreat
 Unbound Cavern
 Ever-Normal Granary
 Jinming Pool
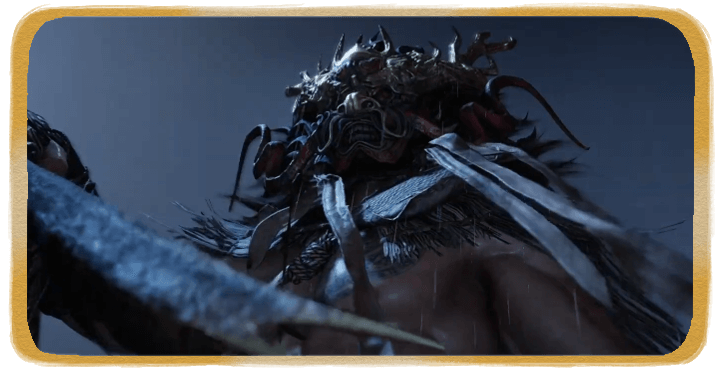 Heavenfall
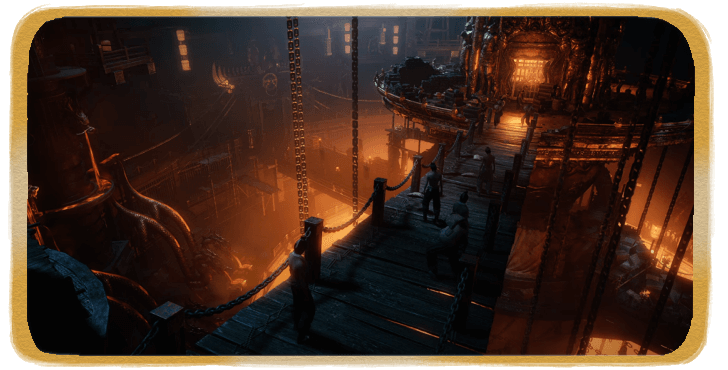 Furnace of Righteousness
 Supreme Freedom
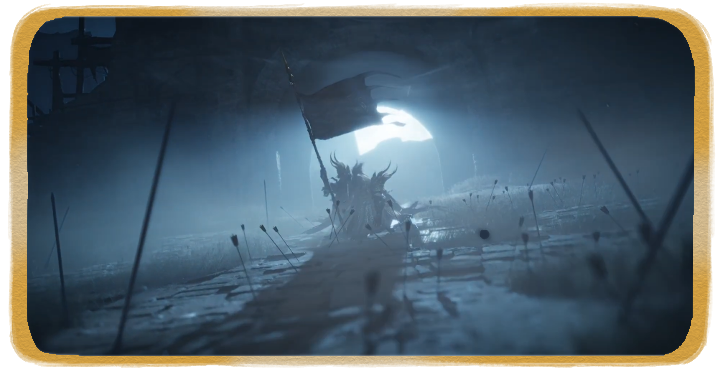 Whitecrown Fortress
This survey will take about 1 minute.
Your answers will help us to improve our website.
Where Winds Meet
Whitecrown Fortress Walkthrough and Rewards
03/06: Hexi Map | Chapter 3
★ Unfettered and Everspring Build
☆ Hexi Bosses: Guo Xin | Wandering Ark
✪ Updated: Best Weapon | Best Builds
☆ WWM Game8 Twitter: New tips daily!
Recruit using our Guild Recruitment Board!
This is a walkthrough for Whitecrown Fortress, a Campaign side quest in Where Winds Meet. See this detailed guide to check out quest objectives, what rewards you receive, and how to unlock it.
List of Contents
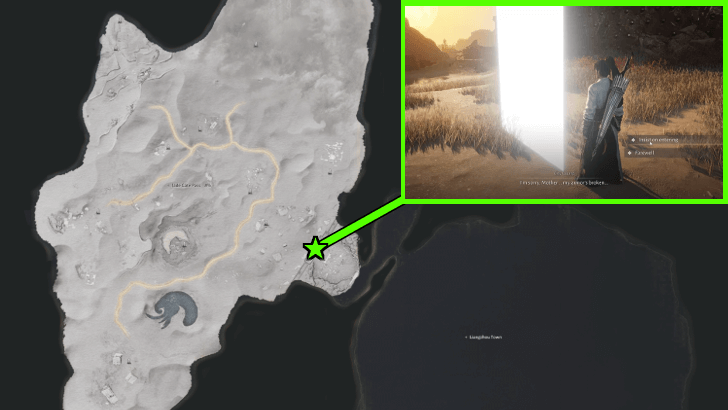
How to Unlock Whitecrown Fortress
Interact with the White Beam Outside Whitecrown City
 |
|
| Region | Jade Gate Pass, Hexi |
|---|---|
| Unlock Req. | Ask the Wayfarer of Jade Gate Pass |
To unlock the Whitecrown Fortress Campaign, track it in your Journal to locate it southeast of Jade Gate Pass. There, you'll see a beam of light through the door which you can interact with to start the Campaign quest.
Whitecrown Fortress Walkthrough
- Enter Whitecrown City
- Find the Five Scattered Military Flags
- Enter Whitecrown City Again
- Defend the City from Siege Monsters
- Find the Next Military Flag
- Place Down the Military Flags
- Defeat Guo Xin
- Uncover Guo Xin's Predicament
1. Enter Whitecrown City
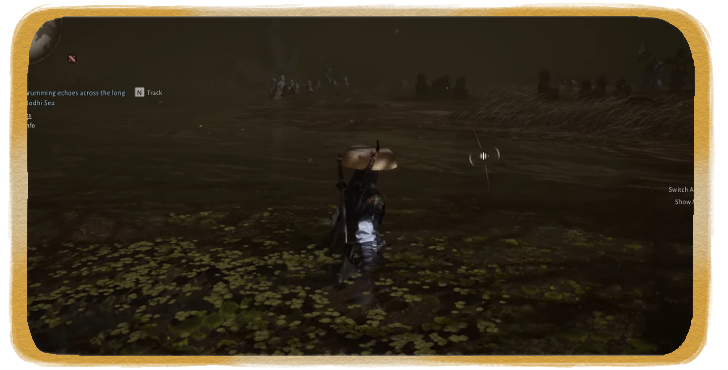
| 1.1 | 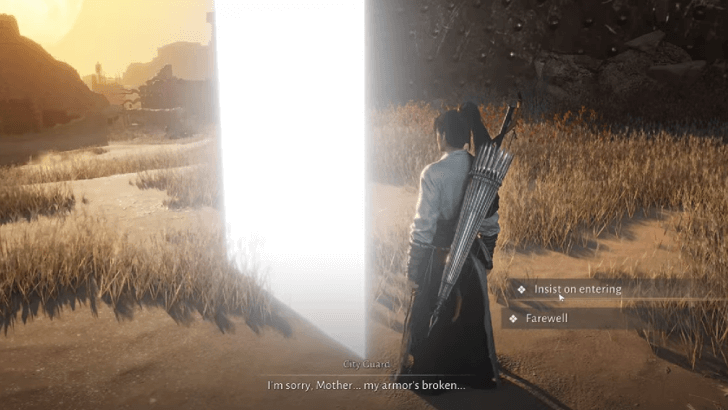 Go to the entrance of Whitecrown City southeast of Jade Gate Pass and interact with the white beam at the gates. Insist the city guard to let you into the city. |
|---|---|
| 1.2 | 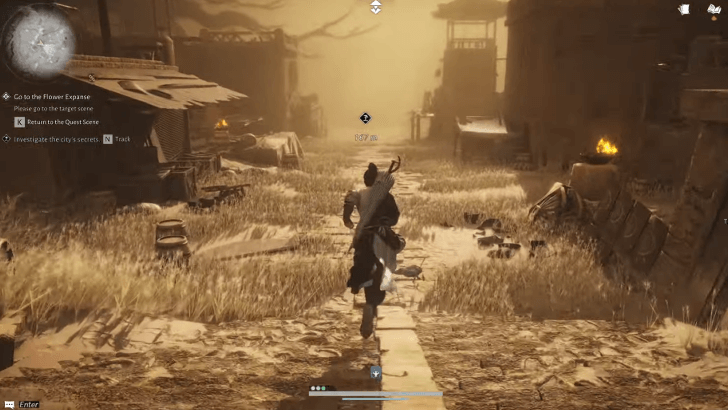 You'll be transported to what appears to be Whitecrown City in the past. Continue down the road until you reach an arena. |
| 1.3 | 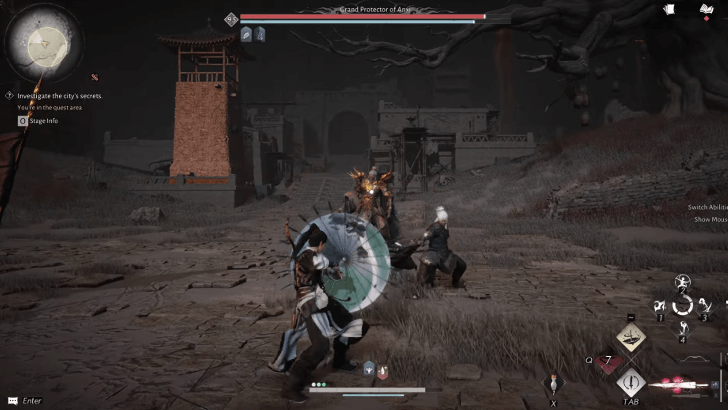 Suddenly, you'll be in a boss battle against the Grand Protector of Anxi. Regardless of whether or not you beat the boss, you'll be taken back outside Whitecrown City. |
2. Find the Five Scattered Military Flags
| 2.1 |  Next, you'll need to find five military flags scattered across Jade Gate Pass. The flags aren't pinned on the map so you need to follow the quest markers in-game instead. The first flag is found near the gates to Whitecrown City by a dried-up well. |
|---|---|
| 2.2 | 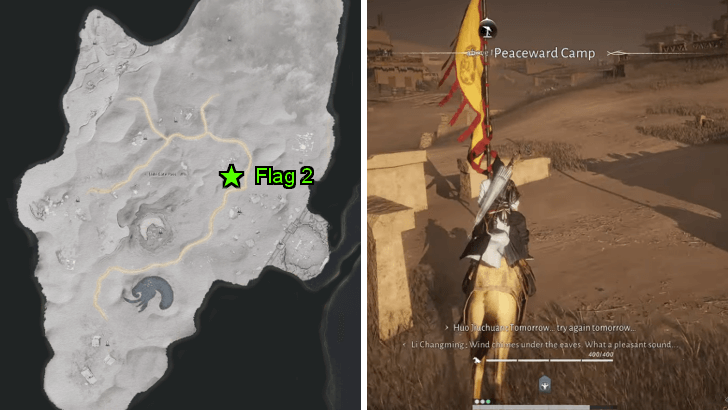 The second flag is planted up north in Peaceward Camp near a building and a campfire. |
| 2.3 |  The third flag is on top of the main building of Howling Sand Outpost, northeast of Jade Gate Pass. The flag is guarded by a soldier with Utuk Raptors flying around. You don't have to defeat the enemies to get the flag. |
| 2.4 | 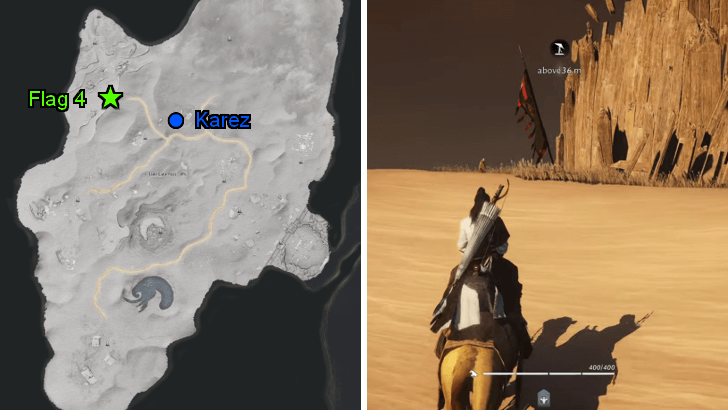 The fourth flag is west of Lost Crossing in a deserted area with a torn tree. You can teleport to the Karez Boundary Stone to cross the distance much faster. |
| 2.5 |  The fifth and last flag is found near the Squarewall Hold Ruins Boundary Stone south of Jade Gate Pass. |
| 2.6 | 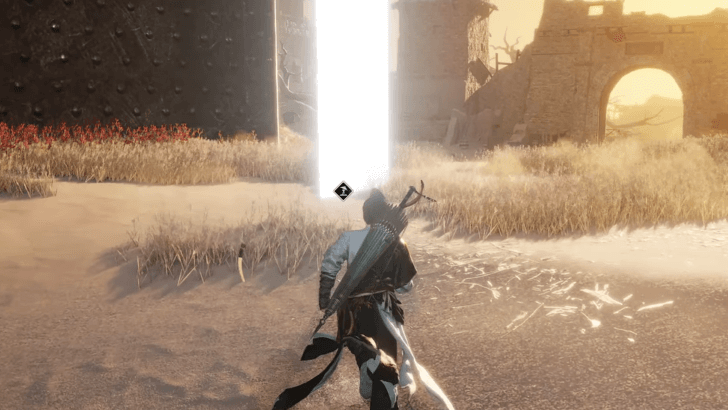 With all flags collected, return to the white beam of light outside Whitecrown City. Talk to the city guard through the beam. |
3. Enter Whitecrown City Again
| 3.1 | 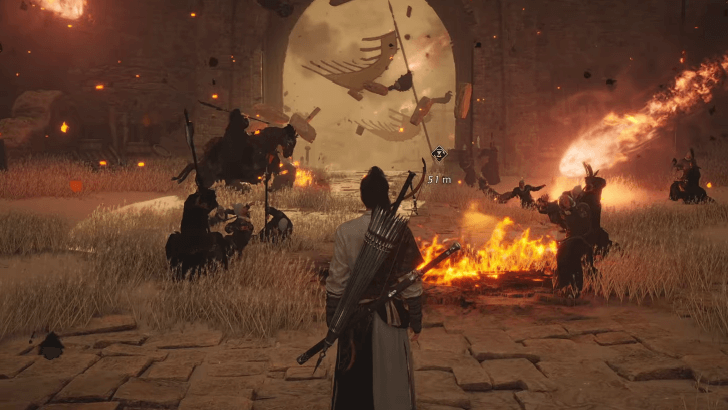 After talking to the city guard, you'll return to the past version of Whitecrown City. Head toward the military flag to touch it, transporting you to a grain tower in Wraithridge Pass. |
|---|---|
| 3.2 | 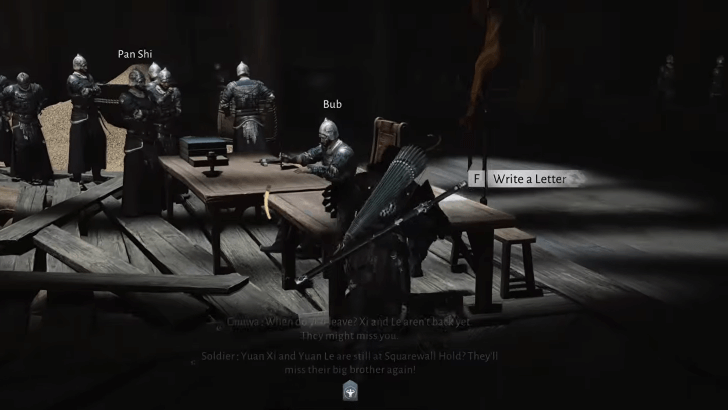 In Wraithridge Pass, go past the hallway and follow the soldier into an open area in the grain tower. At a table, write a family letter and hand it over to the courier after a brief cutscene. |
| 3.3 | 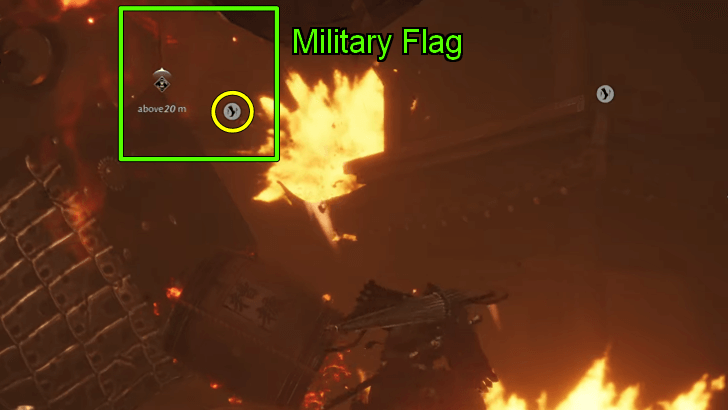 You'll be then asked to investigate the second floor. On your way, an explosion will occur, blocking your way. Leap on the floating debris with Cloud Steps to reach the military flag. Finding yourself back on a road, head down to touch the next military flag. |
4. Defend the City from Siege Monsters
| 4.1 | 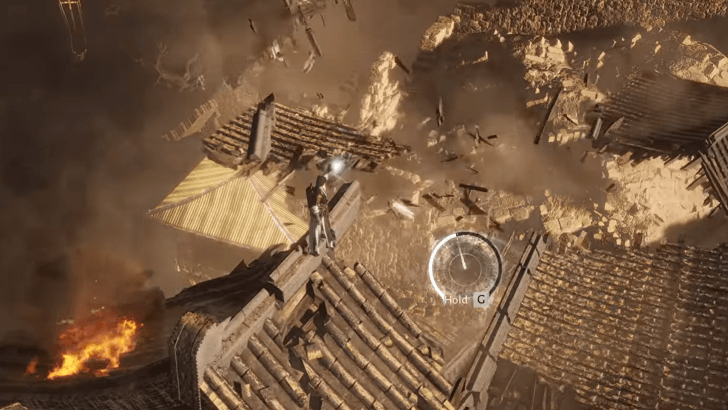 On a roof, use the Cosmic Reversal Mystic Skill to assemble a bridge from the roofs floating around. |
|---|---|
| 4.2 | 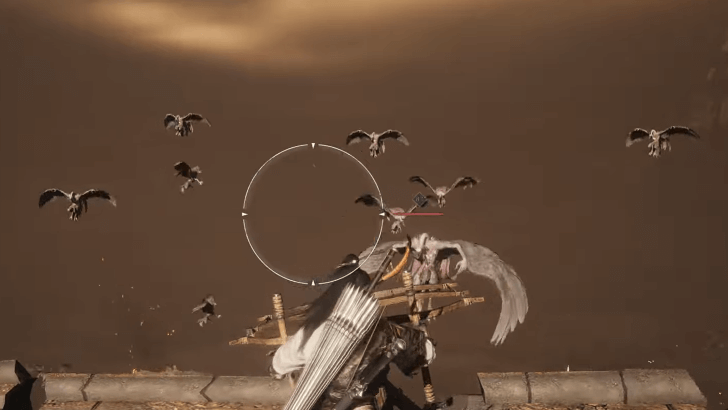 After assembling a bridge, use the ballista to shoot the flying siege monsters. Keep shooting until the ballista is destroyed by a fireball. |
| 4.3 | 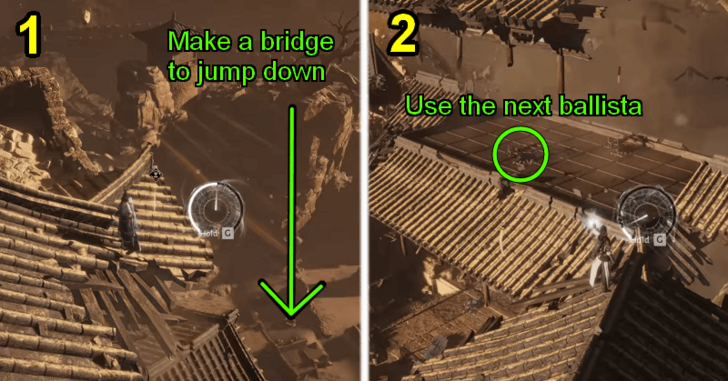 Descend from the bridge by using Cosmic Reversal to assemble more makeshift platforms. Fend off the next wave of siege monsters with the ballista on the roof. Next, use Cosmic Reversal again to make more platforms leading to a fortified wall below. |
| 4.4 | 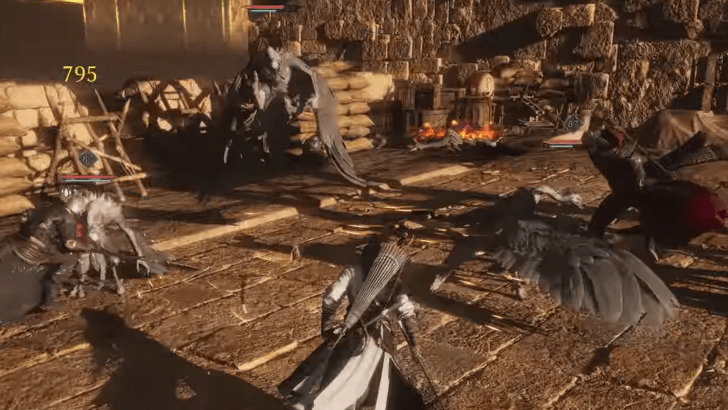 On the fortified wall, assist the soldiers by helping them defeat seven Utuk Raptors. After defeating them, talk to the wounded soldier on the ground. |
5. Find the Next Military Flag

Another explosion will happen, causing time to freeze like in the grain tower. Use Clouds Steps to jump on the objects in the air to find and touch the next military flag.
6. Place Down the Military Flags
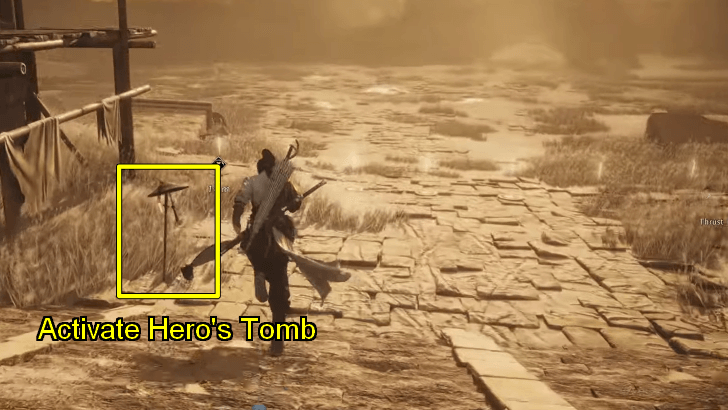
On a dusty road, go ahead and activate the Hero's Tomb, setting the stage for a boss fight ahead. Place down the military flags on the highlighted areas in front of you.
7. Defeat Guo Xin

After putting down the flags, defeat the boss Guo Xin, the Grand Protector of Anxi. Guo Xin's attacks are quite slow, allowing you to strike him between his attack animations. Watch out for the soldiers he summons to briefly fight alongside him.
In his second phase, Guo Xin becomes the Iron-Blooded Prince and begins to incorporate lightning and ranged attacks.
8. Uncover Guo Xin's Predicament
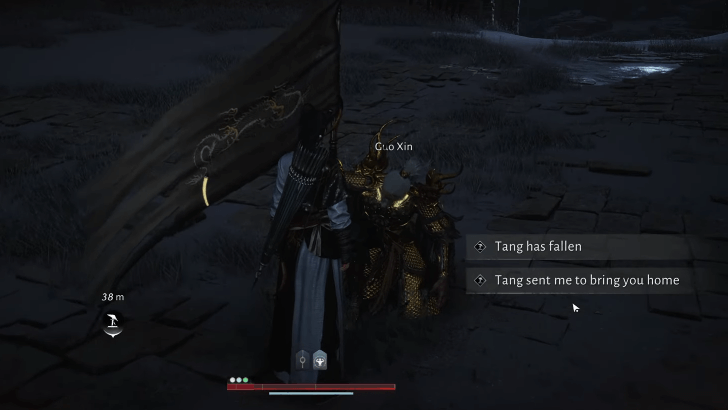
Once the Iron-blooded Prince has been defeated, he will return to being Guo Xin. Talk to him to tell him that the siege is finally over. After a cutscene, the quest will end.
Whitecrown Fortress Boss Guide
Guo Xin Overview
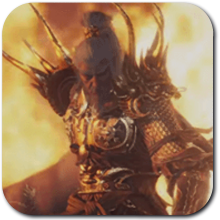 Guo Xin Guo Xin |
Difficulty Rating | ★★★★☆ |
|---|---|---|
| Location | ||
| Found in Whitecrown City | ||
Guo Xin is a boss fought in the Whitecrown Fortress Campaign quest. The best tip to beating Guo Xin is to parry his troops' attacks as doing so depletes his Qi very quickly. As the Iron-blooded Prince in Phase 2, be careful with his feints and ranged attacks as they can bait you into parrying early. He also begins to move more quickly, easily covering distances with his ranged attacks.
Guo Xin Location and How to Beat
Whitecrown Fortress Rewards
Quest Rewards
|
・Echo Jade x50 ・Call of Camps - Tome x1 ・Veteran's Gleaming Cuirass x1 ・Copper Coin Greaves x1 ・Medicinal Tales x1 ・Oscillating Jade x5 ・Hexi Exploration x100 ・Character EXP x37,500 ・Coin x37,500 |
These are all the rewards you can get by doing the Whitecrown Fortress Campaign. The rewards listed above are the total earned as you progress through the quest and upon completing it.
Campaign Rewards
|
・Starweave Set or Jadeclasp Set x2 ・Gear Echo - Glint x2 ・Whitecrown City Appearance Chest x1 ・Crimson Leaves Chest x1 (Chance) ・Bamboocut - Dust Tips x2 ・Inner Way Note - Custom Chest x1 ・Attunment Stone - Glint x1 (Chance) ・Oscillating Jade x3 ・Coin x3,200 ・Character EXP x7,560 |
These are all the rewards you get by clearing the Whitecrown Fortress Campaign, where you can fight the boss Guo Xin again. This campaign is unlocked after initially defeating him in the Campaign quest.
Where Winds Meet Related Guides

| Types of Side Quests | |
|---|---|
| Jianghu Legacy | Campaign |
| World Affairs | Exploration |
| Encounters | Wandering Tales |
List Of All Campaign Quests
Comment
Author

Whitecrown Fortress Walkthrough and Rewards
Please participate in our site
improvement survey
03/2026
improvement survey
03/2026
Would you assist in
improving Game8's site?
improving Game8's site?

×
We are listening to our users' valuable opinions and discussing how to act on them.
The information collected through this survey will be used for the purpose of improving our services. In addition, the information will only be disclosed a part of a statistic in a format that will not allow identification of personal information.
Begin Survey
Not Now
×
Please rate each item regarding Game8.co's Advertisements.
Amount of Ads
Very Dissatisfied
Somewhat Dissatisfied
Fine
Somewhat Satisfied
Highly Satisfied
Placement of Ads
Timing of Ad Display
Ad Loading Speed
Safeness of Ads
Content of Ads
×
Please rate each item regarding Game8.co's Quality of Articles.
Amount of information
Very Dissatisfied
Somewhat Dissatisfied
Fine
Somewhat Satisfied
Highly Satisfied
Frequency of updates
Speed of new information
Accuracy of articles
Understandibility of articles
Readability of sentences
×
Please rate each item regarding Game8.co's Usability of the Site.
Ease of finding information
Very Dissatisfied
Somewhat Dissatisfied
Fine
Somewhat Satisfied
Highly Satisfied
Loading Speed
Use of Color
Font Size
Visibility of Images
Easy to Understand Layout
×
Please rate each item regarding Game8.co's Message Boards, Comments.
Ease of Writing
Very Dissatisfied
Somewhat Dissatisfied
Fine
Somewhat Satisfied
Highly Satisfied
Readability
Ease in Finding Information
Comment Quality
Comment Quantity
Admin Response
×
Please rate each item regarding Game8.co's Site's new design.
Please rate our site's new design
Very Dissatisfied
Somewhat Dissatisfied
Fine
Somewhat Satisfied
Highly Satisfied
Do you think that the website's design change makes the site easier to use?
Has the new design made it easier for you to find information on the site?
Has the new design improved the overall visual appeal of the site?
How would you rate your overall satisfaction with the new design of the site?
×
How likely are you to recommend Game8 to someone you know?
Very Unlikely
0
1
2
3
4
5
6
7
8
9
10
Very Likely
If you have other opinions regarding potential improvement to the website, please share them with us. We would appreciate your honest opinion.
Note: This is a free response section, so you can proceed without entering anything.
Note: Please be sure not to enter any kind of personal information into your response.
Note: Please be sure not to enter any kind of personal information into your response.
×
Thank You
×
Thank you for participating in our survey! Your answers will help us to improve the quality of our website and services.
We hope you continue to make use of Game8.
We hope you continue to make use of Game8.
Close
Rankings
- We could not find the message board you were looking for.
Gaming News


![Slay the Spire 2 Review [Early Access] | Still the Deckbuilder to Beat](https://img.game8.co/4433115/44e19e1fb0b4755466b9e516ec7ffb1e.png/thumb)

Popular Games

Genshin Impact Walkthrough & Guides Wiki
Resident Evil Requiem (RE9) Walkthrough & Guides Wiki
Honkai: Star Rail Walkthrough & Guides Wiki
Monster Hunter Wilds Walkthrough & Guides Wiki
Umamusume: Pretty Derby Walkthrough & Guides Wiki
Pokemon TCG Pocket (PTCGP) Strategies & Guides Wiki
Arknights: Endfield Walkthrough & Guides Wiki
Wuthering Waves Walkthrough & Guides Wiki
Zenless Zone Zero Walkthrough & Guides Wiki
Digimon Story: Time Stranger Walkthrough & Guides Wiki


Recommended Games
Fire Emblem Heroes (FEH) Walkthrough & Guides Wiki
Yu-Gi-Oh! Master Duel Walkthrough & Guides Wiki
Super Smash Bros. Ultimate Walkthrough & Guides Wiki
Diablo 4: Vessel of Hatred Walkthrough & Guides Wiki
Pokemon Brilliant Diamond and Shining Pearl (BDSP) Walkthrough & Guides Wiki
Elden Ring Shadow of the Erdtree Walkthrough & Guides Wiki
Monster Hunter World Walkthrough & Guides Wiki
The Legend of Zelda: Tears of the Kingdom Walkthrough & Guides Wiki
Persona 3 Reload Walkthrough & Guides Wiki
Cyberpunk 2077: Ultimate Edition Walkthrough & Guides Wiki


All rights reserved
©1997-2025 NetEase, Inc. All Rights Reserved
The copyrights of videos of games used in our content and other intellectual property rights belong to the provider of the game.
The contents we provide on this site were created personally by members of the Game8 editorial department.
We refuse the right to reuse or repost content taken without our permission such as data or images to other sites.